
Understanding Audio Normalization: What It Is and How to Apply It
Is Your Audio Too Loud or Too Quiet? Discover Normalization!


Audio normalization is the process of adjusting the overall volume of an audio file so that it reaches a standard level. I first learned about normalization when I was editing my own home videos. I noticed that some clips were too quiet while others were too loud, which made watching the final video a bit uncomfortable. Using normalization helped me balance the sound, so every part was clear and pleasant to listen to.
In simple terms, audio normalization means making sure that all parts of your audio are at a similar volume.
This is very important because it can make your video or podcast easier to listen to, and it helps avoid sudden loud noises or very quiet moments. There are two main ways to normalize audio: peak normalization, which sets the loudest part of the audio to a specific level, and RMS normalization, which considers the average power of the audio. In many real-life situations, such as recording interviews or editing music, using normalization is an essential step to ensure that every detail is heard clearly and consistently.
How Audio Normalization Works
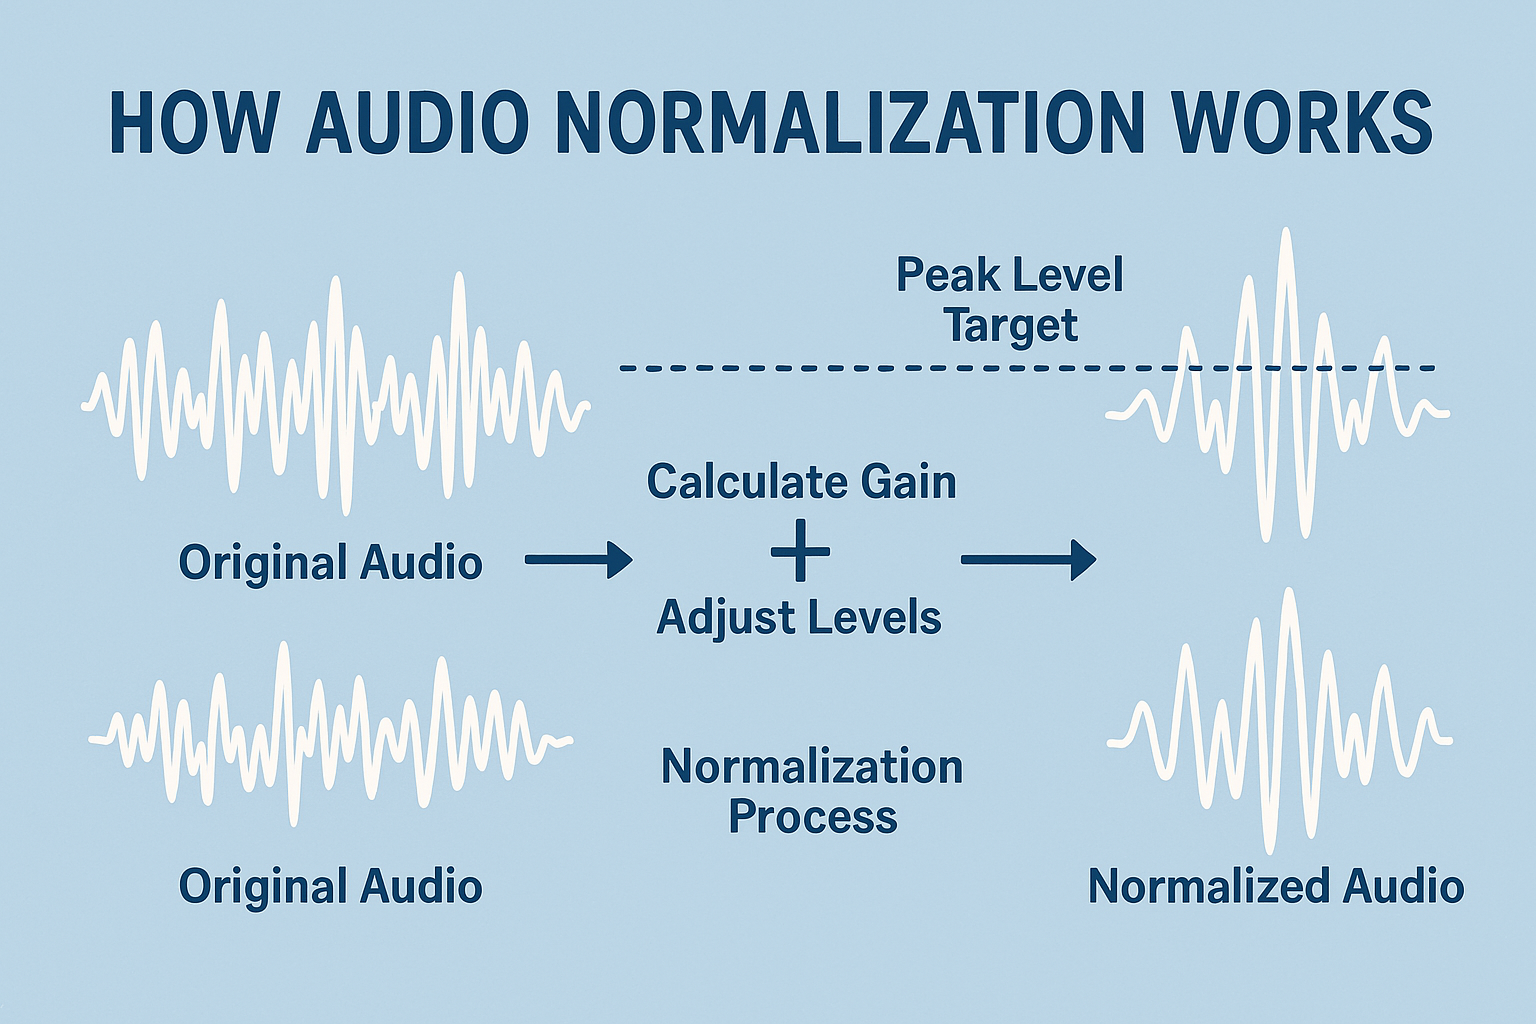
Audio normalization works by measuring the levels of sound in your audio file and then adjusting them to reach a set target. Imagine you have a video where one part is very quiet and another part is very loud. Normalization finds the highest sound level and then increases or decreases the overall volume so that all parts of the audio are balanced. This way, nothing sounds too soft or too harsh. Properly normalized audio is especially important for audio transcription applications like SpeechText.AI, where clear and consistent volume levels improve the accuracy of speech-to-text conversion. If parts of the audio are too quiet or uneven, the transcription process may struggle to recognize words correctly, leading to errors or missing text. By ensuring balanced volume through normalization, you enhance both the listening experience and the effectiveness of automated transcription tools.
Most audio software uses a method called "peak normalization" or "RMS normalization." In peak normalization, the software identifies the loudest sound in the audio and adjusts the rest so that the peak reaches a chosen level, like 0 dB. For example, if the loudest sound in a recording is at -6 dB, the software will boost the entire audio by 6 dB. RMS normalization, on the other hand, looks at the average volume level over time, making adjustments that lead to a more consistent sound across the recording. To help users understand the process, many programs show a visual representation of the audio called a waveform. A waveform is like a picture of your sound, showing where the loud and quiet parts are. For instance, a spike in the waveform indicates a loud sound, while a flat part means it is quiet. By looking at the waveform, you can see how the software makes changes to even out the sound, ensuring a smooth listening experience throughout your project.
Tools and Software for Audio Normalization
Adobe Premiere Pro is a professional video editing software that also offers powerful audio tools, including normalization. It has many advanced features that let you fine-tune your audio, and you can adjust levels very precisely. However, Premiere Pro can be overwhelming for beginners because of its many options and higher price tag. It's a great tool if you already work in video editing and want to integrate audio adjustments into your workflow.
Audacity is a free and open-source audio editing tool that is very popular for basic editing tasks. It supports both peak and RMS normalization, making it a solid choice for balancing audio levels quickly. Audacity is easier to learn and use compared to more advanced software, which makes it ideal for beginners or those on a budget. The downside is that it may not have all the advanced features found in professional programs.
Pro Tools is another high-end option used by many professionals in the music and film industries. It offers precise control over audio normalization and many other advanced audio processing features. Pro Tools is known for its high-quality output and professional-grade tools, but it comes with a steeper learning curve and higher cost. This makes it best suited for professional audio editors and studios that need top-notch performance.
For beginners, Audacity is a recommended choice because it is free, easy to use, and provides essential normalization features. On the other hand, if you work on professional projects or require more advanced audio editing capabilities, Adobe Premiere Pro and Pro Tools are excellent options despite their higher complexity and cost. Each tool has its own pros and cons, so your choice should depend on your specific needs and level of experience.
Step-by-Step Guide to Normalizing Audio
Normalizing audio ensures that your sound levels are balanced and clear. Before applying normalization, it’s important to prepare your audio file properly. This involves cleaning up background noise, removing unwanted parts, and setting an initial volume level. Once your audio is cleaned up, you can use a software tool to apply normalization. Below is a step-by-step guide for two popular tools: Adobe Premiere Pro and Audacity.
How to normalize audio in Adobe Premiere Pro
- Open Adobe Premiere Pro and load your project.
- Drag your audio file to the timeline.
- Select the audio clip - click on the audio track you want to normalize.
- Right-click the audio clip and select Audio Gain.
- Apply normalization - in the Audio Gain window, you will see several options: Normalize Max Peak to – adjusts the loudest sound to a target level (e.g., -3 dB) and Normalize All Peaks to – normalizes multiple selected clips together. Set the normalization level (e.g., -3 dB for balanced audio).
- Confirm and listen and then click OK to apply the normalization. Play the audio to check if the levels are even.
How to normalize audio in Audacity
- Launch Audacity and open the audio file you want to normalize.
- Click anywhere on the waveform, then press Ctrl + A (Windows) or Cmd + A (Mac) to select the full audio.
- Go to Effect -> Normalize from the top menu. In the Normalize window, you will see: Remove DC offset – Check this box to ensure clean audio. Normalize peak amplitude to – Set a value (e.g., -1 dB for a safe level). Click OK to apply.
- Listen to the audio to make sure the volume is balanced. If it sounds good, export the file by going to File -> Export.
To achieve the best results, it’s important not to over-normalize audio. While normalization can help bring up quiet parts and balance overall volume, excessive use can lead to distortion or an unnatural sound. Setting levels too high can cause clipping, where the loudest peaks exceed the maximum limit, resulting in harsh or damaged audio. A good approach is to leave some headroom by setting the peak level slightly below 0 dB, such as -1 or -3 dB, to avoid distortion. Additionally, normalization should complement, not replace, proper recording techniques. If an audio recording is extremely uneven, relying solely on normalization may not fix all issues, and manual adjustments might be needed.
One common mistake in normalization is treating all types of audio the same way.
Music, spoken dialogue, and podcasts require different approaches. Speech normalization should focus on maintaining clarity and consistency so that all words are easily heard, while music normalization should preserve the dynamic range to avoid making quiet parts unnaturally loud. Another mistake is normalizing multiple clips separately rather than as a group. If you have several audio clips that need to match in volume, normalizing them together rather than individually can prevent noticeable volume differences between segments.
Even with careful normalization, unexpected issues may arise. One common problem is unwanted audio artifacts, such as sudden background noise becoming more noticeable after normalization. This often happens when quiet sections are amplified, revealing hidden noises. In such cases, applying noise reduction before normalization can help. Another issue is that some recordings may sound unnatural or too compressed after normalization. Adjusting the normalization target level or using RMS normalization instead of peak normalization can sometimes produce a more natural sound.
Have you tried normalizing your audio before? Share your experiences or any challenges you’ve faced in the comments!
About the Creator
Dominik Sievert
I’m fascinated by how innovation transforms our daily lives, and I channel that wonder into words that make tech both approachable and inspiring.
Enjoyed the story? Support the Creator.
Subscribe for free to receive all their stories in your feed.
Comments
There are no comments for this story
Be the first to respond and start the conversation.