
Trash to Treasure.
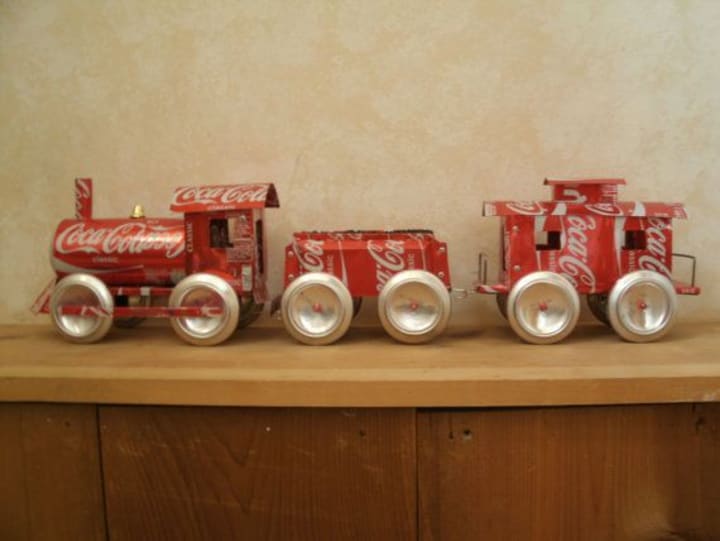
Making a Train on a Budget. Out of trash.
Many crafts satisfy me, but if I were to choose a craft or project, it would be the trash to treasure project (I do not know if it is a craft or a project.) What even is a waste to treasure project? trash to treasure project is where you make different articles (a hot air balloon, stain class, a toilet, the list is endless, honest) out of scrap (primarily cans, bottle caps, leftover paper, cardboard, and textile.)
Recently in Science class, we have had the option to pick from a few projects and activities for our last 'quiz grade.'
The first option was to take a quiz on the lesson we learned.
The second option was to research an animal in this big book on animal Biology (even though I am in chemistry. But I guess Biology and Chemistry correlate in some way.)
The third option was to choose between Climate Change and other real-world problems.
The final option is a Trash to Treasure Project. And for all of the different options, we could have at least one partner (except for the quiz because you know that would be highly unfair. Some people paid attention, and others didn't.)
At first, for this project, my partner I had chosen to research climate change and me. I finished the research, then as soon as that happened, she wanted to switch to trash to treasure project with another person. So, after all that research, we changed from waste to treasure project. The project is still not finished yet because we have not accomplished it that long, but we contributed some elements.
For this project, we had many options to choose from (here are some of the things we were considering for our project):
Once we had come to this step in our project, we just needed the supplies, which was when we realized how this project would be.
Checklist of What We All Need to Bring for The Project:
Friend One ~
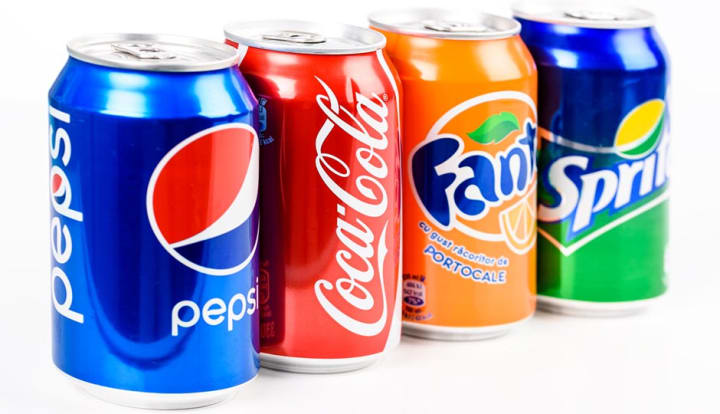
- Soda cans (she informed my other friend and me that her family drank some soda or sparkling water that came in a can.)

- Cardboard box (she said she had the soda or sparkling juice cans; they still had the box.)
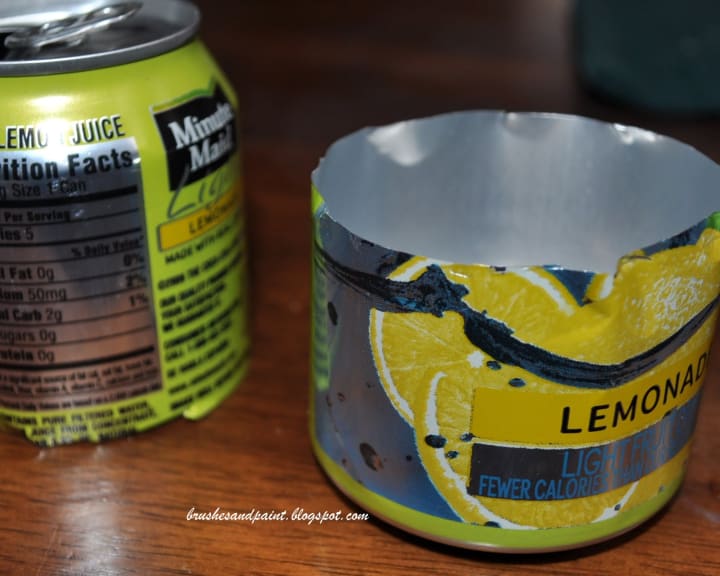
- Cut cans (she was the one who was leaning towards the idea for the train, so she cut the bottom of the soda can off for the wheels.)
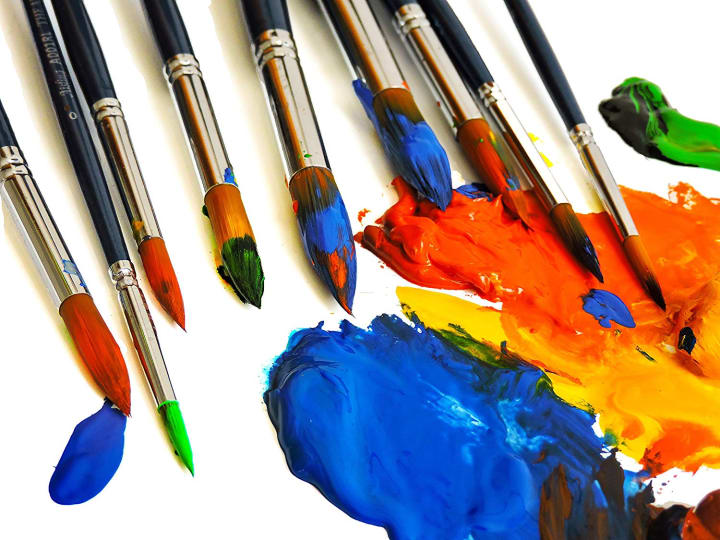
- Paint & Paintbrushes (she also said she bring paint and paintbrushes.)
Friend Two ~
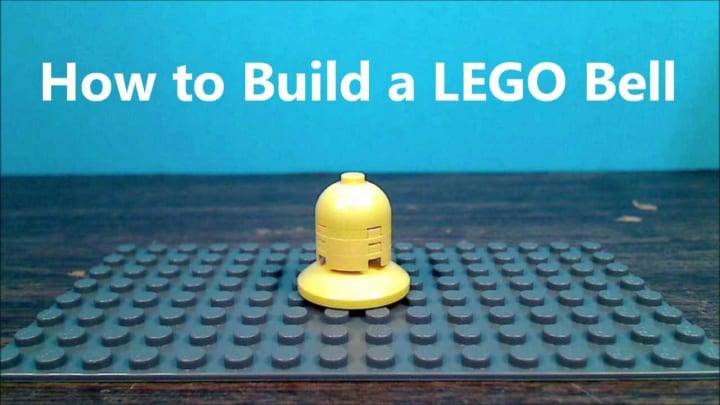
- A bell (the train in the image we were going for had a bell at the top. She said she had a lego bell that looked very similar to the one in the photo.)
Me ~
- More paint (I said I had more paint colors just in case we changed our minds) ~ optional step ~
We had messaged all night (for like three hours or so), planing everything for the next day.
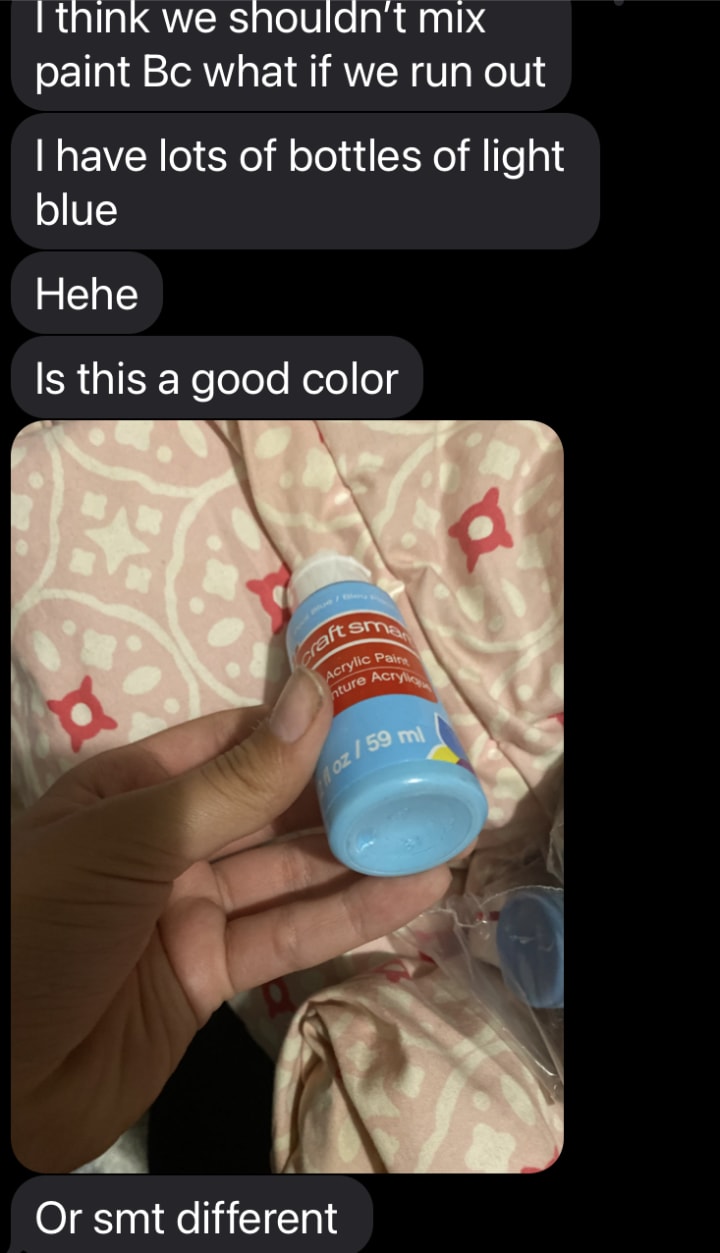
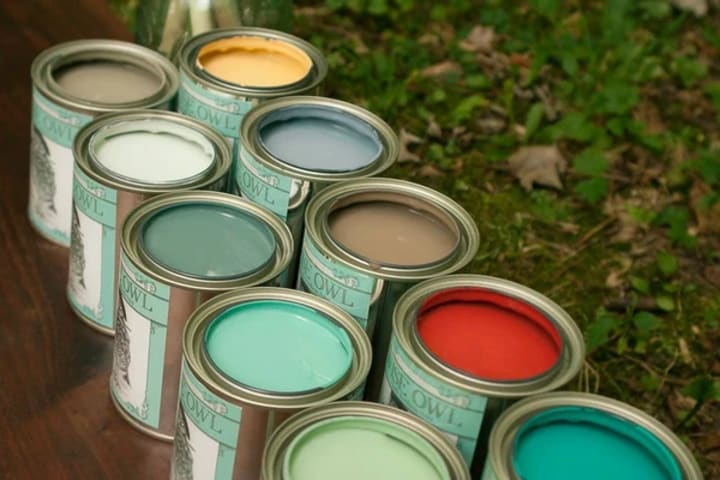
Friend One (the friend who offered to bring everything for our project) created a group chat to communicate there. She was also the one who was showing us what she had. As you can see in the picture, she showed me and my other partner (friend two was gone for 45 minutes, so we had to wait for her to get back) what paint she had chosen. We all agreed that we should color the soda cans with blue paint. So friend one was able to supply us with everything we needed. However, the pieces we didn't have were already in the science lab at school, so the color we need.
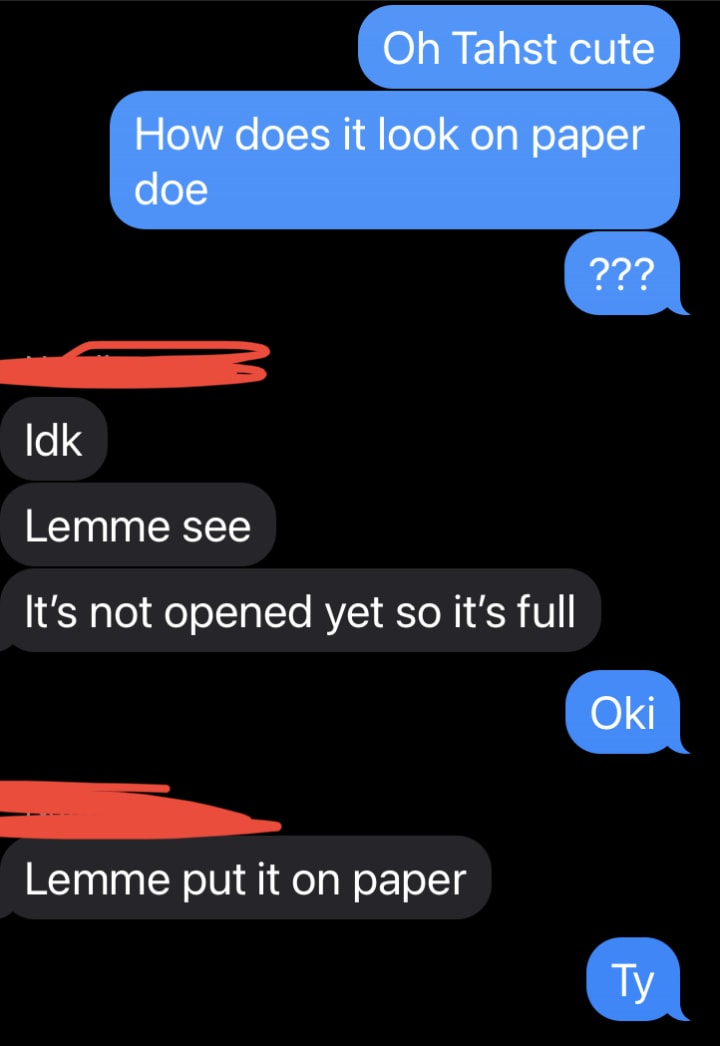
I asked her how it looks on paper just in case it isn't the color we need. At first, we were not planning to paint the soda cans, but we decided it would look a lot better. Friend one had already informed us that her family drinks a lot of sparkling water in a can, so she had already found the cans we were going to use.

The image above is what the paint looked like on paper (or a small notecard with a mark.) Friend two finally came back, and we decided that friend one will bring the blue paint and a bunch of cans from home. It was the perfect plan!
Until we came to school the next day ready to work on our project, my friend who was supposed to bring the leggo bell not only showed up late that day (we had a class first period, and she was late), but she also forgot the bell. This was probably the most insignificant piece of the build, but my friend and I were making a big deal out of it. we ended up working around the problem, and we finally got started, read as ever (oh yes, I also forgot extra paint. Not my fault, I swear. No one noticed.)
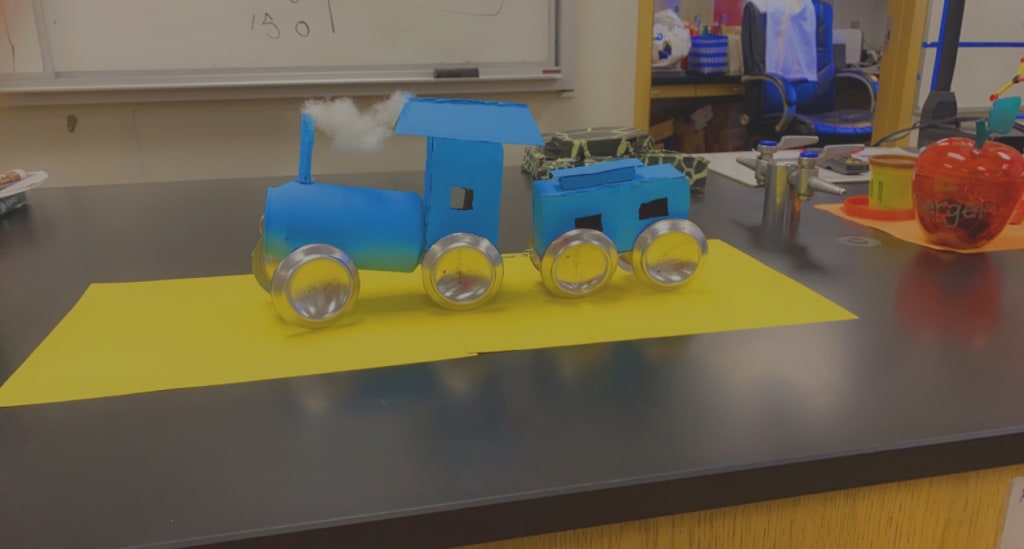
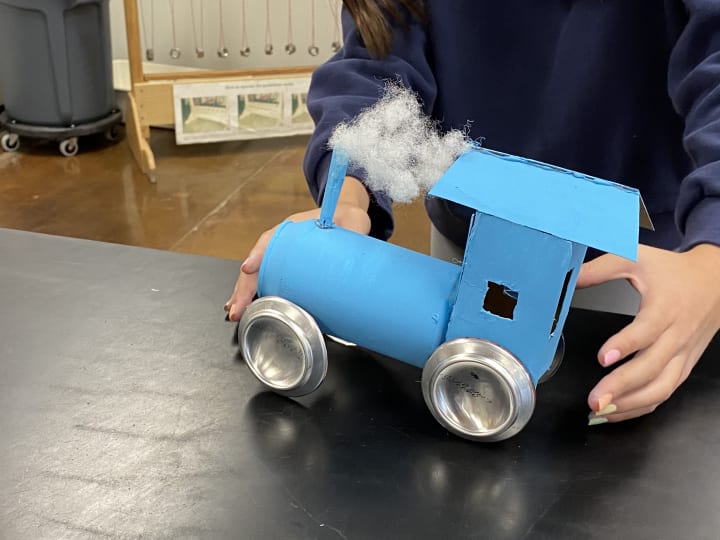
Step by step on how to make a (budget) trash to tressure train out of cans:
Step One:
~Find Time~
- To do this kind of trash to treasure project, you need to have a lot of time on your hands (I mean a lot.)
- My team and I underestimated how long this project would take (since we only had two and a half classes to finish our project. every class period is about 40 - 45 minutes.)
- If you have a lot of time to do this, you are ready to move on (if you do not have a lot of time on your hands and your not very time efficient, I recommend picking a project that is less time-consuming. Depends on what your schedule looks like.)
Step Two:
~Have the right supplies~
- All projects like this take lots of supplies (especially this project, it will take time and dedication.)
- Supplies (if the checklist earlier was not clear):
- Soda can(s) (nothing fancy, just a basic soda can you drink out of. it can be any drink. It just has to be some can.)
- Box of soda (when buying a pack of soda, they usually come in a medium-sized box. So make sure to use that when working on this train.)
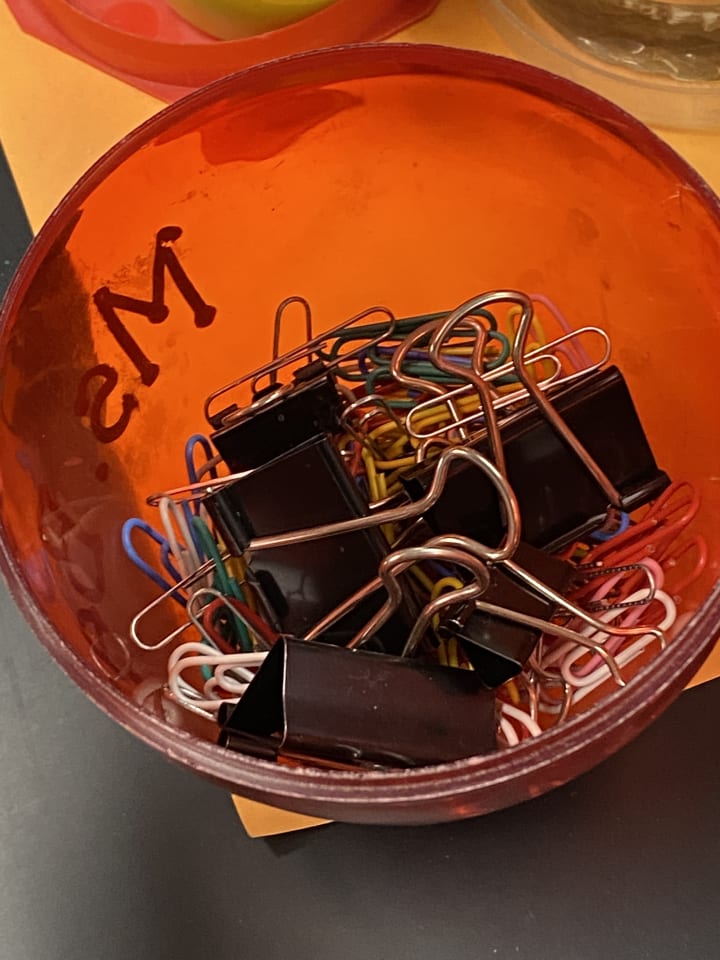
- Paper clips (the paper clips are to attach the three train carts.)
- Exacto Knife (to cut the soda box easily.)
- Hot glue gun (glue the cardboard to make sure the boxes stay together and the wheels.)
- Sharpie or black marker (to outline what you are going to cut)
- Paper (use scratch paper just in case it gets messy)
- Strong scissors (to cut the cans)
- Sticks (to make the wheels)
Step Three:
~Find a Partner~
- This step is optional.
- If you do this step, make sure to find time-efficient partners.
Step Four:
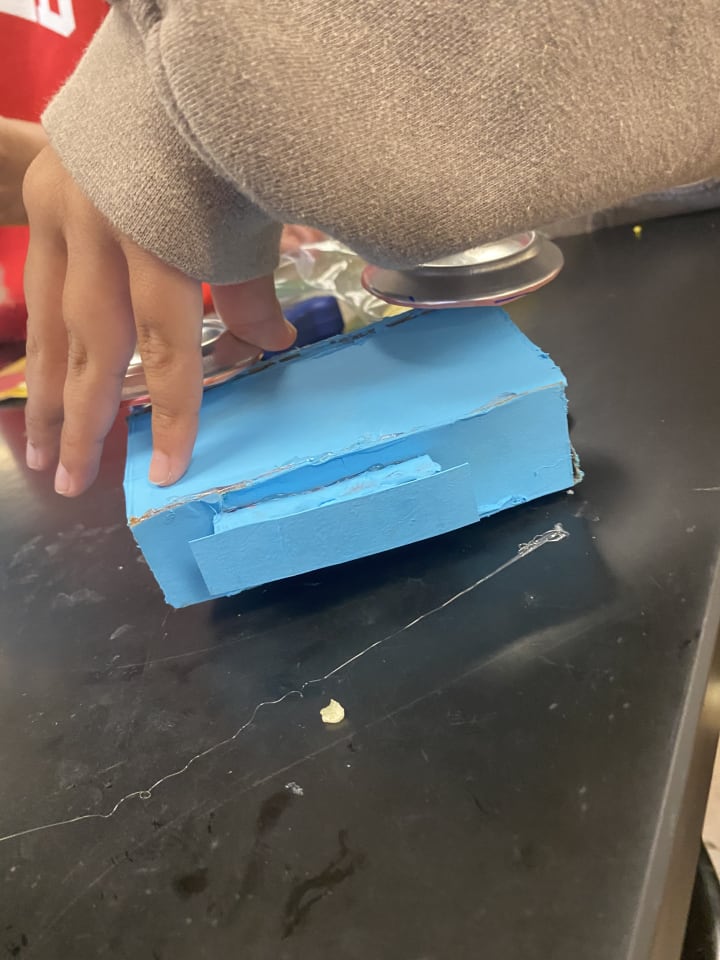
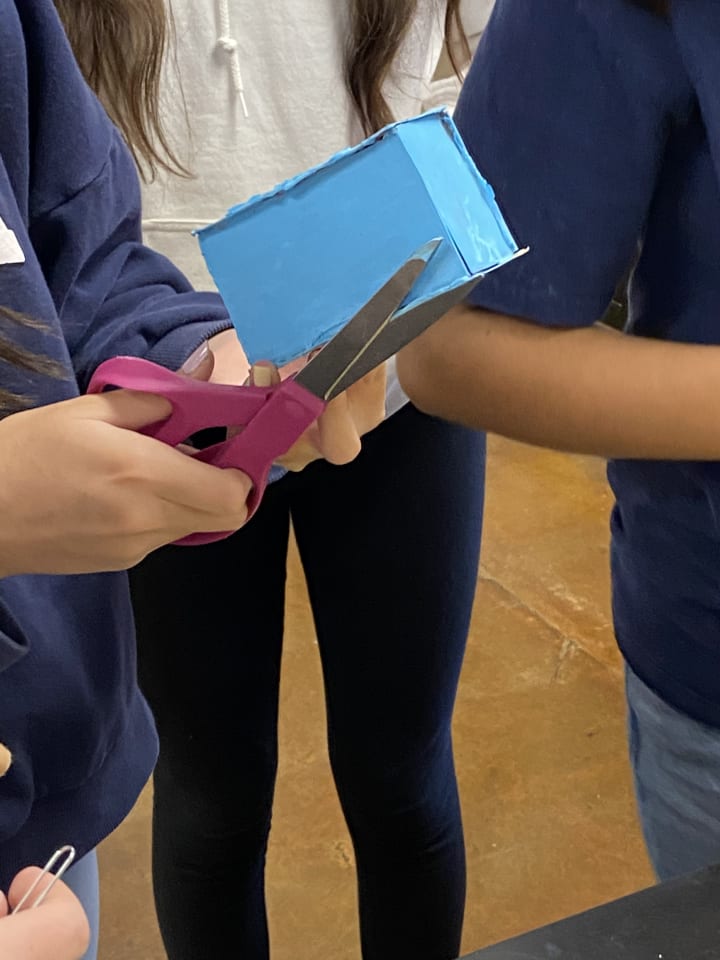
~Cut your cardboard~
- For this step, you will need to get your sharpie and scissors so your train cart will be even.
- Whatever train cart you want to start with, I recommend choosing the easiest one for you.
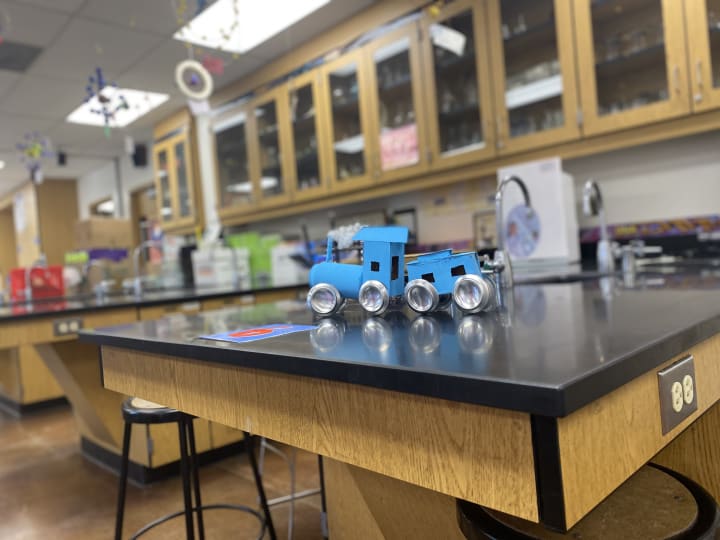
- Note: my group eliminated the middle cart because we soon realized there was not enough time during class. (If you have a lot of time, I recommend doing all three carriages and adding designs and bits and bobs.)
Tips (on how to build):
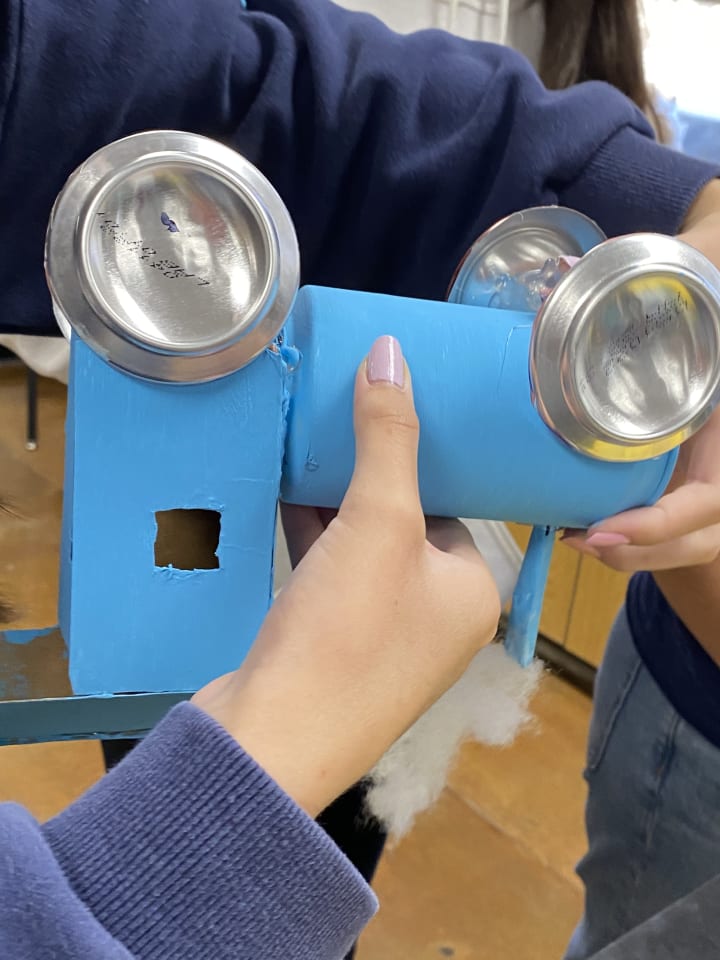
If you start with the first cart (the engine or the control room, to be a bit technical), make sure you cut the cardboard evenly to the can (to cut it evenly, it will make the round shape of the can and the flat cardboard even. So when it comes time to put on the wheels the train, the train will stay upright.)
If you start with the second cart (the middle cart is the easiest to make), cut the cardboard into a three-dimensional trapezoid. (Or instead of cutting it like that, you can cut out a big square and only trim it where you need to trim it.)
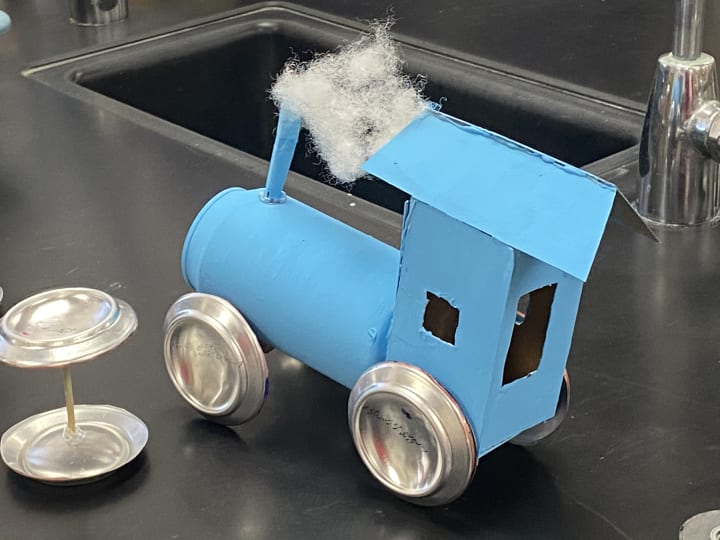
If you start with the last cart, cut the windows evenly (it won't look good if they are uneven.) Also, make sure to cut the roof in the shape of a trapezoid (you need to make two of them, and they need to be symmetrical.) Don't forget to add the little roof thing at the top.
Step Five:
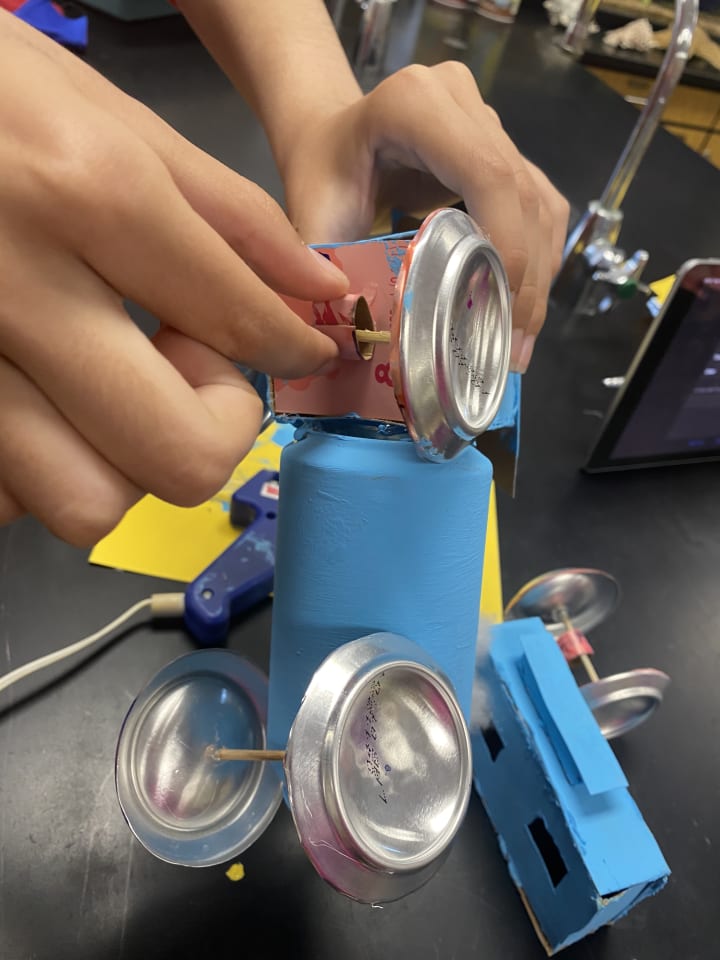
~Make the wheels~
- To make the wheels for the train, you need the hot glue gun, the sticks, and the bottom half of a soda can.
- You have cut the post evenly so it will fit under the carts.
- Once you've done this, you need to hot glue the bottom of the can to the stick.
- There are your wheels! (we tried to make them moveable but soon realized that wasn't possible with the approach we took on the whole thing.)
Step Six:
~Paint your train~
- This step is optional
- If you do this step, you need to consider that you need to paint the train white first and then paint it the color you need.
Step Seven:
~Hot glue wheels~
- Hot glue the wheels on each part of the train (this step is straightforward.)
- Make sure you don't get burned. ~I got burned~
Step Eight:
~Get a paperclip~
- Undo the paper clip, so you can hot glue one side and hook them to the train carts.
Step Nine:
~Add finishing touches~
- Just make sure everything how you like!
Note: there are a lot better directions to follow to build this train. These are just mine.
Extra Photos:
About the Creator
Ceo Of Dying
Join my Roblox group: https://www.roblox.com/groups/3771416/Dance-Battle-Group#!/store
Subscribe to my YouTube: Ceo Of Dying
Discord Server:
Twitter: Briarisdaddy
Discord: Briar is daddy#1761
Instagram: briarlynnx
Roblox: WsgBriar
Keep reading
More stories from Ceo Of Dying and writers in Lifehack and other communities.
Intermittent Fasting for Rapid Weigh loss
Start writing...Intermittent Fasting is extremely popular worldwide. It turns out to be an effective way to lose weight. With intermittent fasting you alternate short periods of eating with periods of fasting to effectively lose weight.
By Elhassan Errezzaki3 days ago in Lifehack
Fiverr Logo Design
A strong brand logo is crucial for businesses to make a lasting impression and stand out from the competition. If you're looking for an affordable and professional logo design service, Fiverr is the platform for you. With a wide range of talented designers, Fiverr offers logo designs that are tailored to your brand's unique identity, helping you elevate your brand's image and establish a strong visual presence.
By Abdulhakeem Momoha day ago in Lifehack


Comments
There are no comments for this story
Be the first to respond and start the conversation.