
Start Beading and Start Wearing Your Own Creations
Summer Earrings: Simple Earring Tutorial

I don’t worry about jewelry. I don’t have to. I create my own and it doesn’t cost a lot of money. You can too.
If you’re confused about trendy jewelry or tired of the plastic look and the sticker price, stop paying for a mass manufactured item and make your own.
I’m a professional and hobby jewelry designer. I’ve made a living designing and making jewelry. I started with a book and kit. You can learn how to make jewelry. In this tutorial, I’ll teach you how to make your own earrings with a few basic supplies and a little time.
I want to encourage you to try. I’ve shown a lot of pictures to inspire you. It’s not intimidating and it’s absolutely liberating to wear your own creativity on your ears. I hope your imagination and personal talents align with this fun project.
I’m not simply interested in showing you how to make earrings. I want to get you to think. It’s possible to make a living by exploring artistry in any medium. Whether you write or draw, take it to the next level and make it a business.
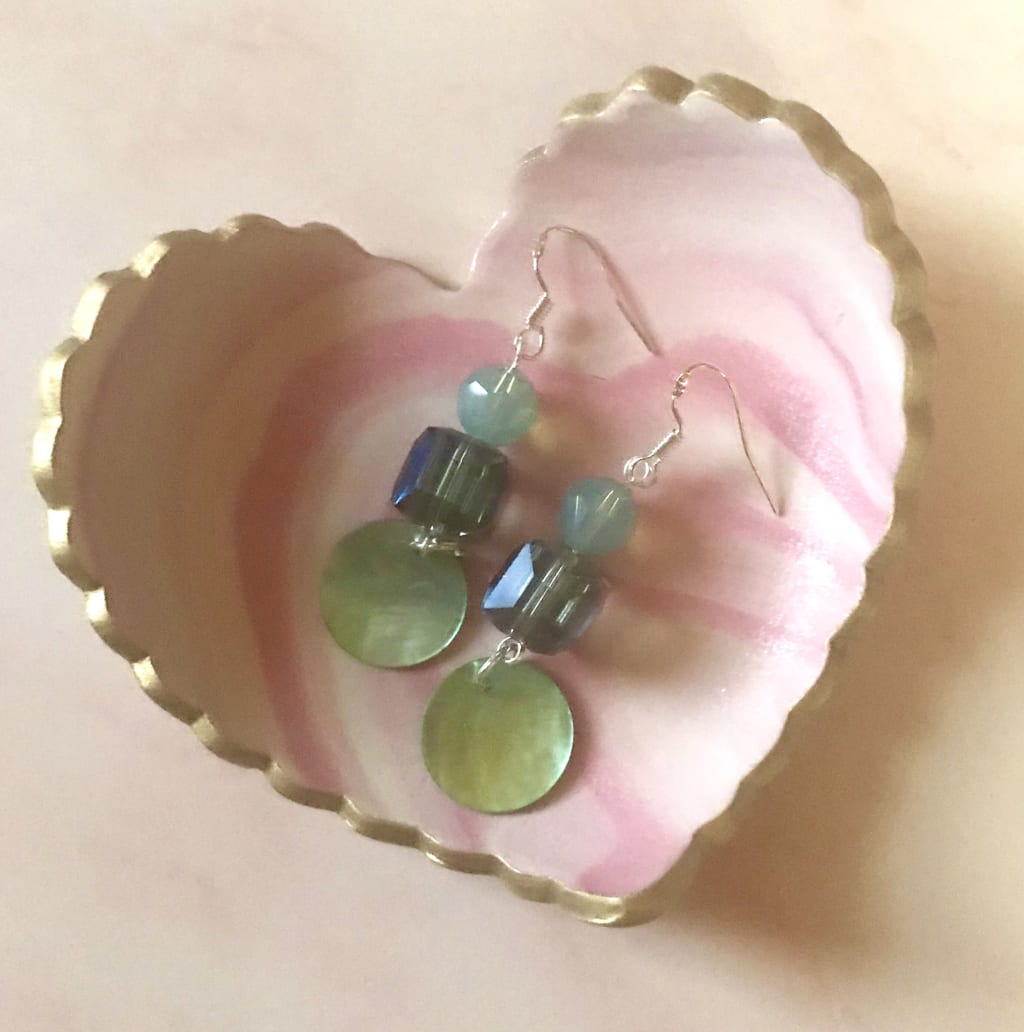
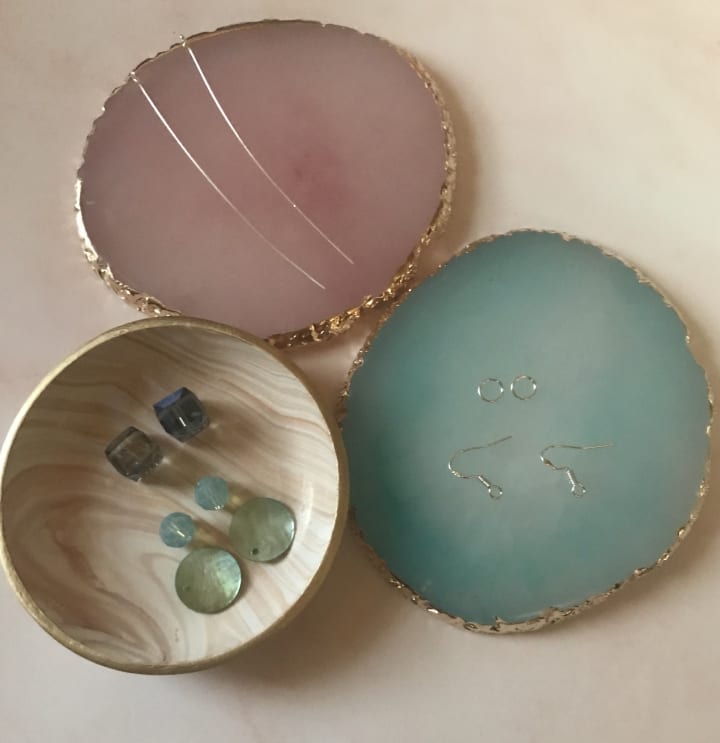
Let’s begin this project. I’ve used beads and shell to make the earrings. I’d normally use a head pin for this project but I decided to add shell for a summer boho vibe. The shell dangle requires an eye pin.
Let’s take a look at my collection of supplies. The fun portion is the beads. I won’t bother telling you how many strands of beads I own. It’s embarrassing but that’s the magic of creativity. The possibilities are endless. You can use any beads you want.
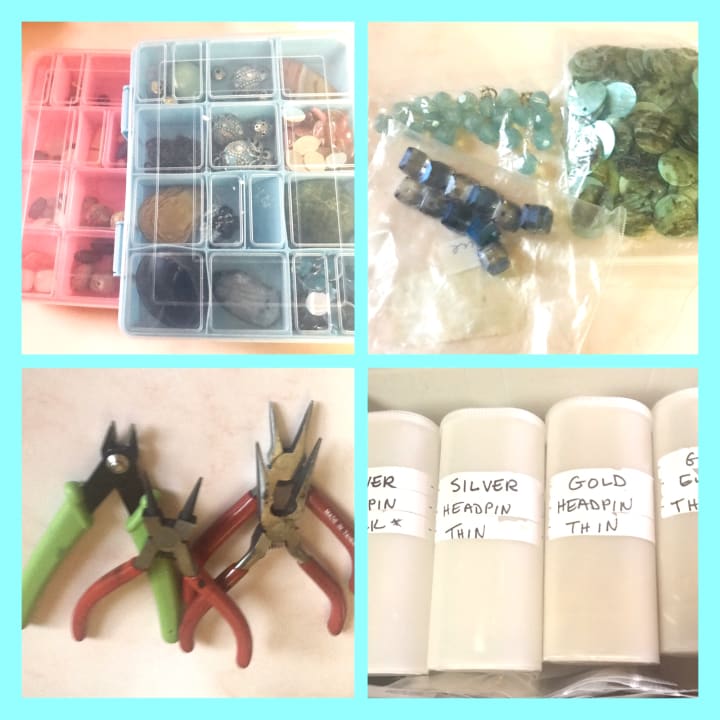
This project requires:
- 2 beads of your choice. You’ll need 2 of each style for the earrings
- 2 shell discs or disc of any style with a drilled hole
- 2 silver plated (silver tone is fine) eyepins (thicker eye pins for larger bead holes)
- 2 silver plated (silver tone is fine) 5-6 mm jump rings
- 1 pair silver plated earrings (silver tone is fine)
- Needle nose pliers and flush wire cutters (you can purchase a starter tool kit cheaper than the individual tools)
You can find any of these items at your local craft store or online. I suggest purchasing a beginner tool kit because they’re inexpensive. You might even be able to find a kit with jump rings, eye pins and head pins. Those are the three basic building blocks of jewelry making. You can design anything with those supplies.
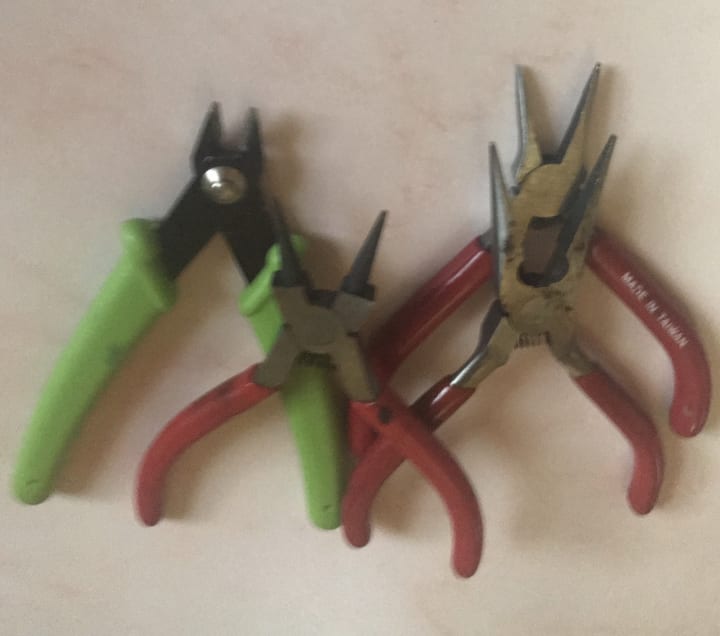
We’ll be using flush cutters and threaded pliers for this project.

I’ve shown the above picture in sequence to demonstrate the first steps of this design. Use your jump ring and open it with the pliers. I’m self taught and I love using threaded pliers. It’s not desirable for fine jewelry, as the thread on the pliers can mar the metal. However, I like threaded pliers because they’re easy to use.
Add the open jump ring to the shell disc. Next, attach the eye pin to the open jump ring. Close the jump ring. You can use your fingers or a second pair of pliers to open and close jump rings.
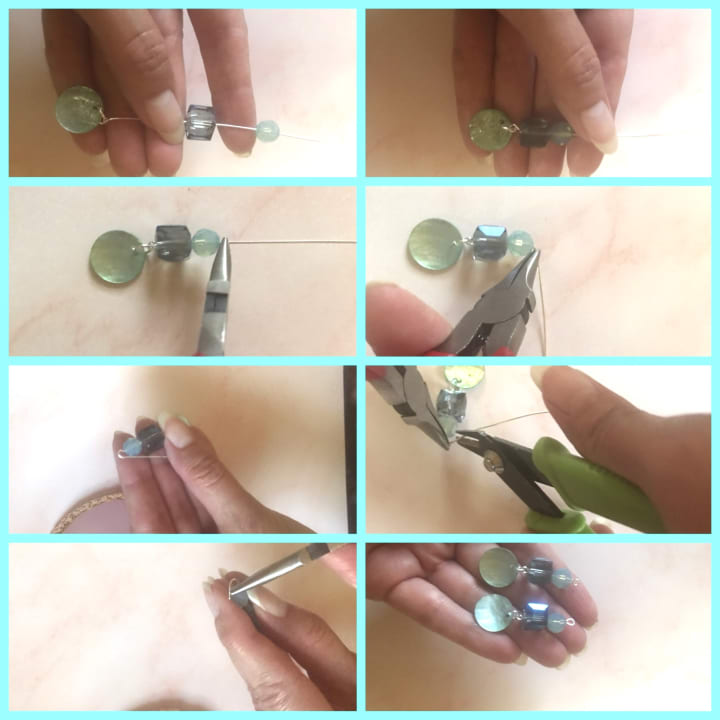
The next part is relatively easy with practice. Follow the pictures and I’ll explain.
String both beads onto your eye pin. Take your pliers and grasp the eye pin close to the beads. Bend the eye pin in a 90 degree angle with your pliers. Wrap and slightly bend the metal around the tip of your pliers. We’re going to cut the metal and pinch it closed to make a nice round circle.
Take your flush cutters and snip the metal to create a nice closed circle. Always use caution when cutting metal. Once you’ve made a cut, simply discard the portion no longer needed. Use the pliers to gently push the metal together to create the closure.
Our last step is adding the ear wires. Most earring loops open in the front or the back. You can choose from varying styles. You’ll find ear wires, as they’re called in jewelry design, really have ability to change the look of your design. I prefer French ear wires to coiled fish hook ear wires. French ear wires provide a dressy polished finish.
Look for the metal loop opening and gently use your pliers to open the loop to the side. You want to open the ear wire loop large enough to attach your deign. Once you’ve put on your designed piece, use your pliers to close the ear wire loops.
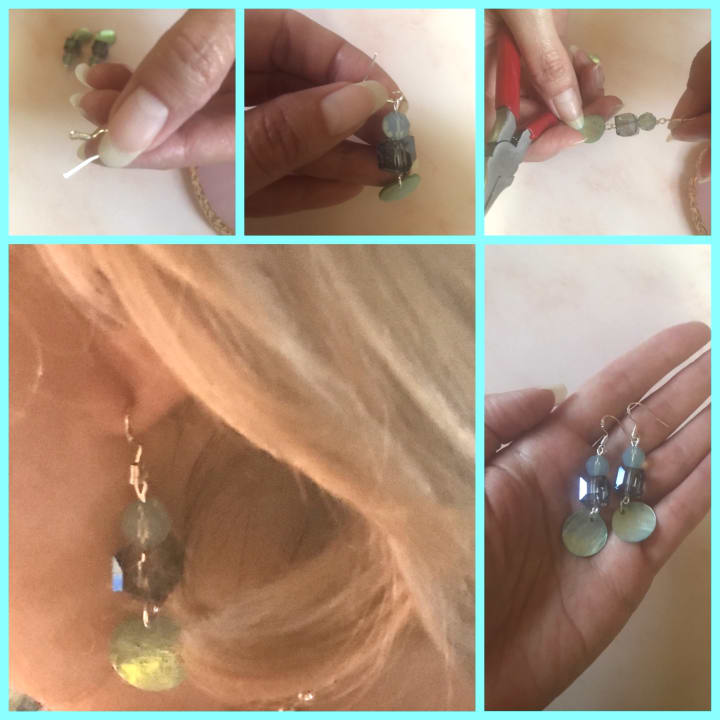
Of course, you’ll need to complete this entire process twice for the pair. I prefer to complete the same steps for both earrings, as I work. It’s easier than repeating the entire process start to finish two times. Do what works for you.
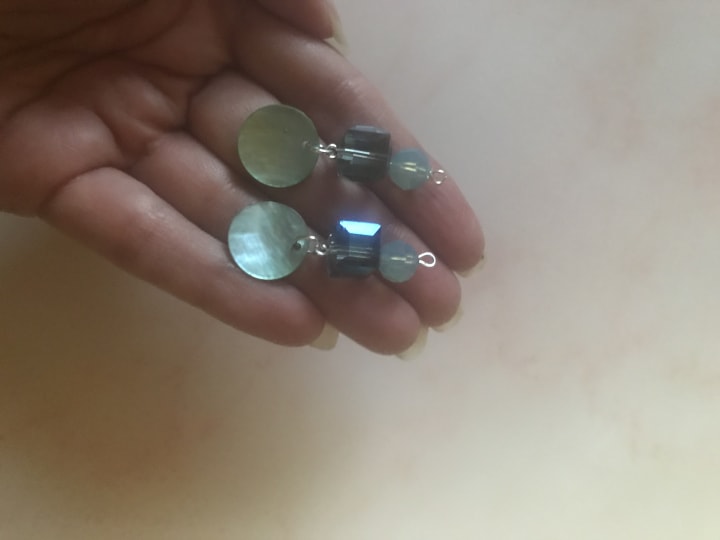
All finished. It’s really that simple. If you’re a beginner, you’ll make errors that look odd. You can adjust or recut the metal and fix them quickly.
I suggest studying connection points of earrings you currently own. You’ll begin to see the elements I discussed (jump rings, eye pins and head pins) in your own jewelry.
Studying your own collection of jewelry gives you a basis for understanding the construction of jewelry.
I chose a mix of blue beads and shell for this simple design. You can select any color theme you like.
To make your life easier, let’s pretend I didn’t add the shell dangle. If you’d like to modify this design, simply use beads of your choice and a head pin not an eye pin. A head pin looks like a nail. It will hold the beads and you can start at the second step. There you can cut and create your top loop and add ear wires.
Now you can create two different styles of earrings. Remember, eye pins provide a dangle option. Head pins allow you to create a simple stacked beaded design.
You can expand on this design by using metal beads, discs, crystals and bead caps for a professional look.
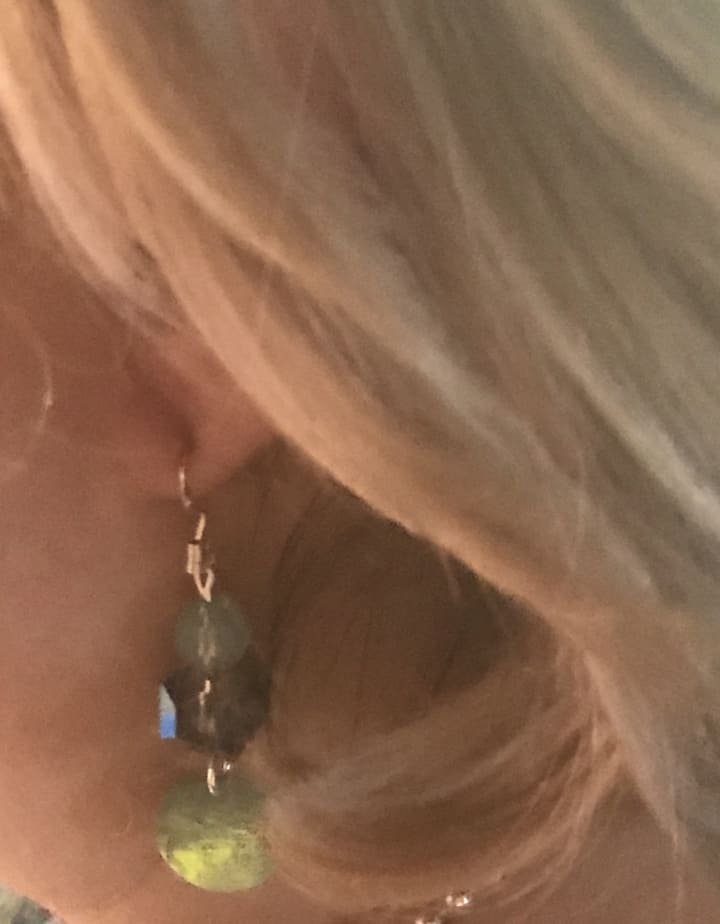
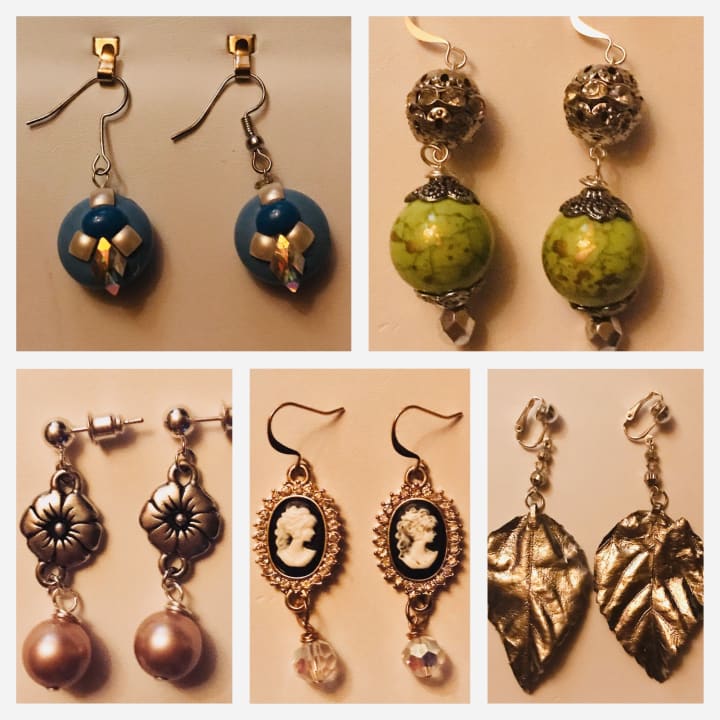
I hope I’ve inspired you to consider creating your own style. Here are a few samples of what you can create along your jewelry making adventure.
About the Creator
Diana Hayes
Thank you for reading. A ❤️is free. Tips are appreciated. From thoughts to words, I hope to inspire you.
Keep reading
More stories from Diana Hayes and writers in Lifehack and other communities.
Vashikaran Specialist in Indore - Astrologer GuruMaa Vidyavati
Do you feel like you can't overcome the obstacles in your life? Are you seeking guidance and solutions to overcome obstacles that have been hindering your progress? Look no further, for in the heart of Indore resides a beacon of hope and wisdom – Astrologer GuruMaa Vidyavati, the eminent Vashikaran Specialist in Indore.
By Astrologer Guru Maa Vidyavatia day ago in Lifehack


Comments
There are no comments for this story
Be the first to respond and start the conversation.