


Do you love handcrafted jewelry? Most people prefer it over factory-made items, because it is beautiful, original, and expresses the personality of the wearer. To start making your own jewelry, you only need a few simple tools and findings. There is a great variety of beads you can choose from, and they are made of different materials, such as precious or semi-precious stones, glass, wood, polymer clay, china, or even plastic. If you learn a few simple jewelry-making techniques you will be able to create a great variety of beautiful earrings, bracelets, necklaces, or anklets. When you create your jewelry, you can think about the setting where the item will be worn. For example, if you go to a wedding you should look for beads made of crystal, or pearl, while if you plan to wear it on the beach, try something more colorful.
Once you have learned the basic handmade jewelry techniques, why not go one step further and sell the items you make. This way you can turn your hobby into a business. You can sell your creations online if you open your own online store. Remember that a beautiful picture is always important to make more sales, and don't forget to add a detailed description as well.
Earrings are easy to make and you can use your imagination to create beautiful designs that everybody will like. In this article, I’ll explain how you can make a pair of wedding earrings, using crystal beads.

List of Supplies:
Tools:
Chain nose pliers
Cutting pliers
Round nose pliers
Findings:
2 French ear wires
2 Headpins
2 Eye pins
Beads:
2 small round crystals
2 small long crystals
2 teardrop shaped crystals

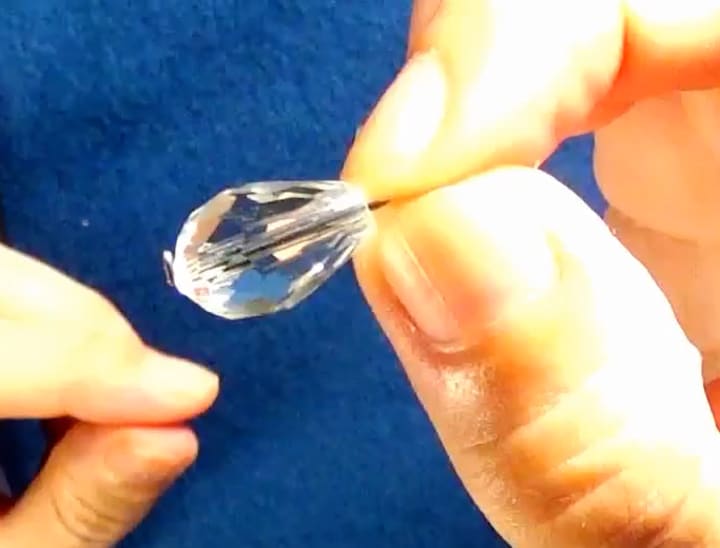
Thread on the teardrop crystal onto the headpin.
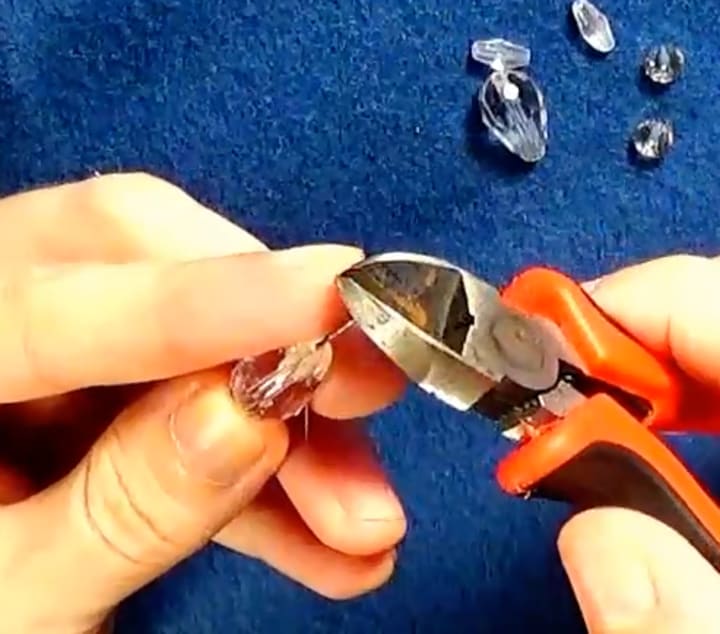
In order to make a nice-sized loop, you will need to use about 1 cm of the wire of your headpin. If you have any more than this leftover after threading your bead on, cut off the excess wire using the cutting pliers, so that you can make the loop.
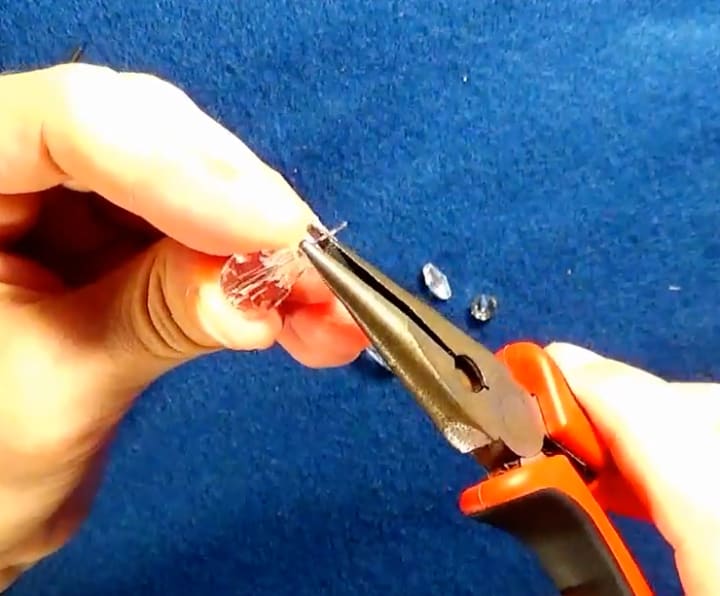
Grab the pin with the chain nose pliers.

Using the chain nose pliers, bend the end of the pin to 90 degrees.
Thread on the small crystals onto the eye pin.

If you have any more than 1 cm of leftover wire after threading your bead on, cut off the excess wire using the cutting pliers, so that you can make the loop.

Using the chain nose pliers, bend the end of the eye pin to 90 degrees.

Place the round nose pliers around the tip of the headpin.

Press it tightly and roll it inwards towards your beads. Roll the loop into place so that the wire follows the natural curve of the pliers. Do not pull it or let go halfway through, since this can result in the loop being misshapen. Do not close the loop entirely, so that you can later connect it to the eye pin.

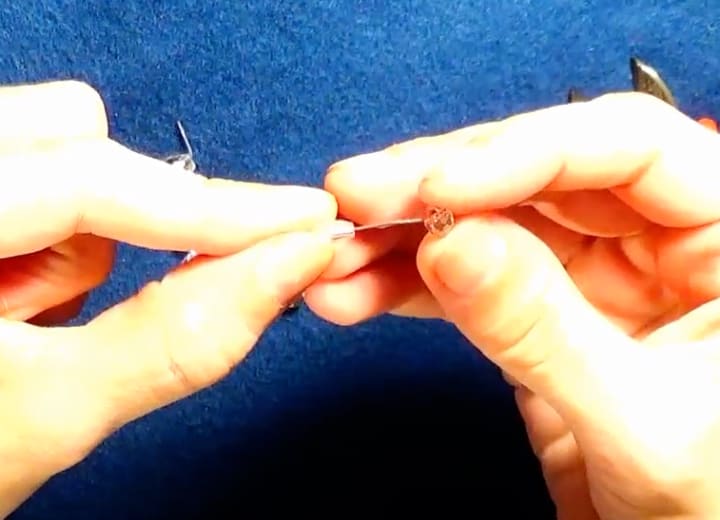
Attach the open loop of the headpin to the eye pin.

Using the round nose pliers, close the headpin loop. When you’ve finished, your loop should rest against the last bead you threaded on.

Place the round nose pliers around the tip of the eye pin.

Press it tightly and roll it inwards towards your beads. Do not close the loop entirely, so that you can later connect it to the french ear wire.


Attach the french ear wire to the open eye pin loop.

Once the french ear wire is attached, the first earring is ready. Now follow the same steps for the second earring.

Now you can enjoy wearing your new earrings!
About the Creator
How to leave behind a meaningful inheritance
Let's embark on a profound exploration of the significance and essence of life letters – those intimate narratives that encapsulate the very fabric of our existence, weaving together the threads of our past, present, and future into a tapestry of meaning and purpose. At the heart of this journey lies the recognition of life's fragility and the poignant realization of its fleeting nature, epitomized by the stories of individuals like Bill and myself.
By Ugochukwu victor7 days ago in Lifehack
Sarah's Journey
Once upon a time, there was a girl named Sarah who used to dislike boredom. She always felt like she needed to be doing something exciting or productive to feel satisfied. Whether it was scrolling through her phone, watching TV, or chatting with friends, Sarah avoided moments of stillness like the plague. But little did she know, those seemingly dull moments held the key to unlocking her creativity, reducing stress, and finding inner peace.
By Rafayet Rabbi 3 days ago in Lifehack
Hall of mirrors
Things used to matter, before all the noise. And at that time when things still had meaning, there had been dreaming too, when dreams still mattered. And the brightest dream from those times was full of mountains and seas and smiles and the types of passion that absorbs you the way a dog is absorbed by witnessing something for the first time: with absolute presence, and awe.
By Giulia Viti4 days ago in Fiction


Comments
There are no comments for this story
Be the first to respond and start the conversation.