
How to Install Drip Irrigation in a Weekend Afternoon
A $75 setup, no plumbing experience required, and up to 50% less wasted water here's how to actually pull it off


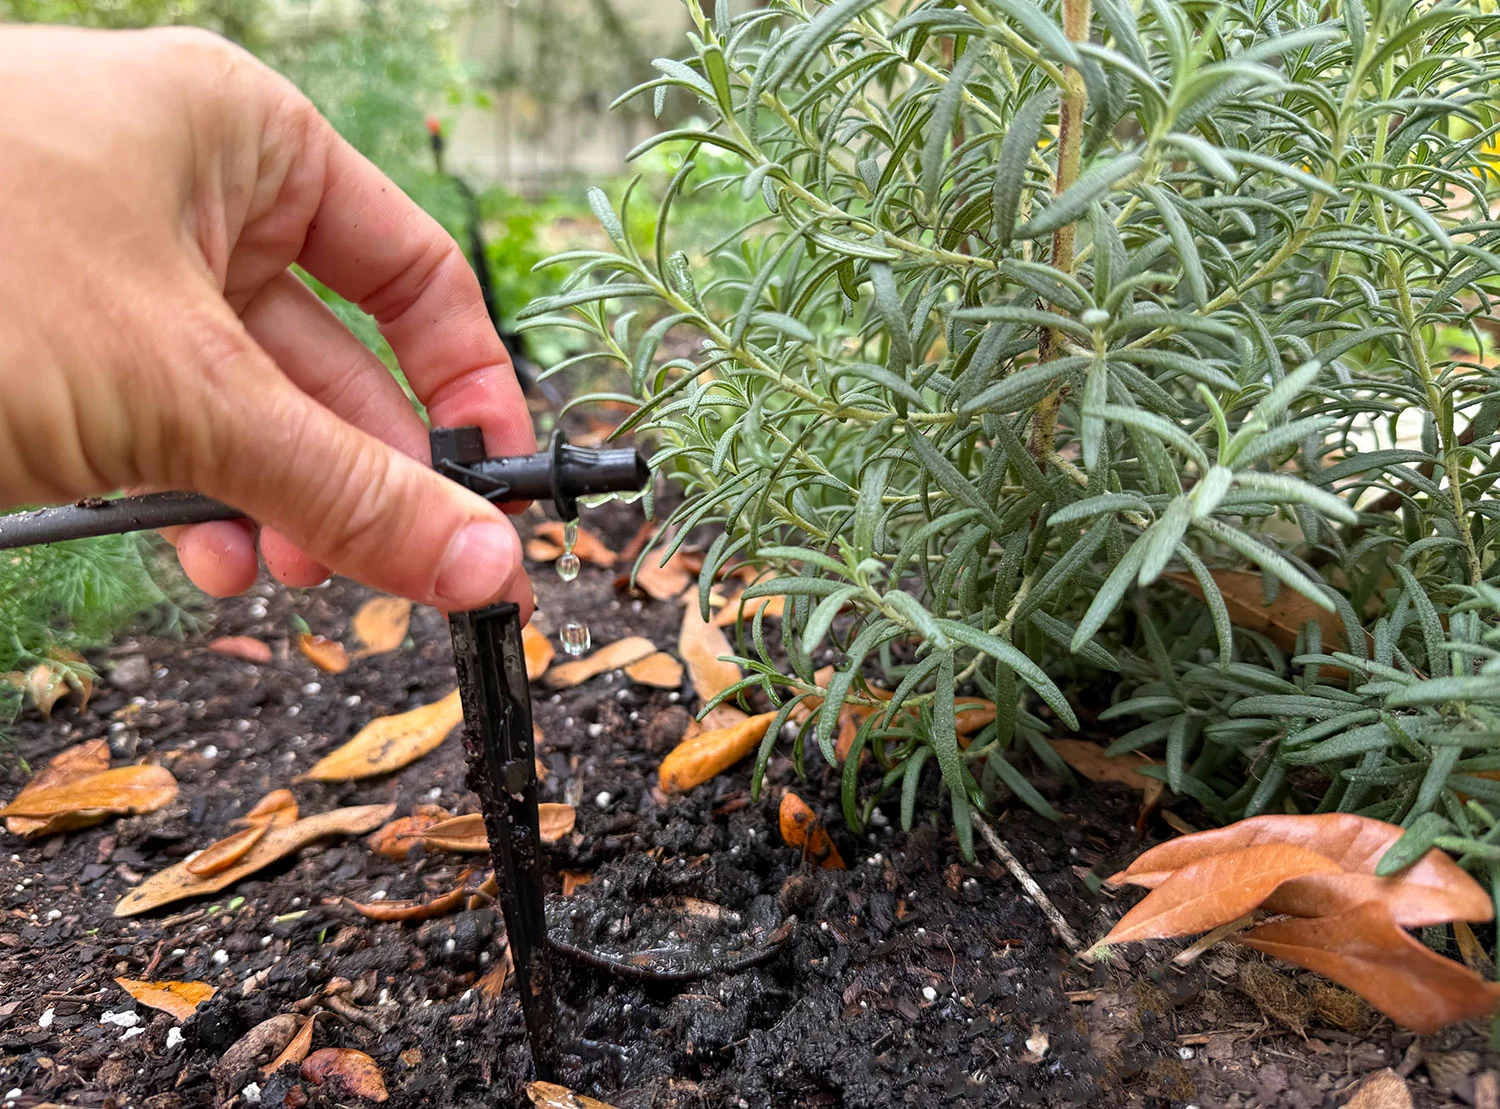
Sprinkler systems have a fundamental problem: they water everything in their path, whether it needs it or not, including the sidewalk, the fence, and the air directly above the lawn, which evaporates before a single drop reaches a root. Drip irrigation solves that problem by doing the opposite, delivering water in slow, precise amounts exactly where plants actually need it, directly at the soil level.
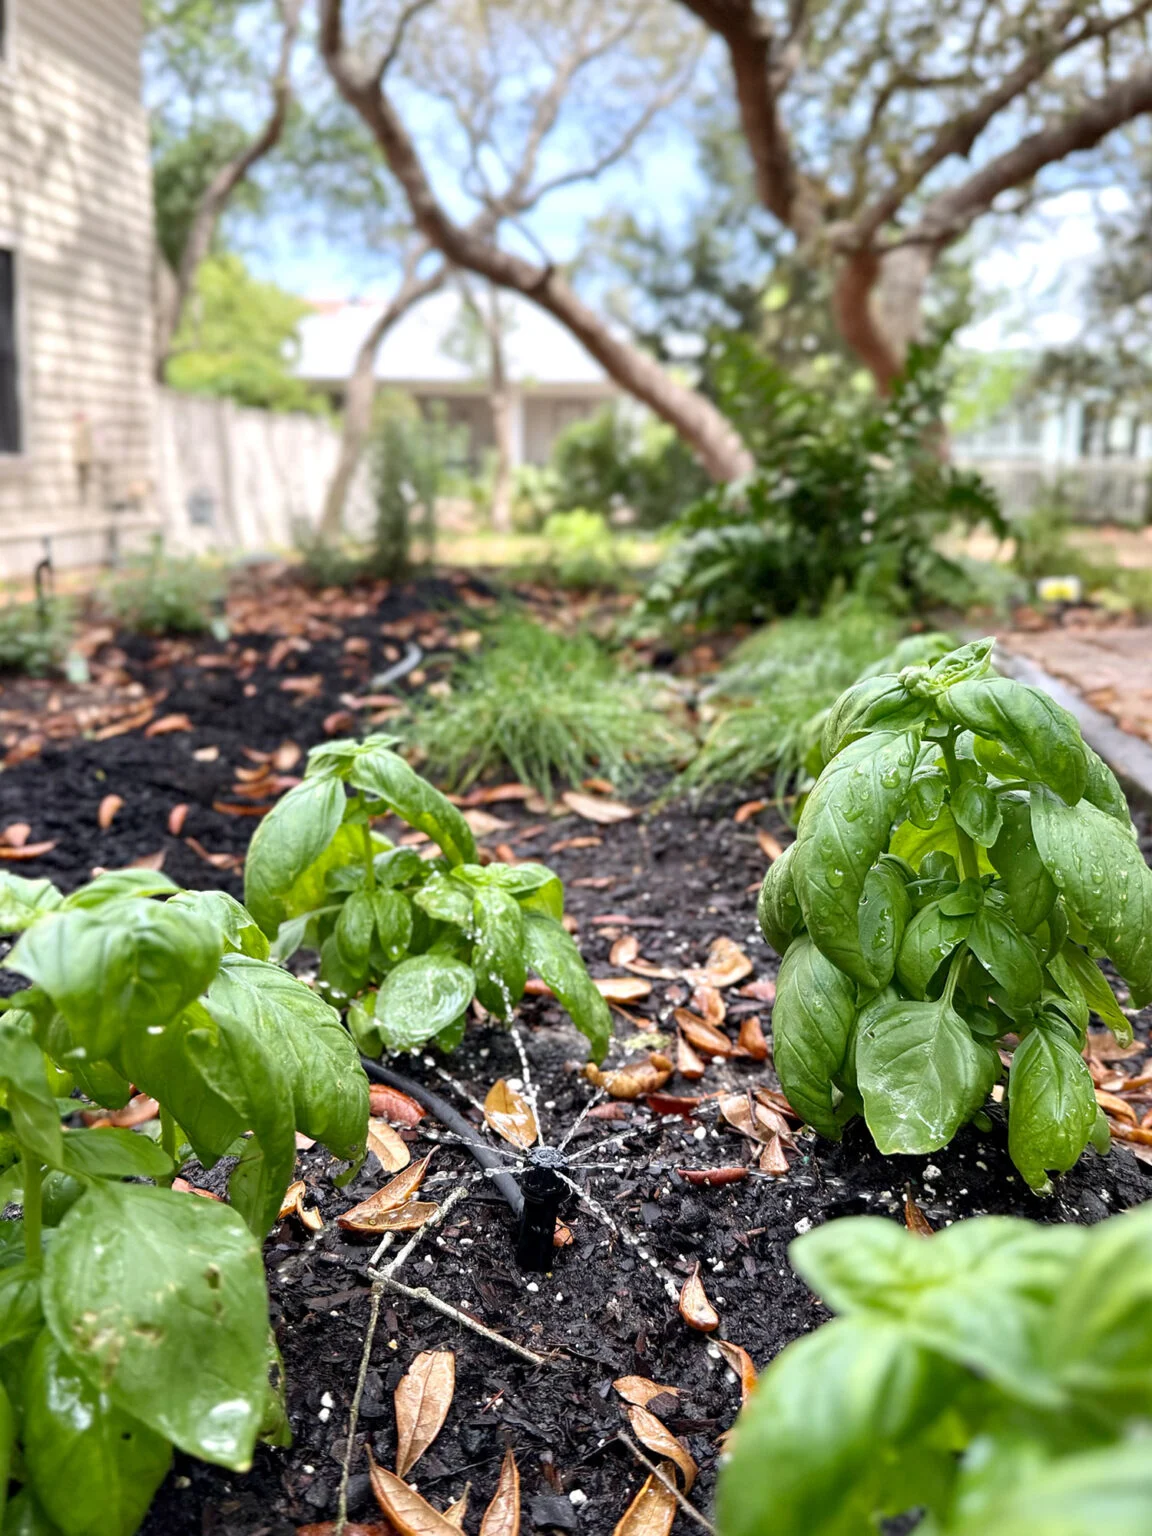
The surprising part isn't that this works better. It's how little effort it takes to set up.
What Drip Irrigation Actually Is
Drip irrigation is a low-pressure watering method that delivers water directly to the base of individual plants through flexible hoses, rather than spraying water broadly across an area the way sprinklers do. It's particularly well-suited to flower beds, vegetable gardens, shrubs, and even larger trees, because every plant can receive a customized amount of water based on its specific needs.
The advantages over traditional sprinkler systems are significant:
Less wasteful. Far less water is lost to evaporation, overspray, and runoff. Drip systems are commonly cited as using up to 50% less water than sprinkler-based alternatives.
More efficient. Because water goes directly to the root zone rather than the surrounding area, watering times can be shorter while still being more effective.
Highly customizable. A combination of flexible hoses and different emitter types means each plant can get precisely the water it needs, more for thirsty vegetables, less for drought-tolerant shrubs.
Genuinely easy to install. No specialized tools, no plumbing experience, and no prior installation experience required. A full system can go in within a few hours.
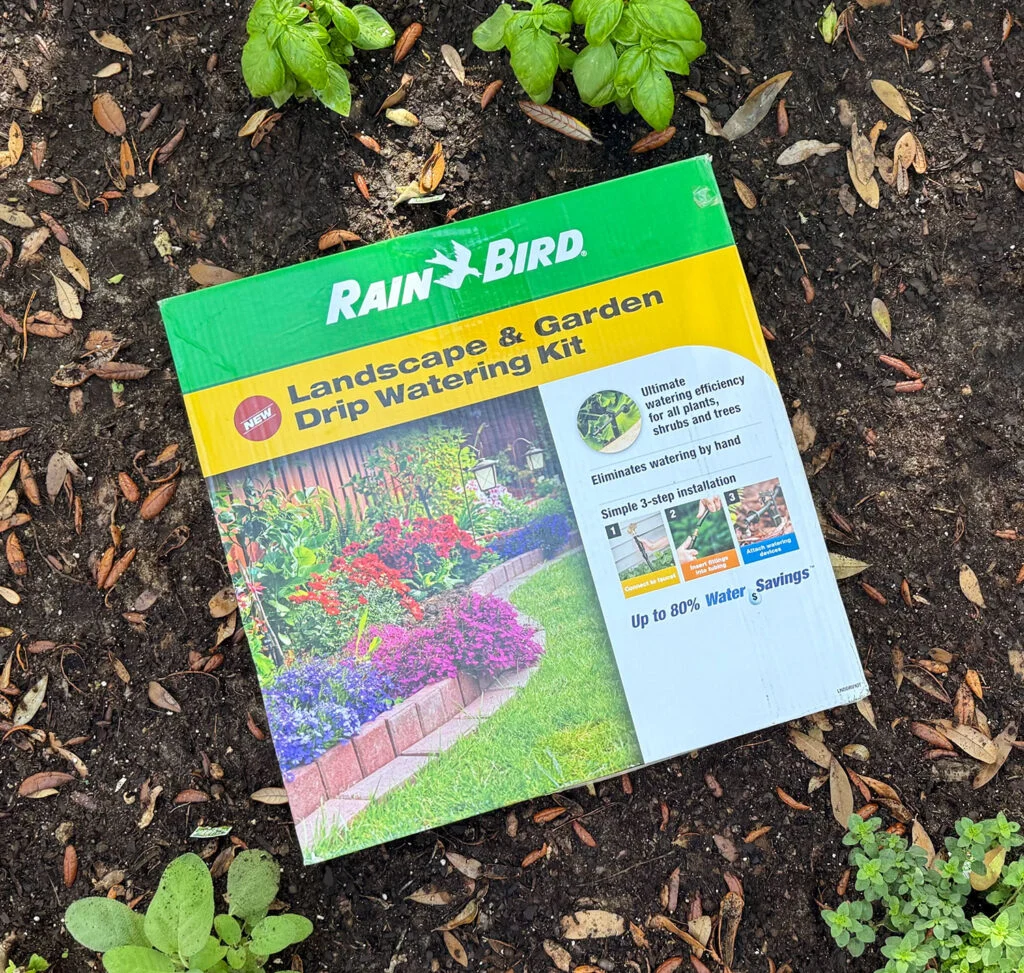
Affordable. A complete kit covering most residential needs runs around $55, with a hose timer (the only additional piece needed for full automation) bringing the total to roughly $75.
Drip systems also outlast soaker hoses, which tend to degrade over time. Soaker hoses are fine for getting new plantings established quickly, but for a more permanent, targeted solution, drip irrigation wins in durability and precision.
Understanding the Parts
Before installing anything, it helps to understand how water actually moves through the system from the spigot to the individual plant.
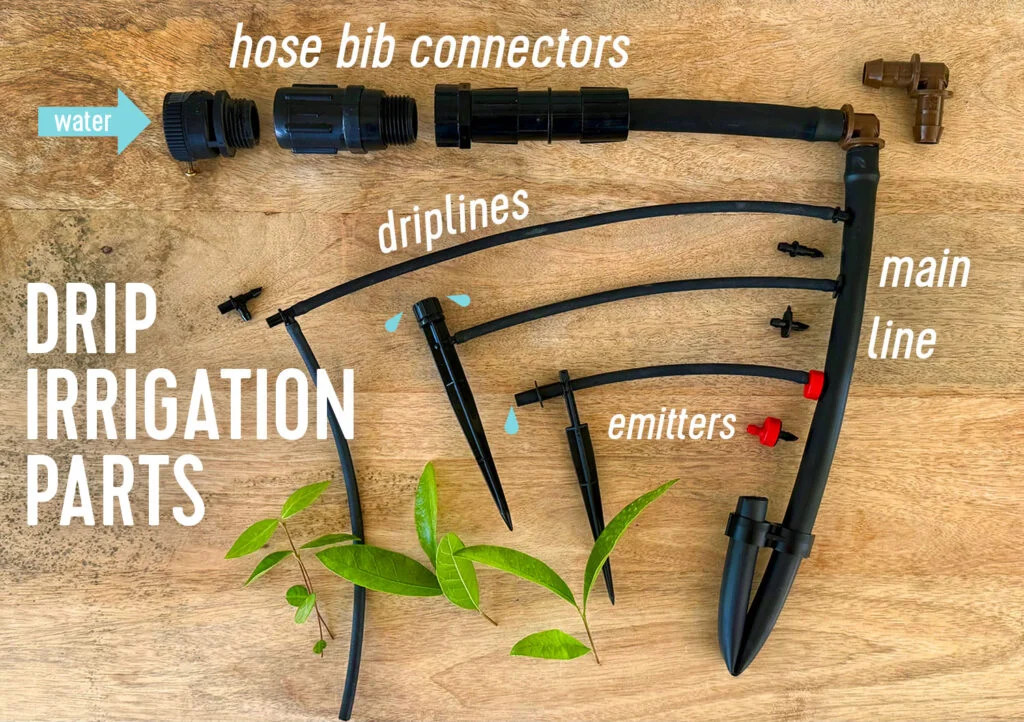
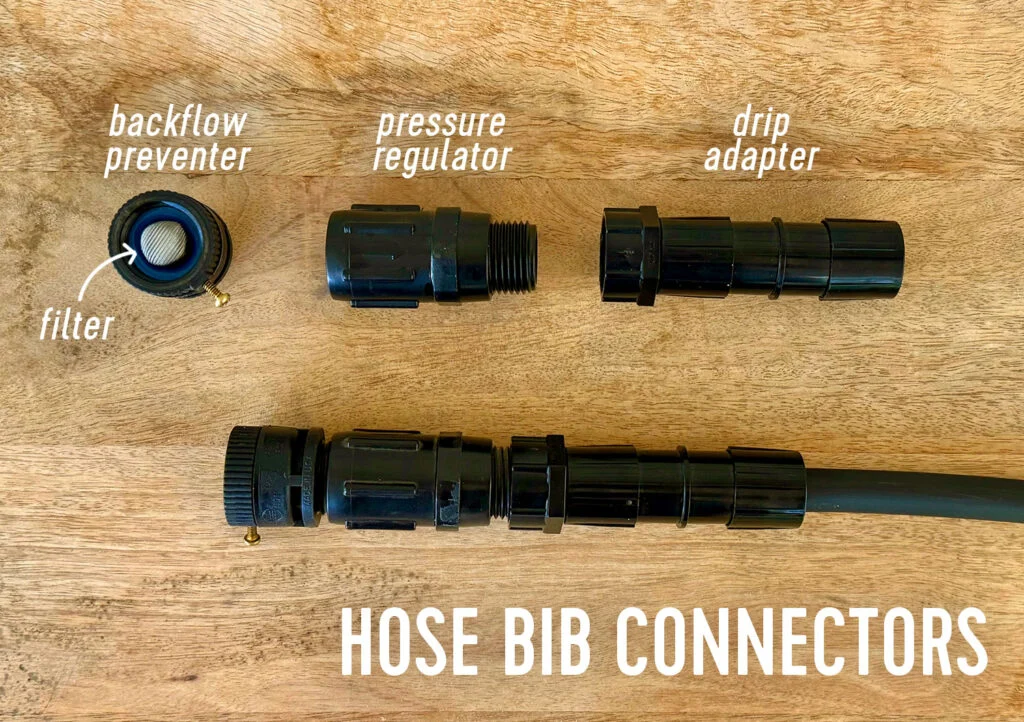
Hose Bib Connectors
This is where your system connects to an outdoor spigot. Several small components handle this connection, most of which come included in a standard kit:
Timer — schedules automated watering; multi-zone and smart/phone-programmable versions are available for more complex setups.
Backflow preventer — prevents water (and any contaminants like fertilizer or pesticide residue) from flowing back into the municipal water supply if pressure drops.
Filter — typically built into the backflow preventer, this keeps debris like sand and rust out of your lines.
Pressure regulator — reduces standard hose pressure down to the lower, steady flow required by drip systems.
Drip adapter - converts a standard 3/4" hose bib connection down to 1/2" or 5/8" irrigation tubing.
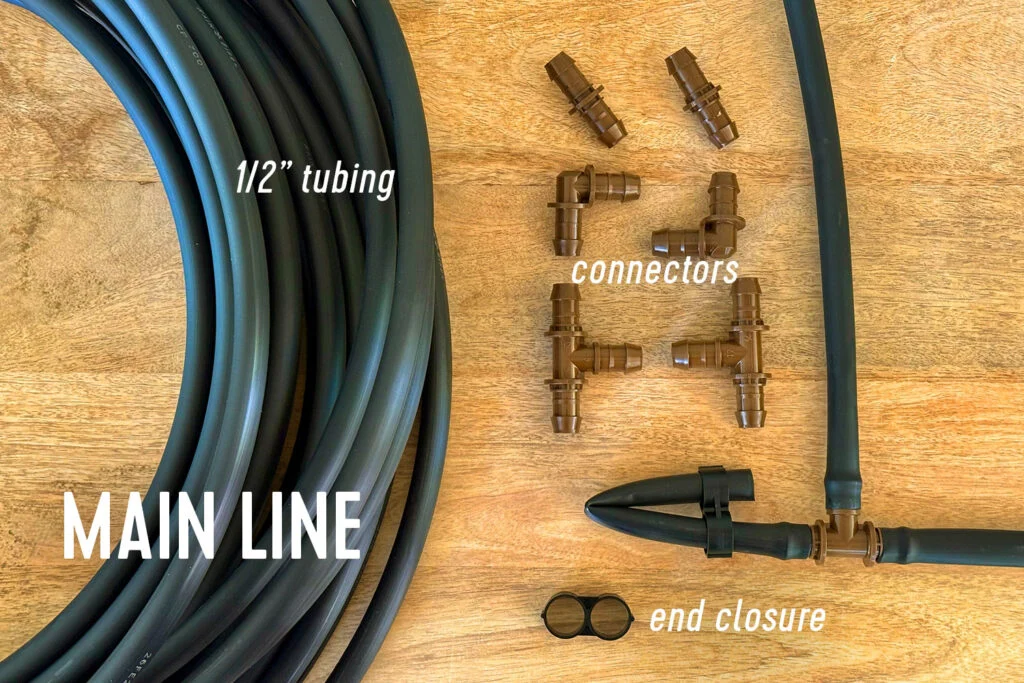
Main Line
The main line is the backbone of the system, the tubing that carries water from your spigot throughout the garden, similar to how a water main runs through a neighborhood before branching off to individual houses.
1/2" tubing (also called flex pipe) carries water through the main route and can be cut with regular household scissors.
1/2" connectors, tees, elbows, and other shapes let you route the main line around obstacles by pushing tubing onto barbed ends.
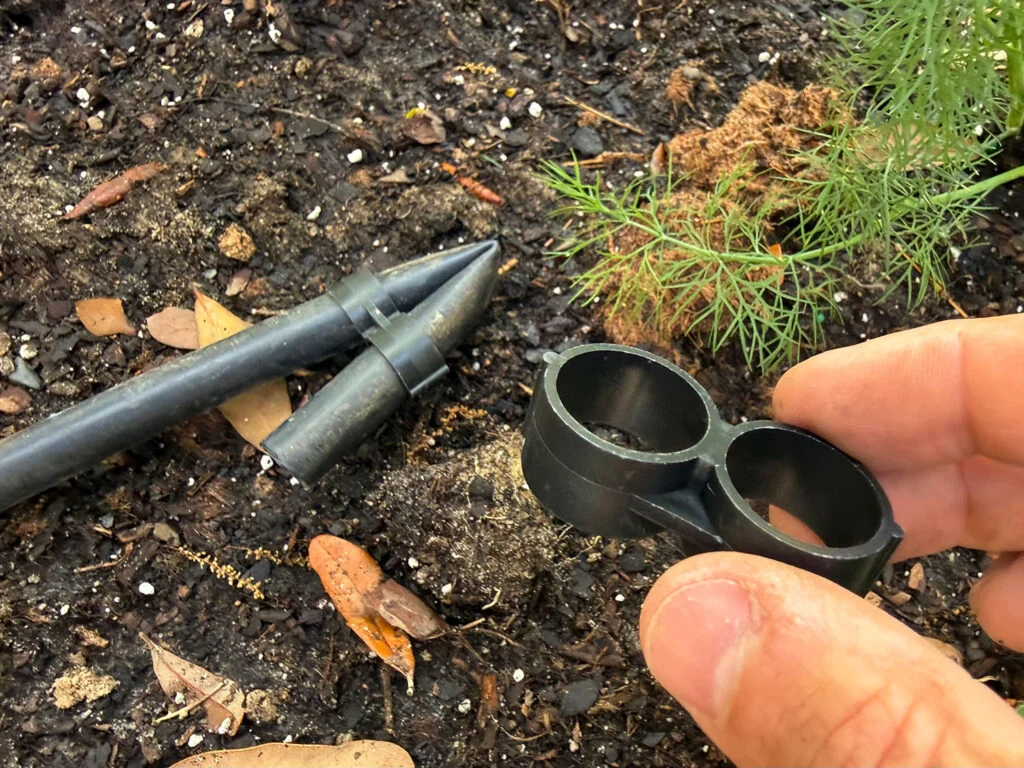
End closures pinch off any open ends of the main line.
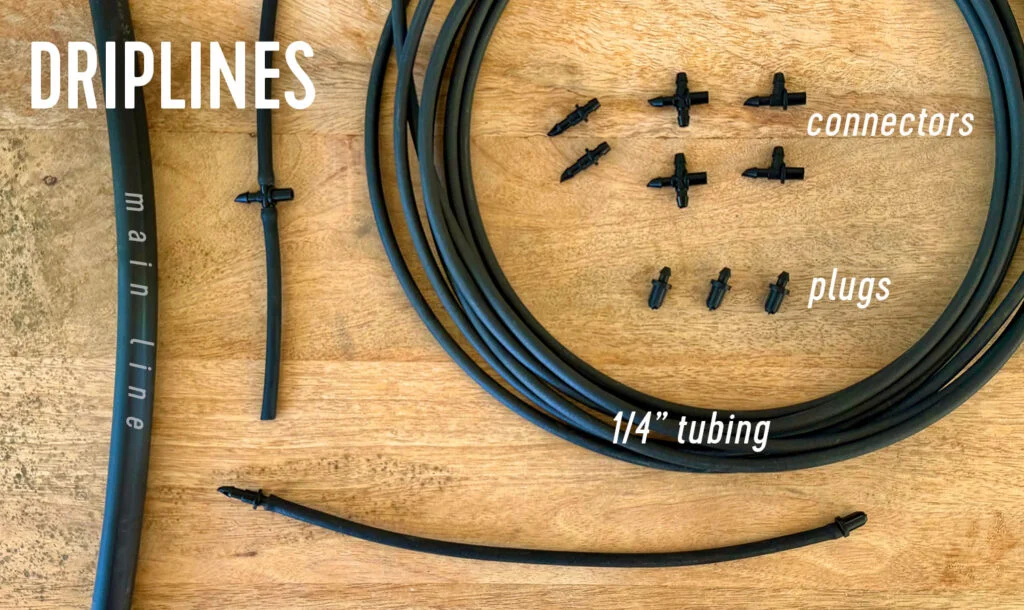
Driplines
From the main line, smaller driplines branch off to reach individual plants, the equivalent of the pipes connecting a single house to the water main.
1/4" tubing ("spaghetti pipe") is the smaller, flexible hose that branches to each plant.
1/4" connectors puncture into the side of the main line to attach each dripline.
Goof plugs are barbed endcaps used to seal off open dripline ends or patch small accidental punctures in the main line.
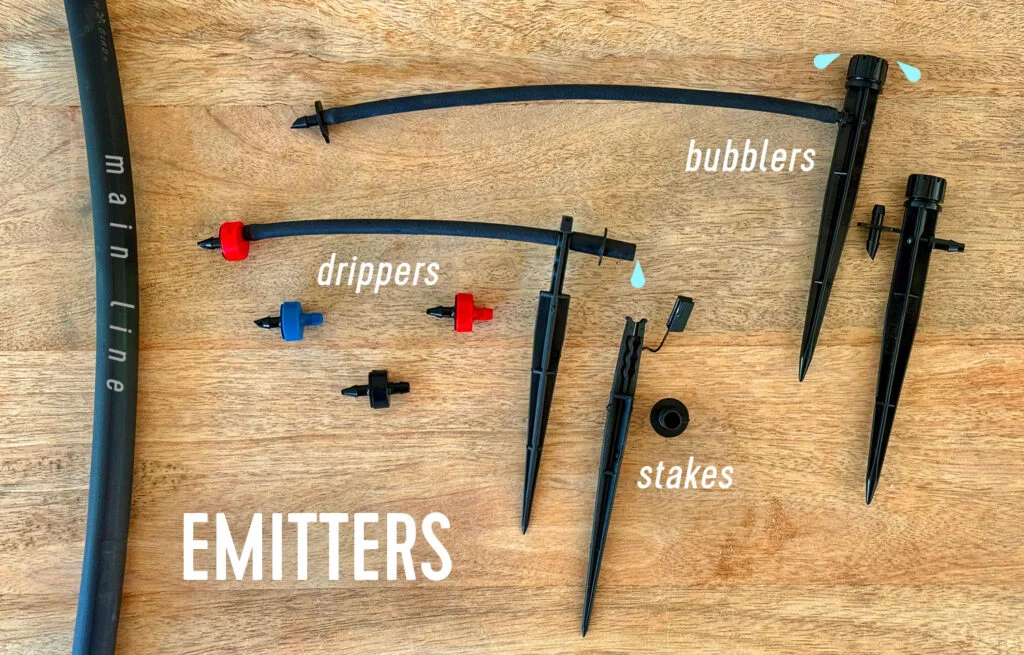
Emitters
Emitters determine how water actually reaches each plant:
Drippers are the most common type, releasing a steady, slow drip at rates measured in gallons per hour (GPH), typically 0.5, 1, 2, or 4 GPH, often color-coded by flow rate.
Tubing stakes anchor dripline ends exactly where you want them.
Bubblers emit eight small streams in a tight circle, good for watering small plant clusters at once.
Sprayers function closest to a mini traditional sprinkler, mounted on a stake, and available in full, half, or quarter-circle spray patterns.
Installation: Step by Step
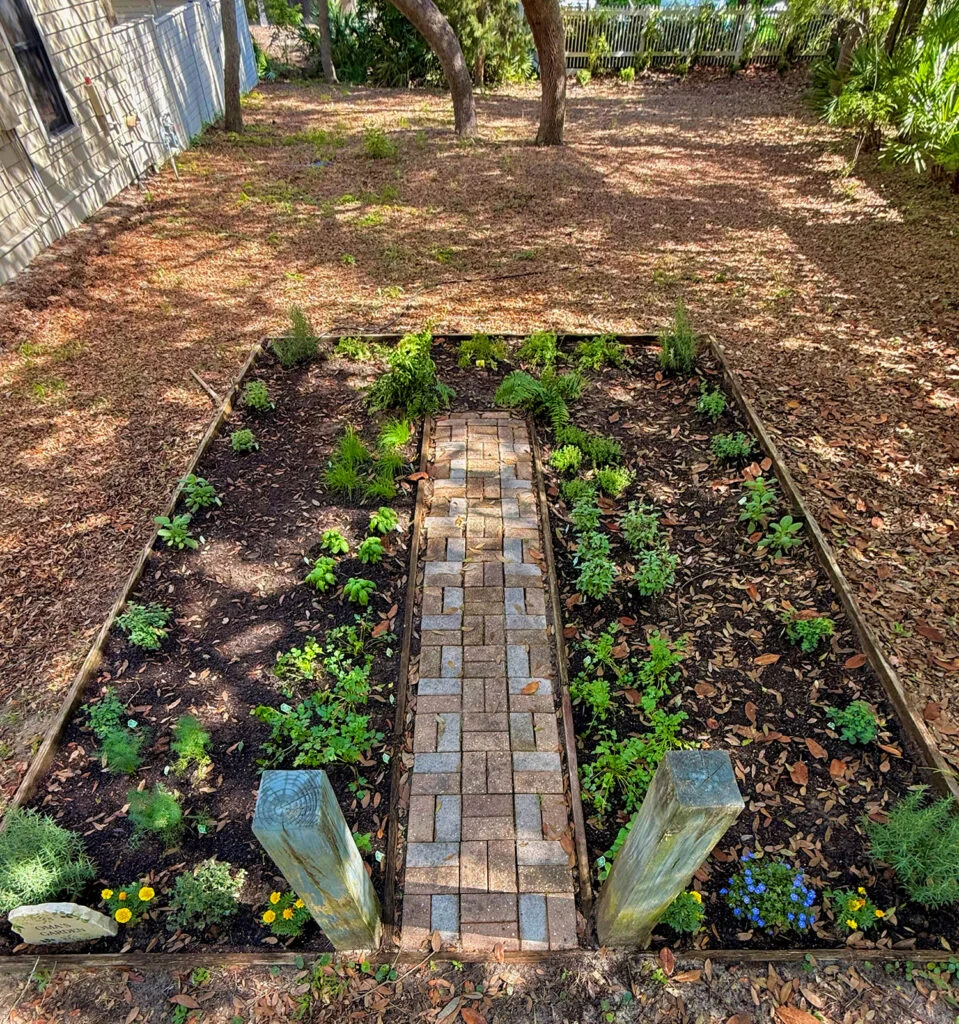
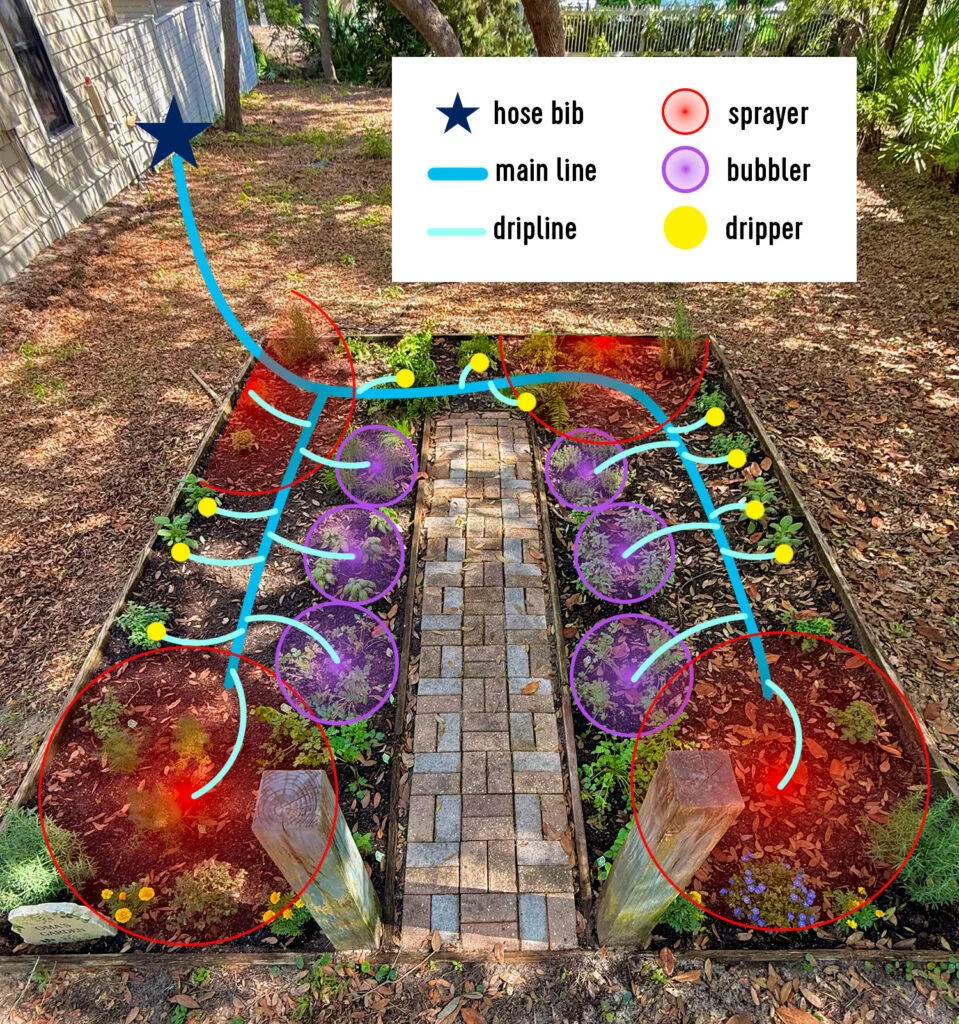
Step 1: Plan Your Layout
Before buying anything, walk your space and answer a few key questions: Where's your water source? How many separate watering zones do you need? Are there obstacles like sidewalks, decks, or fences to route around? How many plants need coverage, and do some need more water than others? Sketching even a rough map with this information ensures you buy the right amount of supplies the first time.
Step 2: Gather Supplies
A basic kit plus a hose timer covers most single-zone setups. You'll need additional connectors (backflow preventers, pressure regulators) if you're building multiple zones, more tubing if your water source is far from your plants, and extra emitters if you have more plants than the kit's included allotment covers. Most individual components, emitters, and connectors are inexpensive, usually just a few dollars each. The timer tends to be the priciest single item, especially multi-zone versions.
Step 3: Give Your Tubes Some Sun
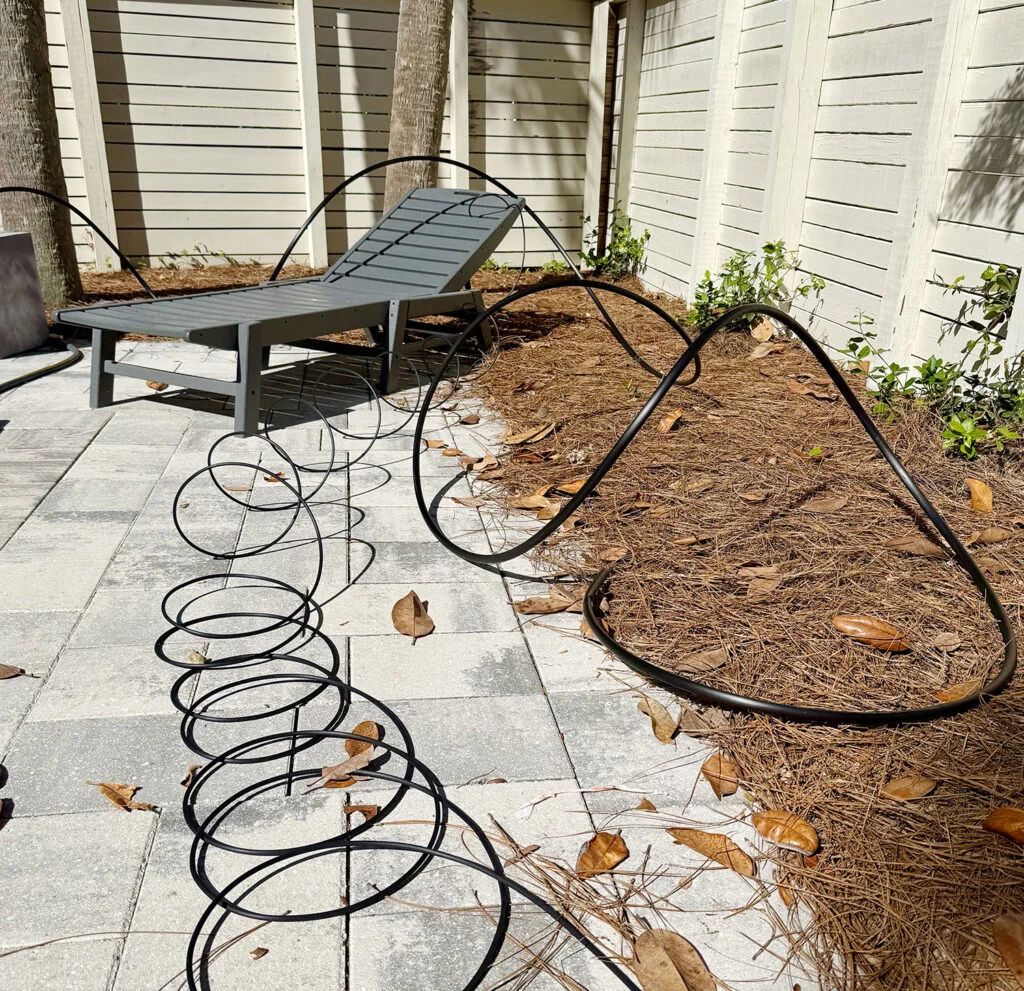
This sounds unnecessary, but it isn't. Lying your tubing out in direct sunlight for about an hour before assembly makes the plastic more pliable, which makes every pressure-fit connection considerably easier on your hands. Use this waiting period productively, dig any trenches you want, lay out emitter positions, or start on the next step.
Step 4: Attach Timer and Hose Connectors
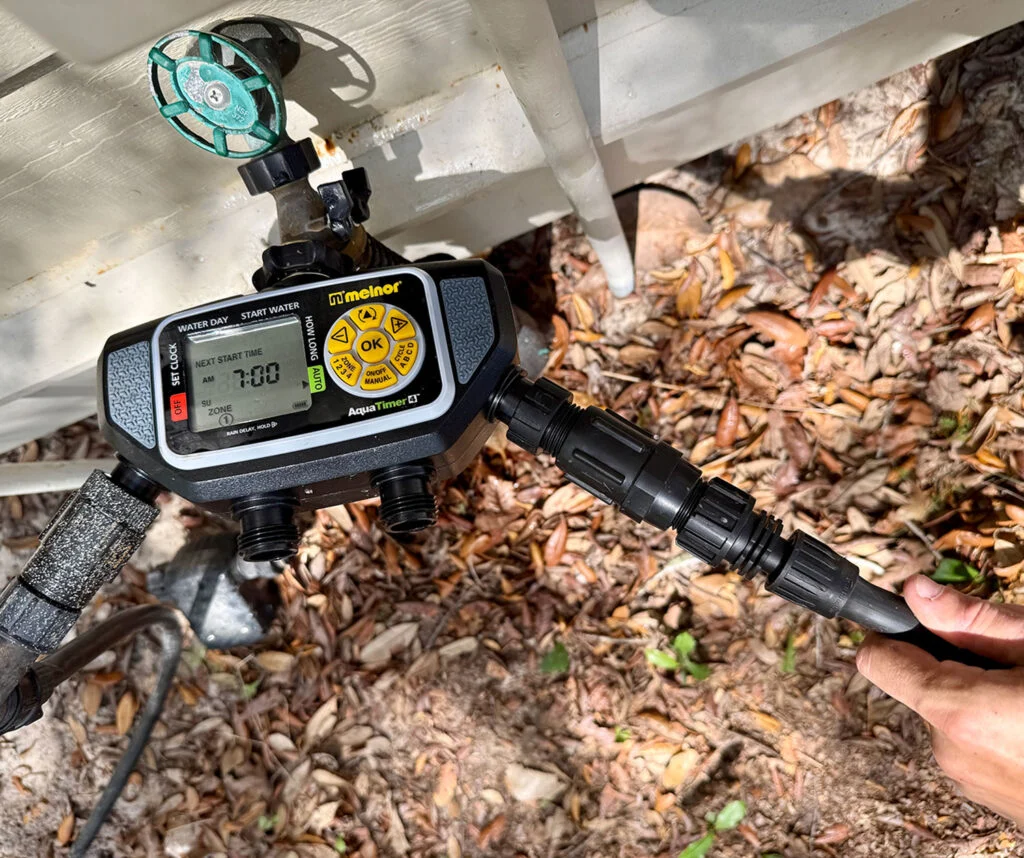
Connect the timer, backflow preventer (with filter), pressure regulator, and drip adapter directly to your spigot, hand-tightening each connection. You can check for leaks once everything's assembled and running. Attach one end of your 1/2" main line to the drip adapter. It should connect with pressure and a slight twist.
Step 5: Run the Main Line
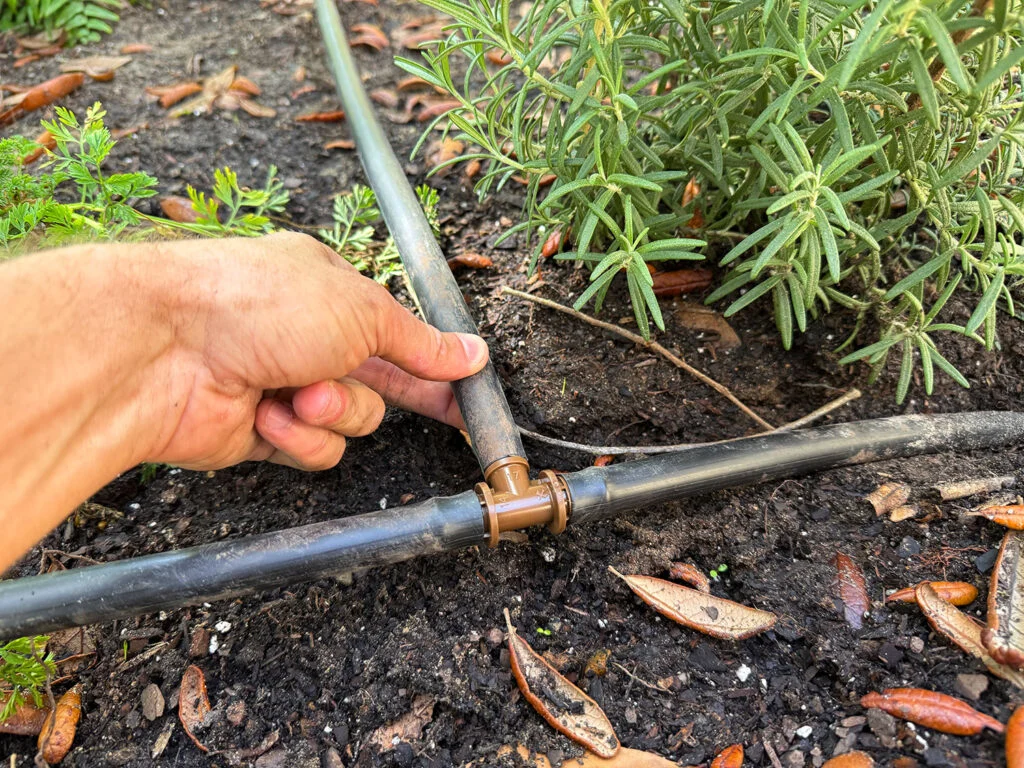
Route your 1/2" tubing from the water source through the main areas you're watering. It doesn't need to run directly against each plant; a few feet is fine. Use barbed connectors to split or turn the line as needed, simply pushing tubing onto the connector ends. Clamp every open end closed with a ring closure, and trim excess tubing with household scissors; no special tools required.
Step 6: Connect Driplines and Emitters
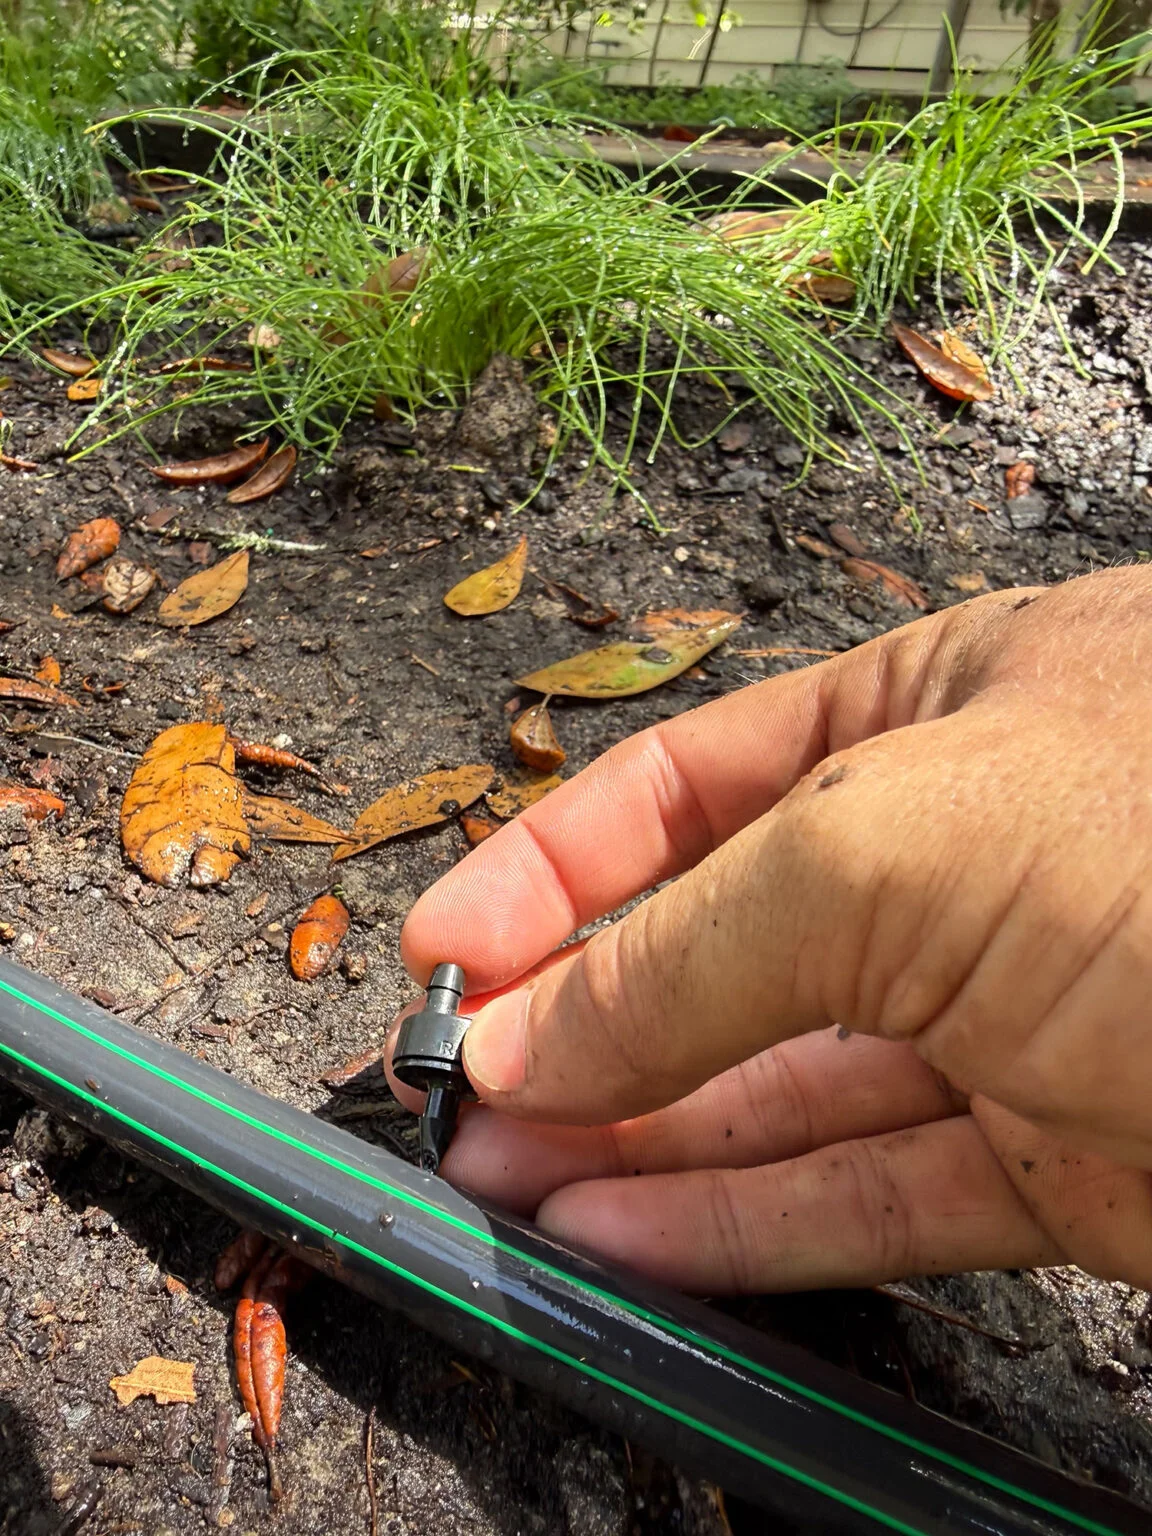
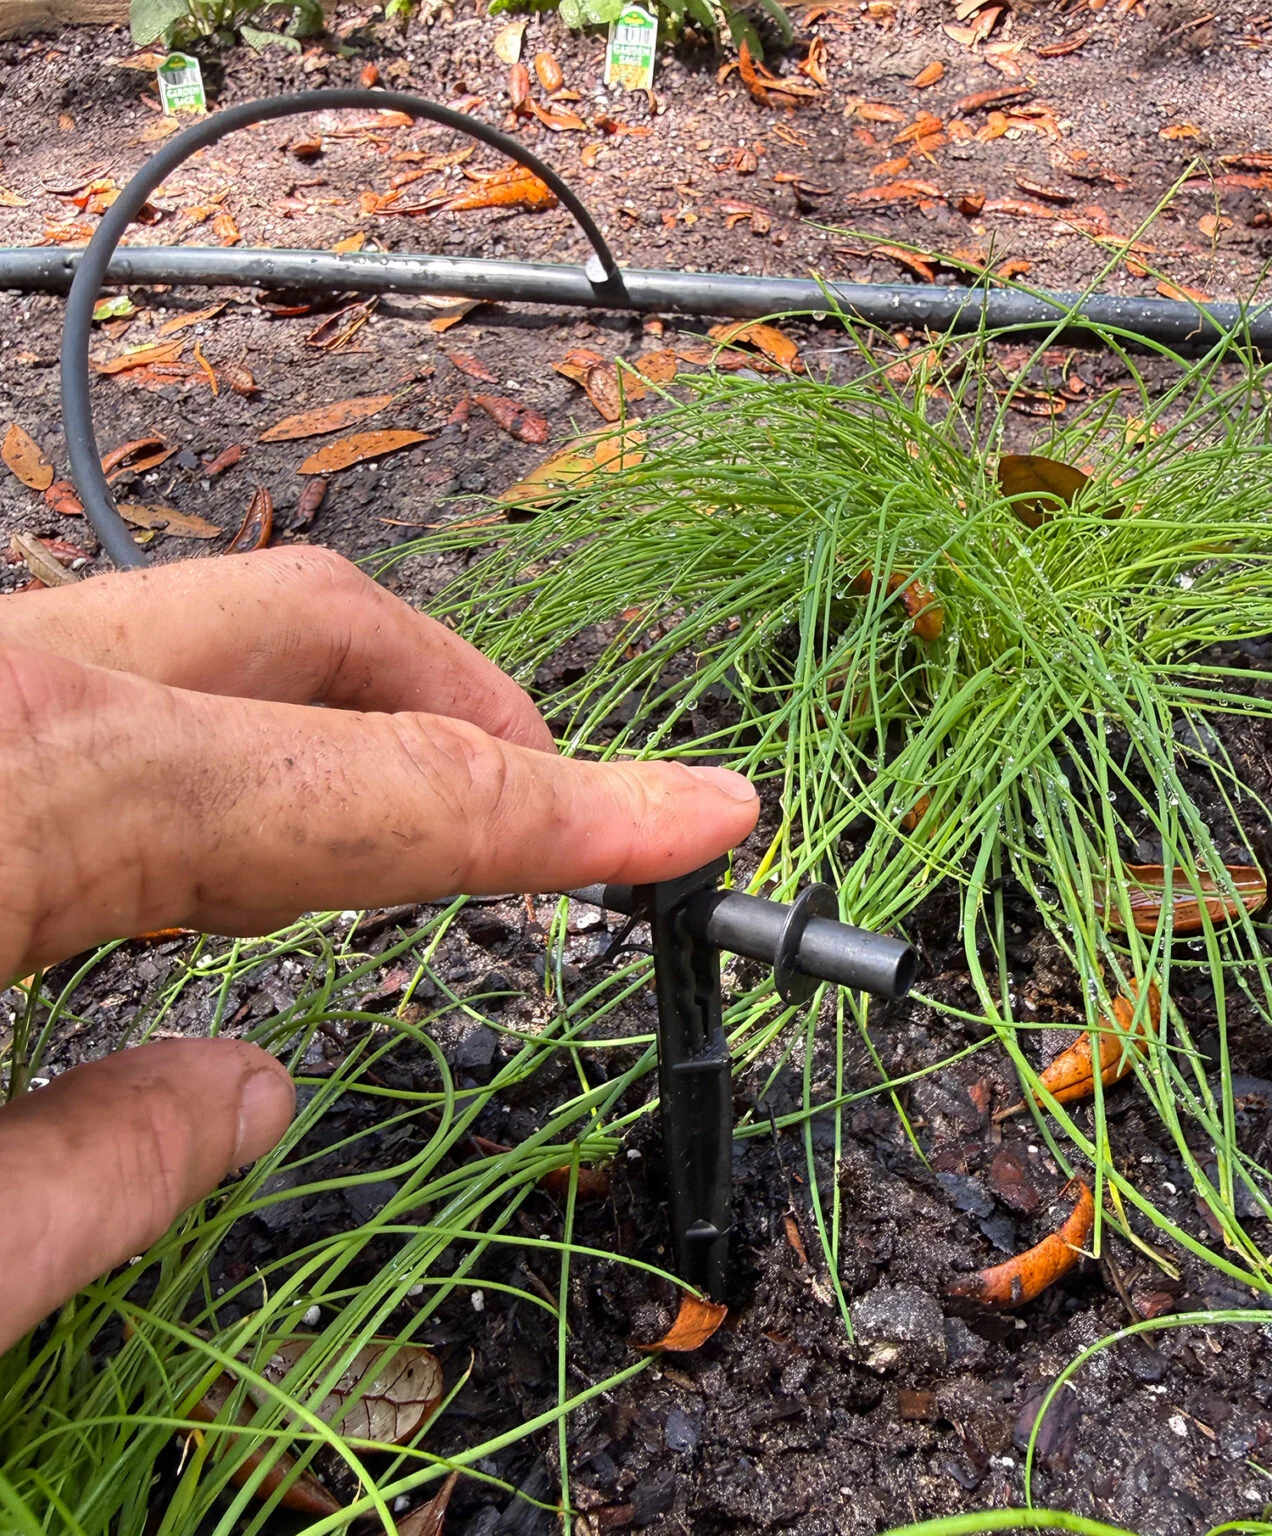
This is where individual plants get connected to the system. Bubblers and sprayers typically come pre-attached to the correct barbed connector; just push them firmly into the side of the main line. For drippers, you'll generally puncture them directly into the main line and attach 1/4" tubing on the other end; for longer driplines, install the dripper partway along the tube (ideally within 5 feet of the plant) rather than right at the main line. Cap off each dripline with a tubing stake to anchor it exactly where you want water delivered.
Made a mistake? Goof plugs can seal a misplaced hole in the main line or cap an unused 1/4" tube end. If a hole's too large for a goof plug, cut out the damaged section and rejoin the tubing with a coupling. Note that once a barbed connector is seated into 1/4" tubing, it's difficult to remove cleanly cutting off the section and starting fresh is usually easier than trying to extract it.
Step 7: Test and Program the Timer
Turn the water on and walk the entire system. Check for leaks at the hose bib and along any connections, tightening as needed. Confirm every emitter is actually dispensing water sprayers and bubblers sometimes need a manual twist to open fully. Check that water is landing where intended, adjusting bubbler and sprayer positioning as needed, and watch for overlapping coverage or overspray onto sidewalks, driveways, or siding.
Once everything checks out, program the timer. Generally, one or two deep waterings per week outperform frequent shallow waterings. Deep soaking encourages roots to grow deeper and stronger, building more drought resilience over time.
Step 8: Mulch Over (Optional)
You can bury the tubing under mulch or soil for aesthetic reasons, and a thin layer also offers some physical protection. Worth knowing: Burrowing animals like moles sometimes chew through buried lines searching for water, and buried tubing makes future leaks harder to spot and repair. A thin mulch layer tends to be a reasonable middle ground, some coverage without making the system invisible if something needs fixing.
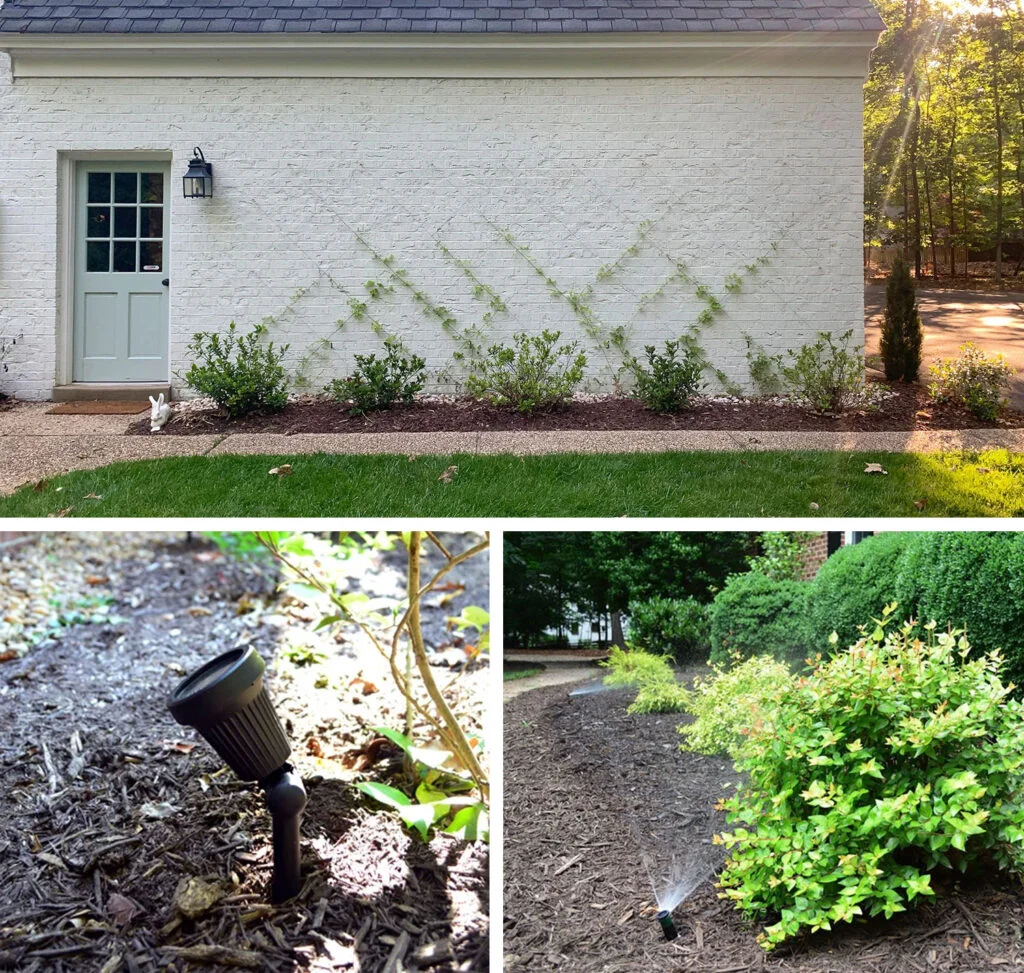
A drip irrigation system removes most of the guesswork and waste from watering a garden, and the barrier to entry is genuinely low: no plumbing background, no specialized tools, and a manageable afternoon of work. For around $75 all-in, you get a system that uses water more efficiently, requires less guesswork about whether plants are getting enough, and tends to outlast simpler alternatives like soaker hoses.
If you've been putting off adding one because it seems like a bigger project than it is, it isn't. It's closer to assembling furniture than doing actual plumbing.
About the Creator
Mark Lim
Hi I am mark an automotive student and a car, tech and food enthusiast ! Im gonna try and post daily & hope you enjoy what I write and do share my page with people you know. I would gladly appreciate it! Cheers
Enjoyed the story? Support the Creator.
Subscribe for free to receive all their stories in your feed.
Comments
There are no comments for this story
Be the first to respond and start the conversation.