
How can I put a resin bound patio kit in my garden?
Guideline
If you're looking to add a stunning new feature to your garden, why not consider a resin bound patio kit? Not only are they visually impressive, but they're also incredibly durable and low-maintenance, making them the perfect choice for any homeowner who wants to transform their outdoor space. However, you may be wondering how exactly to go about installing a resin bound patio kit in your garden. With so many factors to consider, it can seem like a daunting task. But fear not, as in this blog post, we'll take you through everything you need to know in order to successfully install a resin bound patio kit yourself.
From choosing the right materials and tools to preparing the ground and laying the resin, we'll cover all the steps involved in creating a beautiful new patio in your garden. By following our guide, you can enjoy the satisfaction of knowing that you've created a stunning new feature in your home, while also saving money on professional installation. So, read on to find out how you can
1. Ensure you have the correct tools for the job
When it comes to installing a resin bound patio in your garden, one of the most important things to remember is ensuring you have the correct tools for the job. Not having the right tools can result in a poorly finished product and increase the time it takes to complete the project. Before starting your project, ensure you have all the essential tools such as a drill, trowel, rubber mallet, and mixing paddle. These tools will help ensure that you can mix the resin and aggregate thoroughly and efficiently and allow you to lay it out seamlessly. Having the right tools can make all the difference in achieving a successful and professional-looking resin bound patio that can last for years to come.
2. Clear and level the area for installation
Clearing and leveling the area where you plan to install a resin bound patio kit is a crucial step to ensuring a successful installation. Before starting, it is essential to remove any existing surface debris such as grass, weeds, rocks, and any other impediments that may impede the proper setting of the patio kit. The surface should be levelled to avoid any drainage problems, ensuring water is properly drained away from the patio. Additionally, the area should be compacted to prevent any settling of the base material which can affect the durability of the resin bonding. It is important to note that the surface should not be too smooth, as it can interfere with the bonding of the kit, so a slight texture is ideal. In summary, to ensure a long-lasting and attractive resin bound patio surface, preparation is key, and clearing and levelling the area should be prioritized before commencing the installation process.
3. Lay the edging and ensure it is secure
Step 3 of putting a resin bound patio kit in your garden involves laying the edging and ensuring its security. The edging is used to keep the resin in place and to create defined borders around your patio area. It is important to ensure that the edging is level, sturdy, and properly secured before moving on to the next step. This can be achieved by digging a shallow trench for the edging to sit in and using stakes to hold it securely in place. It is recommended to use a spirit level to ensure that the edging is level and to make any necessary adjustments before continuing with the installation of your resin bound patio kit. Properly securing the edging will ensure that your patio will remain in place and continue to look great for years to come.
4. Measure and cut the base material
Before you begin spreading the resin, you must first measure and cut your base material to the correct size and shape. This is an essential step to ensure that your resin bound patio kit fits perfectly into your garden space. Begin by measuring the area where you want the patio to be placed, then mark out the shape of the patio with stakes and string. Next, use a spade or shovel to dig out the marked area to a depth of at least 150mm. It's crucial to make sure that the base is level and compacted to provide a strong foundation for the resin. Once you have a level and firm base, you can proceed to measure and cut the base material to fit into the prepared area. Remember to leave enough space for the edging and the thickness of the resin overlay. With the correctly measured and cut base in place, you can be confident of achieving a flawless finish.
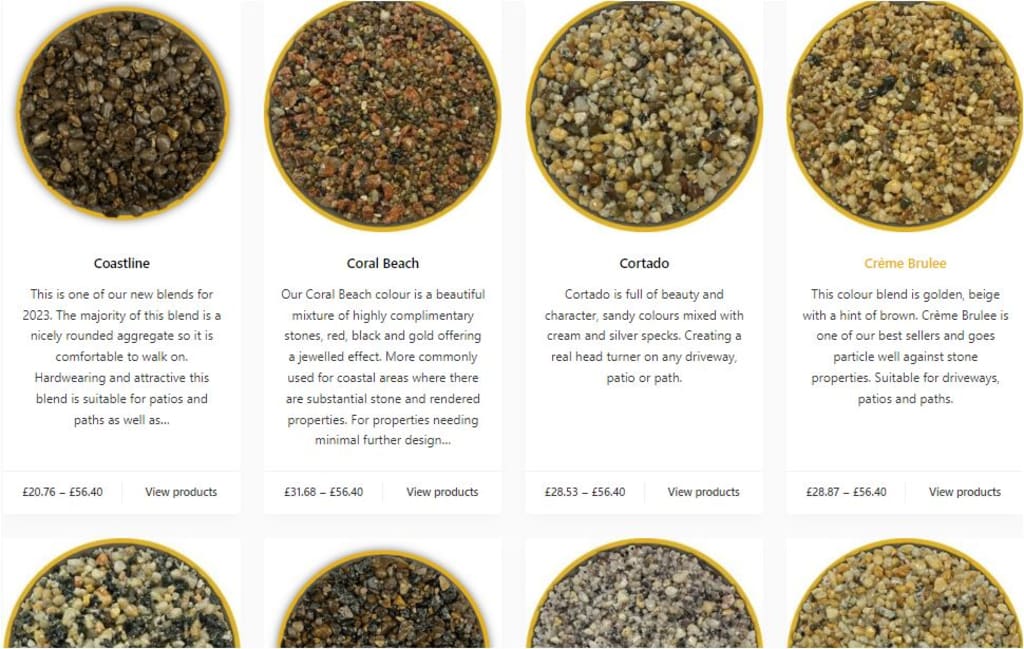
5. Fill the area with the resin bound mixture
The fifth step in the process of installing a resin bound patio kit in your garden is to fill the designated area with the resin bound mixture. To start, carefully pour the resin bound mixture onto the prepared surface and spread it evenly using a trowel or a screed. It is important to ensure that the mixture is distributed evenly and at the right thickness to achieve a smooth and level finish. The recommended thickness for the resin bound mixture ranges between 15mm and 24mm, depending on the specific requirements of your project. Take care to avoid overworking the mixture as this can cause it to become too compact, leading to cracking or unevenness in the surface. Once the area is fully covered with the resin bound mixture, use a roller to level and compact it. For larger areas, it is recommended to break the installation work into manageable sections to ensure that the resin is applied efficiently and carefully.
6. Tamp the mixture down and level it
To put a resin bound patio kit in your garden, you will need to follow a few essential steps. One of them is to tamp the mixture down and level it. Tamping is the process of compacting the resin-bound mixture using a tamping tool or roller. This step is crucial to achieve a smooth and even surface. It is recommended to divide the surface into small sections and tamp each section down separately. Use a tamping tool or roller to apply pressure evenly across the surface, pushing the mixture down and compacting it. Tamp until the surface is firm and even, as this will ensure the resin-bound mixture sets correctly. Once you have completed tamping and leveling the entire surface, allow it to cure for at least 24 hours before applying any weight or traffic on the surface.
7. Leave to dry and set
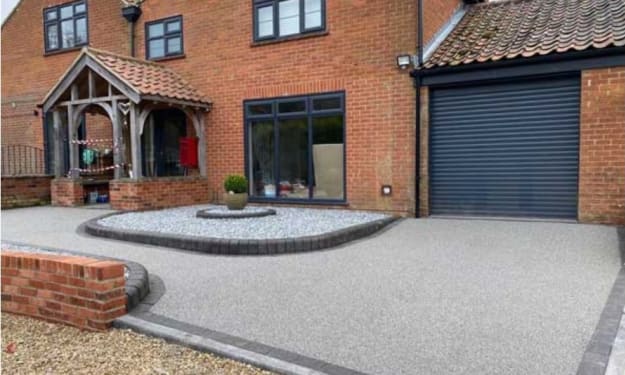
Step 7 in the process of putting a resin bound patio kit in your garden is leaving it to dry and set. This is a crucial part of the process, as it ensures that the patio will be strong and withstand regular use. It is recommended to wait at least 24 hours before walking on the patio, and up to 48 hours before putting any furniture on it or using it heavily. It is important to keep the patio dry during this time, so avoid any rain or excess moisture. Once the patio is fully set, it can be enjoyed for years to come with minimal maintenance needed.
8. Seal the surface for long lasting protection.
If you're looking to install a resin bound patio kit in your garden, it's important to consider how to achieve long-lasting protection for your surface. One key step is to seal the surface to prevent damage from weathering, UV rays, and foot traffic. There are a variety of sealers available, including penetrating sealers and topical coatings, each with their own advantages and drawbacks. A penetrating sealer will soak into the surface of the resin and provide protection from within, whereas a topical coating will create a protective layer on top of the resin. It's important to choose the right sealer for your specific needs and to apply it correctly, following manufacturer instructions. By sealing your resin bound patio kit, you can extend the lifespan of your surface, reduce the need for maintenance, and ensure it looks great for years to come.
In conclusion, installing a resin bound patio kit in your garden might seem like a daunting task, but it's actually a manageable project for a DIY enthusiast with some basic knowledge of landscaping. By following the steps outlined in this guide, you'll be able to create a beautiful, low maintenance, and durable feature in your garden that you can enjoy for many years to come. Remember to take the time to properly prepare the area, and choose a high-quality resin bound mix that suits your style and budget. With a little patience and effort, your new resin bound patio will be the envy of your neighborhood.
Read More: What factors should I consider when choosing a driveway contractor in Norwich?
About the Creator
Neck Akila
My specialty is combining research-backed strategies to create marketing copy that resonates with readers and drives conversions
Keep reading
More stories from Neck Akila and writers in Lifehack and other communities.
What factors should I consider when choosing a driveway contractor in Norwich?
When it comes to making home improvements, your driveway can have a significant impact on the overall look and functionality of your property. Investing in a durable, visually appealing driveway not only enhances your home's curb appeal but also adds value to your property. However, selecting the right driveway contractor can often be overwhelming, with many factors to consider before making a decision. Factors such as experience, reputation, materials used, and pricing should all be taken into account.
By Neck Akila12 months ago in Lifehack
10 EASY DIY SUMMER COCKTAILS
Here are 10 easy summer cocktails. It is party season and it is the summer time and if you are a cocktail enthusiast, you are probably the one that everyone goes to create the cocktails for your parties, so I thought I’d make it easier for you guys and give you guys 10 easy very refreshing crowd-pleasing cocktails to make for your friends and then you can be the hero of all your parties.
By Ngozi Otoechere6 days ago in Lifehack


Comments
There are no comments for this story
Be the first to respond and start the conversation.