
DIY Handcrafted Soap
My 'recipe' for aromatic & moisturizing guest hand soaps went pretty well! Would you like to create some?

Last summer, I found myself with a new hobby: handcrafted soap making! My nights were spent saving ideas to my laptop, while I perused the online stores. I looked through inventory of wholesalers who sold organic ingredients in bulk for crafty people like me. I wanted my end product to be as eco-friendly, natural, and as pretty as possible! Most importantly, I wanted my soaps to be moisturizing.
I have always suffered from dry skin. It has always been annoying to have dry skin from washing my hands throughout the day with soap that doesn't moisturize. Even after menial tasks, I always have to slather on my favorite cocoa butter that Queen Helene makes. A gigantic bottle of that cocoa butter barely lasts me a month, BUT, I will never give up on the Queen! Her cocoa butter is inexpensive, but works. Nevertheless, I got curious about her main ingredient: cocoa butter (curiosity is supposed to have killed the cat, yet people like me are still here!)
Searching online for it, I discovered recipes for DIY lotions, scrubs, bath bombs, soap, make-up, and even nail polish! I began to fall further into the rabbit hole...I found myself a very nice little site: Bulk Apothecary. Today, I have a wish list that's a mile long. After a creative Summer last year, I decided it's probably going to be my hobby once a year. I'm a writer, NOT a soap maker! I have more ideas for this year & I still have a block of Hemp Melt & Pour, color blocks, and plenty of Essential Oils from last Fall.
Many wholesaler's will sell soap making kits, which have all you will need to follow their recipe. Prices vary, depending on what ingredients are in your soap. For instance, would you pay $12.00 for .5 ounces of Organic Ylang Ylang Oil? Or pay for 2 ounces of it when it has a $40.00 price tag and higher? Ylang Ylang Oil is extracted at different stages of flowering (called 'Grading'), so the price will vary. I never knew these things until I went down the damn rabbit hole!
These are some of the online wholesale soap & candle supply sites that I found over the last year:
Brambleberry — Has tutorials & recipes from their Soap Queen
Bulk Apothecary is the most modestly priced I could find for soap molds, packaging, labels, color blocks, organic botanicals, and even recipes.
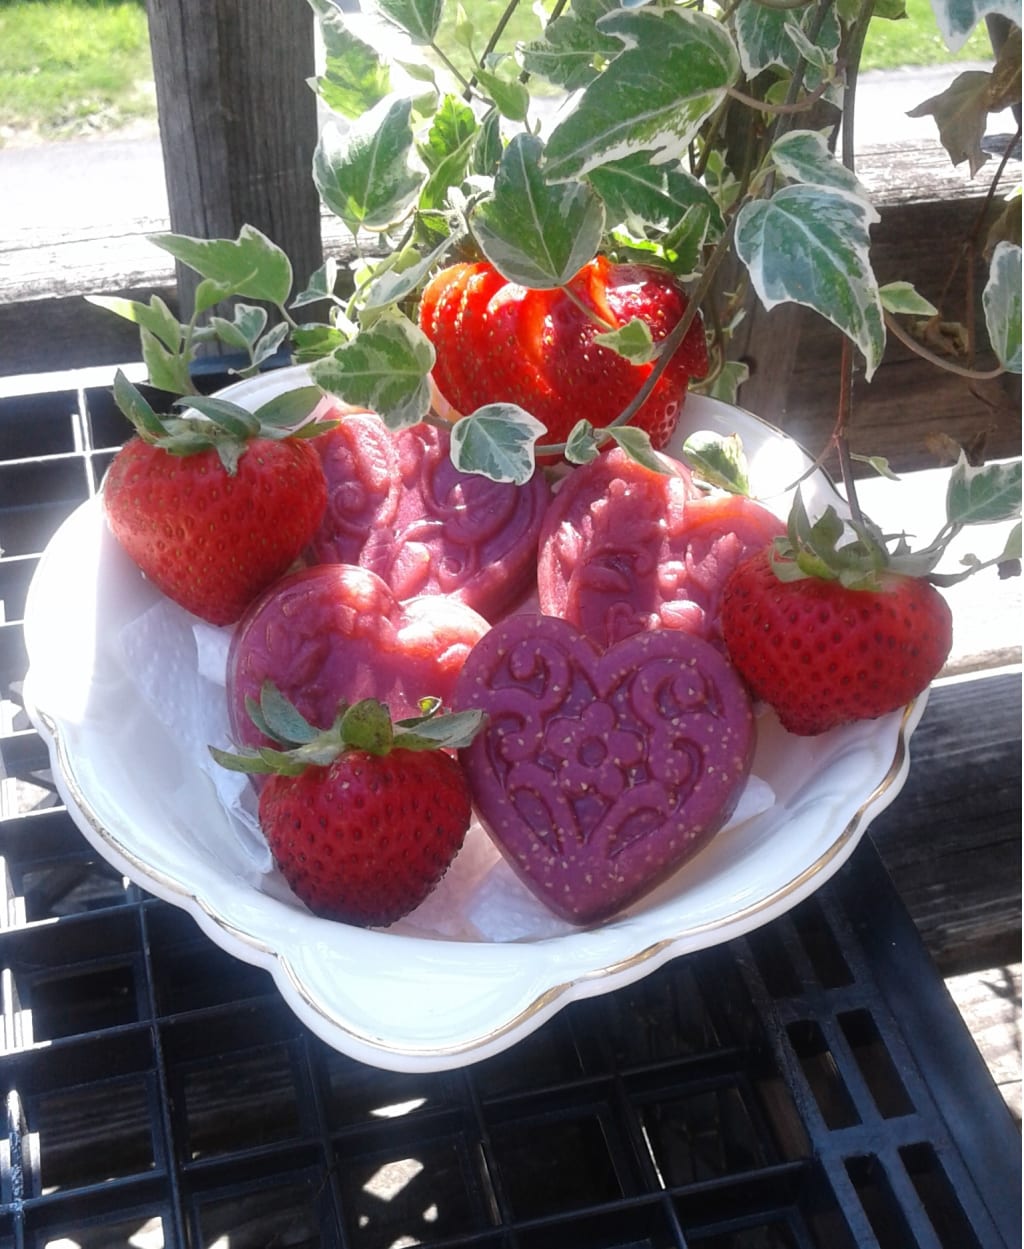
I started simple and bought the Stephensen Olive Oil Melt & Pour Soap Base. The two pound block of Olive Oil Melt & Pour Soap came in the mail within a week of ordering, along with my 2-inch heart shaped molds, strawberry seeds, merlot block of soap color, and strawberry milkshake scented oil. I used these to make the soaps in the picture above. I also made banana, rose, black currant, and patchouli. Later, I used hemp oil melt & pour, blended with the Olive Oil Melt & Pour. I also added olive and sunflower oils that I purchased from the grocery store. I have realized that if it's food grade, it can usually be used in soap...but I could be wrong!
From asking around before I even started, I already knew from the get-go that everyone loves fruits! Fruit scented incense, soaps & candles were most requested by my close friends and family. I can't imagine not enjoying patchouli oil, but that's off topic!
The picture above is from my first batch. Now you have an idea of how easy it really is to use the melt & pour bases. For anyone who doesn't know, melt & pour soap is lye that has already been prepared with fats and oils. Without doing so, lye will burn the skin severely. The process is called 'saponification'. The easiest thing is to just buy the base already prepared to melt & pour! It's become pretty trendy to buy & create crafts using their favorite base. Some people just chop off a portion to use without getting crafty. I like to get crafty...
The steps to make your own soap are pretty easy:
MELT ~ Use glass or stainless steel mixing bowls, and be sure to cut the Melt & Pour in 1-inch chunks. You melt it over your stove using a stainless steel, NON-Aluminum pan. You can also place the chunks in a glass bowl, and microwave it in short 30 second bursts. Stir, continuously and slowly, as it melts. *Keeping the melt & pour constantly moving is the key to even distribution of color & scent.
The heat should be low enough that you aren't burning it, but hot enough so it melts. Gas stoves get hotter, much faster, than electric stoves. I have an electric stove, but still started it on low, just in case. Some beginner instructions say that wood utensils are okay, some say it is not okay. I used stainless steel. Why, you ask me? Well, number one, I didn't want to ruin my wooden stuff. Number two, I'm no chemist (which is why I didn't try to buy lye and induce saponification on my own! Second degree burns while you wash your hands? Anyone? Yes? Right over this way!!) BUT, NUMBER TWO...I would think the wood absorbs moisturizing oils in the soaps, ruining the end quality.
BLEND ~ After the blocks are melted, remove from heat, continuing to slowly stir. I played around with this, since I don't have a thermometer...and did I mention that I don't always follow recipes? I removed my pan with my melted soap from the heat, and blended everything in that pan. For my second batch, I poured my melted soap into a bowl, hoping to aid the cooling process so I could add the strawberry milkshake quicker. Since the first try was such a success, I felt like I was on a roll! My kitchen smelled lovely, too!
The melt & pour does need to cool somewhat so the scented oils don't evaporate when you add them. The melt temperature is 120 degrees Fahrenheit. About 145 degrees Fahrenheit is the recommended pour temperature. Heating above 150 degrees Fahrenheit can cause air bubbles to occur (and burning!). I suggest starting slow to get the hang of your melt & pour base.
Beginning with small portions, blend in your desired color and chosen scented oils. Next, add your botanical ingredients (like Himalayan salt, dried flowers or seeds) before it's too cool to set.
POUR ~ Pour the blend carefully into your soap molds. It will still be hot liquid.
As it cools, hopefully your ingredients don't rise to the surface. To prevent air bubbles as it cools, you can spritz the tops with rubbing alcohol. My strawberry seeds evenly distributed the very first batch. I also didn't spritz that batch with rubbing alcohol and I still had no air bubbles. BUT, the following batch did. I also added about two tablespoons Olive Oil BEFORE I added my color, scent, and strawberry seeds (in that order). I have never been one to follow a recipe without tweaking it, so melt & pour was definitely the way for me to go!
When it comes time to pour into the molds, you don't want it lumpy, so use your best judgement. My molds are so small, during experimentation, I did actually recognize the point that it gets way too cool and I poured lumps. Oh well! After a few hours of cooling in the molds, sometimes overnite, the design was fine!
Heart Shaped Soap Molds

My fourth batch with 3 Banana, 1 Strawberry, and the crust of 1 Banana Cream Pie experiment!
I drove my boys a little crazy last summer with all the little heart shaped soaps that were made. They were in our bathroom, our kitchen, and since I had been giving them away, the individually packaged soaps also lined our small dining room. By fall, the verdict was clear: 'Yes, Mom, your soaps are neat. Can you buy me a bottle of Axe body wash?' I got carried away, but it's an inexpensive hobby that can be explored...and so I purchased scents for the holidays, too!
With spring FINALLY here, and one of my sons getting ready to go camping with some friends, I decided to take a look online to see what recipes there were that I could make for him to take that naturally help repel bugs. Which he won't! He's refusing to even take OFF! He did the same last year, too. KIDS. Because, we live near the water, I already know that there are mosquitos, spiders, and other lil critters waiting right outside my door. I'm spending April & May in 'spring clean' mode!
Even though I decided I'm going to stick with my little heart shaped guest soaps for my hobby, there was still that damn rabbit hole...I found an online wholesaler! Here! In New York! I am pretty impressed with their line of organic bath & body care!
I was so impressed, that I emailed her to see if I could sell her products in my Etsy Shop which I have had set up for a year. Yes, I had been all ready to become a retailer of my very own handcrafted creations! Well, you ask me, WHO is this organic bath & body care company from New York that I find so impressive?? They have the perfect name too: Mooseberry Soap Company!
I'm just going to continue my Summer hobby & gift my tiny scented hearts for free. As you know...I'm a writer, not a soap maker!
Try making your own handcrafted soaps OR just buy a bar of your very own Adirondack Forest today!
About the Creator
Lady Sunday
I'm a self-publishing author of fiction and I love to research and write creative non-fiction.
Keep reading
More stories from Lady Sunday and writers in Lifehack and other communities.
A DIY Mirror Guide
Mirrors are made from a smooth, polished surface that reflects light. Usually a mirror is made of a sheet of glass that has one side coated in aluminum, silver, or gold. That side is then painted, or covered with any solid material, so the reflected image can then be viewed.
By Lady Sunday6 years ago in Lifehack
Intermittent Fasting for Rapid Weigh loss
Start writing...Intermittent Fasting is extremely popular worldwide. It turns out to be an effective way to lose weight. With intermittent fasting you alternate short periods of eating with periods of fasting to effectively lose weight.
By Elhassan Errezzaki4 days ago in Lifehack
Your Money-Making Journey Can Be Affected by Your Body Odour!
Introduction The world of money is not a lonely one. Serious money involves business and social interactions. These interactions help to forge networks and networks are essential leverages for creating wealth. One of the things that can deprive you of peace of mind and limit your opportunities for personal development is having bad body odour. If your body emits an unpleasant odour, people will try to avoid being close to you, and for those close to you who cannot avoid you all the time, they will be living in very difficult circumstances.
By Juma Killaghaiabout 18 hours ago in Lifehack


Comments
There are no comments for this story
Be the first to respond and start the conversation.