
Cosplay DIY: Punk Rock Superman Vest
You'll have a rocking good time with this project.


Greetings to everyone out there. I'm going to provide you step-by-step instructions on how to create a Punk Rock Superman vest. Punk Rock Superman was my second cosplay mashup I have done as a cosplayer. Last year at GlitchCon, I went as this character on the second day of the convention and also in the cosplay contest. Plus, I had a photo shoot that morning and my photographer took some breathtaking shots. As far as this project, it took me over two months to complete the vest. Due to my work schedule at the time, I've worked on it at least two to three hours a night. Other than that, here's a list of items you'll need to customize the vest:
- White printing paper
- Denim vest
- Lots of iron-on patches (preferably Superman)
- Pack of red iron-on flock transfer sheets
- Xacto knife
- Yellow fabric
- Sewing pins
- Black ribbon
- Black Sharpie
- Iron
- Superman cape
- 1-1/8" size 30 silver tree spikes (you can purchase these at Studs and Spikes)
- Red, gold (or yellow), and blue pyramid studs (12 mm)
- DC Comics buttons
- Iron-on letters (optional)
- 13mm black cone screw metal spikes
- Screwdriver
- Super glue gel
- Red fingerless gloves
- Silver studs (12mm)
- If you have an iPad, search for a Superman logo online to trace over with a sheet of printing paper.
- Once you have cut outside the logo, place it on the red iron-on flock transfer sheet. Use the black Sharpie to trace the rest of the logo and then use the Xacto knife to cut it out.
- Trace the logo onto the iron-on flock transfer sheet and then use the Xacto knife to carefully cut out the logo. Just for good measure, turn your denim vest around to the back and place the logo in the middle, making sure that it's a reasonable size.
- Grab some yellow fabric and put in behind the logo, cutting off excess amounts of it. Position some black ribbon around the logo, securing it with sewing pins. Lay the logo on the back of the vest, remove the pins carefully, and cut off any excess black ribbon before sewing it on. Once you get done with that, sew on the cape.
- Now you're going to attach spikes around the collar of the vest. Grab some 1-1/8" size 30 silver tree spikes and poke some holes on the collar of the vest, because you'll be poking the studs through the fabric and screwing them on with a sharp object, like a paper clip. Make the holes big enough for the spikes to go through the collar. Place a spike through the hole and securely screw it on counterclockwise. Make sure the spikes are screwed on tight. It took me six days to attach the spikes around my collar.
- Next, you will need some 12 mm red, gold (or yellow), and blue pyramid studs. You'll be making a pattern on both sides of the vest, from left to right. Secure each pyramid stud by folding the prongs in with a knife or with your fingers, making sure that they don't fall off. Completion time: two days.
- Remember, you're focusing on customizing the front of the vest for now. Gather your Superman iron-on patches and make sure you have purchased enough that they all fit on the front of the vest. I bought my patches on eBay and I've found some good ones to use to place on my vest. To iron on the patches, set your iron at the highest temperature and turn off the steam option. Once the iron is hot, for big patches, press down firmly on the patch for about 30 seconds. Let it cool for 2-3 minutes. If the edges start falling off, press down firmly for another 10-20 seconds and let it cool. For smaller patches, press down firmly for 10-20 seconds. Let it cool for 2-3 minutes. If the edges start to fall off, press down firmly for another 5-10 seconds and let it cool.
- Once all of the patches have been cooled down, check the edges of all of them to make sure that they are 100 percent secure on the vest.
- Now turn the vest around to the other side. Again, it's your vest, so customize it however you want. Follow the same instructions indicated in step seven regarding ironing on the patches.
- Turn the vest around to the front, grab a bag of 12mm silver pyramid studs, and place each one on the bottom left side of the vest, making sure that you're folding the prongs in tight. You should have two rows of silver pyramid studs completed. Do the same thing for the right bottom side of the vest.
- Turn the vest around to the back and you'll be attaching more silver pyramid studs across the bottom back of the vest. Just like the front of the vest, you should end up with two rows of silver pyramid studs. I feel that the pyramid studs add to the punk rock feel. Turn your vest around to the front one last time and add those DC Comics buttons and button them on different places on the vest.
- Now that you're done with your vest, grab your fingerless gloves, a bag of small 13mm black cone metal spikes, and super glue gel. I decided not to screw on the spikes to my gloves, because it would've been too painful wearing them that way, but if you want to do that, that's great. I grabbed one spike, super glued it to the bottom, and carefully placed them on each finger of the glove. I set the gloves aside to dry for 30 to an hour.
Like I've mentioned earlier, it took me over two months to complete my vest. Try on your vest and see how it looks on you. This project is time consuming, but once you enjoy customizing it, you'll be done with it before you attend your next convention. I had a great time being Punk Rock Superman at GlitchCon last year, and my vest turned out the way that I wanted it. At first, I wanted to do a punk rock version of either Batman or The Riddler, but in the end, I decided to give The Man of Steel the punk rock treatment. Hope these step-by-step instructions will be of good use to you. Follow me on my social media pages, and can't wait to see you on there.
My Punk Rock Superman Vest (Front and Back)
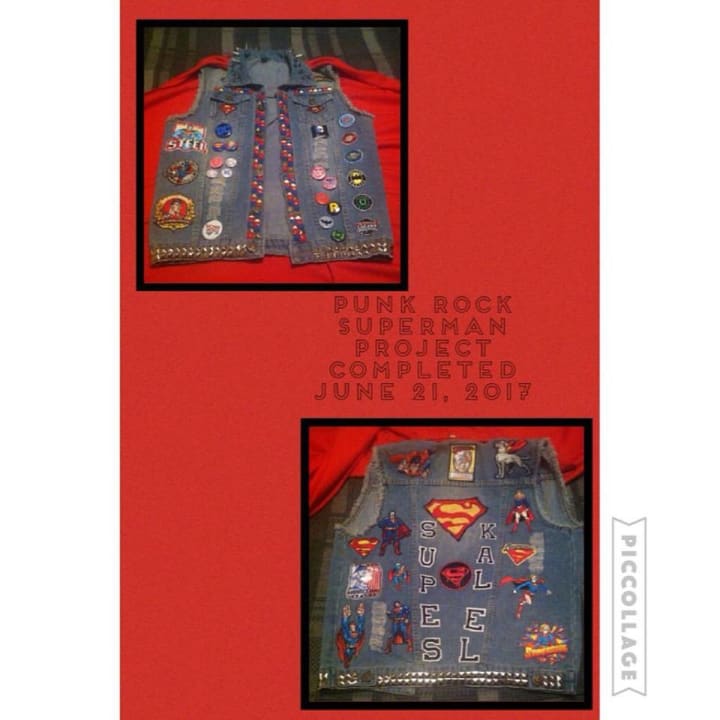
My completed Punk Rock Superman vest. I bought not only Superman iron-on patches, but Supergirl and other iron-on patches, too. I purchased some iron-on letters and spelled out Supes and Kal-El on each side of the Superman logo. Note: the iron-on letters I bought didn't come with dashes, but overall, I had fun working on this project.
About the Creator
Mark Wesley Pritchard
Award-winning cosplayer, cosplay model, influencer, retro gaming fanatic, die-hard Texas Rangers fan, and nostalgic freak. Need I say more?
Threads: @thecosplayerfromtexas
Instagram: @thecosplayerfromtexas
TikTok: @thecosplayerfromtexas
Keep reading
More stories from Mark Wesley Pritchard and writers in Lifehack and other communities.
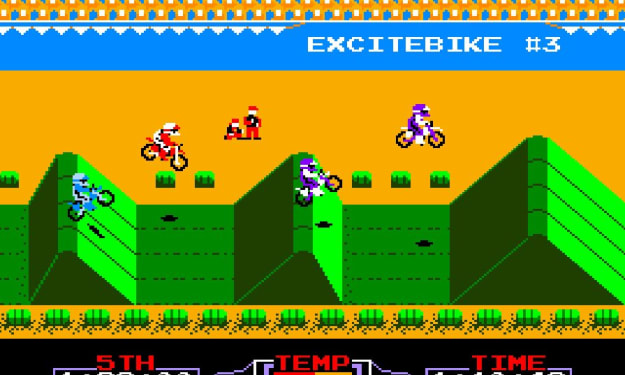
'Excitebike' Perler Bead DIY
Greetings, Vocal readers. It’s been a while since I’ve done a perler bead DIY. The last one I’ve done was the Nintendo logo, which was about a month ago. In case you haven’t seen it, I’ll post a link to it at the end of this article. In this article, I’ll show you how to make this rider that you see above from Excitebike. This game made its debut on the Famicom in 1984 and as a launch title for the NES a year later. When I first played it on the NES Classic a couple of years ago, it wasn’t like any of the other racing games that I was used to playing. Every time I would jump over a ramp, I would fall off my bike. So long story short, I placed 23rd in a race and haven’t played that game since. Hopefully I’ll play it again someday and improve.
By Mark Wesley Pritchard4 years ago in Lifehack
Composing the Soundtracks of Our Life
Lionel Fabert is an award-winning composer known for bringing movie trailer soundtracks to vibrant life. Fabert has always loved music, beginning when he picked up the guitar at 9 years old. This love of music inspired Fabert to quit a great-paying job in corporate Paris and strike out as a freelance music composer and sound designer.
By Susan Scava5 days ago in Lifehack
The Fish Song
The room didn’t smell like disinfectants. Its fragrance seemed light and not overbearing. A soft mixture of lavender and mint permeated the space. No beeping machines or any tubes hooked up to four-year-old Kaleeka. Her cacao skin seemed to glow from the light over her head. The family, save for one and the doctors and nurses exited the room like a trail of saints showing their last vestiges of regard.
By Skyler Saunders6 days ago in Fiction


Comments
There are no comments for this story
Be the first to respond and start the conversation.