
Complete Guide on How to Make a Gathered Fabric Lampshade
A complete picture illustrated guide on how to make a gathered fabric lampshade for you interior setting.

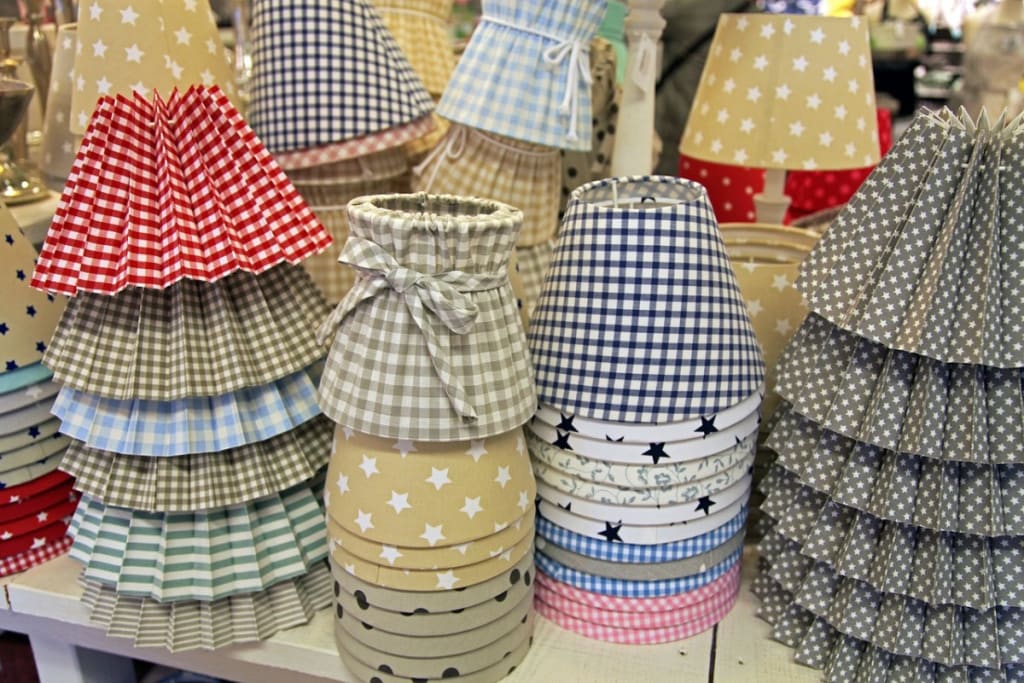
Fabric Lampshades
Made up from fabric that is gathered, stretched, or pleated over a frame. Fabric lampshades provide the opportunity to create original, personal accessories to add to your furnishings.
For the external fabric, use furnishing or dress material that is reasonably pliable. This is an essential quality, since the fabric needs to be stretched over the lampshade frame to ensure a tight fit.
If a fabric is suitable, you can use offcuts to match the larger soft furnishings in the room. You will also need an inner fabric lining to conceal the frame. This should be pale in colour to reflect the light outwards from the shade.

(Please ignore the bad lighting/editing or white cut-offs done on the images in this article, as the images are taken either from a very old book from my library or from a CCL raw image database)
(Links to certain articles are highlighted in a different colour. Click the link and it will take you the article accordingly)
How to Make a Gathered Lampshade?
Choose a lampshade frame and paint it, if necessary. Bind the upper and lower rings, where the fabric will be attached, using purpose-made tape (see article "How to Make a Lampshade Frame"). Allow enough outer fabric for binding strips and gathered frill.
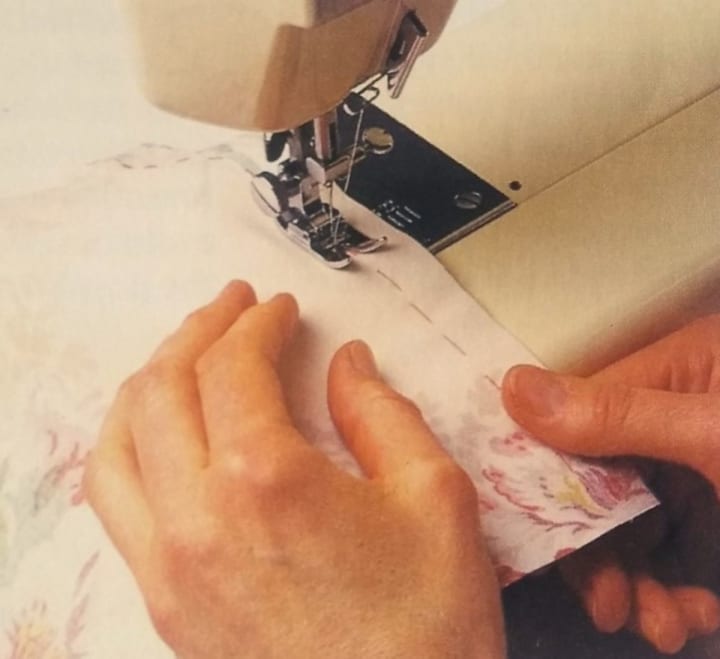
You will also need lining fabric, clear fabric glue, and the basic sewing kit. Cut out the fabric and lining on the straight grain to twice the circumference of the lower ring, by the height of the frame, and add 5 cm (2 in) all around for seams.
1. Sewing Edges: With the right sides together, tack and sew the two short edges of the outer fabric, 1.5 cm (5/8 in) from the edges, to form a circular shape. Turn right sides out.
Safety Notice
As there are people out there who are just beginning on their journey of complete home furnishing. I would advise taking great care when it comes to dealing with sharp knives, scissors and especially pins.
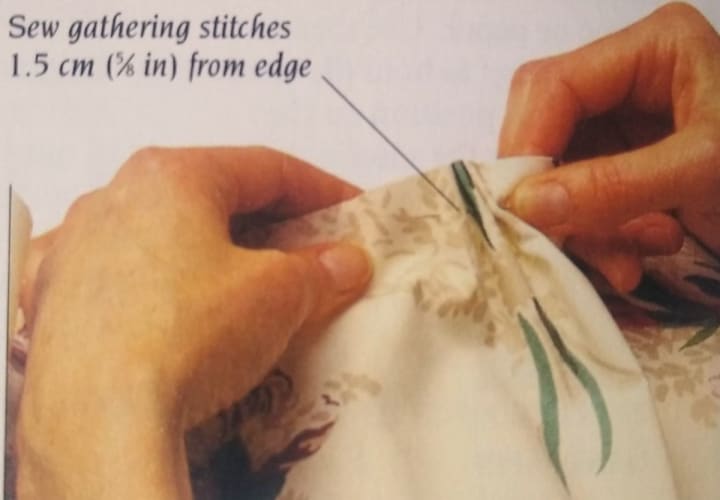
2. Sewing Gathering Stitches: To enable you to make folds in the fabric, sew a line of gathering stitches 1.5 cm (5/8 in) from the top and bottom edges.
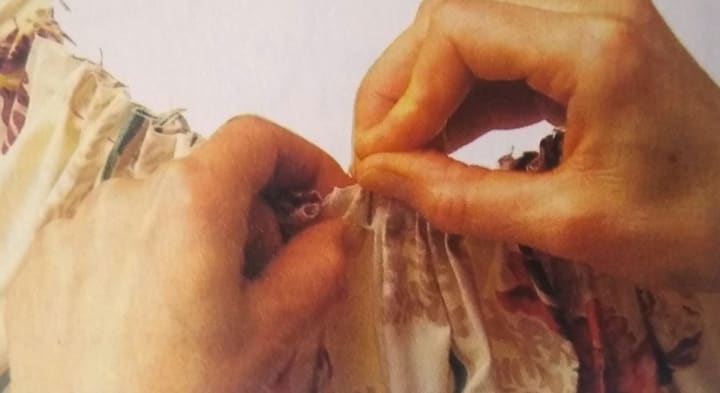
3. Gathering Fabric: Place the fabric over the frame, and fit it to the shape of the frame by pulling up the gathering stitches around the top edge. Arrange the gathers so that they are neat, and spaced and sized equally, and pin the fabric to the tape binding on the upper ring.
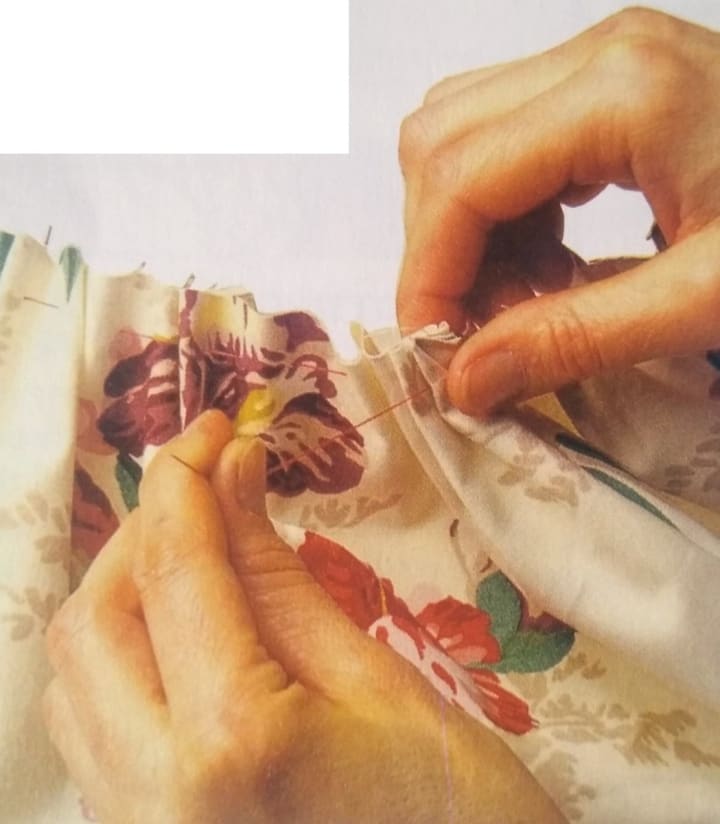
4. Pinning Fabric: Pull up the gathers around the lower ring. Pin the fabric to the tape binding the lower ring. The gathers should be tighter around the upper ring than around the lower ring. Unpin to adjust the gathered fabric.
Stretch the fabric between the rings, form the gathers into folds, and re-pin the fabric to the tape binding the rings. Trim the surplus fabric from the rings.
5. Pinning Lining: Slipstitch the gathered fabric to the tape binding the rings. Prepare the lining with gathering the stitches 1.5 cm (5/8 in) from the top and bottom edges. Pin the lining to the bound rings, adjusting the gathers, as above.
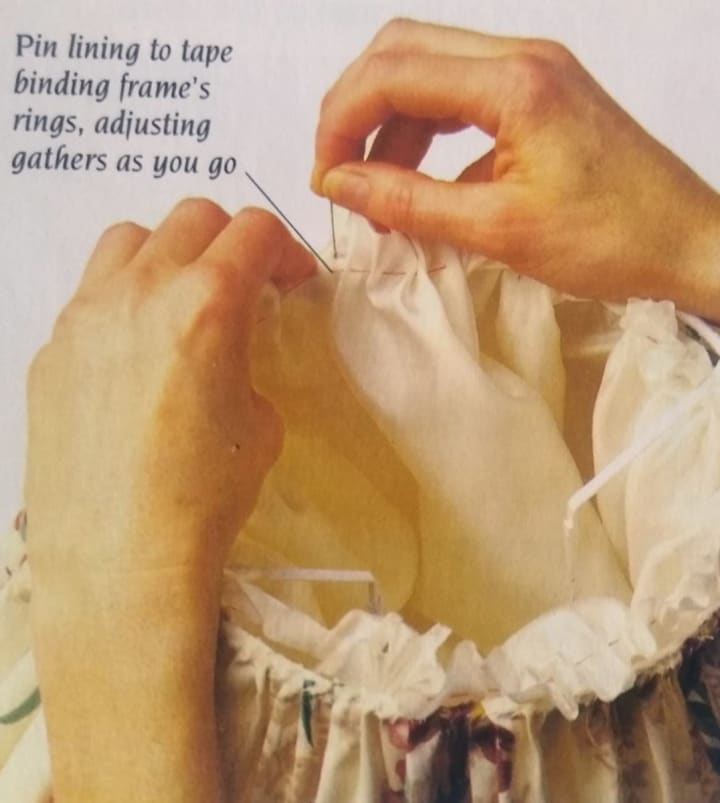
6. Sewing Lining: Slipstitch the gathered lining to the tape binding the upper ring.

Safety Notice
Where silicon padded gloves if necessary and make sure you use a pin cushion for all your collection of pins. Stay away from the fireplace in your house, as the majority of the fabrics are highly flammable.
7. Fitting Lining: As you work around the upper ring, you will encounter the frames inner supporting struts. Cut the lining to fit it around these, using a pair of scissors.

8. Trimming Lining: Trim the surplus lining fabric around the top ring, cutting as close as possible to the stitching so that there is a minimum of fabric bulk.

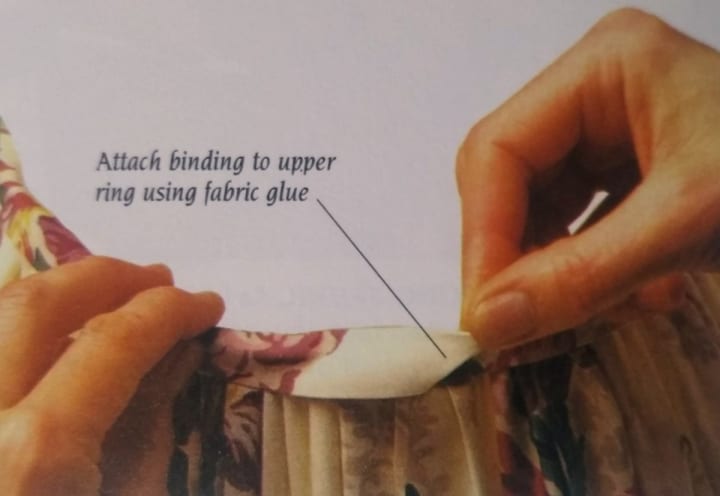
9. Attaching Binding: Make up a bias strip from the outer fabric (see article "Trimmings and Their Types: Binding & Piping") to use a trim for the top edge of the shade to hide raw edges and stitching. Attach binding with fabric glue. Slipstitch lining to the tape binding lower ring. Trim surplus fabric.
10. Attaching Frill: Cut out a length of outer fabric to twice the circumference of the lower ring, by two-and-a-half times the required depth of the finished frill. Fold the strip lengthways, right sides together. Press, then sew gathering stitches 5 mm (3/16 in) from the raw edges.
Pull up the gathering stitches, so that the frill fits the lower ring. Pin and slipstitch the frill through the edge of the main fabric to the lower ring.

11. Attaching Lower Binding: Complete the lampshade by making up a second bias strip that is equal to the circumference of the lower ring. Glue the binding to the top of the frill so that it conceals the raw edges and stitching.


About the Creator
Temoor Dar
💡Topic: Entrepreneur and Writer💡
♟️Hobbies: Traveling, Poems, Playing Chess and Solving Puzzles♟️
🎂Born: July 7, 1991🎂
📍Born in Stockholm, Sweden, and now a Londoner since 1996📍
📚Lifelong Learner📚
🌟Wisdom from Mentors🌟
Keep reading
More stories from Temoor Dar and writers in Lifehack and other communities.
Fiverr Logo Design
A strong brand logo is crucial for businesses to make a lasting impression and stand out from the competition. If you're looking for an affordable and professional logo design service, Fiverr is the platform for you. With a wide range of talented designers, Fiverr offers logo designs that are tailored to your brand's unique identity, helping you elevate your brand's image and establish a strong visual presence.
By Abdulhakeem Momoh5 days ago in Lifehack
Perfect Little Pirate
The rough, sodden rope bit into her fingers as she swung over the roiling water far below. Reaching out with the toe of her boot, she managed to catch hold of the rain-soaked railing of the ship- and promptly slipped. Throwing herself forward, she landed hard on the deck, slamming her elbows against the wood planks. The sharp yelp of pain quickly bubbled into a laugh, and she rolled onto her back, laughing up at the gray sky as a torrent of rain washed away the soot covering her skin.
By M. A. Mehan 4 days ago in Fiction


Comments
There are no comments for this story
Be the first to respond and start the conversation.