
Absolute Beginners: How to Clean Up After Painting in Oils
In Not-So-Tricky Steps!


As a teenager, I struggled to teach myself how to paint with oils. Its various quirks and complexities outwitted my stubbornness and eventually overwhelmed me to the point where I swore them off completely, and I did not return the the medium for several years.
Eventually, I scored some brilliant tutors who demystified the subject for me sufficiently to make oils an absolute joy to work with from then on.
The point of this article, and most of my other articles, is to help keep other self-taught Michelangelo's out there from becoming bogged down in the same pitfalls that so thoroughly soured my own taste for oils for so long. Oil painting is a marvelous, versatile adventure that will willingly lend itself to the artist's command once the artist knows how, but of all the books and articles and blogs out there, there is a sore lack of information regarding certain steps of the process. Like:
HOW DO YOU CLEAN THEM UP?!
I ruined my brushes, my palette, my white turtleneck (because that was smart—wearing a white shirt to paint in. Duh) and the top of a table before deciding the cleanup process was too nightmarish to handle. If this is you, then take courage: it doesn't have to be this way! Here are my basic, step-by-step tips to tidy up your station.
Brushes
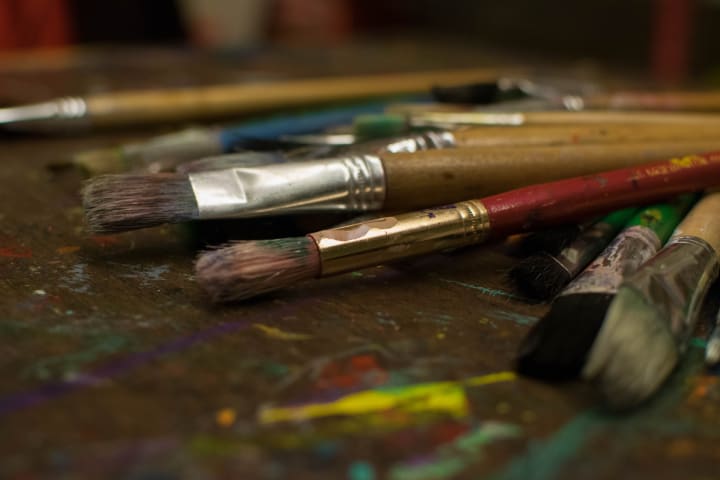
Perhaps your most important tool, and possibly the most expensive, your brushes deserve to be taken care of. And if not cleaned out properly, they are so easily ruined. But after all the focus on painting techniques, few lessons go so far as to describe how to deal with your tools afterwards. This drove me crazy and led me down a rabbit hole of complicated cleaners and stiff, paint-caked bristles. But the solution, my friend, is so much less complicated than it seems!
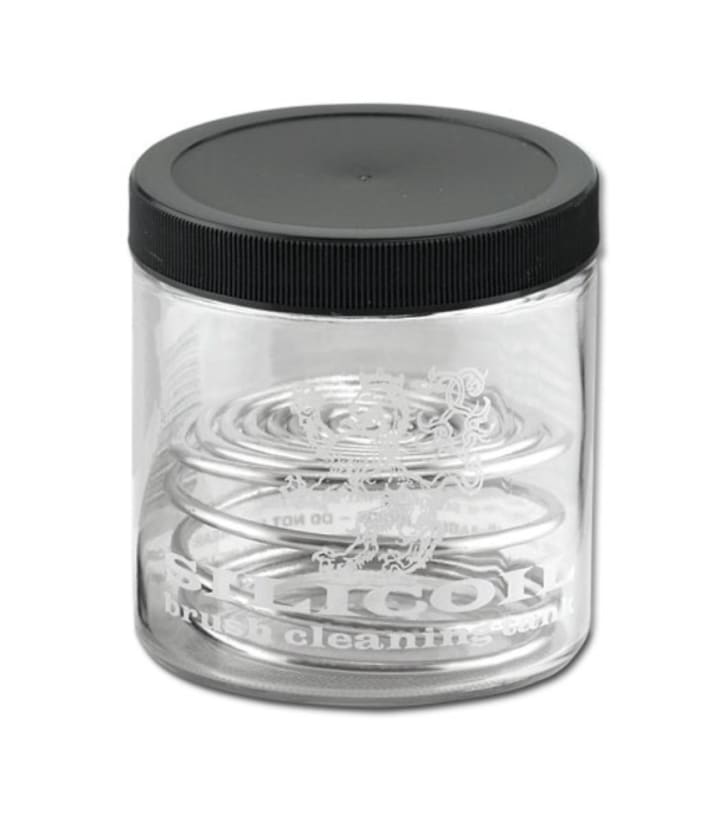
Jerry's Artarama has these at very affordable prices, especially if you wait for a sale! Jerry's Artarama
Cue your (and your brushes') new best friend: the Silicoil. This precious invention consists of a glass jar with a metal spring inside which acts like a washboard for your bristles, once filled with mineral spirits.
Once you've completed your paint session, gently wipe off excess amounts of paint on a cloth or paper towel. Then dunk the bristles in the Silicoil and lightly scrub back and forth across the surface of the spring, releasing pigments into the mineral spirits. The spirits break down the paint and help cut the greasiness of the oils, and the coil helps separate the bristles for a more thorough going-over without damaging them. From there, you'll want to take a trip to the sink for some warm water and soap. Regular dish soap will do. I use 7th Generation to avoid contact with harsh chemicals, but Dawn or some other generic brand will work as well. Work the soap through the bristles, splaying the fibers to get through the layers and running your fingernail through to make sure nothing is clogged in the base. Rinse and repeat as often as necessary until no trace of paint remains.
Once satisfied that all paint has been removed, gently squeeze out excess water and reshape the bristles to their original appearance. This will prolong the life of the tip or edge of your brush.
ALWAYS scrub with the direction of your bristles! Pushing against them will fray and damage the shape!
NEVER dry your brushes upright! This will cause the water to pool within the ferrule and mildew, loosening the bristles and damaging the seal between ferrule and handle. Lay them flat in a safe place until dry.
NEVER store brushes on their tips! This causes bending and fraying and will ruin brushes. Set them upright in a jar or brush holder.
Palettes

There are some artists out there who allow all paint mixes to dry on their palettes and accumulate like some crazy, impasto mixology diary forever, as a sort of art form in itself. I like things neat and tidy, though, so this idea all but makes me hyperventilate. Besides, it takes too long to let the mess dry before adding more layers. So, here is another option:
As soon as you're done painting for the day, scrape off excess paint with a palette knife. Don't throw it away; you can save it by moving it to a scrap of wax paper, lay it in a Tupperware and freeze it. Depending on the color and the amount, it'll keep this way for days or weeks.
For plastic or glass palettes, dunk a rag or paper towel in mineral spirits and wipe off the residue. Then follow with Windex and a dry paper towel, and you're done! For a wooden palette, after wiping down with your solvent, you may need to treat it with a layer of linseed oil to keep it in good condition.
Of course, many companies offer disposable paper palettes if you're in a hurry, or painting plein air, but it's usually more cost effective and environmentally conscious to reuse a solid palette if you can.
Palette Knives
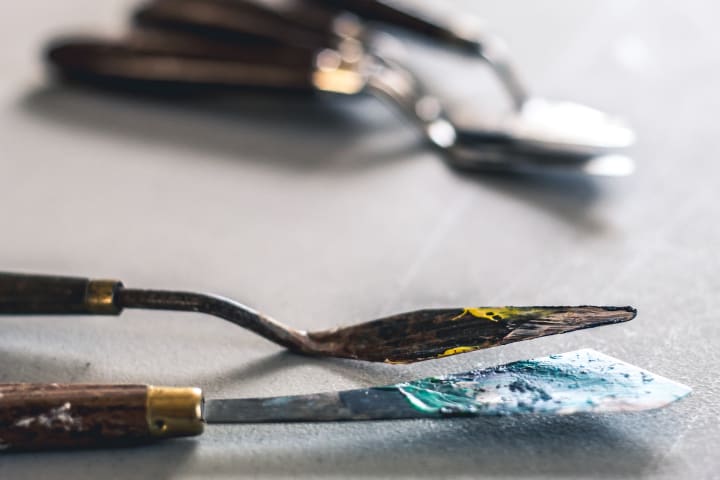
Palette knives are wonderful workhorses during a painting session, but that necessarily means that they, too, need cleaning. I recommend wiping them off throughout your session to aid the process, and at the end of the day you may not need more than a paper towel to get the rest of it off. If the paint is stubborn, try some mineral spirits. If it's dry and caked on, then use another stiff palette knife to scrape it off. Easy peasy!
Disposing of Solvents

Turpentine/mineral spirits are toxic and volatile and should never, ever be poured down the sink. Which begs the question, what to do with it? I suggest not pouring up much more than you need at a time, keeping it in a small resealable container until you've squeezed the last bit of usefulness out of it. Empty spice jars and small Tupperware buckets are great options if you like reusing things around the house, or you can find many different artist-specific tins or jars from art stores like Jerry's Artarama or Dickblick. This way, you only have a little bit to dispose of at a time, and any potential environmental impact is minimized.
Small amounts can be poured out over used paper towels or tissues to be absorbed, and thrown away safely. If you have too much to be absorbed, as when changing out the solvents in the Silicoil brush cleaner, pour into an empty milk carton or plastic bag and seal it before throwing away. For significant quantities of solvents, then the best thing for it is to truck it off to the chemical recycling center at your landfill. But make sure to place it in an approved, well marked, sealable container.
As a side note, don't let the Silicoil go too long without changing the solvents in it, or it will get murky and all the dissolved paint will settle at the bottom in a tenacious layer of slag, difficult to clean. This churns up when cleaning your brushes and flakes of it will become stuck within the bristles. Yuck!

Well, those are the basics. I hope this article has been useful in dispelling some confusion!
Check out my other art-related articles, such as a step-by-step process to earn direct painting here: Lifehack: "Direct Painting: A How-To for Oils", or my take on some of the most fun art tools around Lifehack: "5 Thrifty Artist Tools to Make Life Awesome."
If you have any questions or comments, I encourage you to contact and follow my Facebook page below. Also, if you enjoyed this article, don't hesitate to leave a tip to promote more quality content!
Thank you!
About the Creator
Shaking Bird Art
Shelby Lynne is a professional artist and art instructor. Her great passion is to share her knowledge of the art world with others, and promote a culture of curiosity, enjoyment and kindness through creativity.
Keep reading
More stories from Shaking Bird Art and writers in Lifehack and other communities.
5 Thrifty Artist Tools to Make Life Awesome
Wouldn't it be bliss if creating a masterpiece was as easy as picking up a brush and laying down paint? No cleanup, no mismatched eyes, no losing bristles, no losing patience. There was a time when I thought oil painting in particular was too much trouble to bother with. I didn't realize that having the right tools was half the battle!
By Shaking Bird Art5 years ago in Lifehack
A Full Guide to Convert EML to MSG on Windows PC
Different email clients stores emails messages in different format an you need to convert these emails from one format to another type of file format for some reasons. This article explain the best methods to batch convert EML to MSG with attachments. It is a common work which is done for the purpose of switching email clients, archiving and storage or scanning for malware.
By Adam Gilchrist7 days ago in Lifehack
How to make Money!
Making money is a fundamental aspect of modern life, essential for fulfilling needs, achieving goals, and securing a comfortable future. While the idea of making money may seem daunting or overwhelming, there are various strategies and principles that can guide individuals toward financial success. In this essay, we will explore some effective ways to make money and build wealth.
By Willow Peddya day ago in Lifehack


Comments
There are no comments for this story
Be the first to respond and start the conversation.