
One Square, No Cuts?
The Challenge of Creating Origami the Hard Way

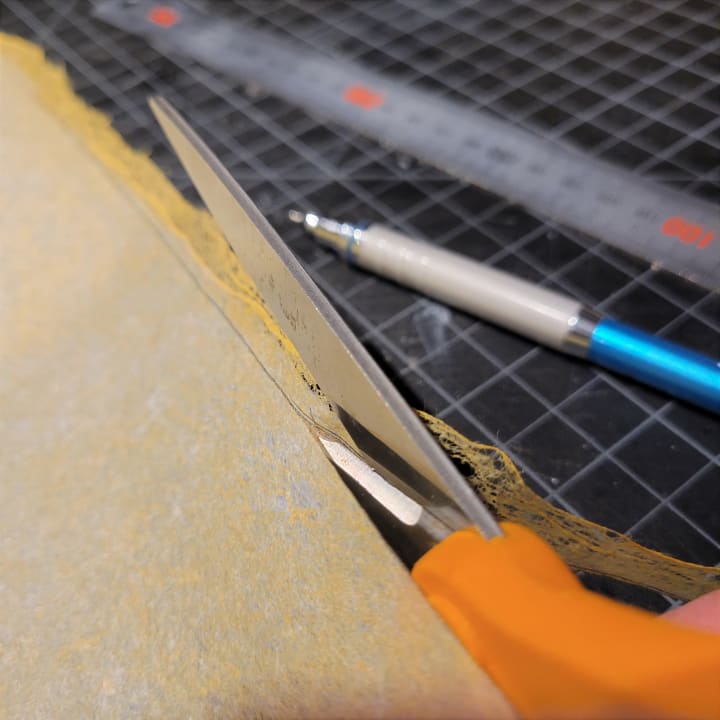
The only step where scissors are allowed when making true origami is also the most critical step: creating the perfect square. I fold my best pieces from handmade paper (in this case, made by my friends at Origamido Studio) which comes with rough, irregular edges which must be cut straight. The square must be perfectly straight-edged, perpendicular at the corners, and have equal sides. A small error in the beginning will manifest itself as a noticeable irregularity in the final fold. After that, folding creates the complex forms of the origami creatures, plants, and even human characters that I design.
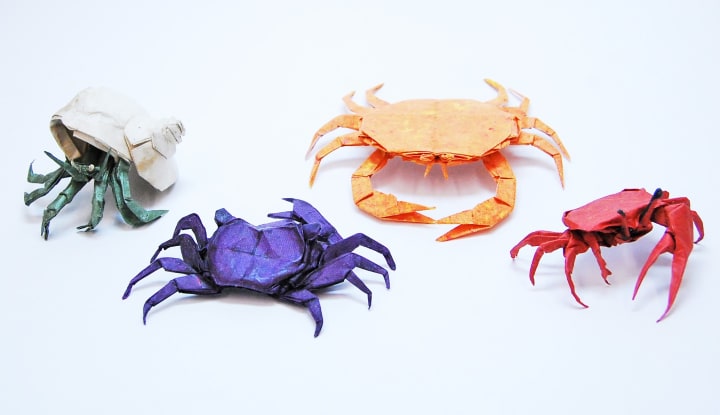
I was first drawn to the art of origami as a child, practicing from the classic books of John Montroll, Robert Lang, David Brill, and Kunihiko Kasahara. It was this hard rule, "One square, no (more) cuts" that intrigued me the most. How could such complicated forms still be achieved? But as I folded Montroll's designs the magic would happen by my own hand. By the age of ten I could fold a complex lobster, complete with legs, claws, antennae and even tiny stalk eyes. I bought more books, with even more intricate designs. It was no longer about generic beetles, but specific species of scarab beetles with accurate horns and anatomically correct body segments and even feet hooks.
In college I unlocked a new ability: I finally learned about the design theory of origami, described in detail by Robert Lang, and it revitalized my interest in origami. Up until this point I was only folding the works of other creators. Now, suddenly I could make my own sculptures! I practiced and experimented with paper every day. I started simple at first, folding things like maple leaves and oak leaves. Within a year I had created a small menagerie of creatures. Soon after I had the chance to visit the Origami USA Convention in New York, where I was able to meet many of these authors whose books I owned for so long, and also connected with others with the same desire to create. I still attend this convention and others around the world. We share techniques, exhibit our latest works, and of course make new friends.
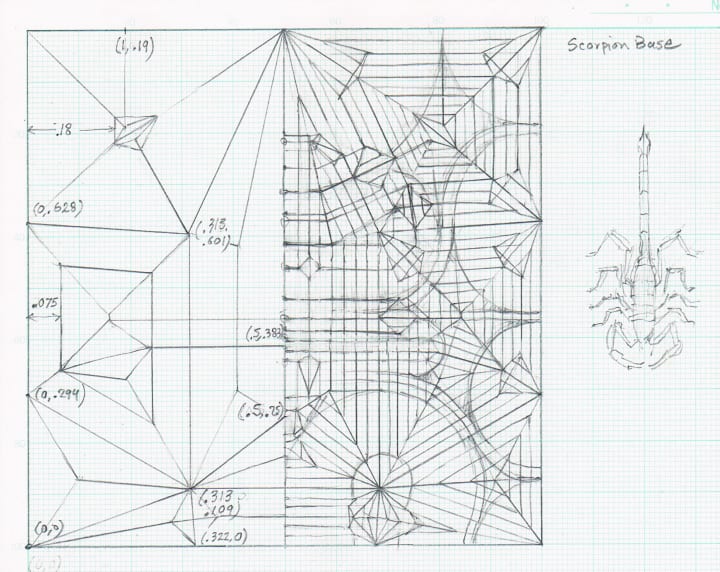
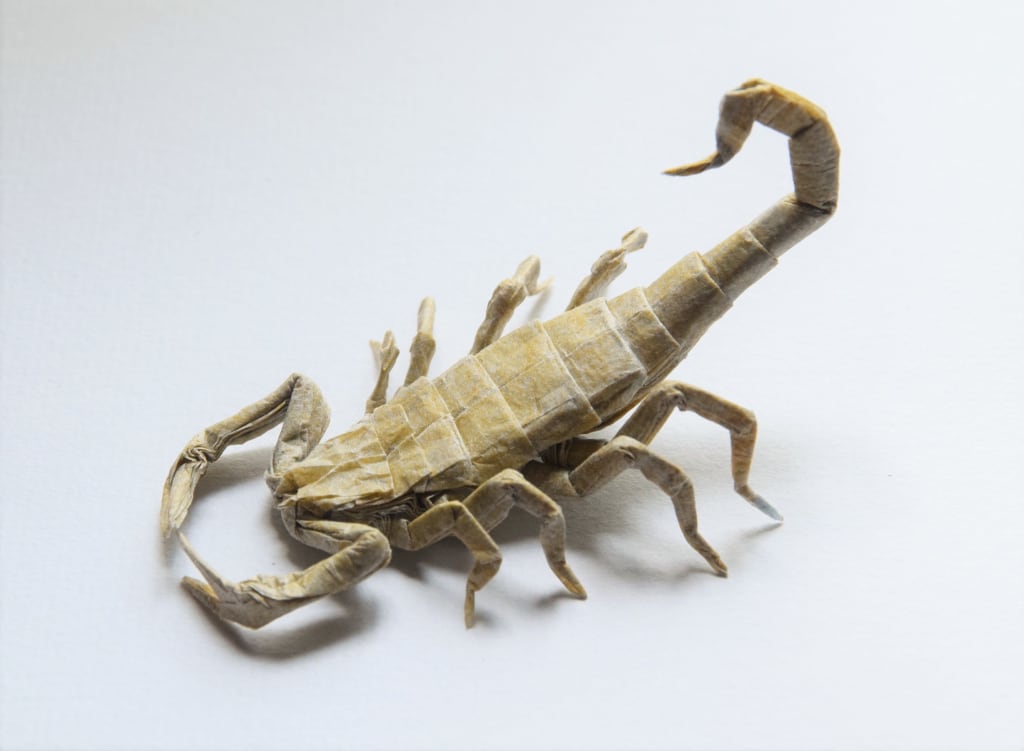
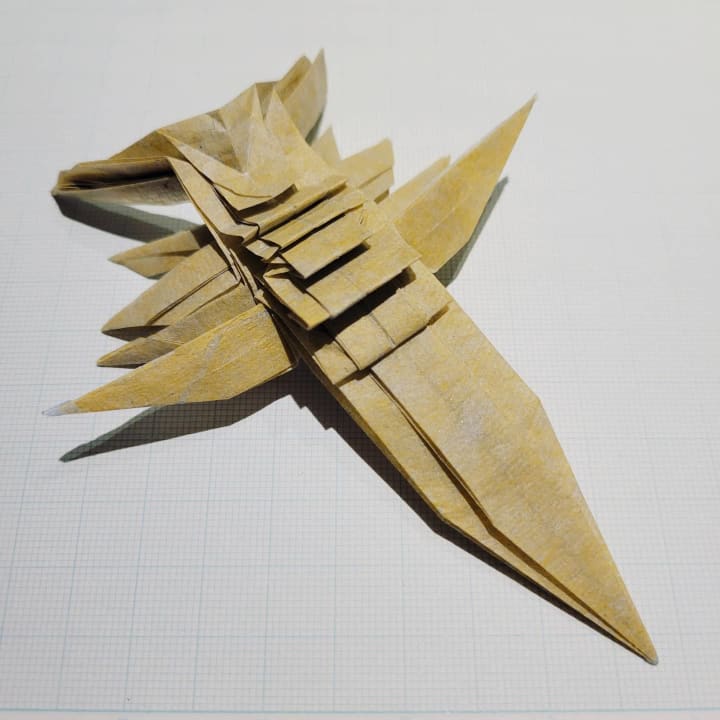
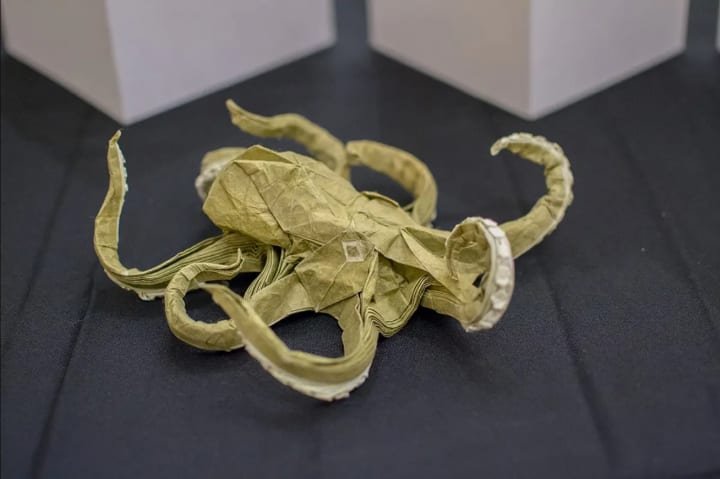
So how does it work? In a nutshell (or a bug shell?) the trick is to allocate parts of the square to become parts of the model. The circular regions fold radially (imagine a collapsing umbrella) into long "flaps" which can be made into parts of the model, such as legs, claws, and stinger tails, for example. The larger the circle, the longer the flap. Careful adjustments of these circle sizes are key to creating balanced proportions in the final sculpture. After these regions are planned out, the main creases are put in by connecting the circle centers, and subsequent creases are placed in order to slim the folded flaps so that they more resemble the parts of the real scorpion. The very last bit of the process involves careful clamping, wetting, starching and gluing of the paper, all while shaping it into the lifelike form it is meant to become. It is the most time consuming and demanding phase but also the most satisfying, as I am not just folding straight lines, but sculpting features.
These days the journey continues as I continue to design and fold. Occasionally I teach and collaborate, publishing diagrams with fellow creators so that other aspiring origami artists too can fold our new models. The simplicity of origami, where you start by cutting a clean square of paper, and learn to see the infinite possibilities, is what makes this art form so magical.
About the Creator
Brian Chan
I am an origami designer, illustrator, and crafter finding inspiration from nature. Things that excite me are mechanical design, things that transform and articulate, and of course the science of folding.
Keep reading
More stories from writers in Journal and other communities.
When the Robots Took My Job
This is for RM Stockton's Write Club prompt for the month of April: AI Please allow me to vent. For "college," I went to a scam school that is now closed. We were promised internships that were never spoken of again after admissions, and we were promised help finding jobs. The first time I went to the career counselor's office, she was completely frazzled. She had no idea what to do with us, the film majors. The second time I visited her office, I let her know that I'd found myself a job, and she was visibly relieved.
By Rebekah Conard4 days ago in Journal
Semiconductor and Circuit Manufacturing Market to be Worth $1,056.7 Billion by 2031
Meticulous Research®—a leading global market research company, published a research report titled, ‘Semiconductor and Circuit Manufacturing Market by Component (Memory, Logic, Analog, Micro), Semiconductor (Intrinsic, Extrinsic), Material (Silicon, Germanium), Application (Consumer, Automotive, Industrial), & Geography - Global Forecast to 2031.’
By Bhavana Metia day ago in Journal


Comments
There are no comments for this story
Be the first to respond and start the conversation.