
How to Add Pages in Blogger | Step By Step
learn step by step how to add pages!


In this guide, you will learn that how to add pages in blogger and how you can add pages into the navigation menu of a blog.
Let's Get Started, Happy Blogging!
What are pages in a Blog?
Pages contain static information of your blog like about your blog, contact information, privacy policy and services related information of your blog. Pages allow you to organize information in a better way so that your potential audience can find it easily. You can also add a page in the navigation menu or sidebar.
According to the guidelines of Google the necessary pages that you have to add to your blog are
- Home
- About us
- Contact us
- Terms and Conditions
- Privacy policy
- Disclaimer
How To Add Pages in Blogger
Follow the given instructions 👇 step by step to add pages to the blog.
☞ Firstly log into your blogger dashboard and open your blog in which you want to add pages.
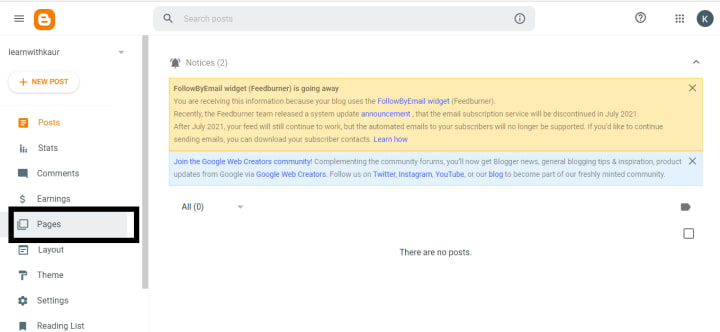
☞ On-Screen now you will see a pages option click on it.
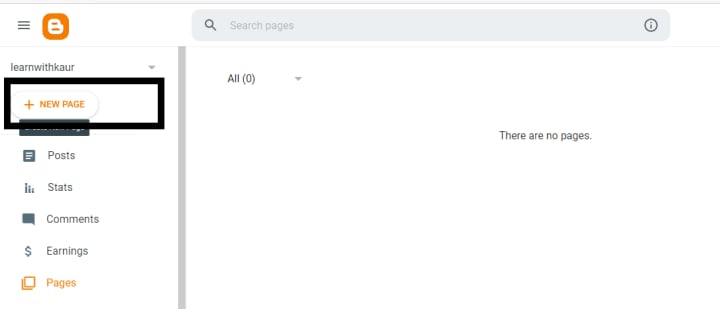
☞ After that click on new page option.
☞ After selecting a new page, a new window will open where you can create your page.
☞ The first option is the page title and here you can enter the name of your page whatever name you want to give to your page. It can be Home, about us, contact us and any other. For the sake of this article, I'm going to create an about us page so I will enter about us in the page title area.
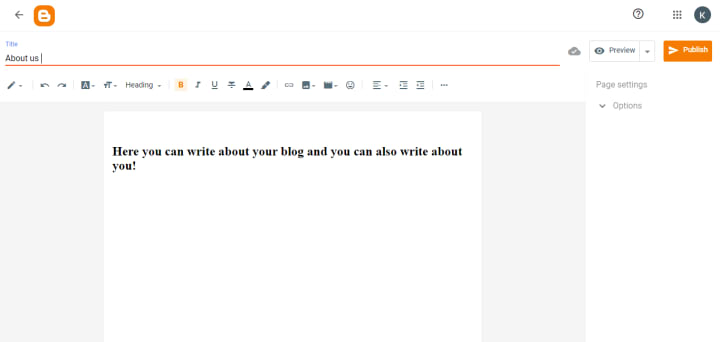
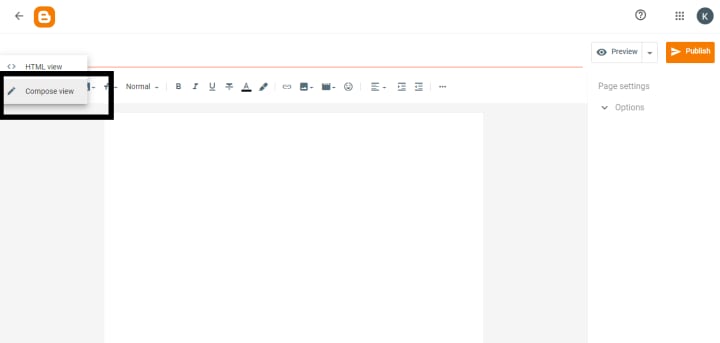
☞ Next Click on compose option which allows you to enter information on the page.
☞ Now you can start writing in the text area and you can also add images, videos, links and other information if you want.
☞ If you don't know that how to write about us page just visit your competitor's site and look that what they have written on the about us page.
☞ Now you have an idea that what to write on-page and write your own and unique content.
☞ After writing content click on the preview option and it will show you how your page will look like.
☞ If you want to make any changes then you can. Otherwise, click on publish option and it will be successfully added to your blog.
How to Add Pages in the Navigation Menu
Like posts, the page will not show on your home page. You can add a page in the navigation menu and it depends upon your theme that how you can add pages into navigation. I'm using the Smart SEO template of this sample blog "learnwithkaur" and the following are the steps for this theme.
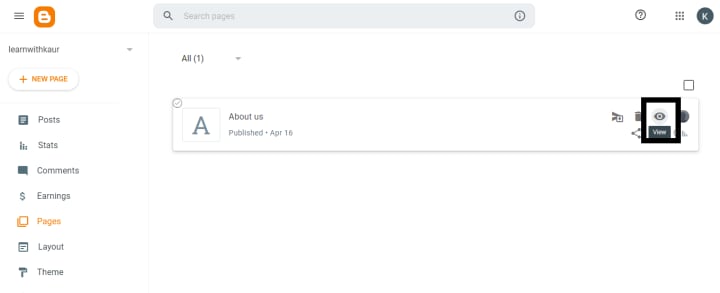
☞ Go into pages and click on the view option to view the about us page.
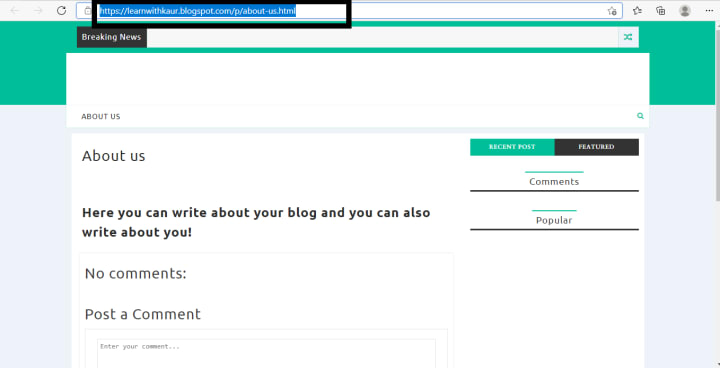
☞ New copy the URL of the about us page.
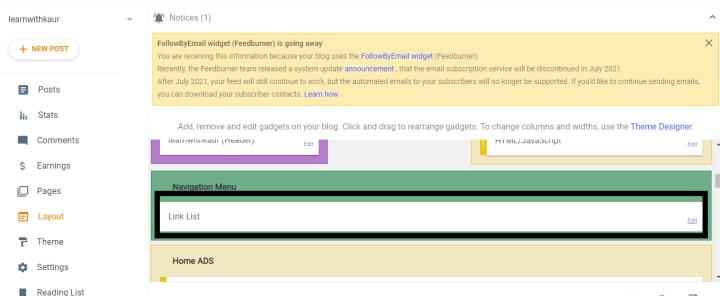
☞ From the left sidebar select the layout and click on it.

☞ Find the navigation menu option and click on the edit button.
☞ Now give a name to your navigation menu like the header menu
☞ Enter the name of your page, URL that you've copied and click on add link.
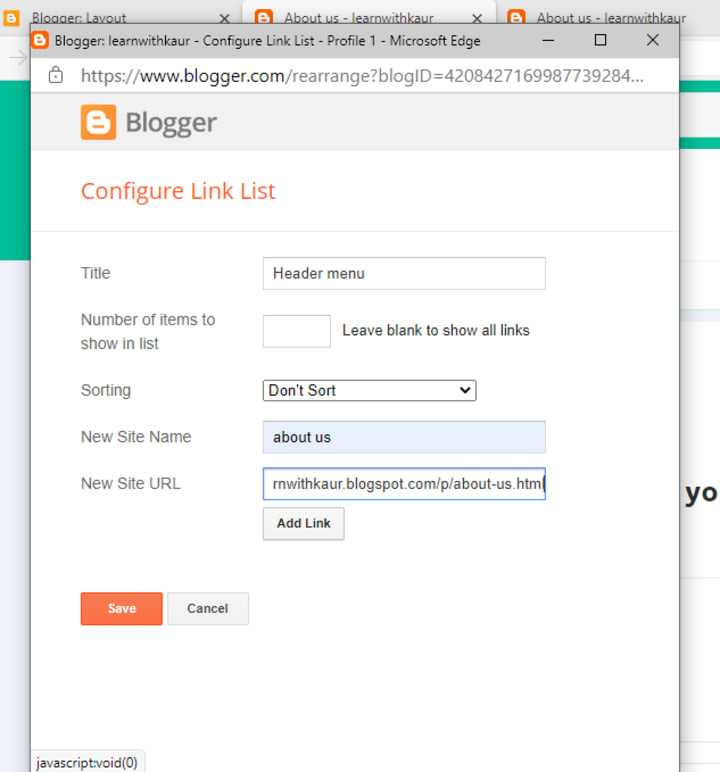
☞ To save changes click on the save button and it will add the about us page to your navigation menu.
☞ To see, click on view blog and now you can see that the about us page is added in the main navigation menu.
Final Thoughts
I hope this guide, will help you to learn that how to add pages in the blogger and navigation menu. You can also add other pages such as contact us, disclaimer and privacy policy page in the similar way that you've learned in this guide.
In the next article, we will discuss that how to add posts to a blogger blog and how you can write a post.
Keep learning keep growing!
About the Creator
Kamaljeet Kaur
I am a digital marketer with robust designing and WordPress skills and proven experience in creating and designing fresh and unique content. Founder of digitalnoteshub.
Keep reading
More stories from Kamaljeet Kaur and writers in Journal and other communities.
Sabotage
Lately I’ve been in a funk where everything can be going right. You know I’m in a happy place talking to who knows, I’m at peace and feel like everything is just going great you know. But once I start seeing that everything is going great for some reason I need to sabotage it. I need to sabotage my happiness and what I have going on in my life so no one else is able to do it for me. Does that make sense? Am I the only one who gets this way?
By Merjaunie Lena4 days ago in Journal
Unveiling 7 cutting edge IOS app development trends shaping the future
In today's dynamic mobile app development arena, staying ahead is paramount. iOS, with its polished interface and stellar performance, maintains market dominance, making tracking trends essential.
By Mike Kelvin4 days ago in Journal
The Business of Nature
Dew drops reflected the light of the sun. The inhabitants of Whispering Woods woke up to the golden droplets of water on the leaves of the flora. The oaks particularly enjoyed the light and the maples did, too. Happiness enveloped all who lived there, even the rocks that cried out in the night delighted in the morning.
By Skyler Saundersa day ago in Fiction


Comments
There are no comments for this story
Be the first to respond and start the conversation.