
A Filmmaker's Guide to the Horror Techniques Used in 'Insidious: Chapter 3'
Study, Experience, and Analysis


(Note: This article will be analysing the third installment of the Insidious franchise and in order to get the most out of the article, it is recommended that you watch the film at least once).
An incredible third installment which acts as a prequel to the other two films. The third installment covers what happens before the haunting that we are used to in the first two films, so we get to know about what takes place in terms of reasoning. In this case, it is the girl who is trying to contact her dead mother and accidentally seems to release the demons instead of getting to her mother. Let's have a look at the themes we will be analysing:
- Presenting Demons
- Darkness
- Fear
Let's have a look at each theme in context of the film then:
Presenting Demons
When we had a look at the other two installments, we covered hauntings, which made sense because the child was actually being haunted. In this case, the girl has released demons by accident after trying to contact her dead mother. I wanted to cover the presentation of demons in this film because this is where it is first established. If you were going to watch the films in time order, you'd naturally start with this one because this is when the demons are first "let out" into the real world and begin torturing the girl. Let's have a look at the frame we'll be analysing:
Frame

Demons are normally presented by this blueish tint—look at the amount of smoke around the demon. It's not only this, but there's a certain amount of depth to the scene that makes the whole thing look smokier and more intense. The fact that the audience doesn't see the end of the hallway is very important as this makes the horror seem more extreme; the unknown and feeling of uncertainty are both heightened here.
If you wanted to use this in your own film you would want to concentrate on the amount of space given to the demonic entity. Notice how this scene's cinematography is very similar to the cinematography in The Conjuring 2 when Judy sees Valak and points to her. It's the depth rather than the width you want to create. It gives the impression that they are quite far away even though they are fairly close. It adds an air of uncertainty to the demon by having the character have to travel down a claustrophobic area to get to them.
Darkness
Darkness is very well used in the third installment of the franchise as there is always a reason for it to be there. Note: You must always have a reason for darkness, but the better your reasons are, the more effective the horror will be. For instance, you cannot just say that the lights went out for no reason, so therefore, the horror begins. This may be a perfectly good reason once the horror has already started, but not to establish it entirely. Facts like nighttime and power-cuts are a good idea; things like smashed bulbs or even closed curtains are too, great ideas. Let's have a look at how this is used in the film:
Frame

The way in which Insidious: Chapter 3 uses darkness in this scene is to create that space in which the demon opposite this character walks around. The darkness is very important because mostly, we see this from under the bed. This means that any of the light sources on top would cast a shadow upon the bed making the area around it look slightly darker than the rest of the room. This is important for creating the space as now we can see how much space is in between the character and the demon without seeing the bed itself. It's a very good technique to use because it can expand on the way you use darkness without just having a dark room or lights going off.
If you were going to use this technique, you would need a space which is already fairly big, this would allow a good amount of shadow and a reasonable amount of space to work with when producing the darkened area. It will also mean that in comparison to the rest of the room, the shadowed space would look darker and thus, you will create darkness in a new and unique way without having to go through the trouble of having no focused light sources.
Fear
Fear is a huge theme in any horror movie, and it's not just about the audience fearing the events of the film, it's also about producing the atmosphere for fear to take place. This is important as it is a common trope of any horror film. You'll probably notice it mostly by music and sound. When the music or sound goes quiet or goes off for a long amount of time, this usually means something scary is about to take place in the next few seconds. But, let's have a look at what this means in the context of a scene and frame:
Frame
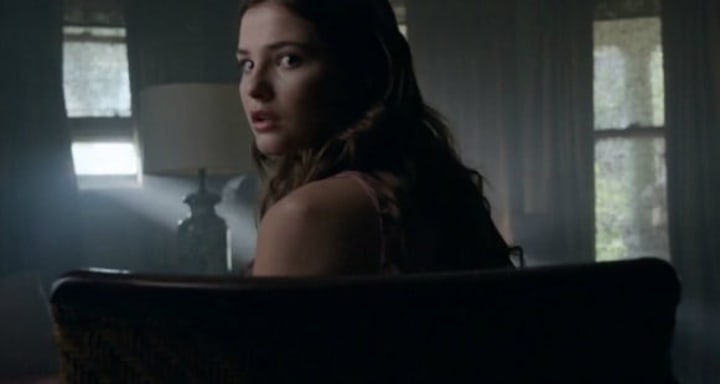
Just have a look at how well fear has been designed in this scene. This is the scene in which our main character looks behind them for the sake of feeling uncomfortable and sees nothing sitting in the chair. It is very important to recognise that there is not only a lack of sound here, but there is also a lack of pretty much everything else. The light from the window is shining directly on to our character, lighting them up in comparison to the rest of the room. It is very important to notice this as now, you will see that the rest of the room has been thrown into near-darkness. This sets up the scare by having the rest of the room look darker than it actually is; this is because we can clearly see that it is broad daylight outside. The next thing to notice is the fact that the lamp isn't on at all. This again, is for the effect of fear. If there is too much contrasting light (i.e. natural and artificial light in the same place) then the fear will not build because of the amount of light being cast in one particular direction.
If you're looking to use this in your own film, please remember that if you are using natural light, then lay off the artificial one. This is why it makes it better to use artificial light during nighttime scenes because then there is no way you could have natural light except if you are purposefully using moonlight. Try not to mix the light sources and keep to one category.
Conclusion
I hope you've enjoyed reading this small overview of the Insidious: Chapter 3 uses and techniques of horror. If you want to explore this film in more depth, I suggest the following themes would come in handy:
- Accident and Injury
- The Outdoors
- Hallways
Good luck on your next project!
About the Creator
Annie Kapur
200K+ Reads on Vocal.
English Lecturer
🎓Literature & Writing (B.A)
🎓Film & Writing (M.A)
🎓Secondary English Education (PgDipEd) (QTS)
📍Birmingham, UK
Keep reading
More stories from Annie Kapur and writers in Horror and other communities.
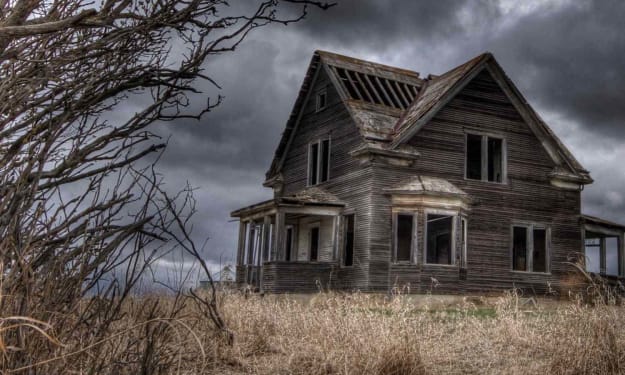
"The Shadowed Secrets of Blackwood Manor: A Tale of Terror"
In the heart of the sprawling city of Ashbourne, nestled amidst towering skyscrapers and bustling streets, there stood an old, decrepit mansion known as Blackwood Manor. Shrouded in legend and whispered tales of horror, the mansion had long been abandoned, its darkened windows and overgrown gardens a haunting reminder of the secrets that lay within.
By Isaac Roblesa day ago in Horror
BARE HUNTER
CHAPTER 15 I pulled up in front of Sandy’s a little early, so I texted Becca again and left a message for Sharon, hoping she had a good day and I’d see her tomorrow. Two cars pulled into Sandy’s driveway. I don’t know why I was surprised to see another man with her. We’d been apart for two years and I certainly didn’t waste any time getting back on the horse.
By Tina D'Angelo5 days ago in Chapters

Comments
There are no comments for this story
Be the first to respond and start the conversation.