

Awakenings is the first mission you’re presented when you start a new character in the campaign modes of No Man’s Sky. The mission acts as the game’s tutorial, directing you do to a number of tasks that will be crucial to your survival throughout your gameplay.
However, there are numerous important tasks that are also vital to your ongoing survival which Awakenings doesn’t explain directly, or in the same manner that it explains the other critical tasks. These can be easily missed, especially for brand new players just starting out in the game.
This guide is meant for all new No Man’s Sky players, to point you to those items the tutorial fails to teach clearly. I hope it helps you have a much better, more successful, and more enjoyable introduction to this most excellent game.
Note that the info here was derived from the PC version of the game.
1. First-Person View
No Man’s Sky starts you off in third-person view. If that’s the way you’d prefer to play, then you can ignore this section. But if you’d like to switch to first-person view, you have to open your Quick Menu (X on keyboard) and select Toggle Camera View.
2. Multi-Tool Charging
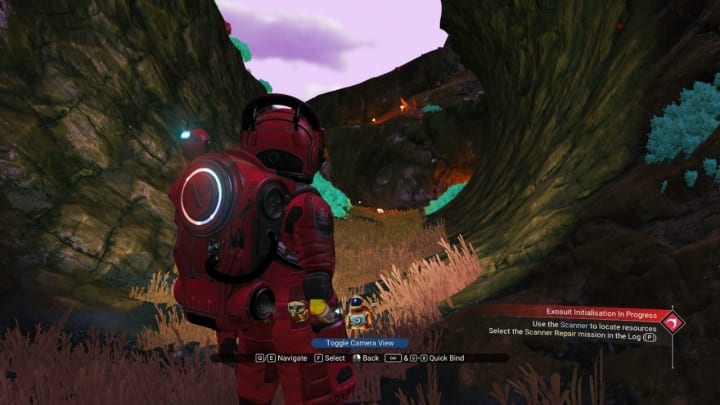
Once you have control of your character after your Atlas Systems suit initializes, you’ll get your first task in the Awakenings questline: REPAIR SCANNER. To do so, you’ll first have to use your Multi-Tool to mine 75 units of Ferrite Dust.
BUT WAIT. Before you do that, you need to recharge the Mining Beam component of the Multi-Tool. At the start, it’s only charged to 50%. If you were to go off immediately to mine for Ferrite Dust and anything else, you’d use up that 50% charge quickly, leaving you with no power source for the Mining Beam, and no way to mine for resources. Not good.
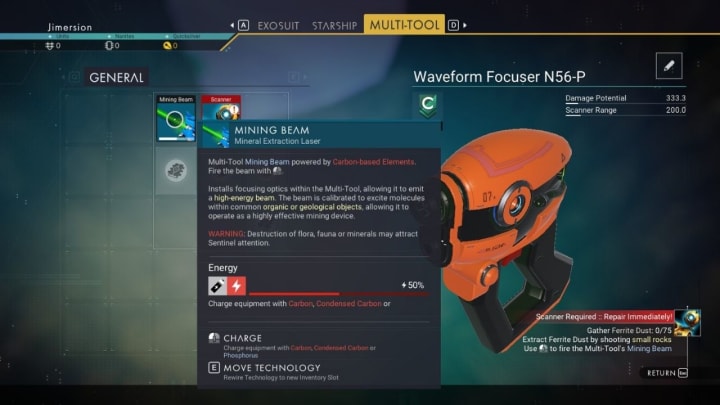
So, it’s imperative you first locate and mine Carbon, Condensed Carbon, and/or Phosphorus, the resource elements that will recharge your Mining Beam. Once you have a full Mining Beam charge, it’s safe to go on and mine for Ferrite Dust.
3. Life Support Charging
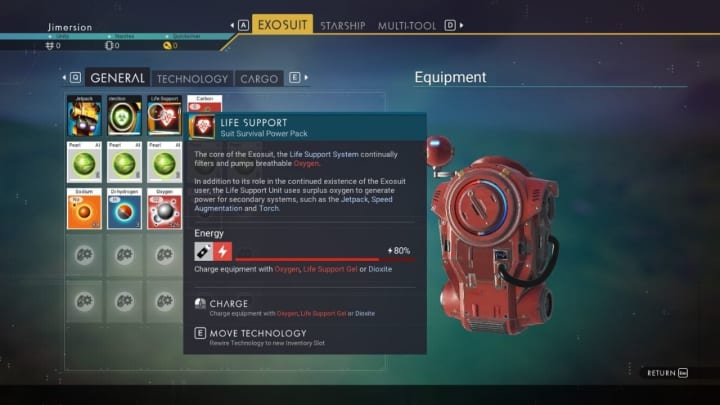
Your Atlas System suit starts with a couple of survival and protective measures to help keep you alive. One of the Awakenings tasks helps you understand this by having you mine Sodium, which is used to recharge the suit’s hazardous protection ability.
But the suit has another component that also requires charging: Life Support. The Life Support charge doesn’t run out as fast as the suit’s hazardous protection, but it’s just as vital to keep it charged, and to have the Oxygen, Life Support Gel, and/or Dioxite in your inventory to do so when needed.
4. Enclosed Protection
When the game first gives you control of your character, you’ll see that your suit’s hazardous protection charge is dangerously close to running out. There are two things you can immediately do at this time. The first is PANIC until your suit’s charge runs out, and your adventure ends before it even began. The second is to remain calm and quickly look around for and gather Sodium, which may or may not be close by.
But there’s a third option you can do here, and that is to look for a nearby cave, and double-time your character straight for it. Once you go deep enough into the cave to get a solid level of overhead protection, your suit will slowly begin to recharge its hazardous protection on its own, thereby saving you from having to stay exposed to the environmental danger present on the planet you’re on.
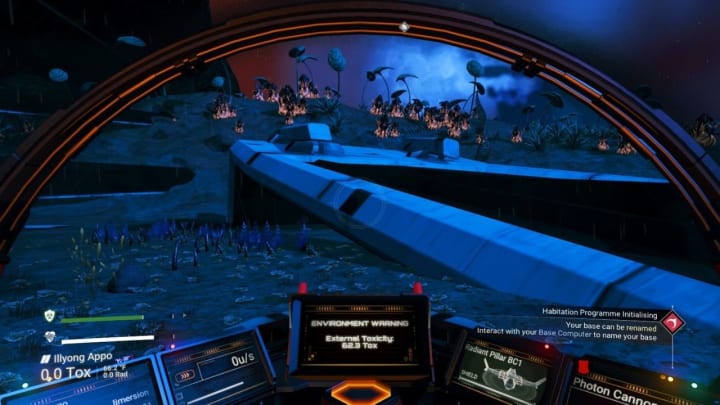
Caves, buildings, your ships, and other enclosed spaces offer you protection from the environment, and will also help you use fewer resources for charging your hazardous protection.
5. Inventory Space
In Normal mode, your inventory space won’t be much of a problem, especially later in the game. Depending on how many different resources you mine or collect, you may do some juggling with inventory items in order to keep hold of the ones you want.
At the start, the General Inventory section of your suit has 12 inventory slots, and can be upgraded to a max 48 slots as you progress through the campaign. In Normal mode, each slot can hold a max 9,999 units of basic resources such as Carbon, Ferrite Dust, Oxygen, Sodium, and others. However, in Survival and Permadeath modes, each inventory slot only holds a max 250 units of those resources.
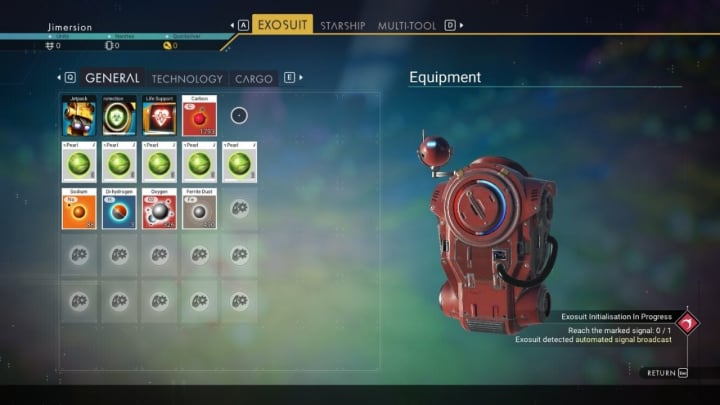
Knowing how much each inventory slot holds of each item will help you prioritize the resources and other items you need and/or keep on hand.
6. Multi-Tool Overheating
While using the Multi-Tool to mine or manipulate terrain, you can simply press and hold the trigger (mouse or controller button) for a constant beam. But if you hold the trigger down for too long, the Multi-Tool will overheat and stop working for a short time.
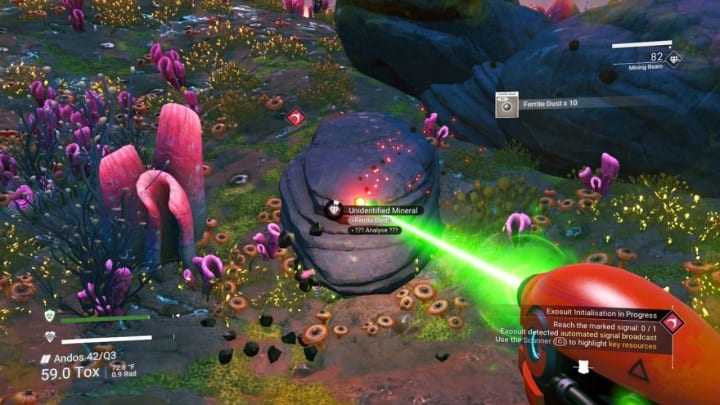
When you have a beam active, there’s a bar that appears in the upper right of your screen. This bar measures the length of time you have before the Multi-Tool overheats. Keep an eye on that bar, and try not to let your tool overheat and stop working right when you really need it to.
7. Terrain Manipulator Modes
The Terrain Manipulator is a mod for your Multi-Tool which allows you to (you guessed it) manipulate terrain. During the Awakenings questline, you’ll be taught how to excavate various mineral deposits with it, but that’s just one of four uses the mod is capable of.
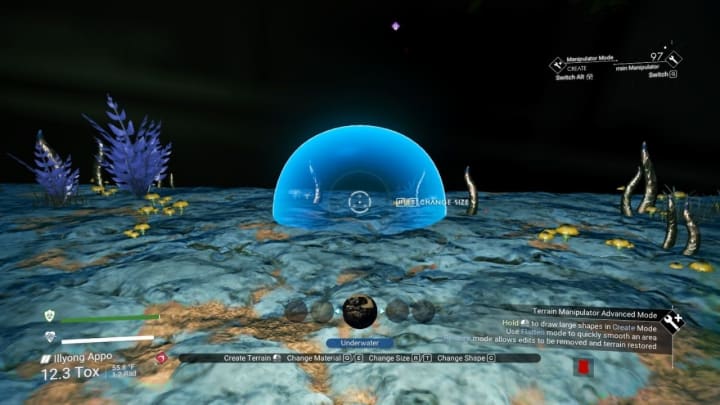
In addition to the mostly-used Mine mode, the Terrain Manipulator also has the ability to Create, Restore, and Flatten. The amount of terrain that can be manipulated can also be controlled by using the three reticle size options (small, medium, large). The middle mouse button is the default trigger to bring up these modes on the PC, which also displays basic instructions on how to cycle through the settings.
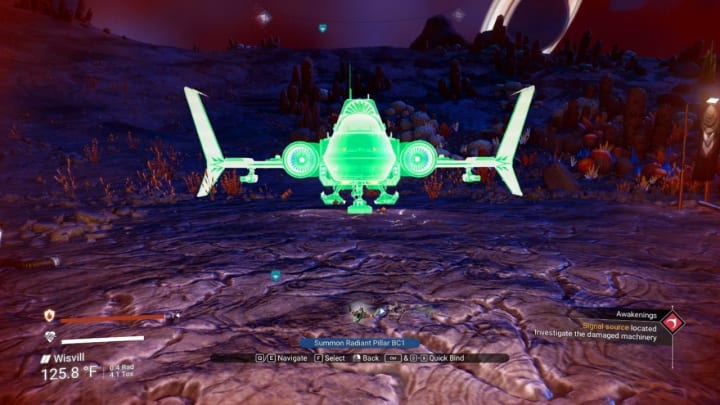
8. Summon Ship
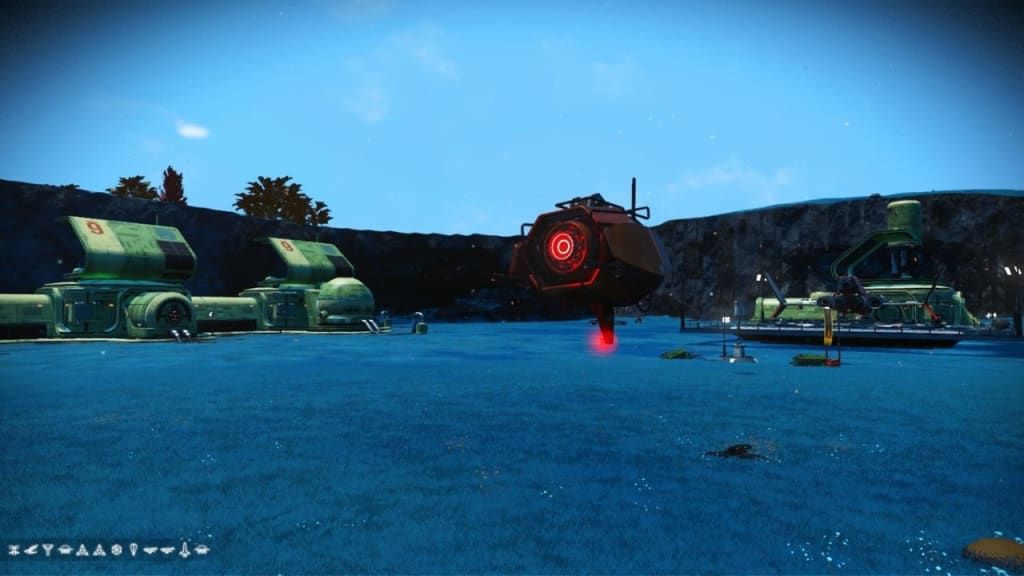
The first few tasks in the Awakenings questline have you locating your first spaceship and repairing it to full working order. Once that’s done, and it’s fueled adequately, you can bring up the Quick Menu to summon it to a nearby space at your location. This is useful for when you’re mining resources and happen to wander too far from your ship, especially when a sudden weather alert sounds off and you don’t have a nearby building or cave to take shelter in.
9. Restore Points
No Man’s Sky is an online multiplayer game, and as such, doesn’t have a Save function you can activate with a hotkey. However, there are two ways to save your progress in this tutorial section of the game, by using Restore Points.
One way to trigger a Restore Point save is to simply exit your ship. Each time you do, the game marks that point in game time and location as a Restore Point. This is where your character will respawn if they die, and where you’ll start from when you log out from and back into the game.
Another way to set a Restore Point is by locating and activating a territory marker. Each planet’s surface is divided into numerous territories, with each territory having a marker that will trigger a Restore Point and tell you the name of the territory when activated.

10. Sentinels
This last point in the guide is probably the most important, especially early in the game, when your character is weak, vulnerable, and defenseless.
Sentinels are small, floating robotic entities that will appear seemingly out of thin air and at any location on the surface of a planet. Unless attacked or provoked, they’ll ignore you as they carry on their duty of scanning random flora and fauna.

The early game danger comes while you’re mining, and one of them suddenly appears close by. If they are close enough to detect that a piece of the planet is being destroyed, they’ll beep an alert and suddenly swoop in to scan you. If you manage to spot them or hear their alert go off and stop mining quickly enough, they’ll chalk it up as a false alarm and float off to continue their business. But if they catch you in the act of destroying something, they’ll attack. And until you have a weapon mod plugged into your Multi-Tool, your best defense is to attempt to hide in a cave or building, or jump into your ship and fly far away.
If you need it, the Awakenings questline is described in detail on the Gamepedia-hosted No Man’s Sky wiki. If you choose to instead take on your first journey without referring to a full walkthrough, I hope this small guide helps you off to a good start without spoilers. And if you see me (Jimersion) space truckin’ around the stars in game, jet pack on over and say hi!
About the Creator
RoleCraft
RoleCraft is creating video, board, and tabletop roleplaying game content!
patreon.com/RoleCraft
Sachin Tendulkar: A Cricketing Legend and Cultural Icon
Introduction: Sachin Tendulkar, often hailed as the "God of Cricket," is one of the most revered and celebrated sports personalities in the world. With a career spanning over two decades, Tendulkar's contribution to the game of cricket transcends statistics and records, encompassing his influence on millions of fans, the evolution of cricket itself, and the cultural landscape of India. This essay delves into the life, career, and legacy of Sachin Tendulkar, exploring his journey from a young prodigy to a cricketing legend and cultural icon.
By WILLIAM DIAGO RODRIGUES3 days ago in Gamers


Comments
There are no comments for this story
Be the first to respond and start the conversation.