

From the haunted, mist and monster filled halls of Briarstone Asylum, to unknown realms brimming with Lovecraftian horrors, we lay our scene. Blood filled chambers, otherworldly creatures, and endless opportunities to come face to face with your more diabolical self (lost memories and doubles alike). There’s no better way to spend Friday night than engaging with these terrors side by side with your friends, except perhaps as the guide on the other side of the table.
Over the last year, I have embarked upon a noble endeavour and accepted the transformation from heroic adventurer to first time GM (Game Master). You never quite realise just how much time and creativity go into a tabletop RPG (roleplaying game) from behind the GM screen. With the ‘Strange Aeons’ campaign, which draws heavily from Lovecraftian fiction and lore, the characters begin with missing memories and I, as a rather ambitious first time GM, decided to run the game with complete amnesia for all members of the party. This meant the backstories of every character were entirely mine to devise from scratch and weave them into the already complex narrative, but that’s not where my ambition on this creative journey ended.
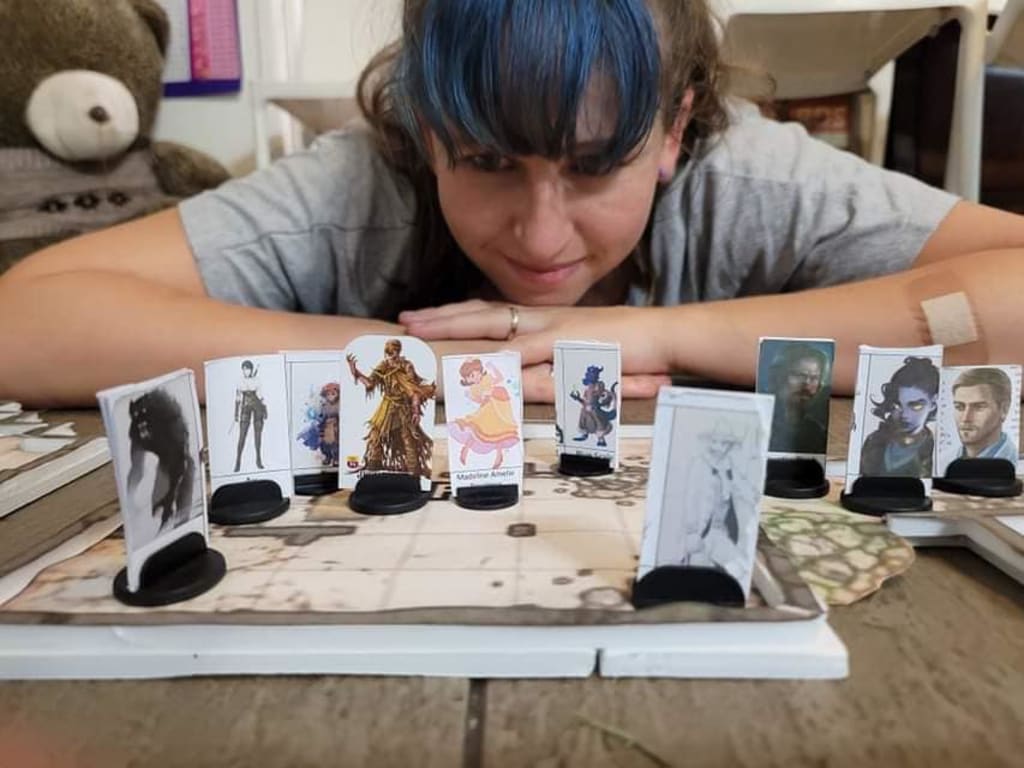
As a player, my favourite games were always the ones with physical maps. It’s what I started with so I can’t say nostalgia doesn’t play a part, but it’s not only that. There’s something about physically moving the characters around the world that draws you in and brings it a little closer to the real world. Also, with this being my first campaign I wanted to create something special for my players. I wanted to create something a bit more three-dimensional, but unlike a lot of players and GMs out there, I do not have anywhere near the funds needed to design and build professional battle maps for my group. So what could I do? How could I come up with at least halfway decent battle maps with next to zero funds? Well, I had to improvise but before long my dream would become a reality.
With only a simple idea in my head, a vision of the end product, I made my way down to the nearest Officeworks and found amongst their staff a fan of tabletop RPGS. To my surprise he enjoyed running both Pathfinder and Dungeons & Dragons games (D&D5e) in his own time and when I shared my plans he was all too excited to help. I told him I was after foam boards and before long he had me set up comparing the sizes and consistency, searching together for the boards that would do best. Finally we came to an agreement, A3, 5mm white foam boards (5 pack) would be the boards of my campaign. Now all I had to do was print the Paizo provided map grids to size and build those battle maps. Let the crafting process commence!
Equipment for Starter Maps
While I had my boards and the necessary ‘In Search of Sanity: Interactive Map’ PDF (and the other interactive map documents for the future books of the campaign), there was still a bit of trial and error in working out the most effective items for this crafting venture. For one thing, not everything I needed could or should be cut with the same item parts of the map building experience. Scissors were clearly better for paper to avoid jagged tears and a Stanley knife was needed for cutting the boards with the necessary precision and manoeuvrability. Seems obvious enough, but I tend to enjoy short cuts where I can find them. No shortcuts here I’m afraid as you’ll discover soon enough when I detail my procedure.
Now, without further ado, my Book 1 ‘In Search of Sanity’ Maps equipment list:
A 5 pack of A3, 5mm, foam boards (you already know about that one)
Maps pages or templates
Laptop/Computer
Printer with coloured ink
Stanley knife
An old wooden cutting board (do not use your kitchen favourite)
Paper
Scissors
Glue stick
Patience (okay, not equipment but trust me, you’ll need it if you try this method)
Procedure
With my foam boards and other equipment by my side, I thought I was ready. I thought this would be a quick and easy process. Use the margins on Word document to give me those perfect square and map sizes, print away, cut, match, slice, build. How hard could it be?
Step 1: Print the Maps
Well, I’ll clue you in on a little secret for those of you who are not already aware. Those squares on the Pathfinder Maps, or at least the Strange Aeons ones, do not line up with each other...at all. The sizes are way out, which as it turns out really messes with the margins plan. Trial and error became my friend in more ways than one. Rather than just using the margins, I found I had to toy with the image settings, copy and crop a whole lot, and quite literally place one section of a map over another again and again to size it all up just right (or close enough to it). Patience and persistence. I needed them during this part of the procedure more than ever.
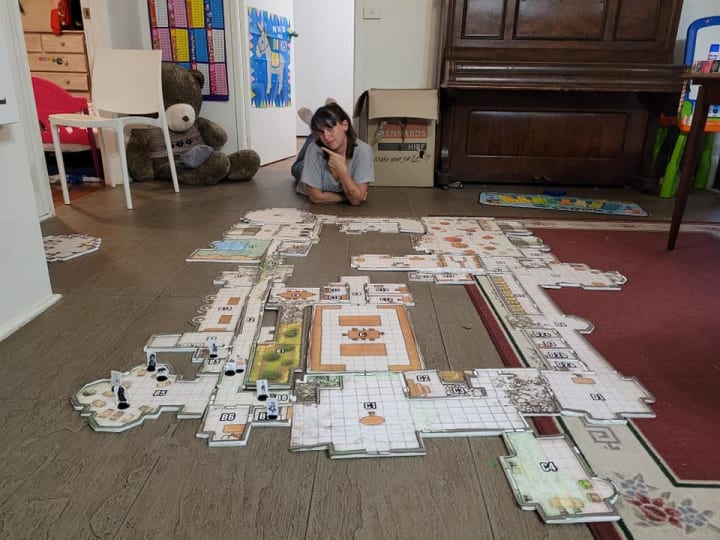
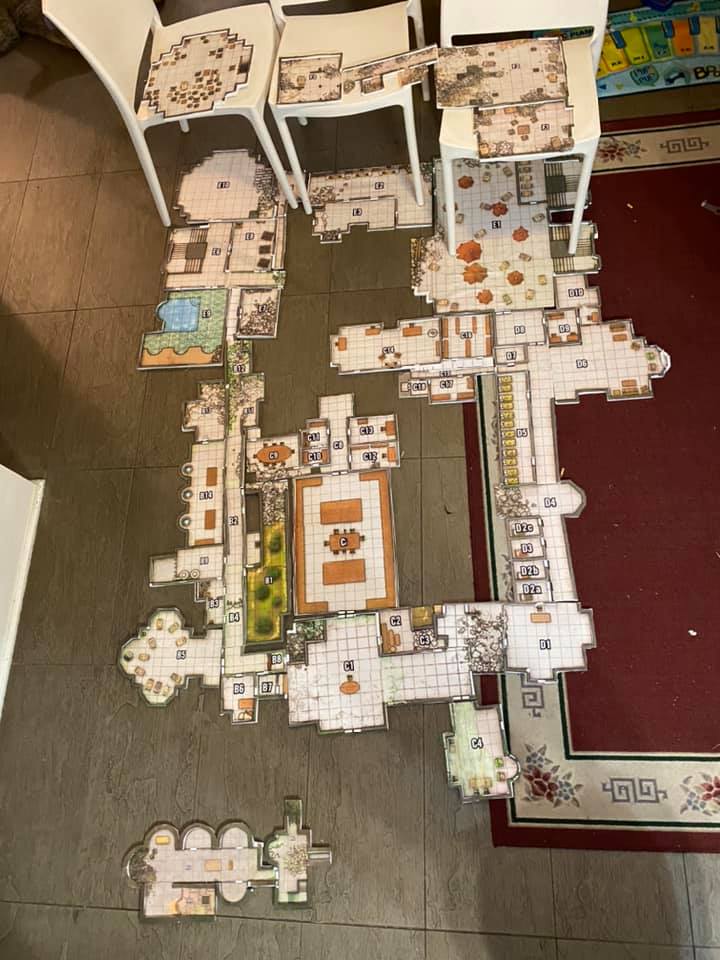
The basement was the easiest to perfect. So few pages were needed and there weren’t too many places that needed to line up. The middle floor was by far the hardest and the upper floors were more difficult than the first, but a great relief after the soul-crushing puzzle that was the rooms of Bs, Cs, Ds, and Es.

Step 2: Cut and Match
Now, I did this one floor at a time, staying far enough ahead of my players that I would always have the tile they needed to add to this ever-expanding puzzle asylum, but it could just as easily (probably more easily) be done all at once, before taking any other steps.
At first I thought I needed to print thin wall colours separately to sit on top of the teeny tiny foam walls I intended to create. After all, how could I possibly work out how wide to make the walls if they weren’t sitting there attached to the rooms? How would I ever cut the lines straight enough and to size without the wall images to guide me?
Thankfully, with a little practice and again some trial and error, I found a less wasteful solution than my initial plan. It turns out the width of the walls aren’t quite as important as other parts and as long as you play with your puzzle pieces before actually gluing the foam walls to the base, you can use the Stanley knife to adjust as needed. Realistically, even if you jump the gun and paste the walls before you’ve cross checked your work with neighbouring rooms you can still make changes. This isn’t a hot glue gun we’re talking about, just your garden variety glue stick. If you’re rough enough, it’ll come right off.
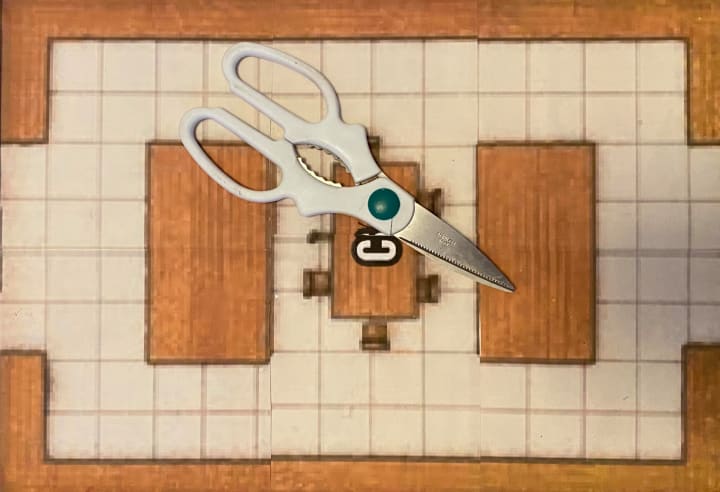
So, what I decided to do was cut out the room segments using scissors, leaving wings to paste as needed to form a series of separate but whole room print-offs. I would use these pages to determine how large each room would need to be and bring in the Stanley knife to cut the boards to the correct shape and size. Please use the old cutting board for this on you will straight up cut through your floor.
Once I had my tiles, I broke out the scissors again to cut the wall images from the rooms then set them aside while I estimated and pasted the rooms to the board.
Step 3: Build those walls
With the rooms firmly affixed to the correct places on my tiles, I was able to estimate the size of the walls and slice thin lines from the remaining board with the Stanley knife to make them. Once they were prepared at the correct width and length, I used the glue stick to paste them to the board, outlining the rooms where needed. Rounded rooms were a challenge of their own, but for me it simply meant cutting shorter rectangles and arranging them on an arc.
All that was needed once this next round of glue had dried was to add a little colour to the tops of the walls. Since the wall images were pre-cut they fit pretty close to perfectly every time. All it took was some time and care to trace the glue along the walls, and patiently place the wall images on top, with a gentle press to secure them in place.
Results
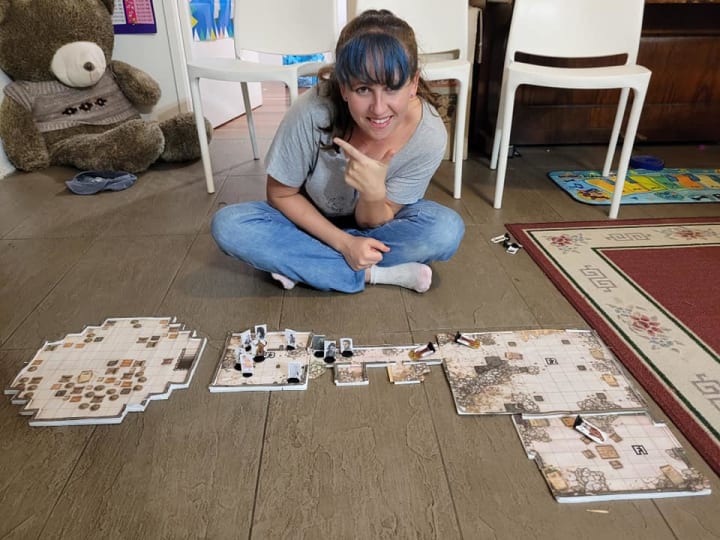
While it took a crazy amount of time and my maps aren’t quite as state of the art as the many pre-build terrains sets and 3D-printed models, I was pretty happy with the results and all of my players were too. They were functional, allowed for surprise reveal rooms with each new tile place giving the asylum a real dungeon exploration feel to it, and in all honestly they still looked pretty cool.
There were so many lessons I was able to learn in this map building process and as I continue with my newbie GM journey (we’re now part way through Book 2) I have begun to implement changes to my process in response - Dungeon Draft for easier scaling being one.
I still enjoy creating maps for my players, so much so that if I’m not careful I’ll soon have all of Golarion in my game room!
About the Creator
Keep reading
More stories from Bree Beadman and writers in Gamers and other communities.
A World of Our Own
The greatest fantasy worlds aren’t the ones we read in a book, or watch on the screen, they are the ones we create with our friends. There is no better escape from the mundane responsibilities of adulthood than to embark upon an epic journey of magic, mayhem and self discovery with some of the greatest minds you’ve ever known. Why watch someone else’s fictional characters experience the pains and joys of such wonderful worlds when you yourself can embody one of your own and create an amazing wealth of memories and experiences with your friends and family from the safety of your own home.
By Bree Beadman3 years ago in Gamers
Sachin Tendulkar: A Cricketing Legend and Cultural Icon
Introduction: Sachin Tendulkar, often hailed as the "God of Cricket," is one of the most revered and celebrated sports personalities in the world. With a career spanning over two decades, Tendulkar's contribution to the game of cricket transcends statistics and records, encompassing his influence on millions of fans, the evolution of cricket itself, and the cultural landscape of India. This essay delves into the life, career, and legacy of Sachin Tendulkar, exploring his journey from a young prodigy to a cricketing legend and cultural icon.
By WILLIAM DIAGO RODRIGUES6 days ago in Gamers
Her Majesty Mia and her minions
I rule this rag tag lot… they’re not much, but they’re all I’ve got! I preside at the head of the table, my indisputable, rightful place. But, I randomly perch on other chairs at a moment’s notice… whenever the mood strikes. Such fun keeping them off balance. Fun reminding them who’s boss... ME!
By Angie the Archivist 📚🪶2 days ago in Petlife


Comments
There are no comments for this story
Be the first to respond and start the conversation.