
12 Fun Art Projects for Kids
Cool, Creative, and Colorful

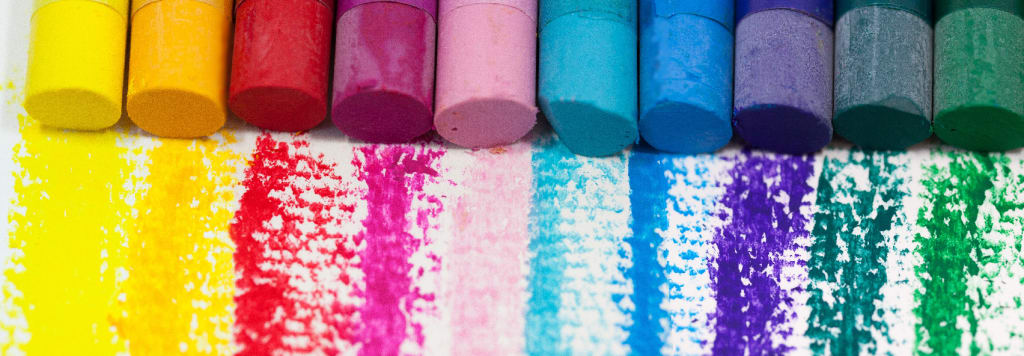
Coloring is the perfect rainy day activity. It’s kid-tested and parent-approved, and it’s undeniably better for brain development than sitting in front of the television for hours. However, even the most creative children run out of artistic ideas eventually. What follows is a list of fun coloring projects to try out when a little inspiration is needed.
Note: Be sure to supervise children, especially young children, as appropriate. Art supplies such as scissors and glue can be dangerous in young hands.
1) Boredom Fortune Teller
Pictured in Gallery!
“I’m bored” is one of the complaints most often heard by parents. This project gives kids a way to solve their boredom problems independently. Simply fold the paper to create a fortune teller using the usual method. Then unfold and use the fold lines as a guide to color the sections and write “boredom fortunes.” See the photo in the gallery for an example.
Suggested supplies: Paper, scissors, crayons or colored pencils, black marker
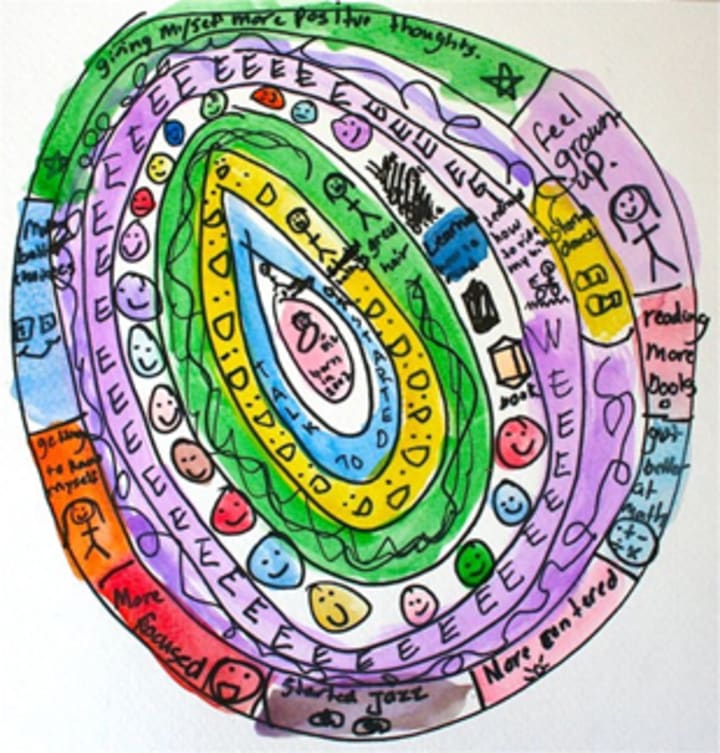
2) Growth Rings (playfullearning.net)
Pictured in Gallery!
This is an artistic way for kids to tell their own life stories. Each tree ring represents one year of life. Begin by drawing as many rings as needed (e.g., seven rings for a seven-year-old child). Label them by year and/or age if desired. Next, the child colors in the rings and draws what happened during each year in the appropriate ring. It can be fun to do this with a parent or older siblings, whose story telling can give kids ideas for the younger years that they may not remember. This project isn’t just an opportunity to make art; it also encourages bonding between family members and provides a sense of connection and shared history.
Suggested supplies: Paper, water colors, paintbrush, thin-tipped marker or pen
3) Color by Number Group Project
This is a variation of traditional color by number pages that encourages collaboration between children. Begin by having each child draw a picture using only a black pen or marker. No peeking at the others’ drawings! Next, have everyone pass her or his drawing to the left. Using pencil, have them assign numbers (e.g., 1 through 6) to each of the spaces that need to be colored in. Then, turn all of the pictures over so that the blank side is facing up and pass to the left again. The next person’s job is to assign colors to each number, 1 through 6. Finally, pass to the left again and use the key on the back of the drawing to complete the color by number. Be sure to share the results with the group once everyone is finished!
Suggested supplies: Paper; black pens or markers; colored markers, crayons, colored pencils, or paint
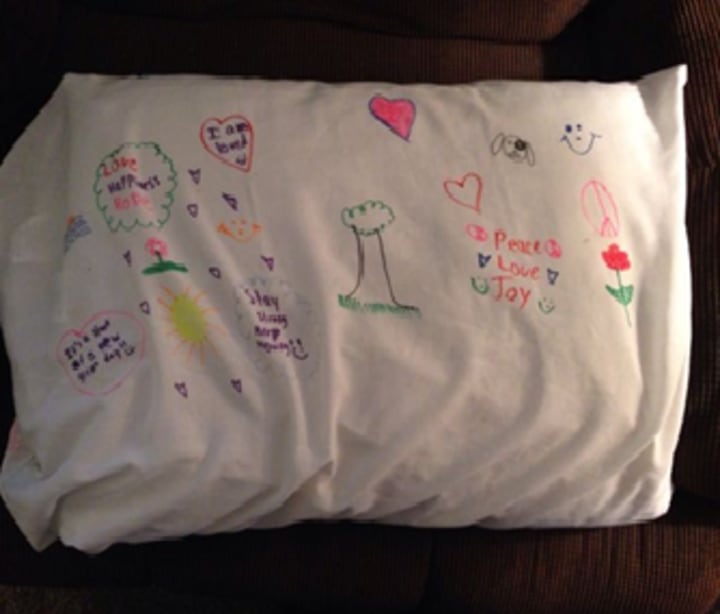
4) Decorate a Pillowcase
Pictured in Gallery!
Decorating pillow cases is especially fun as a sleepover activity, although it can be done at any time. Just make sure to use coloring supplies that are appropriate for fabric, and always follow any specific laundering directions that are given.
Suggested supplies: Pillowcases, fabric pens/markers/paint
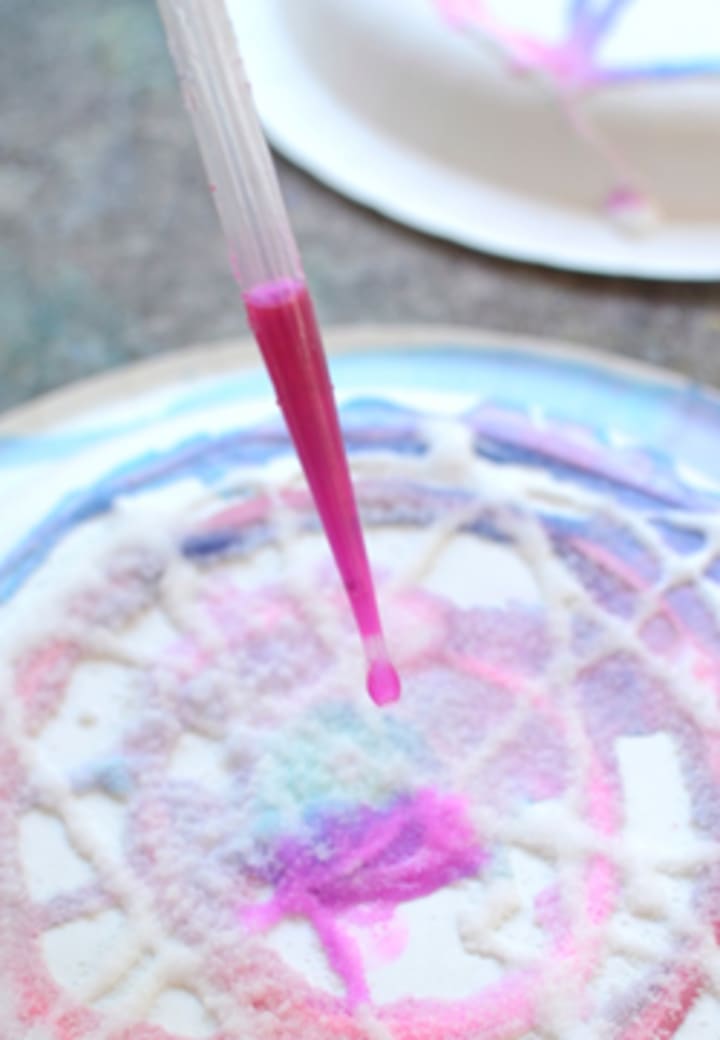
5) Salt Painting (mericherry.com)
Pictured in Gallery!
The photo below shows paper plates, but this art project works just fine on cardboard, too. The first step is to make a design with glue, making sure to have some crisscrossing lines. Next, pour salt over the glue, shaking off and reusing any salt that doesn’t stick. Finally, use the eyedroppers to drop the liquid watercolors on the salt/glue painting. Have fun mixing colors and watching how the different colors blend into each other.
Suggested supplies: Liquid watercolors (or water + food coloring), paintbrushes, eyedroppers (pipettes), paper plates or cardboard, salt, white glue
6) Construction Paper Mosaic
To prepare, tear up several differently-colored sheets of construction paper into little pieces about the size of a dime. Have the child begin by drawing a black outline of, for example, a striped fish swimming along the bottom of the ocean. (Make sure the child chooses something that can easily be turned into a multicolored mosaic.) Next, fill in the spaces with the small pieces of colored paper. The pieces should be close to the others but not touching. Once satisfied with the arrangement and the color selections, glue the pieces of paper to the drawing.
Suggested supplies: White paper, multiple different colors of construction paper, black marker or pen, glue
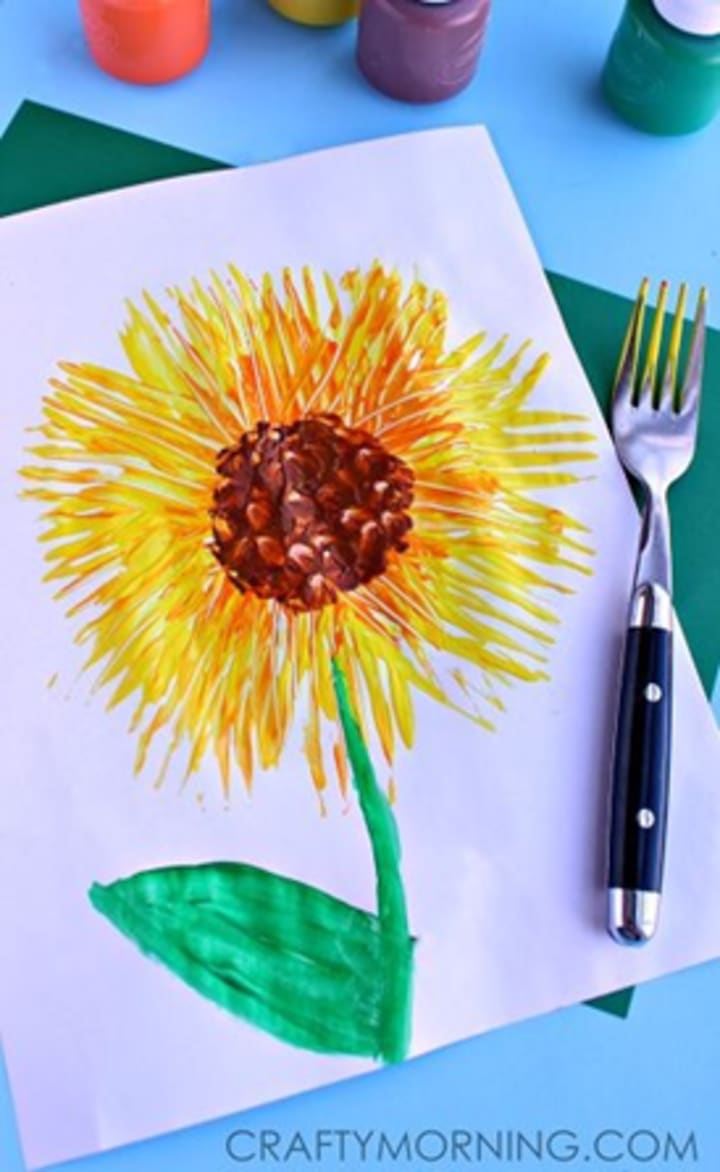
7) Fork Print Sunflower (CraftyMorning.com)
Pictured in Gallery!
As shown in the photo, a fork and some paint can be used to make a beautiful sunflower. It’s simple enough that even those who “aren’t artistic” will feel successful. Notice the mixing of the yellow and orange paints in the petals. Get creative and have fun experimenting with different color combinations or different types of flowers.
Suggested supplies: Paper, fork, paint, paintbrushes
8) Footprint Robin (sweetandsimplethings.blogspot.com)
Pictured in Gallery!
This simple springtime crafts is perfect for young ones. Older children who don’t mind getting a little messy will enjoy it, too. Make sure to have soap and water handy and to cover the floor with newspaper to avoid getting brown footprints all over the floor.
Suggested supplies: Paint, paintbrushes, paper, newspapers, supplies to wash up
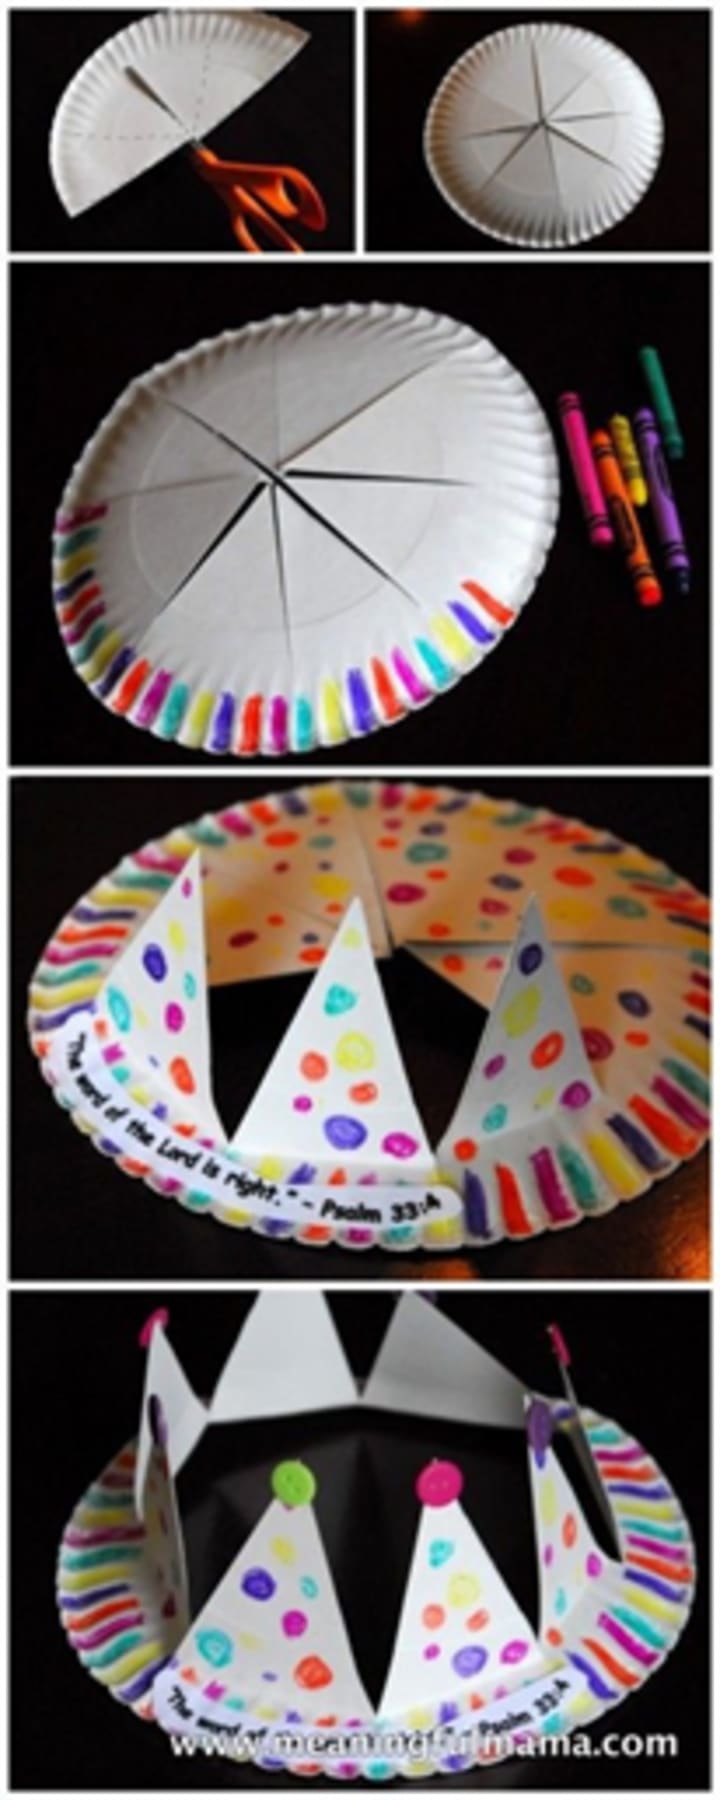
9) Paper Plate Crown (Meaningfulmama.com)
Pictured in Gallery!
This craft is a great way to keep kids entertained at events like birthday parties, neighborhood barbecues, or New Year’s Eve celebrations. Cut the paper plate as shown in the photo below, and let the kids go to town decorating. When finished, fold the middle triangular sections into their crown positions.
Suggested supplies: Paper plates, scissors, crayons or markers, any additional “fun” decorations that can be glued on
10) Bean and Cardboard Signs
Glue dry beans of various colors onto a cardboard rectangle to create a unique mosaic-style sign. It can be helpful to draw an outline on the cardboard in pencil before gluing the beans down. Also, make sure to allow plenty of time to dry, and don’t be shy with the glue. Beans are heavy, so more glue is better, as long as it will dry clear.
Suggested supplies: Cardboard, various types of dried beans (separated by color), glue, pencils
11) States Art Project
This project is as much educational as it is fun. Begin by printing off a blank map of the country with the states outlined in black. Challenge your child to hunt through magazines to find something to cut out and glue on top of each state. Some examples include a picture of the St. Louis Arch for Missouri, an orange for Florida, etc. Seeking help and ideas from a parent, a teacher, a book, or an Internet resource is encouraged! If 50 states seems like too much, split the project up into several days.
Suggested supplies: Map outline, magazines, scissors, glue
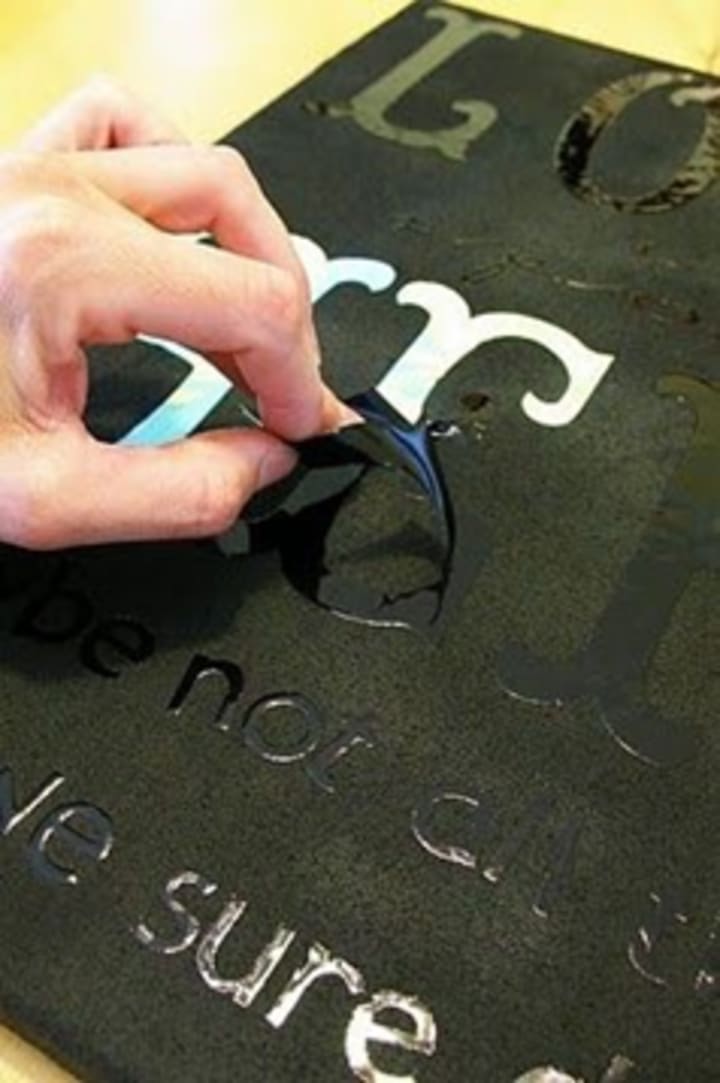
12) Mirror Quote (brassyapple.blogspot.com)
Pictured in Gallery!
Finally, here is a simple yet classy craft that even teenagers will think is cool. First, pick a quote and write it on the mirror using letter stickers. Next, paint over the entire thing with whatever colors are desired. Once the paint is dry, peel off the letter stickers to reveal the mirror quote. Show it off by hanging it up as a wall decoration.
Suggested supplies: Mirror, letter stickers, paint, paintbrushes


About the Creator
Alice Minguez
Keep reading
More stories from Alice Minguez and writers in Families and other communities.
The 8 Best Medical Shows on Netflix
Who doesn’t love a good medical show? Whether you’re in the mood for comedy or drama, these highly binge-worthy medical shows are sure to please. All are currently available on Netflix and all have been tested, approved, and ranked. Stick around — number one may surprise you!
By Alice Minguez7 years ago in Geeks
The Best Mini Fridge
In today's fast-paced world, convenience is key, especially when it comes to keeping our favorite beverages and snacks chilled and ready for enjoyment. Enter the mini fridge, a compact yet mighty appliance that has become a staple in various living spaces, from dorm rooms to offices and beyond. As we navigate through the demands of modern living, the mini fridge stands as a versatile companion, offering both functionality and style in a compact package.
By Travon Montgomery4 days ago in Families


Comments
There are no comments for this story
Be the first to respond and start the conversation.