
How to make wine the old-fashioned way
A Beginner’s Guide
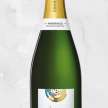

Making wine from grapes at home is a time-honored craft that connects people to the ancient art of winemaking. Although it requires patience and attention to detail, creating a bottle of wine from fresh grapes can be a highly rewarding experience. This guide will take you through each step of making wine from grapes, from selecting the right fruit to bottling your final product.
1. Choosing and Preparing Your Grapes
The quality of your old-fashioned wine starts with the grapes you select. Wine is typically made from varieties of Vitis vinifera grapes, which have the proper sugar and acidity levels to produce balanced flavors. Some common types include:
Red Grapes: Cabernet Sauvignon, Merlot, Pinot Noir, and Syrah.
White Grapes: Chardonnay, Sauvignon Blanc, Riesling, and Chenin Blanc.
If you don’t have access to specific wine grape varieties, you can use table grapes, although they may require extra sugar adjustments to achieve the right alcohol content.
Tips for Selecting Grapes
Choose Ripe Grapes: Fully ripe grapes are essential for developing rich flavors. For a beginner batch, about 16-18 pounds of grapes per gallon of wine is a good starting point.
Wash and Destem: Gently wash the grapes to remove any dirt or pesticides. Remove all stems, as they can add unwanted bitterness to your wine.
require advanced equipment, but having the right tools will make the process easier and ensure a high-quality final product.
Ingredients Needed
Grapes: About 16-18 pounds per gallon of wine.
Sugar: Additional sugar may be required if your grapes are low in natural sugars, especially with table grapes.
Wine Yeast: Wine yeast is more tolerant of alcohol than bread yeast and will produce better flavors. Popular strains include Montrachet, Premier Blanc, and Champagne yeast.
Campden Tablets (Optional): Campden tablets kill wild yeasts and bacteria and help ensure that only your added yeast ferments the wine.
Essential Equipment
Fermentation Bucket: A food-grade plastic bucket with a lid works well.
Primary Fermentation Container: A glass carboy or demijohn with an airlock is ideal for secondary fermentation.
Airlock: Allows gases to escape while preventing contaminants from entering.
Siphoning Tube: Transfers the wine between containers without disturbing sediment.
Bottles and Corks: Clean, sanitized wine bottles and corks for bottling the wine.
3. Preparing the Must
The mixture of grape juice, skins, seeds, and sometimes stems (for red wine) is called the “must,” which serves as the base for fermentation.
Crushing and Pressing the Grapes
Crush the Grapes: For red wines, crush the grapes along with their skins to release juice and flavors. This step can be done with a potato masher or by hand. For white wines, you’ll want to remove the skins before fermentation.
Optional - Add Campden Tablets: Add one crushed Campden tablet per gallon of must to kill wild yeast and bacteria. Wait 24 hours before adding yeast to ensure the Campden tablet’s sulfur dioxide has dissipated.
Measuring Sugar Levels
If you have a hydrometer, measure the sugar content (Brix level) in the must. Grapes should naturally have enough sugar to ferment into an alcohol level of about 10-13%. If not, add sugar slowly, testing with the hydrometer to reach your desired Brix level.
4. Primary Fermentation
After preparing the must, it’s time to start the fermentation process.
Add Wine Yeast: Sprinkle your wine yeast onto the must. The yeast will consume the sugar and convert it to alcohol. You should see bubbling within a day or two.
Cover the Container: Cover the fermentation container loosely to let air escape while keeping out contaminants. Stir the must daily with a clean spoon to keep the yeast and fruit skins evenly distributed.
Monitor for Bubbles: Fermentation will create carbon dioxide bubbles, which you’ll see as foam or bubbling on the surface. This stage usually takes 5-7 days.
5. Pressing and Secondary Fermentation
Once primary fermentation is complete, it’s time to separate the liquid from the solids and transfer it to a secondary container.
Press the Must: Strain out the grape skins and seeds, using a cheesecloth or press. This step is especially important for red wines, as skins give the wine its color and tannins.
Transfer to a Carboy: Pour the strained liquid (young wine) into a glass carboy or demijohn, filling it up to the neck to limit oxygen exposure.
Attach an Airlock: Insert an airlock to allow gases to escape while preventing air from entering.
Ferment for 3-4 Weeks: Move the carboy to a cool, dark place and let it sit undisturbed for about a month. The wine will begin to clear as the remaining yeast settles to the bottom.
6. Racking and Aging
To clarify the wine further and remove sediment, you’ll rack the wine—this is the process of siphoning it from one container to another.
Rack the Wine: Use a siphoning tube to transfer the wine to another clean container, leaving behind any sediment at the bottom. This process helps clarify the wine and prevent off-flavors.
Repeat if Necessary: You may need to rack the wine multiple times over several months until it’s clear and free of sediment.
Age the Wine: For optimal taste, let your wine age for 3-12 months. Red wines benefit from longer aging times, while whites can be enjoyed sooner.
7. Bottling Your Wine
Once you’re satisfied with the clarity and taste, it’s time to bottle the wine.
Sanitize Bottles and Corks: Clean and sanitize all bottles, corks, and bottling equipment to prevent contamination.
Bottle the Wine: Use a siphoning tube to transfer the wine into bottles, filling each one up to about an inch from the top.
Cork the Bottles: Seal each bottle with a cork. Lay red wine bottles on their sides to keep the corks moist.
8. Storing and Enjoying Your Homemade Wine
For the best results, let the wine continue aging in the bottle for another few months to a year. Store bottles in a cool, dark place. Homemade wine can improve with age, developing richer flavors and a smoother finish.
Label the Bottles: Add labels with the date and type of wine for easy tracking.
Serve with Food: Homemade wine pairs beautifully with meals, so experiment with pairings that complement your wine’s flavor profile.
Final Tips and Common Questions
Tips for Success
Sanitize Everything: Good sanitation is key to preventing contamination, so make sure all equipment is clean.
Be Patient: The best wines take time to mature. Avoid the temptation to taste too early.
Keep Records: Document each step, including the amounts of sugar, yeast, and any additional ingredients. This way, you can replicate or tweak your process for future batches.
Common Questions
1. Can I use bread yeast? While possible, bread yeast may not yield the best results. Wine yeast is specially formulated for better alcohol tolerance and flavor.
2. How long does homemade wine last? If stored properly in a cool, dark place, homemade wine can last several years. Red wines typically age better than whites.
3. Why is my wine cloudy? Cloudiness can occur from residual yeast or proteins. Allow the wine to settle and rack it a few more times if needed.
Conclusion
Making wine from grapes at home is a rewarding journey that combines science and creativity. By following these steps, you can create a delicious homemade wine that reflects your tastes and preferences. Whether you’re enjoying it with a meal, gifting a bottle to friends, or simply savoring the fruits of your labor, homemade wine is a satisfying experience worth the effort. Cheers to your homemade wine adventure!
About the Creator
sam harris
We specialize in bringing classic wines from classic regions to wine lovers in Ontario. We work with small wineries in Europe and are constantly on the lookout for the next new discovery.
Enjoyed the story? Support the Creator.
Subscribe for free to receive all their stories in your feed.
Comments
There are no comments for this story
Be the first to respond and start the conversation.