
Basic Residential Plumbing Repair
There's no need to be afraid of a clogged sink.


When the typical homeowner thinks about their kitchen sink, or their bathroom sinks, the first thought is usually about the items stored underneath it. The typical finds are cleaners, spare sponges, a lonely bucket, so on and so forth. Nothing else is thought of until something goes wrong… the dreaded clogged sink. The average cost of unclogging a sink, in the United States, according to thumbtack.com, is between $130 and $180! What if I told you that YOU, yes you, could repair that clog for nothing more than a few tools and a little bit of time? That’s right, YOU can fix it! Whether it’s a single sink with the basic drain, or a double sink with a garbage disposal, even a bathroom sink with a stopper attachment, you can fix it. And I’m here to tell you how.
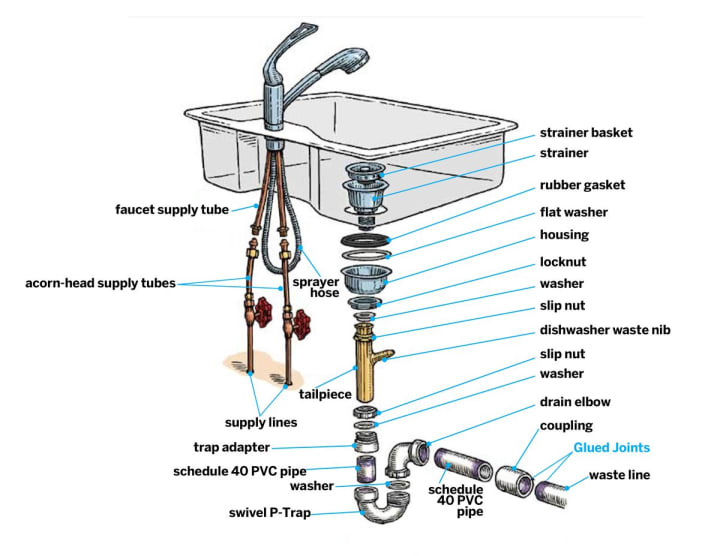
The photo above is common plumbing for a single basin kitchen sink. It looks complicated, but it’s really not. In fact, this drawing is more complicated than it needs to be. Just remember that everything needs to be watertight. Once a sink is installed into the countertop, the strainer has to be installed. Since it’s metal-to-metal, plumbers, and the general public, can use what’s called plumber’s putty. I like to call it adult Play-Doh. Regardless, all it does is provide a clay-like seal between the strainer and the sink. If you ever install a new drain, make sure you have that on hand. Once installed, then the rubber gasket and paper flat washer are placed flush to the underside of the sink and held in place by either a large locknut, which requires a large pair of channel lock pliers to tighten, or, as pictured above, by a secondary housing with a smaller locknut. If you’re going to take it apart and work on it, just pay attention to how it comes apart and put it together the exact same way. Trust me, it’s not rocket science. Once that is installed, then drain washer is placed inside the tailpiece and the tailpiece is snugged in place using a slip nut that only needs to be slightly more than hand tight. Here you can use either your channel lock pliers or a pipe wrench. If the drain pieces are made of PVC, just be careful not to damage the pieces with the metal teeth of the tools.
Below that is where most of the problems are found. If you notice that you have leakage from the tailpiece to the P-Trap or S-Trap (so named due to their shape), then chances are that the tailpiece wasn’t inserted far enough into the trap. The tailpiece needs to be inserted as far as it will go into the trap prior to tightening the slip nut. Remember that the slip nut and the washer must be placed on the tailpiece, in that order, before installing the trap! The piping is installed as necessary to lineup the trap with the waste line going into the wall. However, if all you’re doing is the repair, then that is something you shouldn’t have to worry about unless a redesign of the drainage system is required.
You’ll also notice on the tailpiece, if you have a dishwasher installed, the nib where the dishwasher drain pump discharge connects will be evident. It is a simple connection that is just as easy to remove if the dishwasher drain line needs to be cleaned out. Now that you know what your drain line consists of, taking it apart to clean out the trap and unclog your sink should be an easy process. Furthermore, based on the above drawing, it should be fairly intuitive on the process to replace your faucet, as that is nothing more than compression fittings from the water supply lines and retaining ring fittings holding the faucet assembly tight to the sink.
When you prepare to unclog your drain, make sure that you have a bucket to catch water from the drain. Remember that your trap is always full of water because of the physics of the operation. It works on the siphon effect, much like every drain in your house, including the toilet. As the water fills up the drain, the level in the trap will begin to rise. Once that level is above the level of the waste line, the water will begin to flow, this causes a low pressure to form in the waste line and the water will be “sucked” out of the drain line.
A double basin kitchen sink is not so different from what we just discussed, with the exception of having a second drain and a means to connect them to a single waste line. Most commonly used is the T-connector midway between the two drains. But what if I have a garbage disposal installed? Not to worry, even a garbage disposal doesn’t complicate matters much. First, if you notice a sink clog with a garbage disposal installed, you check to see if the disposal itself is clogged. The key to remember with garbage disposals is that they have a power source, and before ANY work is done on it, that source of power MUST BE REMOVED. Most systems have the countertop switch connected to an outlet under the sink, so removing power is as easy as unplugging the disposal unit. If the unit is hardwired, then you can tape the switch in the off position or open the breaker that supplies the electrical power.
the two most common mistakes when it comes to garbage disposals is their capabilites and their operating requirements. No disposal unit will work properly without flush water, so always ensure that your water is running when operating the disposal Second, disposals are meant to grind up small pieces of leftover food, they are not meant to dispose of any and all food waste, such as corn cobs and steak gristle. Such large pieces of food waste can easily bind up the grinders inside. But, over time, even with proper use, the blades can and will bind up on you. Not to worry! If you have a set of Allen Keys, or Allen Wrenches, then all you have to do is find the correct size for the manual operator at the bottom of the disposal unti and spin the blades both ways, with the water running to try and clear the bind.
If the disposal is not the problem, then take apart the trap and clean it out. One of the most common reasons for trap clogging of a kichen sink is congealed fat. If you pour fat down your drain, it’s best to emulsify it in a stream of hot water when you pour it down the drain. this will keep the fat in liquid form as it goes into the waste line and down to the sewer line. Additionally, let the hot water run for about 15 seconds afterwards to ensure no buildup of congealed particles.
The photo below is a nice, clean setup of a double basin sink with installed garbage disposal.

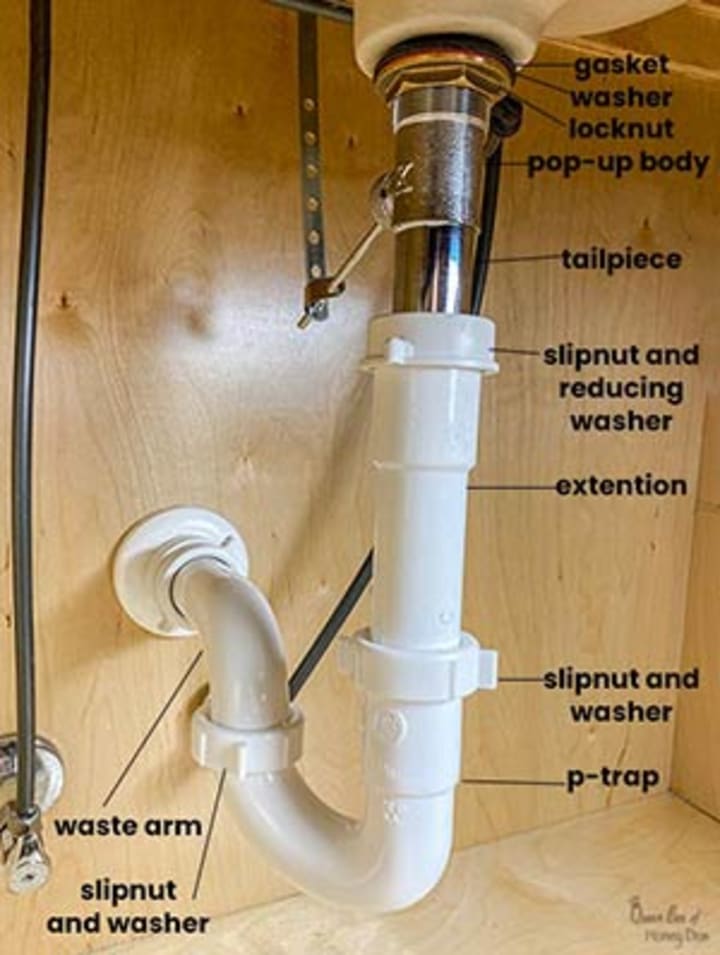
What about the bathroom sink, you ask? Have no fear! Bathroom sinks and their drain systems are, again, not all that dissimilar from what we’ve already talked about. Just as above, a bathroom sink drain is installed using the plumber’s putty, the gaskets and locknut, and the tailpiece. Bathroom sinks, however, have the installed drain plugs, which, in the photo below, you can see as the operator arm and pull connector on the backside of the tailpiece. Taking apart the drain plug is also an intuitive process, the key thing to remember is that the operator arm must be in the full down position for the drain plug itself to be in the up position. If you remove the operator arm from the tailpiece, be sure to give yourself a moment of pause to properly insert the operating arm into the drain plug; it can be frustrating for those that have never done it before.
With this knowledge in hand, your only worry for a clogged sink should be if none of what we discussed works. Your first indication that cleaning the drain won’t work will be a significant amount of water draining out of the waste line when the trap is removed. That’s an indication that the clog is in the waste line itself. If you don’t have a drain snake, or don’t know how to use one, then maybe a call to a professional plumber may be in order. If any work has to be done beyond the use of a snake, and you are unfamiliar with residential plumbing design and installing PVC piping, then again, call a professional.
In conclusion, so many people waste a ton of money on plumbing repairs that can easily be done with a few tools and a little knowledge. There is no need to be afraid of doing your own home repairs, and Google and YouTube are EXCELLENT resources for the wannabe DIYer. I hope this information helps you and has eased your mind when it comes to basic residential plumbing and the problems that can sneak up on us. Happy Repairs!
About the Creator
Anthony Stauffer
Husband, Father, Technician, US Navy Veteran, Aspiring Writer
After 3 Decades of Writing, It's All Starting to Come Together
Use this link, Profile Table of Contents, to access my stories.
Use this link, Prime: The Novel, to access my novel.
Keep reading
More stories from Anthony Stauffer and writers in Education and other communities.
Life Writes Us, So We Write Life
I remember it like it was yesterday, an early morning in mid-September of 1988, the beginning of my 7th grade year. The Sun was bright coming over the trees, and the air was warm and inviting. I walked to the end of my driveway, a convenient pickup spot for the bus to school, and my neighbor, Jen, was sitting next to our mailbox nose-deep in a book. Reading was one of things I liked doing the least when I was that age, and I snickered to myself when I saw her. But something tickled my brain, and a couple of minutes of standing there in silence, I decided to ask her what she was reading. Without looking up from the novel, she told me that it was “The Two Towers”, the second book of “The Lord of the Rings” by J R R Tolkien. My curiosity piqued further, I asked her to describe the scene that she was currently engrossed in.
By Anthony Stauffer3 years ago in Humans
Social Media Marketing & Copywriting: A Dynamic Duo for Online Success
In the bustling digital marketplace, having a fantastic product or service isn't enough. You need to capture attention, spark conversations, and build relationships – all while navigating the ever-evolving landscape of social media. This is where the powerful partnership of social media marketing and copywriting comes in.
By James Moody7 days ago in Education
What are the different parts of a test automation framework?
A test automation framework consists of tools, features, compilers, programs, rules and guidelines that are tactically used to execute automated test scripts seamlessly and methodically. A framework provides a well-defined structure so that the test automation activities can be carried out in a more productive and rewarding manner. In this article, you will get to know the different parts of a test automation framework.
By Jessica Wood5 days ago in Education


Comments (1)
I see you have mentioned unclogging in your house and I can share with you my own experience in this issue. It is very important and you should save it. This company of basement waterproofing toronto on this article https://www.draincom.ca/basement-waterproofing-toronto/ has recently distinguished itself as a very high-quality service, many people improve the quality of life every month with the help of these men who unclog all the tubes.