

Since I was a little girl, I've always had nice, thick, mid length hair. My grandmother would always style my hair in cute barrettes, beads, braids, and everything else my younger self wanted.
As I got older, I started to want to straighten my hair. African American hair is naturally coily, kinky, frizzy, etc., so it wasn't enough just to straighten it. I began putting chemicals in my hair with perms on top of an insane amount of heat with blow drying and flat-ironing.
I loved getting a perm at the time because I loved how my hair looked when it was straight, and to me, it made me look a lot better. Since my hair was a decent length, I had gotten a lot of peer attention, which any kid would want, right?
By middle school, I was perming my hair at least once every 6-8 weeks, and getting wash-n-sets (washing and curling under dryer), once every 2 weeks. I'd go to a Dominican-owned hair salon because I really liked the stylists, it was close by my grandmothers house, and my wash-n-sets only costed me (my mom) $20.
I remember taking my 8th grade graduation photo and feeling really good about myself because from the looks of it, my hair was on point, it looked well nourished, and healthy.
In reality, my scalp was damaged from all the chemicals and heat I had put it through. My hair had stopped growing!
I remember the day that I realized my hair was not healthy. I was sitting in class and a friend of mine was sitting behind me. She tapped me on the shoulder and said "Asija, what happened to your hair?" I had looked her with such confusion because I had no idea what was actually going on-- I really did not pay attention to my hair besides going to get it done.
She then went on and said "you have a patch in the middle of your head, its really short". I reached my hand in the middle of my head, and realized I BASICALLY HAD A BALD SPOT!
I had never felt so embarrassed in my life. I went home and cried. I was more upset that my hair stylist had witnessed my hair falling out and did not warn me or say anything about it. She took advantage of a naive child. I promised myself from then on that I'd never perm my hair again, nor would I go to a hair salon ever again.
Unfortunately, I did perm my hair ONE more time, for my senior prom in HS. But after that, my natural hair journey began. A few weeks into college, I decided to cut my hair (well cut off the permed ends), and start from scratch. My hair was extremely short and I had no idea how to take care of it.
I did not know my hair, I didn't know what it needed, how often it needed it, or anything of the sort. But, eventually, I started to understand how my hair worked and what made it thrive:
- Water
- Conditioner
- Oils
It will be 7 years since I made the decision to go natural, and while I've definitely had my share of trial and error when it comes to what products to use, I am so happy that I've finally found products that work for me as well as I've made some of my own products that I love!
You guys asked for the products and my routine, so HERE IT IS!
Note: Some links below are affiliate links, which means I'll get a small commission if you purchase.
Purchased Products
Washing: Sunday's have been my wash day for a few months now. I was washing my hair once every two weeks, but recently, I have transitioned to once a week as an experiment, we'll see what happens! Make the decision that is best for your hair, however, I really don't recommend waiting more than two weeks at a time to wash your hair (even with certain protective styles).
My hair is really thick, so I have to section it off into 4 parts and wash/condition the 4 parts separately. I have been loving the shampoo and conditioner sets from "Shea Moisture". I have been using the Coconut & Hibiscus, Curl & Shine Shampoo & Conditioner since it's specifically designed to moisturize thick & curly hair. I shampoo each of the 4 sections twice, making sure to detangle any knots both by finger-combing and using my detangler brush.
Shea Moisture Curl & Shine Shampoo
Shea Moisture Curl & Shine Conditioner
Shampoo/Conditioner/Curl Enhancer Set
Detangler Brush (similar to mine)
Styling & Moisturizing: Once my hair is washed, it's time time to moisturize! I was so excited last year, because one of my favorite hair vloggers launched her hair care company, Melanin Hair Care. When I tell y'all her products are the ish, I MEAN THAT! I've tried soooo many leave-in conditioners and twist creams and NONE of them compare to these products. (FYI I do not personally know her, nor is this blog post sponsored, lol. This is my serious feeling!)
I start off with parting my hair in half, down the middle of my head. On each side, there will be 5 twists (3 single twists in the front, 2 flat twists in the back). The first product I use is the multi-use leave-in conditioner. You can also use this as a regular in-shower conditioner, but I choose not to only because I'm trying to hold onto it as long as I can, lol. I take a decent amount of that for each section, making sure to pay attention to the ends. I do this to avoid frizz and split ends as much as possible.
I then take a small amount of the twist-elongating style cream (a little goes a long way), and massage than in each section. I love this product specifically because it REALLY helps define your natural curls. So, if I wanted to do a wash-and-go, this product would help my curls stand out, while defining the length.
Finally, I take a little bit of the oil blend and massage that on the section, to seal in the moisture from the water (from washing), leave-in conditioner, and styling cream. Depending on the section of my head I'm on, I either proceed to do a single twist, or a flat twist. After that, I let that sit a day or two until I'm ready to wear my twist out.
Multi-Use Leave-In Conditioner
DIY Product
The last thing that I do is moisturize my scalp with my hair oil pomade that I made myself. It is a Shea Butter based oil blend. Here are the ingredients I used:
First, I melted down the shea butter. To achieve this, place water in a pot to boil, then lay a strainer pot on top of it, and place your shea butter in a glass bowl, in the strainer pot and let the heat from the boiling water melt the shea butter over time.
Then, once your shea butter is melted, add in the other oils. I use a plentiful amount of jojoba oil, but the others on a drop-like basis.
Once all of your oils are added, place in a small container with a top, and place in the fridge. Leave in the fridge until the mixture hardens. However, you don't want this to be too hard in texture, so keep an eye on it.
Mixture is done!
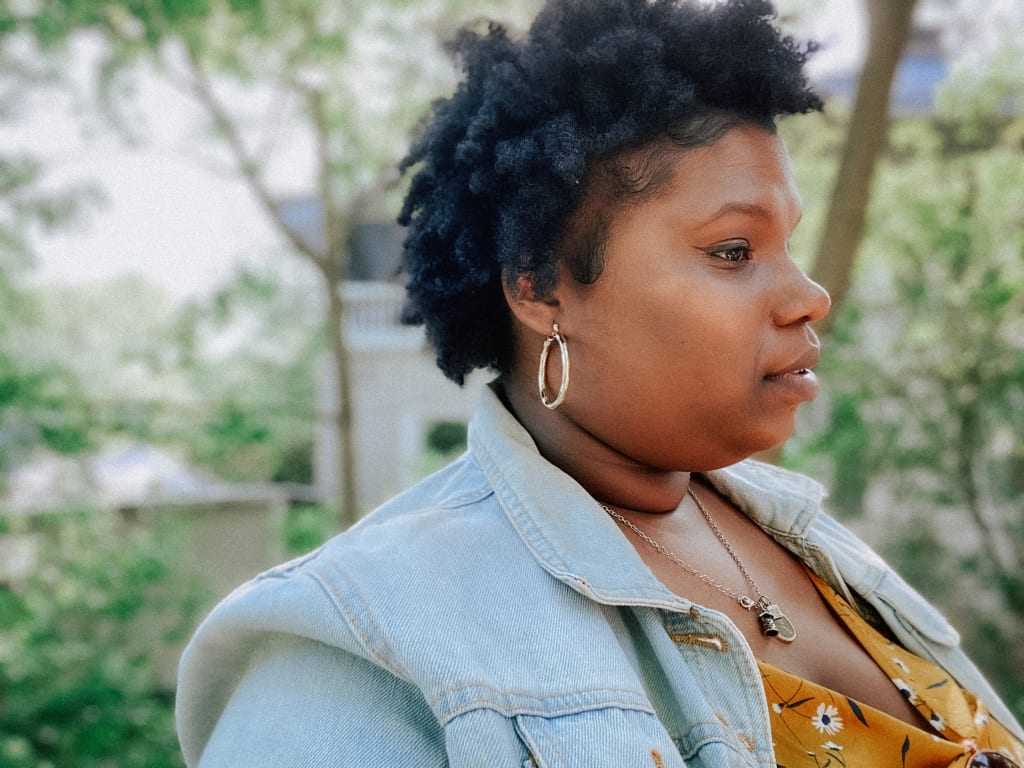
You're now good to go with your pomade. I strictly use this for moisturizing my scalp and edges. After a few days, my twists have set, and so has the moisture, and I'm ready to let my beautiful mane (I call it a mane, lol) shine. Look how full and healthy these products have made my hair!
I've definitely had my own struggles with my natural hair and it has taken me a very long time to find what products work and what routine works for me. My next DIY project will be to make my own shampoo, so I'll keep you guys updated with that progress!
I hope this was helpful, and I hope you consider some of these products if you haven't yet!
XOXO
Asijá
About the Creator
Asija B.
Hi, I'm Asijá, and I create stories that provide everyday budgeting tips and tricks for those who love to shop (like me) but don't want to burn holes in their pockets!
Amil Baba In Pakistan, Amil Baba In Karachi, Amil Baba In Lahore, Amil Baba
Amil Baba In Pakistan, Amil Baba In Karachi, Amil Baba In Lahore, Amil BabaAmil Baba In Pakistan, Amil Baba In Karachi, Amil Baba In Lahore, Amil BabaAmil Baba In Pakistan, Amil Baba In Karachi, Amil Baba In Lahore, Amil BabaAmil Baba In Pakistan, Amil Baba In Karachi, Amil Baba In Lahore, Amil BabaAmil Baba In Pakistan, Amil Baba In Karachi, Amil Baba In Lahore, Amil BabaAmil Baba In Pakistan, Amil Baba In Karachi, Amil Baba In Lahore, Amil BabaAmil Baba In Pakistan, Amil Baba In Karachi, Amil Baba In Lahore, Amil BabaAmil Baba In Pakistan, Amil Baba In Karachi, Amil Baba In Lahore, Amil BabaAmil Baba In Pakistan, Amil Baba In Karachi, Amil Baba In Lahore, Amil BabaAmil Baba In Pakistan, Amil Baba In Karachi, Amil Baba In Lahore, Amil BabaAmil Baba In Pakistan, Amil Baba In Karachi, Amil Baba In Lahore, Amil BabaAmil Baba In Pakistan, Amil Baba In Karachi, Amil Baba In Lahore, Amil BabaAmil Baba In Pakistan, Amil Baba In Karachi, Amil Baba In Lahore, Amil BabaAmil Baba In Pakistan, Amil Baba In Karachi, Amil Baba In Lahore, Amil BabaAmil Baba In Pakistan, Amil Baba In Karachi, Amil Baba In Lahore, Amil BabaAmil Baba In Pakistan, Amil Baba In Karachi, Amil Baba In Lahore, Amil BabaAmil Baba In Pakistan, Amil Baba In Karachi, Amil Baba In Lahore, Amil BabaAmil Baba In Pakistan, Amil Baba In Karachi, Amil Baba In Lahore, Amil BabaAmil Baba In Pakistan, Amil Baba In Karachi, Amil Baba In Lahore, Amil BabaAmil Baba In Pakistan, Amil Baba In Karachi, Amil Baba In Lahore, Amil BabaAmil Baba In Pakistan, Amil Baba In Karachi, Amil Baba In Lahore, Amil BabaAmil Baba In Pakistan, Amil Baba In Karachi, Amil Baba In Lahore, Amil BabaAmil Baba In Pakistan, Amil Baba In Karachi, Amil Baba In Lahore, Amil BabaAmil Baba In Pakistan, Amil Baba In Karachi, Amil Baba In Lahore, Amil BabaAmil Baba In Pakistan, Amil Baba In Karachi, Amil Baba In Lahore, Amil BabaAmil Baba In Pakistan, Amil Baba In Karachi, Amil Baba In Lahore, Amil BabaAmil Baba In Pakistan, Amil Baba In Karachi, Amil Baba In Lahore, Amil BabaAmil Baba In Pakistan, Amil Baba In Karachi, Amil Baba In Lahore, Amil BabaAmil Baba In Pakistan, Amil Baba In Karachi, Amil Baba In Lahore, Amil BabaAmil Baba In Pakistan, Amil Baba In Karachi, Amil Baba In Lahore, Amil BabaAmil Baba In Pakistan, Amil Baba In Karachi, Amil Baba In Lahore, Amil BabaAmil Baba In Pakistan, Amil Baba In Karachi, Amil Baba In Lahore, Amil BabaAmil Baba In Pakistan, Amil Baba In Karachi, Amil Baba In Lahore, Amil BabaAmil Baba In Pakistan, Amil Baba In Karachi, Amil Baba In Lahore, Amil BabaAmil Baba In Pakistan, Amil Baba In Karachi, Amil Baba In Lahore, Amil BabaAmil Baba In Pakistan, Amil Baba In Karachi, Amil Baba In Lahore, Amil BabaAmil Baba In Pakistan, Amil Baba In Karachi, Amil Baba In Lahore, Amil BabaAmil Baba In Pakistan, Amil Baba In Karachi, Amil Baba In Lahore, Amil BabaAmil Baba In Pakistan, Amil Baba In Karachi, Amil Baba In Lahore, Amil BabaAmil Baba In Pakistan, Amil Baba In Karachi, Amil Baba In Lahore, Amil BabaAmil Baba In Pakistan, Amil Baba In Karachi, Amil Baba In Lahore, Amil BabaAmil Baba In Pakistan, Amil Baba In Karachi, Amil Baba In Lahore, Amil BabaAmil Baba In Pakistan, Amil Baba In Karachi, Amil Baba In Lahore, Amil BabaAmil Baba In Pakistan, Amil Baba In Karachi, Amil Baba In Lahore, Amil BabaAmil Baba In Pakistan, Amil Baba In Karachi, Amil Baba In Lahore, Amil BabaAmil Baba In Pakistan, Amil Baba In Karachi, Amil Baba In Lahore, Amil BabaAmil Baba In Pakistan, Amil Baba In Karachi, Amil Baba In Lahore, Amil BabaAmil Baba In Pakistan, Amil Baba In Karachi, Amil Baba In Lahore, Amil BabaAmil Baba In Pakistan, Amil Baba In Karachi, Amil Baba In Lahore, Amil BabaAmil Baba In Pakistan, Amil Baba In Karachi, Amil Baba In Lahore, Amil BabaAmil Baba In Pakistan, Amil Baba In Karachi, Amil Baba In Lahore, Amil BabaAmil Baba In Pakistan, Amil Baba In Karachi, Amil Baba In Lahore, Amil BabaAmil Baba In Pakistan, Amil Baba In Karachi, Amil Baba In Lahore, Amil BabaAmil Baba In Pakistan, Amil Baba In Karachi, Amil Baba In Lahore, Amil BabaAmil Baba In Pakistan, Amil Baba In Karachi, Amil Baba In Lahore, Amil BabaAmil Baba In Pakistan, Amil Baba In Karachi, Amil Baba In Lahore, Amil BabaAmil Baba In Pakistan, Amil Baba In Karachi, Amil Baba In Lahore, Amil BabaAmil Baba In Pakistan, Amil Baba In Karachi, Amil Baba In Lahore, Amil BabaAmil Baba In Pakistan, Amil Baba In Karachi, Amil Baba In Lahore, Amil BabaAmil Baba In Pakistan, Amil Baba In Karachi, Amil Baba In Lahore, Amil BabaAmil Baba In Pakistan, Amil Baba In Karachi, Amil Baba In Lahore, Amil BabaAmil Baba In Pakistan, Amil Baba In Karachi, Amil Baba In Lahore, Amil BabaAmil Baba In Pakistan, Amil Baba In Karachi, Amil Baba In Lahore, Amil BabaAmil Baba In Pakistan, Amil Baba In Karachi, Amil Baba In Lahore, Amil BabaAmil Baba In Pakistan, Amil Baba In Karachi, Amil Baba In Lahore, Amil BabaAmil Baba In Pakistan, Amil Baba In Karachi, Amil Baba In Lahore, Amil BabaAmil Baba In Pakistan, Amil Baba In Karachi, Amil Baba In Lahore, Amil BabaAmil Baba In Pakistan, Amil Baba In Karachi, Amil Baba In Lahore, Amil BabaAmil Baba In Pakistan, Amil Baba In Karachi, Amil Baba In Lahore, Amil BabaAmil Baba In Pakistan, Amil Baba In Karachi, Amil Baba In Lahore, Amil Baba
By maryam maryamabout 6 hours ago in Blush
Amil Baba In Pakistan, Amil Baba In Karachi, Amil Baba In Lahore, Amil Baba
Amil Baba In Pakistan, Amil Baba In Karachi, Amil Baba In Lahore, Amil BabaAmil Baba In Pakistan, Amil Baba In Karachi, Amil Baba In Lahore, Amil BabaAmil Baba In Pakistan, Amil Baba In Karachi, Amil Baba In Lahore, Amil BabaAmil Baba In Pakistan, Amil Baba In Karachi, Amil Baba In Lahore, Amil BabaAmil Baba In Pakistan, Amil Baba In Karachi, Amil Baba In Lahore, Amil BabaAmil Baba In Pakistan, Amil Baba In Karachi, Amil Baba In Lahore, Amil BabaAmil Baba In Pakistan, Amil Baba In Karachi, Amil Baba In Lahore, Amil BabaAmil Baba In Pakistan, Amil Baba In Karachi, Amil Baba In Lahore, Amil BabaAmil Baba In Pakistan, Amil Baba In Karachi, Amil Baba In Lahore, Amil BabaAmil Baba In Pakistan, Amil Baba In Karachi, Amil Baba In Lahore, Amil BabaAmil Baba In Pakistan, Amil Baba In Karachi, Amil Baba In Lahore, Amil BabaAmil Baba In Pakistan, Amil Baba In Karachi, Amil Baba In Lahore, Amil BabaAmil Baba In Pakistan, Amil Baba In Karachi, Amil Baba In Lahore, Amil BabaAmil Baba In Pakistan, Amil Baba In Karachi, Amil Baba In Lahore, Amil BabaAmil Baba In Pakistan, Amil Baba In Karachi, Amil Baba In Lahore, Amil BabaAmil Baba In Pakistan, Amil Baba In Karachi, Amil Baba In Lahore, Amil BabaAmil Baba In Pakistan, Amil Baba In Karachi, Amil Baba In Lahore, Amil BabaAmil Baba In Pakistan, Amil Baba In Karachi, Amil Baba In Lahore, Amil BabaAmil Baba In Pakistan, Amil Baba In Karachi, Amil Baba In Lahore, Amil BabaAmil Baba In Pakistan, Amil Baba In Karachi, Amil Baba In Lahore, Amil BabaAmil Baba In Pakistan, Amil Baba In Karachi, Amil Baba In Lahore, Amil BabaAmil Baba In Pakistan, Amil Baba In Karachi, Amil Baba In Lahore, Amil BabaAmil Baba In Pakistan, Amil Baba In Karachi, Amil Baba In Lahore, Amil BabaAmil Baba In Pakistan, Amil Baba In Karachi, Amil Baba In Lahore, Amil BabaAmil Baba In Pakistan, Amil Baba In Karachi, Amil Baba In Lahore, Amil BabaAmil Baba In Pakistan, Amil Baba In Karachi, Amil Baba In Lahore, Amil BabaAmil Baba In Pakistan, Amil Baba In Karachi, Amil Baba In Lahore, Amil BabaAmil Baba In Pakistan, Amil Baba In Karachi, Amil Baba In Lahore, Amil BabaAmil Baba In Pakistan, Amil Baba In Karachi, Amil Baba In Lahore, Amil BabaAmil Baba In Pakistan, Amil Baba In Karachi, Amil Baba In Lahore, Amil BabaAmil Baba In Pakistan, Amil Baba In Karachi, Amil Baba In Lahore, Amil BabaAmil Baba In Pakistan, Amil Baba In Karachi, Amil Baba In Lahore, Amil BabaAmil Baba In Pakistan, Amil Baba In Karachi, Amil Baba In Lahore, Amil BabaAmil Baba In Pakistan, Amil Baba In Karachi, Amil Baba In Lahore, Amil BabaAmil Baba In Pakistan, Amil Baba In Karachi, Amil Baba In Lahore, Amil BabaAmil Baba In Pakistan, Amil Baba In Karachi, Amil Baba In Lahore, Amil BabaAmil Baba In Pakistan, Amil Baba In Karachi, Amil Baba In Lahore, Amil BabaAmil Baba In Pakistan, Amil Baba In Karachi, Amil Baba In Lahore, Amil BabaAmil Baba In Pakistan, Amil Baba In Karachi, Amil Baba In Lahore, Amil BabaAmil Baba In Pakistan, Amil Baba In Karachi, Amil Baba In Lahore, Amil BabaAmil Baba In Pakistan, Amil Baba In Karachi, Amil Baba In Lahore, Amil BabaAmil Baba In Pakistan, Amil Baba In Karachi, Amil Baba In Lahore, Amil BabaAmil Baba In Pakistan, Amil Baba In Karachi, Amil Baba In Lahore, Amil BabaAmil Baba In Pakistan, Amil Baba In Karachi, Amil Baba In Lahore, Amil BabaAmil Baba In Pakistan, Amil Baba In Karachi, Amil Baba In Lahore, Amil BabaAmil Baba In Pakistan, Amil Baba In Karachi, Amil Baba In Lahore, Amil BabaAmil Baba In Pakistan, Amil Baba In Karachi, Amil Baba In Lahore, Amil BabaAmil Baba In Pakistan, Amil Baba In Karachi, Amil Baba In Lahore, Amil BabaAmil Baba In Pakistan, Amil Baba In Karachi, Amil Baba In Lahore, Amil BabaAmil Baba In Pakistan, Amil Baba In Karachi, Amil Baba In Lahore, Amil BabaAmil Baba In Pakistan, Amil Baba In Karachi, Amil Baba In Lahore, Amil BabaAmil Baba In Pakistan, Amil Baba In Karachi, Amil Baba In Lahore, Amil BabaAmil Baba In Pakistan, Amil Baba In Karachi, Amil Baba In Lahore, Amil BabaAmil Baba In Pakistan, Amil Baba In Karachi, Amil Baba In Lahore, Amil BabaAmil Baba In Pakistan, Amil Baba In Karachi, Amil Baba In Lahore, Amil BabaAmil Baba In Pakistan, Amil Baba In Karachi, Amil Baba In Lahore, Amil BabaAmil Baba In Pakistan, Amil Baba In Karachi, Amil Baba In Lahore, Amil BabaAmil Baba In Pakistan, Amil Baba In Karachi, Amil Baba In Lahore, Amil BabaAmil Baba In Pakistan, Amil Baba In Karachi, Amil Baba In Lahore, Amil BabaAmil Baba In Pakistan, Amil Baba In Karachi, Amil Baba In Lahore, Amil BabaAmil Baba In Pakistan, Amil Baba In Karachi, Amil Baba In Lahore, Amil BabaAmil Baba In Pakistan, Amil Baba In Karachi, Amil Baba In Lahore, Amil BabaAmil Baba In Pakistan, Amil Baba In Karachi, Amil Baba In Lahore, Amil BabaAmil Baba In Pakistan, Amil Baba In Karachi, Amil Baba In Lahore, Amil BabaAmil Baba In Pakistan, Amil Baba In Karachi, Amil Baba In Lahore, Amil BabaAmil Baba In Pakistan, Amil Baba In Karachi, Amil Baba In Lahore, Amil BabaAmil Baba In Pakistan, Amil Baba In Karachi, Amil Baba In Lahore, Amil BabaAmil Baba In Pakistan, Amil Baba In Karachi, Amil Baba In Lahore, Amil Baba
By maryam maryamabout 6 hours ago in Blush


Comments
There are no comments for this story
Be the first to respond and start the conversation.