Latest Stories
Most recently published stories in Blush.
Different Paths,One Distination
The old lighthouse keeper, Silas, always said the sea held all the stories. He'd seen them too, etched onto the faces of sailors, whispered in the howling wind, and painted in the vibrant sunsets that bled into the endless horizon. I, too, had come to believe this, especially as I stood on the cliff, watching the two figures make their way towards the town.
By Zakriashahabout a year ago in Blush
8 Daily Beauty Mistakes That Secretly Harm Your Skin
Because beauty should enhance, not harm, your health. In the quest for beauty, we often develop routines that seem helpful but are actually harmful. These habits—often overlooked—can lead to skin damage, early aging, or long-term health issues. Let’s break the cycle by identifying the most common bad beauty habits and replacing them with healthier, smarter alternatives.
By KAMRAN AHMADabout a year ago in Blush
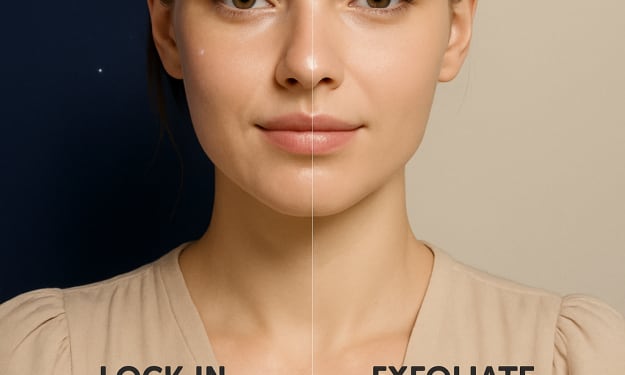
Are Slugging and Skin Cycling Right for Your Skin Type?
Slugging and skin cycling are two skincare trends that have exploded in popularity across social media platforms, with dermatologists, influencers, and beauty enthusiasts all swearing by their benefits. While both trends promise improved skin texture, hydration, and long-term skin health, they are not universally ideal for every skin type. Understanding what these routines entail and evaluating how they interact with your unique skin concerns can make the difference between radiant skin and unwanted breakouts. This guide breaks down both methods and helps you determine if either—or both—deserve a place in your nighttime skincare routine. What Is Slugging? Slugging involves applying a thick, occlusive layer—usually petrolatum-based like Vaseline or Aquaphor—at the end of your nighttime skincare routine to lock in moisture. The goal is to prevent transepidermal water loss (TEWL), especially during sleep when your skin is most prone to dehydration. By forming a protective barrier, slugging allows the serums and moisturizers underneath to penetrate more effectively and reduces environmental exposure. Benefits of Slugging The key advantage of slugging is deep hydration. It’s particularly beneficial for those with compromised skin barriers or extremely dry, flaky skin. It helps soothe irritated skin, improve elasticity, and restore a plump, dewy complexion by morning. In colder months, it’s a game-changer for preventing windburn and moisture loss. Who Should Avoid Slugging? Slugging is not ideal for oily, acne-prone, or combination skin types. Applying a thick occlusive layer can trap sebum, sweat, and bacteria, leading to clogged pores, blackheads, and potential breakouts. Even if your skin is only moderately oily, using slugging too frequently can upset your skin’s natural balance. Those with fungal acne or rosacea may also want to skip this trend unless advised by a dermatologist. What Is Skin Cycling? Skin cycling is a four-day skincare rotation method that involves alternating active ingredients to minimize irritation and maximize results. The typical cycle includes: Night 1: Exfoliation (AHAs/BHAs) Night 2: Retinoids Nights 3 & 4: Recovery (Hydration + Barrier Repair) By spacing out active ingredients like retinol and acids, skin cycling helps reduce sensitivity and inflammation while maintaining efficacy. It’s a smart approach that encourages long-term consistency and skin barrier health. Benefits of Skin Cycling This method works for a broader range of skin types because it incorporates rest days that allow your skin to recover. People with sensitive skin often find that skin cycling helps them tolerate stronger actives without the usual irritation. It also helps prevent over-exfoliation—a common skincare mistake—and promotes more predictable, stable skin behavior over time. Who Should Embrace Skin Cycling? Skin cycling is versatile and customizable. Whether you have dry, oily, combination, or aging skin, you can adjust the actives and frequencies to fit your skin’s needs. For example, dry skin types can use a gentler exfoliant and hydrating retinoid, while oily or acne-prone skin may benefit from stronger formulations. Sensitive skin types may stretch the cycle to five or six nights, adding more recovery days. The key is to observe how your skin reacts and adjust accordingly. Slugging vs. Skin Cycling: Which Is Better? The better option depends entirely on your skin type, current concerns, and climate. Slugging is all about hydration and protection, ideal for very dry or compromised skin. Skin cycling is more strategic and results-driven, offering balance, structure, and long-term benefits through controlled use of actives. You don’t have to choose one or the other—they can actually work well together if done right. For example, you might use slugging only on recovery nights in your skin cycling routine to enhance hydration and barrier repair. However, you should never slug over exfoliants or retinoids, as this can drive these actives deeper into the skin and cause irritation or even chemical burns. How to Incorporate These Trends Based on Skin Type Dry Skin: Both slugging and skin cycling can be beneficial. Use slugging 2–3 nights per week and choose gentle exfoliants and retinoids in your cycle. Oily Skin: Avoid full-face slugging but consider spot-slugging on dry patches. Skin cycling can help control excess oil when using the right actives like salicylic acid. Combination Skin: Targeted slugging and a flexible cycling routine work best. Use hydrating serums before slugging on dry areas and adjust active nights based on oil production. Sensitive Skin: Skip slugging unless your barrier is severely compromised. Start with a five-night skin cycle with one active night and focus on calming ingredients like ceramides and hyaluronic acid. Acne-Prone Skin: Use non-comedogenic occlusives if trying slugging and avoid it on active acne. Skin cycling is ideal with acne-focused actives like retinoids and niacinamide. Final Thoughts Slugging and skin cycling are powerful skincare strategies—but only when used appropriately. Listening to your skin, being patient with the results, and making gentle adjustments based on your environment and season can unlock the full potential of these trends. Don’t fall into the trap of thinking more product or more steps equals better results. Sometimes, less is more, and smarter routines deliver stronger outcomes. Instead of copying someone else's skincare regimen from TikTok, understand your unique skin type and start small. The glow-up is always better when it’s personal. Have you tried slugging or skin cycling yet? What worked—or didn’t—for your skin type? Let’s talk skincare transformations below!
By The Blush Diaryabout a year ago in Blush
The ‘Clean Girl’ Aesthetic – Simple Steps to Nail the Look
The "clean girl" aesthetic has taken social media by storm and it's not hard to see why This effortlessly chic style blends minimal makeup glowy skin sleek hairstyles and neutral tones into one cohesive look that screams polished but approachable Think Hailey Bieber Zendaya or Sofia Richie—flawless glowing and fresh without trying too hard But here's the truth behind this low-key trend it actually takes a few thoughtful steps to master The magic lies in perfecting the small details so you look like you woke up glowing—even if it took a little effort This look is more than just a beauty routine It's a lifestyle statement about wellness simplicity and self-care In this article we’ll break down the exact steps you need to follow to fully embrace the clean girl aesthetic and keep it looking natural yet refined Step 1 Prep Your Skin Like a Pro Flawless makeup starts with healthy hydrated skin For the clean girl glow invest in a consistent skincare routine Use a gentle cleanser a hydrating toner and a lightweight moisturizer with hyaluronic acid Don't forget to apply SPF daily as sun protection is key to maintaining an even skin tone A facial oil or serum with vitamin C can boost your natural radiance and help with dullness Use a gua sha or jade roller to de-puff and stimulate circulation Your base needs to be dewy and healthy because that’s the foundation of the clean girl look Step 2 Use Minimal Yet Strategic Makeup The clean girl makeup routine is all about looking like you’re not wearing makeup while subtly enhancing your features Start with a tinted moisturizer or skin tint that evens out the skin without looking cakey Follow with a creamy concealer only where you need it like under the eyes or on redness Add warmth with a cream bronzer or blush applied high on the cheeks for a lifted look Choose peachy or rosy tones for a natural flush Use a brow gel to brush your eyebrows up and out creating that full laminated brow effect For eyes skip the eyeshadow and opt for a single coat of brown or black mascara A touch of highlighter on the high points of the face adds that signature clean girl glow but keep it subtle not sparkly Finally the lips Keep them soft and plump with a hydrating lip balm or a tinted gloss in nude or soft pink shades The goal is natural freshness Step 3 Sleek Hairstyles Only Hair is a defining feature of the clean girl vibe The signature styles are slicked-back buns low ponytails and soft waves that look like you didn’t try too hard even if you did Use a lightweight hair gel or serum to smooth flyaways and give your hair that glossy finish A middle part is essential for balance and symmetry If you want to keep your hair down go for loose natural waves created with a wide barrel curling iron or overnight braids Finish with a shine spray and tuck the front strands behind your ears for a tidy finish Step 4 Simple Nails for Maximum Impact Minimalist nails are part of the aesthetic Skip the bold nail art and stick to clean shapes like short ovals or almond tips Choose polish in shades of nude soft pink sheer white or even just clear Apply cuticle oil daily to keep your hands and nails looking healthy and fresh Step 5 Choose Timeless Accessories Jewelry in the clean girl aesthetic is dainty and minimal Gold hoops thin chains and stackable rings are staples Don’t over-accessorize Instead opt for one or two pieces that complement your outfit If you're wearing sunglasses go for classic shapes like cat-eye or round frames Bags should be structured and neutral Think beige taupe or soft pastels that won’t clash with your outfit Step 6 Curate a Neutral Wardrobe Outfits should be crisp neutral and effortless Go for monochrome fits with whites beiges creams and soft greys Think tailored trousers tank tops oversized white shirts simple slip dresses and matching sets Layer delicate pieces for dimension but keep your look uncluttered Comfort is key but that doesn’t mean sloppy Your clothes should be well-fitted ironed and made of high-quality breathable fabrics like cotton linen or silk Step 7 Embrace a Wellness Mindset The clean girl aesthetic isn’t just surface-level It’s rooted in a lifestyle of balance and wellness Stay hydrated drink herbal teas and aim for whole foods that nourish your body A glowing complexion starts from within Light workouts like pilates yoga or long walks not only support physical wellness but also boost your mood and keep your posture graceful Avoid overloading your schedule—embrace slowness and mindfulness where possible Step 8 Keep It Authentic The clean girl trend shouldn’t make you feel like you have to be perfect It’s about simplifying not erasing your personality The trend is highly customizable whether you prefer a touch of bold eyeliner or you have curls that don’t slick down Use the aesthetic as a base and adapt it to suit your skin tone hair texture and personal vibe The idea is to feel confident glowing and in control of your own version of minimalism Final Thoughts The clean girl aesthetic is more than a passing TikTok trend It’s a celebration of quiet luxury understated beauty and intentional living You don’t need a vanity full of expensive products to achieve it—just smart skincare natural makeup sleek hair and a calm confidence So if you’re ready to radiate that lit-from-within glow with minimal effort start implementing these steps today You’ll be surprised how far a little skincare and simplicity can take you Are you already channeling the clean girl look or ready to start your glow-up journey Let us know which trick you’re trying first
By The Blush Diaryabout a year ago in Blush
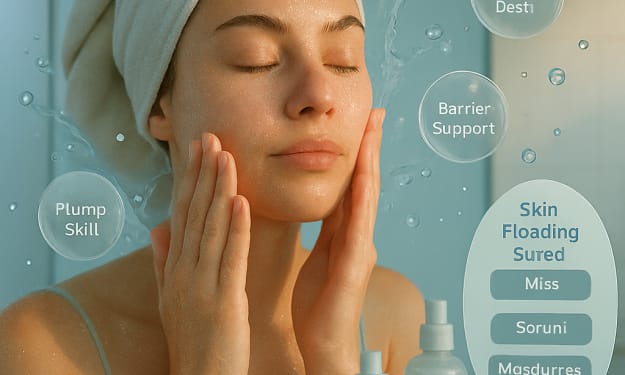
Skin Flooding: The Hydration Hack Your Routine Is Missing
In the ever-evolving world of skincare, trends come and go—but every now and then, one emerges that genuinely changes the game. Enter skin flooding, the hydration hack that’s taking over TikTok, beauty blogs, and dermatologist recommendations alike. This method is not just a passing fad. It’s rooted in skincare science and emphasizes an effective way to achieve healthy, glowing, and deeply hydrated skin. If you’ve been struggling with dryness, dullness, or tight skin no matter how many serums you use, skin flooding might just be what your routine has been missing. So, what exactly is skin flooding? In simple terms, it’s the process of layering hydrating products—typically starting with a damp face—one after another to deeply saturate the skin with moisture. Think of it like soaking a dry sponge. The goal is to apply hydrating ingredients in a specific order and while the skin is still moist to lock in every drop of moisture. The result? A plump, smooth, and dewy complexion that feels as good as it looks. To get started with skin flooding, you don’t need a million new products. You just need to understand the right ingredients and the correct order of application. It all begins right after cleansing your face. Instead of waiting for your skin to completely dry, leave it slightly damp. That’s when your skin is most ready to absorb hydration. The first product should be a hydrating toner or essence. Look for one that contains ingredients like hyaluronic acid, glycerin, or panthenol. These humectants draw water into your skin, acting like magnets for moisture. Next up is a hydrating serum. This is where you can really amplify your routine. Serums with multi-weight hyaluronic acid, niacinamide, or peptides are perfect here. Hyaluronic acid can hold up to 1000 times its weight in water, which makes it one of the most powerful hydrators on the market. Apply it gently over your damp skin, and you’ll feel it drink it in instantly. Niacinamide, meanwhile, helps strengthen your skin barrier, making it better at holding onto all that precious hydration. Once your serum is in place, it’s time to seal everything in. That’s where moisturizer comes in. A good moisturizer doesn’t just hydrate your skin—it helps to prevent the moisture from evaporating. Choose one that’s rich enough for your skin type. If you have oily skin, opt for a gel-based moisturizer with lightweight ingredients like squalane. For dry skin types, a thicker cream with ceramides or shea butter can be ideal. The final step in the skin flooding process is an occlusive if needed, especially during nighttime. Occlusives like Vaseline, facial oils, or balm-type products create a barrier that locks in hydration. This step is especially useful during winter or if you sleep in a dry environment. One of the biggest advantages of skin flooding is how customizable it is. Whether you have oily, dry, sensitive, or combination skin, the technique can be adjusted to suit your needs. Sensitive skin types may want to stick to fragrance-free and alcohol-free products. Acne-prone individuals can use non-comedogenic options and still benefit from hydration without triggering breakouts. The beauty of skin flooding lies in its simplicity and adaptability. Another reason why skin flooding is so effective is because it works with your skin’s natural biology. The stratum corneum, the outermost layer of the skin, needs water to function properly. When it’s dry, it becomes flaky, rough, and more prone to irritation. By delivering hydration in layers, you’re reinforcing this barrier and ensuring your skin stays resilient. It’s not about overwhelming your skin with too many actives—it’s about giving it what it really craves: water. Many people make the mistake of overloading their routine with exfoliants, retinoids, and harsh treatments while neglecting basic hydration. Skin flooding resets that balance. When your skin is properly hydrated, it responds better to actives, heals faster, and looks noticeably healthier. You’ll find that your foundation glides on smoother, fine lines appear less noticeable, and your skin glows from within. You might be wondering if skin flooding is safe for everyday use. The answer is yes—provided you’re using products suitable for daily application. Unlike some skincare hacks that should only be used a few times a week, skin flooding can be incorporated into your morning and evening routines. In the morning, pair it with a sunscreen to protect all your hard work. At night, let your skin soak in all that goodness while you sleep. One thing to keep in mind is product layering. Always go from thinnest to thickest texture. Toners and essences first, then serums, then moisturizers, and finally occlusives. Also, don’t rush through the steps. Give your skin a few seconds between each product to let it absorb before moving on to the next. If you’re just starting, try skin flooding two to three times a week and adjust based on how your skin responds. You’ll likely notice a difference within a few days—smoother texture, reduced flakiness, and that supple, hydrated feel that skincare lovers dream about. Over time, it can even reduce the appearance of wrinkles and improve skin tone. In conclusion, skin flooding isn’t just a trendy phrase—it’s a powerful hydration strategy that can elevate any skincare routine. It’s gentle, effective, and deeply nourishing for all skin types. Whether you’re a skincare beginner or a seasoned enthusiast, embracing this technique can be a turning point for your skin’s health and glow. Your skin is thirsty—give it the flood it’s been waiting for. Note: This article was created with the assistance of AI (ChatGPT), then manually edited for originality, accuracy, and alignment with Vocal Media’s guidelines.
By The Blush Diaryabout a year ago in Blush
Blush Placement Tricks to Lift Your Face Instantly
Blush is often underestimated in the world of makeup, yet when applied correctly, it can completely transform the structure of your face. A strategic blush placement doesn’t just add a healthy flush—it creates the illusion of high cheekbones, lifted contours, and a radiant, youthful appearance. Whether you’re aiming for a sculpted editorial look or a subtle everyday flush, understanding where and how to apply blush can make all the difference. Let’s dive into the ultimate guide to blush placement tricks that can instantly lift your face and elevate your entire makeup routine. Before diving into techniques, it’s important to understand your face shape. Whether you have a round, oval, square, heart, or long face, the right blush placement should work with your natural bone structure—not against it. A round face may benefit from upward-angled strokes, while an angular face might look softer with curved placement. Identifying your face shape helps tailor your blush for the most flattering effect. One of the most common mistakes is placing blush too low or too close to the nose. Traditionally, blush was applied directly on the apples of the cheeks, which can actually drag your face down visually. The modern technique for a lifted effect involves sweeping blush from the top of the apples up toward the temples. This diagonal, upward angle mimics the lift of a good contour but adds a natural flush of color that instantly brightens the face. Cream blushes are ideal for achieving a skin-like finish, especially when using a stippling brush or sponge to blend upward and outward. Begin by dabbing a small amount on the upper part of your cheeks and gently blend toward the hairline. The key is light, layered application—build slowly rather than overloading the brush or sponge with product. Another trend taking over the beauty scene is “blush draping,” a technique where blush is used like contour to sculpt the face. Using two tones—one deeper and one lighter—apply the deeper blush under the cheekbone and the lighter one higher up near the temple. Blend well for a seamless gradient. This technique creates definition while maintaining a soft, youthful appearance, and it works particularly well with powder blushes. Want to add an instant lift without extra tools? Try the “C-shape” blush method. Starting at the top of the cheekbone, sweep your blush in a gentle C shape up around the temple and slightly onto the brow bone. This not only lifts but also connects the blush with your eye makeup, creating a cohesive and radiant look. It’s especially flattering for mature skin as it opens the upper face. For those who prefer a more minimal makeup routine, the monochromatic blush trend is a game-changer. Using the same blush shade on your cheeks, eyelids, and even lips creates harmony and draws attention upward. This technique naturally guides the viewer’s eye along the top half of your face, creating the illusion of lift without dramatic lines. Blush placement isn’t one-size-fits-all—it also depends on your desired look. For a youthful, fresh look, dab blush slightly above the apples of the cheeks and blend outward. For a sophisticated and lifted effect, start higher on the cheekbone and avoid going too far inward. Blending is key—harsh lines will defeat the purpose and can appear dated or overdone. The color you choose also plays a major role. Cool-toned pinks and soft mauves work well on fair skin tones and give a soft lift. Peach and coral shades flatter medium skin tones, while richer berries and deep rose hues pop beautifully on deeper skin tones. The key is selecting a shade that enhances your natural undertones and adds life to the face without overpowering it. If you wear bronzer or contour, apply blush just above the contour line. This creates a layered effect that sculpts and lifts simultaneously. You can also layer a soft highlighter on the top edge of your blush for a lit-from-within glow that further accentuates the lifted cheek area. Avoid overly glittery highlighters—opt instead for fine shimmers or satin finishes to keep the look elevated and sophisticated. Those who wear foundation should be mindful of their base texture before applying blush. Dewy foundations pair beautifully with cream blushes, while matte or powdered bases benefit from powder blushes. A well-prepped canvas ensures that your blush blends easily and doesn't patch, especially when using lifting techniques that involve blending over wider areas. You don’t need a full glam face to benefit from blush lifting. Even on bare skin, applying blush high on the cheeks gives a natural facelift effect. Tinted balms or cheek stains are great for this purpose. Apply with fingers and tap upward along the cheekbones for a barely-there glow. This is especially effective for busy mornings or low-maintenance beauty lovers. Tools matter too. A fluffy angled brush is perfect for precise, lifted applications. Sponges give a more diffused, natural look, while fingers offer control and warmth when blending cream products. Try different tools to discover what works best with your skin type and desired finish. Finally, remember that practice makes perfect. Try applying blush in front of natural light and take a selfie from different angles to see how the light plays on your cheeks. Small tweaks in angle or position can make a major difference. Don’t be afraid to experiment and adjust based on what flatters your unique features most. Blush is no longer just a supporting character in your makeup routine—it’s the star player that can lift, brighten, and energize your entire look. By mastering these blush placement tricks, you’ll unlock the secret to looking more sculpted, awake, and radiant in seconds. So next time you reach for your favorite blush, remember: a simple sweep in the right direction is all it takes to elevate your glow.
By The Blush Diaryabout a year ago in Blush
Latest Makeup Styles
The beauty industry continues to evolve rapidly, and the latest makeup styles of 2025 are nothing short of revolutionary. From minimalist elegance to bold glam, makeup trends have found the perfect balance between artistic expression and everyday wearability. Whether you're a beauty enthusiast, influencer, or someone exploring your personal style, this year’s makeup styles offer something fresh for everyone.
By Lana Roseeabout a year ago in Blush
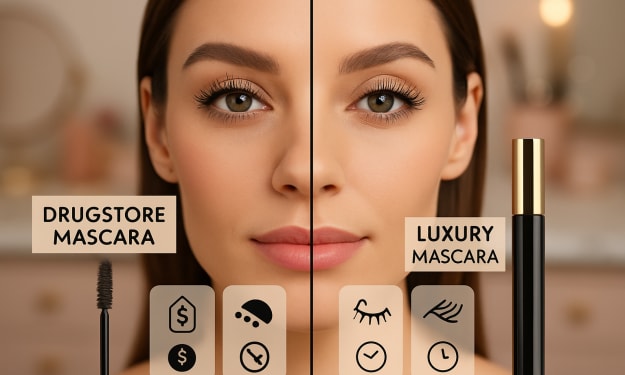
Mascara Wars: Comparing Drugstore vs. Luxury for Ultimate Lashes
In the ever-expanding world of beauty, few makeup products are as transformative as mascara. Just one coat can elevate your look from sleepy-eyed to wide-eyed glamour. But the shelves are brimming with choices, from $5 drugstore finds to $50 luxury wands. So, is that fancy tube really worth the splurge, or can a budget mascara deliver the same dramatic lashes? Welcome to the Mascara Wars — where we pit drugstore and luxury mascaras against each other to determine who truly reigns supreme. The Basics: What Makes a Good Mascara? Regardless of price, a quality mascara should deliver length, volume, curl, and smudge-proof wear. The formula and brush design play key roles in achieving that dreamy lash lift. While some mascaras excel in separating and defining lashes, others offer intense volume for a bold, fluttery finish. But does paying more guarantee better results? Let’s compare these lash contenders based on several essential factors: performance, longevity, formula, packaging, and value. Performance: Drugstore Mascaras Hold Their Ground Luxury mascaras often promise next-level lashes — Dior’s Diorshow, Too Faced’s Better Than Sex, or Lancôme’s Hypnôse boast of revolutionary formulas and custom brushes. They do deliver stunning results: intense volume, deep pigmentation, and often a wow-factor on the first coat. But don’t count out drugstore heroes like Maybelline Lash Sensational, L’Oréal Voluminous Lash Paradise, or Essence Lash Princess. These mascaras offer surprising performance at a fraction of the cost. Many makeup artists even keep these affordable staples in their professional kits. In blind tests, some drugstore mascaras even outperform their luxury rivals in curl retention and length. Brush Design: Innovation vs. Functionality Luxury brands invest heavily in custom brush technology — hourglass shapes, curved combs, micro-wands — all designed to hug the lash line and coat each hair evenly. This innovation often makes application smoother and clump-free. Drugstore brands may not have the same elaborate wand designs, but they’re not behind in effectiveness. Maybelline’s patented brushes and CoverGirl’s flexible rubber wands show that functionality can be just as impactful as innovation. You may not get a gold-plated handle, but the results can be nearly identical. Formula: Ingredients and Eye Sensitivity Luxury mascaras often feature enriched formulas — think vitamin E, peptides, conditioning agents, and lash-enhancing serums. These ingredients not only beautify your lashes but also nourish them over time. If you have sensitive eyes or wear contact lenses, luxury formulas may feel gentler and cause less irritation. That said, many drugstore mascaras have also stepped up their game. Brands like Neutrogena, Almay, and NYX offer ophthalmologist-tested, fragrance-free options that are perfect for sensitive eyes. Waterproof formulas are available on both sides, though removal can be easier with high-end options that dissolve with warm water or specialized removers. Longevity and Smudge Resistance: A Draw Long wear and smudge-proof formulas are must-haves. And here’s where drugstore and luxury mascaras often go head-to-head. Drugstore formulas like L'Oréal Telescopic or Maybelline Sky High provide incredible staying power, resisting flaking and smudging all day. Luxury mascaras such as YSL’s Faux Cils or Chanel’s Inimitable also stay put, but some wearers notice that certain high-end formulas can be more prone to smudging due to richer, creamier bases. The key is matching the formula to your lash type and environment — for humid climates, waterproof is your best friend regardless of price. Packaging and Experience: Luxury Wins Here There’s no denying the visual and tactile appeal of luxury mascara packaging. Weighted tubes, metallic finishes, and chic design make them a joy to hold and display. When you pull out a Tom Ford or Givenchy mascara from your bag, it feels like a beauty statement. Drugstore options, while functional, don’t always offer the same aesthetic satisfaction. Plastic packaging and loud branding are common, although some brands are leaning toward sleek, minimalist designs. Price and Value: Drugstore Is the Clear Winner Luxury mascaras can cost anywhere from $30 to $50 — and that’s for a single tube you’ll likely toss in 3 months. Drugstore mascaras typically range from $5 to $15, offering significant savings without major performance compromises. For budget-conscious beauty lovers, this is a major deciding factor. Additionally, since mascara has a short shelf life, splurging repeatedly on luxury options can feel wasteful unless you truly notice a difference in performance or comfort. Who Should Choose Luxury? Those with highly sensitive eyes or lash concerns People who value the aesthetics of premium packaging Makeup lovers wanting added benefits like lash conditioning Users willing to invest in the full luxury makeup experience Who Should Choose Drugstore? Budget-conscious shoppers Everyday users who replace mascara frequently Makeup beginners testing different formulas and finishes Those who want reliable performance without splurging The Verdict: There’s No One Winner In this mascara showdown, both sides emerge with strong points. Luxury mascaras offer refinement, comfort, and luxe appeal, while drugstore mascaras surprise us with their quality, affordability, and reliability. It’s not about price—it’s about what your lashes need and what you value most in your beauty routine. Your best bet? Mix and match. Try layering a lengthening drugstore mascara with a volumizing luxury one for the ultimate lash cocktail. Or find your perfect formula at the drugstore and save your splurges for skincare or foundation. In the end, the true winner of the Mascara Wars is you — the beauty lover who knows that stunning lashes don’t have to break the bank. Do you swear by a $10 lash miracle or can’t live without your high-end mascara wand? Share your ultimate mascara pick below!
By The Blush Diaryabout a year ago in Blush
The Glass Skin Obsession: How to Achieve That Lit-From-Within Glow
In the ever-evolving world of skincare, one trend that refuses to fade is the obsession with “glass skin.” Originating from Korean beauty routines, glass skin refers to a complexion so clear, dewy, and luminous that it looks like a flawless pane of glass. Unlike heavy makeup techniques that aim to mask imperfections, glass skin emphasizes healthy, glowing skin achieved through hydration, layering, and consistent care. If you’ve ever admired someone’s radiant, smooth face and wondered how to replicate that look naturally, this is the ultimate guide for you. Glass skin is more than just a trend—it’s a skincare philosophy that combines consistency, minimalism, and targeted ingredients to create a glow that comes from within. Here’s everything you need to know to achieve the glass skin look, including key steps, must-have products, and natural tips. 1. The Foundation of Glass Skin: Double Cleansing Double cleansing is the essential first step. Start with an oil-based cleanser to break down makeup, sunscreen, and excess sebum. This is followed by a gentle water-based cleanser to remove any remaining impurities. This two-step method ensures a clean base for better absorption of skincare products and helps prevent clogged pores. Remember, clean skin is happy skin. 2. Gentle Exfoliation for a Smooth Surface Exfoliation is vital for removing dead skin cells and allowing new, healthy skin to emerge. Use a mild chemical exfoliant like glycolic acid or lactic acid two to three times a week. Avoid harsh scrubs that can damage your skin barrier. Proper exfoliation brightens the complexion, smooths texture, and prepares the skin for hydration. 3. Hydration is the Heart of Glass Skin Hydration is the true secret behind the glass skin glow. After cleansing and exfoliating, apply a hydrating toner or essence that balances your skin’s pH and infuses it with moisture. Follow this with layers of lightweight hydrating serums—especially those containing hyaluronic acid, niacinamide, or glycerin—to deeply penetrate and plump the skin. 4. Layering Lightweight Moisturizers Instead of slathering on a single heavy cream, layer lightweight moisturizers that gradually build up hydration. Korean skincare emphasizes using emulsion, gel creams, and light moisturizers to create a soft, cushiony glow without clogging pores. This method locks in all the hydration and enhances your skin’s natural dewiness. 5. Facial Mists for On-the-Go Glow Facial mists can be used throughout the day to keep skin hydrated and fresh. Choose alcohol-free formulas with soothing ingredients like rose water or aloe vera. A few spritzes can instantly revive dull skin and boost radiance. It’s a small but effective step to maintain the “lit-from-within” look. 6. Use Brightening Serums Wisely Glass skin is not just about moisture—it’s also about clarity. Serums containing vitamin C, niacinamide, or licorice root extract help even out skin tone, fade hyperpigmentation, and enhance brightness. Incorporate these a few times a week in your morning or night routine, always paired with SPF during the day. 7. Don’t Skip Eye Cream A bright under-eye area contributes to an overall glow. Use a lightweight eye cream with ingredients like caffeine or peptides to reduce puffiness and dark circles. Gentle tapping motions help stimulate circulation, giving your eye area a refreshed appearance. 8. Lock It All In With a Nourishing Sleeping Mask Nighttime is when your skin repairs and regenerates. Use a nourishing sleeping mask or overnight treatment a few times a week to seal in all the hydration and nutrients. Look for masks with ceramides, peptides, or squalane to deeply moisturize and heal the skin barrier while you sleep. 9. Sunscreen is Non-Negotiable All your efforts will be in vain without sun protection. UV damage is the number one culprit of aging and dullness. Apply a broad-spectrum SPF 30 or higher every morning, even if you’re indoors. Many Korean sunscreens are ultra-lightweight and moisturizing, making them perfect for layering over your skincare without ruining the glow. 10. Diet and Lifestyle Matter True glow begins within. Drink plenty of water throughout the day, eat antioxidant-rich foods like berries, citrus fruits, and leafy greens, and avoid excessive sugar or processed foods. Sleep well, manage stress, and exercise regularly to keep your skin looking fresh and vibrant. Optional Natural Remedies for the Holistic Touch Natural remedies can supplement your skincare routine. Use aloe vera gel for cooling hydration, rose water as a toner, and honey masks for a weekly moisture boost. These simple additions can help amplify the benefits of your regular skincare products. Myths and Mistakes to Avoid Many people mistakenly pile on heavy oils thinking it will create a dewy look. In reality, this can clog pores and cause breakouts. Another myth is that oily skin doesn’t need hydration. In fact, properly hydrating oily skin can reduce excess oil production. Stick to non-comedogenic products and listen to your skin’s needs. Consistency is the Real Secret There’s no overnight trick to glass skin. The real magic lies in consistency. Build a routine that suits your skin type, and stick to it every day. Over time, you’ll notice your skin becoming smoother, brighter, and naturally glowing without the need for filters or highlighters. Final Thoughts Glass skin is not about being perfect; it’s about achieving healthy, luminous skin that reflects light naturally. With the right habits and a little patience, anyone can unlock this glow-up. So take the time, love your skin, and let your inner radiance shine through every day. Note: This article was created with the assistance of AI (ChatGPT), then manually edited for originality, accuracy, and alignment with Vocal Media’s guidelines.
By The Blush Diaryabout a year ago in Blush
. “The Billion-Dollar Industry Built on Your Insecurities”
In the age of hyper-connectivity, where our screens are reflections of curated perfection, there’s an invisible industry thriving in plain sight. It doesn’t sell products—it sells validation. It markets not answers, but anxieties. And it wraps it all in glitzy packaging with promises of “fixing” you.
By Hamza Habibabout a year ago in Blush
Beneath the Silent Sky
No one had spoken in 317 days. Not a whisper. Not a murmur. Not even a breath too loud. The sky had gone silent first. One morning, birdsong never returned. The wind stopped humming through the trees. Storms passed overhead without a sound. Thunder was reduced to a flicker of light—lightning’s shadow without its roar.
By Muhammmad Zain Ul Hassanabout a year ago in Blush