
I'm new to hair systems — DIY vs salon hair system attachment. What should I know before ordering?
DIY vs. Salon Hair System Attachment Guide for 2026

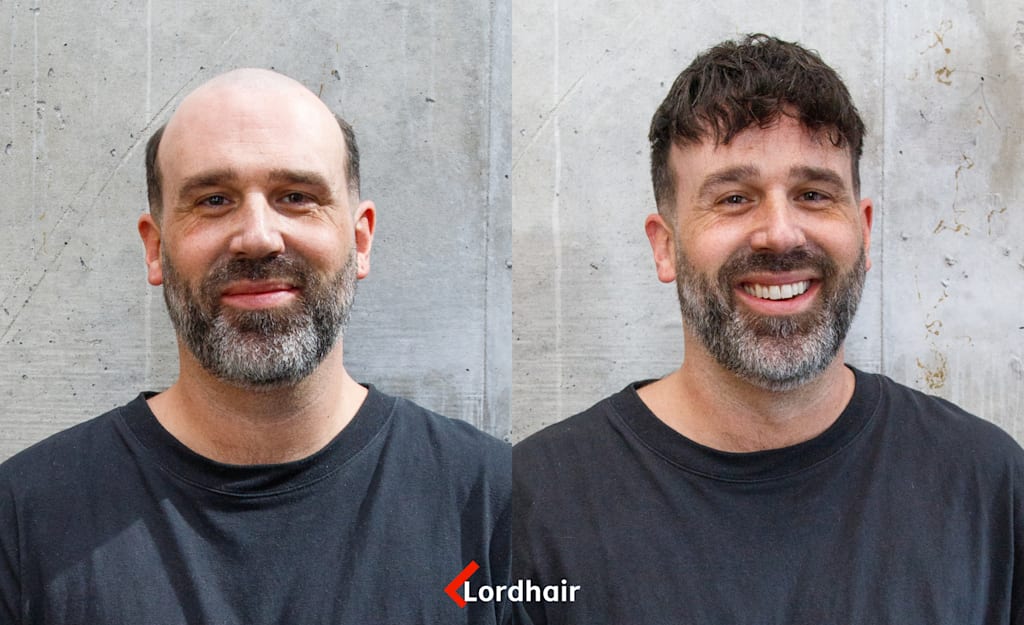
I'm new to hair systems — DIY vs salon hair system attachment. What should I know before ordering?
Choosing between a DIY or salon hair system attachment really comes down to your budget, how comfortable you are doing it yourself, and the amount of support you need right out of the gate. A salon gives you professional guidance. But going the DIY route with Lordhair hair systems can seriously cut down your ongoing costs once you get the hang of it.
We'll help you figure out the pros and cons so you can pick the right attachment method before you order that very first system.
Key Takeaways
A professional initial fitting establishes a reliable cut-in for first-time wearers.
DIY attachment lowers ongoing costs after practice builds consistent placement skills.
A skin base with tape simplifies early home maintenance.
The First-Timer's Dilemma: DIY vs. Salon Hair System Attachment
Your first attachment method really shapes how confident you feel wearing a hair system. Doing it yourself at home gives you way more control and cuts down your ongoing costs. On the flip side, going to a pro salon gives you that hands-on help when the whole process is still brand new to you.
The best choice just depends on how comfortable you are with self-upkeep, how much free time you have, and if you want some extra guidance right out of the gate. Seeing the practical differences side by side makes the choice a lot easier. Simple.
Visual Decision Matrix: Comparing DIY and Salon Attachment Side-by-Side
Tackling a DIY attachment with Lordhair hair systems takes a little patience and a willingness to learn basic maintenance. But a hair system stylist handles all the fitting and placement for you. That alone can really take the edge off your first application.
FactorDIY Home AttachmentProfessional Salon ApplicationSkill neededYou learn the process over timeStylist applies the systemUpfront investmentNeeds supplies and practiceYou pay a service fee each visitTimeMore time at first; faster with experienceLess hands-on time for youResult qualityRelies on your techniqueRelies on the stylist's skillStress levelHigher for beginnersUsually lower at the start
Booking a salon service is a smart first step if you want help figuring out exactly what a secure, natural-looking fit feels like. DIY might be more your speed once you're ready to handle the regular attaching and taking off by yourself.
The Case for Professional Salon Hair System Attachment
Going to a professional salon gives first-time wearers a perfect starting point and hands-on help. A hair system stylist handles the cut-in, placement, and bond while you get a feel for how a secure, natural fit should sit.
The trade-off is pretty clear. Salon service takes the pressure off you, but it does add recurring appointments and extra costs. Simple.
Flawless Initial Cut-In and Custom Perimeter Bonding
A hair system stylist can trim a Lordhair system to perfectly match your real hair and stick it right where the hairline looks natural. They'll check the fit before making any cuts, then blend the system into your sides and back. That way, the transition is barely noticeable.
Professional salon visits also cover scalp prep and perimeter bonding tailored to your skin type, lifestyle, and how much hold you want. A stylist might go with a full head bond if needed, but max glue coverage isn't really the goal. It's all about getting a secure fit that stays comfortable and sits perfectly from day one.
The Cost and Convenience Trade-Off of Regular Salon Visits
Salon attachment takes a bit of an upfront investment for that first fitting, cut-in, and application. From there, regular visits add a monthly maintenance fee or recurring service cost depending on how often your bond needs fixing.
You'll definitely save personal time since the stylist handles the removal, cleaning, reattachment, and blending right there in the chair. But you also have to work around their schedule and pay for every single visit. For beginners, that extra support can easily be worth the spend. For seasoned wearers, handling DIY attachment with Lordhair systems usually offers way better control over those long-term costs.
The Case for DIY Hair System Attachment at Home
DIY home attachment puts you in charge of when you take off, clean, and reapply your hair system. It cuts down on endless salon visits. But, it also means you're on the hook for every single step of the routine.
This route works best if you're ready to practice and accept that your first few tries might not look flawless.
Maximum Financial Savings and Schedule Independence
Learning to do it yourself can seriously drop your monthly upkeep costs since you aren't paying a salon for every single removal, wash, and reattachment. You still need the right supplies, but you get to choose when to buy and use them. A Lordhair system can be maintained right at home on your own schedule, instead of working around a stylist's busy calendar.
Careful handling is also a big deal for your hair system's lifespan. Taking the unit off slowly, washing away the old glue, and storing it safely helps stop avoidable damage. Plus, you can fix lifting edges the second they happen instead of waiting days to get a spot at the salon.
The Steep Learning Curve and Early Skill Demands
The risks of DIY attachment are definitely highest during those first few tries. New wearers might put the hairline too far forward, mess up the bond, or leave sticky residue on the base. These mistakes are usually just annoying, not permanent. But they can waste your supplies and make the system feel a bit loose.
Prepping your scalp takes patience since your skin needs to be totally clean, dry, and oil-free before you attach anything. Practice the whole routine in a quiet spot, give yourself plenty of time to fix mistakes, and don't rush it right before work or a big event. If taking it off causes any pain, redness, or skin damage, just stop and ask a professional for help.
Total Cost of Ownership: 1-Year Financial Breakdown
Doing it yourself usually means a bigger upfront spend on supplies, but your monthly upkeep drops since you're handling the removals and reattachments. On the flip side, going to a salon adds up over time since you're paying for their professional time.
Want to figure out your true 1-year cost? Just add up the Lordhair system price, your replacement supplies, and 12 months of maintenance. Then, compare that number to the system price plus all those salon visits based on your schedule. DIY only really saves you cash if you can keep the attachment clean and secure without burning through supplies. Plus, if it's your first time wearing a hair system, you'll need to prep for the personal adjustment.
Managing the Psychological Transition and First 48-Hour Anxiety
Putting on a hair system for the first time might feel way more obvious to you than it actually is to anyone else. Those first 48 hours are mostly just about getting used to your new reflection. That's true whether you applied a Lordhair hair system at home or had a pro handle it at the salon.
Keep your plans low-pressure early on. Wear it around the house, run a quick errand, and then meet up with someone you trust. Go ahead and check how the front hairline looks in natural daylight, but don't keep touching it or staring into the mirror every five minutes. Most folks are just focused on their own lives anyway. Sticking to a calm routine helps the new look feel completely normal and makes everyday interactions a lot easier.
The Recommended Strategy: The 3-Stage Training Wheels Approach
A full DIY attachment usually isn't the best first move if you're new to wearing hair systems. Start by getting professional help. Practice the easy, repeatable parts at home, and then take over the whole routine once your hands and confidence catch up.
Moving slowly from the salon to full DIY protects the fit and style you paid for. Plus, it builds real self-maintenance skills along the way.
Stage 1: Professional Initial Template and Cut-In
Always go to a hair system stylist for your first application, even if you plan to do the maintenance yourself later. A pro can shape the base perfectly to your scalp, place it right, and cut the hair so it blends seamlessly with your natural hair. That's it.
This salon trip gives you a solid starting point. Keep in mind that a realistic front hairline relies heavily on placement, hair direction, and the cut around the temples. Even tiny mistakes can stand out.
Yes, a salon visit costs more upfront than applying your Lordhair system at home. But it saves you from turning a poorly fitted first unit into an expensive mistake. Don't be afraid to ask the stylist to walk you through what they're doing and what you'll need to maintain between visits.
Stage 2: Assisted Home Cleanings and Perimeter Re-bonding
Leave the original cut-in alone while you learn the daily maintenance tasks. Start by just watching or helping with the cleaning process. Learn how to remove old adhesive from the edges and apply a fresh perimeter bond.
Working with a stylist early on shows you exactly how much glue or tape to use and where placement tends to go wrong. You'll also learn how to check the front edge without messing up the professionally trimmed base.
Doing your own maintenance definitely cuts down your ongoing costs compared to regular salon visits. Still, reach out for help if the system shifts, the hairline won't sit flat, or you just aren't sure where the edge belongs.
Stage 3: Graduating to Complete DIY Self-Attachment
Ready for full DIY home attachment? Make the jump only after you can comfortably remove, clean, align, and re-bond the system without rushing. A great sign is when you can nail the exact same placement every time and spot when the bond needs fixing.
Block out plenty of time for your first solo run. Clean your scalp thoroughly, check the alignment before you stick down the bond, and never treat a waterproof bond like it's permanent. It still needs regular check-ups and maintenance. Simple.
Lordhair systems are built to handle a DIY routine, but salon services are still great when you need a fresh cut-in, a big style change, or help fixing an attachment issue. Being independent is awesome, but knowing when to call a stylist protects both your system and your overall look.
The Pre-Order Checklist: What to Buy Before Your Unit Arrives
Get your base and attachment supplies before your Lordhair unit shows up, not after you've got a freshly cut system sitting on the counter. A stock unit and a small, compatible kit can also keep that upfront price lower than paying for repeated salon visits.
Go for easy handling instead of chasing the most invisible hairline on your very first try. The stock vs custom hair system choice affects fit, hair density, and exactly how much professional help you might still want.
Selecting the Right Stock Base Material: Lace vs. Skin (Poly)
Most beginners find a skin (poly) base way easier to manage than lace. Its solid edge gives tape or glue a clear surface to grab onto. It usually suits guys learning perimeter re-bonding, while lace takes more care at the front edge. Only go with lace if front hairline realism is your biggest priority and you're willing to get help with that first cut-in or attachment.
The stock vs custom hair system choice matters here, too. Pick a stock piece only if its base size, hair density, color, and wave pattern are close to your natural hair. A custom unit might be worth the higher price tag if a standard shape or density just won't blend well.
Essential DIY Attachment Toolkit: Chemical Adhesives and Solvents
A practical hair system attachment checklist includes hair-system tape or liquid adhesive, a scalp protector, isopropyl alcohol, adhesive remover, and a good solvent like C-22. Tape is usually simpler for beginners. But a liquid medical-grade adhesive can help create a more tailored perimeter bond. Just learn one attachment method first instead of mixing products on day one.
Use isopropyl alcohol for surface prep and alignment checks, but only as directed on the label. Keep some adhesive remover ready for cleanup, and make sure that C-22 solvent actually suits your base material. Always work in a well-ventilated space. And buy the full kit before the unit gets there, so your first attachment doesn't turn into a frantic search for supplies.
Troubleshooting Common DIY Attachment Mistakes
Doing your own attachment can save you salon fees, but small placement errors happen a lot on the first try. You can definitely attach a Lordhair system at home. Still, the risks of DIY hair system attachment include a visible hairline, trapped air, and edges peeling up too early.
Most mistakes are way easier to fix right away rather than waiting for the adhesive to fully set.
Correcting Misaligned Front Hairlines and Air Bubbles
If your front hairline is crooked, lift it and reset it while the glue or tape is still sticky. Don't pull the base hard. Just use an adhesive remover made for your base type to clean up the mess. Then, prep your scalp again with isopropyl alcohol, following the label instructions.
To get a natural hairline DIY attachment, check the front edge in a mirror before you press down the rest of the unit. Start right in the center. Then, press outward toward each temple.
Got air bubbles under your skin or lace base? That usually means you put the unit down too fast. Just lift the bubbled area, let the trapped air out, and press the base flat from the center outward. Simple.
Fixing Premature Edge Lifting and Adhesive Seepage
Edge lifting just needs a quick perimeter bonding repair, not a full removal, as long as the rest of the system is secure. Gently lift the loose edge and take off the old adhesive from both your scalp and the base. Let the area dry completely before you apply fresh tape or liquid glue.
Dealing with liquid glue vs adhesive tape means different cleanup methods. Wipe any seepage carefully with a good adhesive remover before it gets into the hair. For tape residue, make sure you clean it off the base edge before putting on a new strip.
Don't add fresh adhesive right over old residue. A clean, dry perimeter gives that repaired edge a much better chance of staying flat.
How Lordhair Supports Both Salon and DIY Wearers
Lordhair hair systems work just as well for a first salon fitting as they do for home attachment, meaning beginners aren't stuck with just one approach. Stock hair systems give you a ready-made starting point while you figure out exactly how much hands-on help you actually need.
If you go the salon route, you can rely on a pro for the fitting, cutting, and attachment. This really cuts down the risk of an uneven hairline or early edge lifting. On the flip side, DIY wearers can pick out a system, double-check the fit, and lean on Lordhair support resources before putting on adhesive at home. Yes, salon visits will add to your total cost over time. Doing it yourself saves money, but it definitely takes some patience and practice.
Frequently Asked Questions About Hair System Attachment
Is it cheaper to do a hair system DIY or go to a salon?
DIY is cheaper long-term. Salon costs more per visit; DIY saves only once you stop wasting tape, adhesive, and units through beginner mistakes.
What are the risks of attaching a hair system at home for the first time?
Bad placement. Loose bonds. Adhesive residue. Usually annoying, not permanent—but one bad first cut-in can ruin an expensive unit.
How long does a salon hair system attachment last vs. DIY?
Neither automatically lasts longer. Bond life depends on your application and maintenance; a salon is simply more reliable when you're new.
Can I switch from salon attachment to DIY maintenance later?
Yes. That's the smart route. Get the first fitting, base trim, placement, and cut-in done professionally, then learn maintenance at home.
What is the best base material for a beginner (Lace vs. Poly)?
Poly. Its solid edge makes tape and glue easier to control. Lace looks great at the hairline, but demands more careful attachment.
Can I swim and shower with a DIY hair system attachment?
Yes, once the bond is secure. Showering is routine; swimming adds stress. Check the bond afterward, especially around the perimeter.
About the Creator
Leo
Passionate men's hairstylist with a keen eye for detail and a knack for creating on-trend looks. Dedicated to delivering hair restoration education that enhances individual style.
Enjoyed the story? Support the Creator.
Subscribe for free to receive all their stories in your feed.
Comments
There are no comments for this story
Be the first to respond and start the conversation.