


Bored with your dark brown hair and fancy going platinum at home? It can be done! However, the first thing I want to make VERY CLEAR is this is a long, tiring and expensive process! Unfortunately there is no way to make your hair go from dark brown to blonde overnight. So if you think this isn't a colour you want to stick to or wouldn't mind staying your current colour, then I wouldn't recommend trying to go blonde. This is a commitment and no matter how you do it, you will walk away with more damage then you started with. The second thing I will tell you is that it takes a lot of upkeep and maintenance. For example: Bleaching your roots possibly more than once every few months, toning and conditioning your hair regularly. If you think this is too much to add to your routine, don't go blonde.
Still want to lighten your locks? Let's get into it! There are a few things you can do to prep your hair. If you're not desperate to change up your colour, you could spend a few weeks deep conditioning your hair and avoiding heat to prevent further damage. You should use hair masks with oil. In any beauty supply store you'll find fairly cheap hair masks that contain coconut oil, olive oil, Argon oil, whatever. It doesn't matter what oil you use, just focus on building up the moisture in your hair. The reason for this is our hair gets damaged because bleach strips the oil out of the hair leaving it weak and brittle. Once the hair gets dry it breaks easily which is why people's hair falls out during the bleaching process. You shouldn't wash your hair for at least a few days before bleaching. Let your natural oils build up to avoid damage.
Step One: Colour Remover
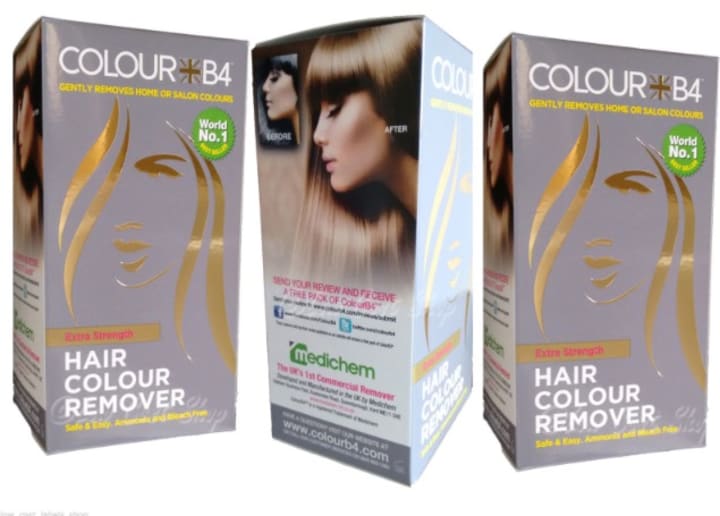
If you already have dyed hair, you need to get as much of it out as possible, especially if you have plenty of layers of colour. Before going anywhere near the bleach you should get a colour remover. This is a product that strips the dye from your hair. It is designed to take you back to your natural colour. The best part is it doesn't damage your hair. If your naturally blonde and just dyed your hair dark brown, you can just use this product to return blonde. If you've never dyed your hair, skip this step. This product will have no effect on you. The hair colour remover in the picture above is the one I use. Everyone's hair is different so it might not work on your hair as well as it does mine. You can choose whatever brand you like but this one works well on my hair. You'll find this at any cosmetics store, like Boots, Superdrug, etc. It will be around £6 – £10. I recommend getting one that says extra strength; even if you just have one layer of colour, use this one to make sure it works.
The colour remover itself looks something like a hair dye. You mix bottle A into bottle B then use bottle C to rinse it off (make sure you read the instructions on your colour remover to double check). The liquid in the bottle is clear and smells kind of funny. Try to open a window whilst applying to get some ventilation. The instructions should say to wash off after about 45 minutes. Then, hopefully you should be back to your natural colour or, if you have previously lightened hair, it will take you back to the lightest hair colour you ever had, or somewhere close to it. Once your hair is dry (I recommend leaving to air dry to prevent damage) you're ready for step two.
Or, if it didn't work, repeat step one.
Step Two: Preparing for Bleaching Process
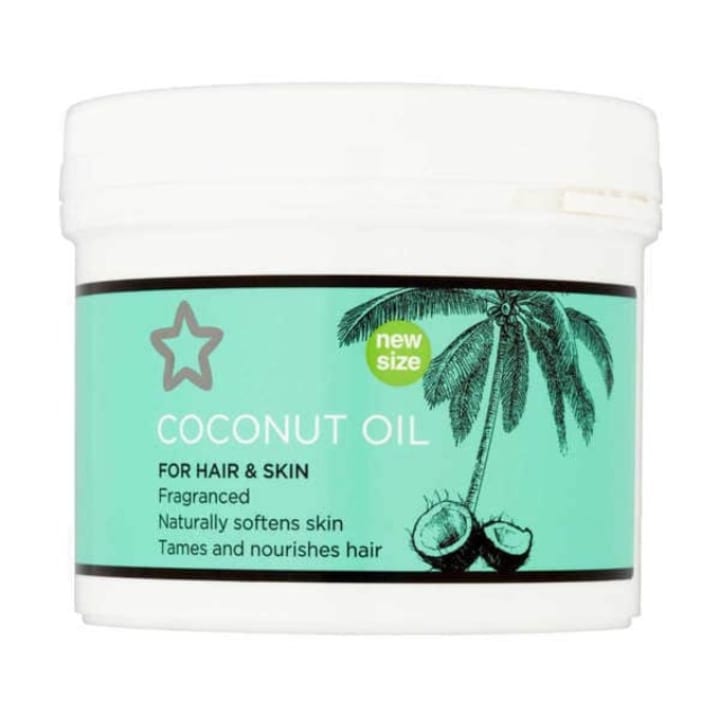
Regardless of how long you spent prepping your hair beforehand, you must NOT skip this step. This is my secret for preventing hair breakage during the bleaching process. And it's so simple! Get yourself some coconut oil. I personally think this is the best oil to use, but if you really can't afford to buy some, you can use an oil you have at home. I use this coconut oil (in picture above) from Superdrug. It's only £1.65 for a small tub and £5.99 for a big one. It's better to use the organic kind if you have it, but this one does the job! All you have to do is take a spoonful or two of the oil (depending if you have short or long/thick hair) and place it in a bowl in the microwave for about a minute or however long it takes to completely melt with no white bits.
Right before bleaching, you need to cover your hair (whilst dry) from root to tip in the oil. Make sure all of your hair is fully saturated before spending a few seconds massaging and combing through. You can also leave this on overnight for better results. Making your hair greasy like this will mean the bleach only strips out the excess oils and your hair will still be in decent condition afterwards!
Now you're ready for step three.
Step Three: Bleaching (First Time)

After you've done step two and ONLY after you've done step two, you can begin the bleaching process. I use this bleach (in picture above) and I swear by it! This is the only bleach that I've used that fully works on my very stubborn hair, so hopefully it will work on yours to. It's called Garnier Nutrisse truly blonde. On the back of the pack you'll see a little hair chart that shows the hair going from dark brown to light blonde (but don't get your hopes up). This product works amazingly, but like I said earlier, there is no way to get your hair from dark to platinum overnight.
This bleach is £4.50 at Wilko and also comes in different strengths, so if your hair is already light brown or dark blonde, you could try using a weaker one as the stronger one may damage your hair unnecessarily. If you don't want to use this bleach, I recommend finding a similar product. LIVE XL has their own vision which is around £5. I don't recommend using the bleach powder and developer that you buy separately, unless you already know that's what works on your hair. Once you've purchased your dye, you're ready to bleach your hair. Make sure you read the instructions carefully, then apply the product as described. Straight into your oil covered hair. Make sure you do not wash it out beforehand. Whilst applying the bleach, make sure you cover every part of your hair or you'll end up with patchy bits! Try get someone to check the back and remember to section your hair off. When you've washed it off, pat your hair dry with a towel and move on to step 4.
Step Four: Toning and Conditioning
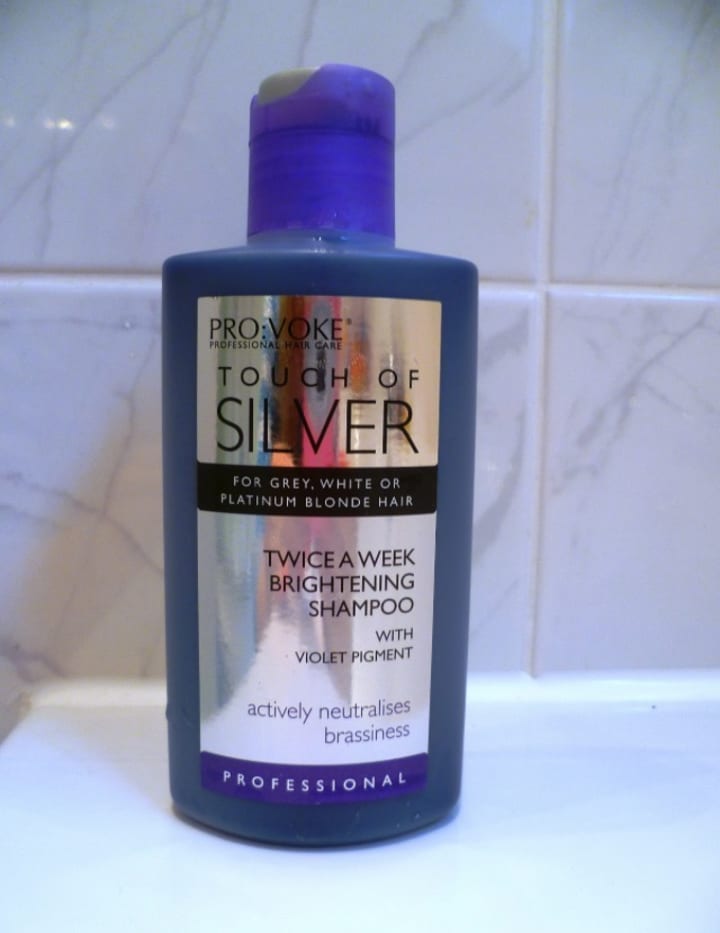
If you're going to bleach your hair, you need to get a good toner and conditioner. You have probably heard people raving about this wonderful purple stuff! Touch of silver toning shampoo (blue shampoo) is a well known brand for a reason. It works amazingly to majorly reduce orange and yellow tones from bleached hair. It does this by counteracting the brassy tones with its bluey-purple colour because it's on opposite side of the colour wheel. You can purchase this life saver for under £3. You apply it like normal shampoo and leave for 5 minutes before rinsing. Make sure you apply it evenly, though, or you'll end up with patchy hair!
By now, your hair should be an orange-yellow colour. Hopefully it is a light peach or ideally light yellow; if it is light yellow, the toner should bring you to a blonde colour. On peachy, light orange hair it will tone down the brassy tones. On any colour darker than these, the toner will not work at all.
After rinsing the shampoo, use a deep conditioning hair mask or your favorite conditioner generously. Leave on for as long as possible before rinsing with cool water to lock in the moisture.
If you still haven't got blonde hair, don't worry! Just wait a few days or possibly weeks (depending on how damaged your hair is) and repeat steps 2,3 and 4. Make sure to keep your hair conditioned in between bleaches. You can also tone your hair using a hair dye. You want to find ones with names such as ash blonde, cool blonde, or iced blonde as these colours are cooler toned and will counteract any redness.


Comments
There are no comments for this story
Be the first to respond and start the conversation.