
How do I choose the right size topper? A Stylist's Guide to Measuring Beyond the Loss Area
How to Size Hair Toppers: A 2026 Stylist's Measuring Guide

How do I choose the right size topper? A Stylist's Guide to Measuring Beyond the Loss Area
How do you pick the right size Hair Topper for a client? Start by looking at their Thinning Hair. Next, match the base shape and size so it doesn't pull on their healthy strands. It's really that simple. This Bono Hair stylist guide to measuring gets you the exact Coverage they need. It'll help you dodge scalp tension, bad blending, and extra refits using clear diagrams and video support.
Key Takeaways: Sizing Hair Toppers for Security and Seamless Blending
Separate measurements define thinning width and length.
Clip anchors must sit in stable hair beyond the sparse area.
Blend allowance extends around every edge of the measured loss area.
Base shape should follow the loss pattern and scalp contour.
Oversized bases create visible edges on fine hair.
Why Topper Sizing Is About Anchor Security, Not Just Coverage
A Hair Topper that covers the area of Thinning Hair can still be the wrong fit if its clips land on fine or weak strands. Those clips might slide around while worn, and all that repeated tugging puts way too much strain on the scalp.
Security actually comes from solid anchor spots around the base, not from Coverage alone. Check where it needs to sit using a scalp diagram or a quick fitting video. Then, just map out those exact same landmarks every single time before fitting your client. Simple.
Step-by-Step: Measuring the Core Hair Loss Area
Start by looking at the thinning area, but make sure to leave enough healthy hair around the Hair Topper base for the clips to grab onto. Getting these measurements right cuts down on refits. Plus, it helps you pick a base shape that actually matches your client's specific loss pattern.
Grab a soft measuring tape and write down the width and length separately. Using a scalp map makes every consultation easy to repeat. Simple as that.
Step 1: Measuring Width (Side to Side) Across the Peak Loss Zone
Part your client's Thinning Hair just like you normally would. Put the tape at one outer edge of the visible thinning, stretch it across the widest point of the crown or part line, and stop right at the other side. Jot down the width without pulling the tape too tight.
The Hair Topper needs Coverage past this zone. That way, the clips sit in strong, healthy hair instead of grabbing onto sparse strands.
Step 2: Measuring Length (Front to Back) Along the Natural Part
Keep your tape right on the natural part, starting from the front edge of the hair loss and moving back toward the occipital curve where the head starts rounding. Mark the exact spot where the visible thinning stops. Then, write down that distance as the length for the base size.
Don't measure all the way down to the nape or follow the curve along the back of the head. The base needs to cover the crown or part thinning, but it still has to leave enough natural hair up at the hairline for seamless blending.
Visual Aid & Diagram Placement: Mapping Scalp Points
Keep a scalp diagram or an overhead photo right next to your consultation notes. Mark the front, back, left, and right endpoints directly on the scalp using a washable makeup pencil. After that, just transfer those marks over to your diagram.
This beginner step helps a stylist or expert double-check the base boundaries before ordering from Bono Hair. Once that's sorted, look closely to see if the hair at each outer point is actually strong enough to anchor the clips.
Step 3: Performing the Tension Test to Locate Healthy Anchor Hair
Clip placement matters just as much as base measurements. A Hair Topper might cover the loss area perfectly, but it'll still cause problems if the pressure-sensitive clips snap shut over weak bio hair.
The Tension Test helps you spot every Healthy Hair Anchor before you mark any clip positions. Doing this protects the client's remaining hair and cuts down on refits.
The Problem: Clipping Into Fragile or Thinning Bio Hair
Pressure-sensitive clips put all their pulling force on the few strands caught right under each comb. When that hair is already thinning or shedding, any clip movement just adds traction and strains the scalp.
Don't treat Coverage hair like anchor hair. Simple as that. A Hair Topper might hide the loss area, but putting clips right in that spot can actually worsen Thinning Hair and leave you with a loose fit.
The Fix: Executing the Stylist's Tug Test for Scalp Security
To find a solid Healthy Hair Anchor, isolate the hair right outside the loss area and hold it close to the scalp. Give it a gentle pull outward with your fingers. If your client feels any tenderness, movement, or discomfort, stop right there.
So, where should you place clips on a Bono Hair Topper for maximum comfort? Just mark the stable spots past the sparse hair, then double-check every single planned clip position in the final blend zone.
Calculating the Blend Zone Formula for Natural Transitions
Size the base by adding a blend allowance to every single edge of the measured loss area, not just once. Here's the formula: base width = loss width + (2 x blend allowance); base length = loss length + (2 x blend allowance). This border has to reach stable hair. That way, the clips can actually grip and the Hair Topper can blend right over your client's bio hair.
Map the outline on a head diagram. Flat dimensions are really just a starting point. But remember, the client's actual scalp curve is what sets the final shape. That's it.
Matching Base Shape to Scalp Contour and Loss Patterns
Base size needs to cover the thinning area plus enough surrounding hair for a natural blend. But the outline has to follow the client's actual loss pattern. An oval, teardrop, or narrow strip Bono Hair Topper can look wildly different on the exact same scalp.
Grab a head diagram during the consultation to mark out the sparse spot, part direction, and frontal edge before picking the shape.
Oval vs. Teardrop Bases for Crown Thinning
Go with an oval base when the thinning spreads out evenly around the crown. The balanced outline gives you Coverage over a round or wide sparse zone without creeping too far toward the hairline.
Try a teardrop base when the crown is thin, but the loss gets narrower as it moves up the part. The wide end sits right over the crown, and the tapered end just follows the part line. This cuts down on extra base Coverage and usually gives you a much cleaner blend.
Narrow Base Strip Designs for Widening Parts
A narrow, long base works perfectly for early part widening. It focuses right on that visible line of scalp instead of hiding the healthy hair around it. Just measure the part's length and width on your scalp diagram, then add only enough extra width to blend it nicely into the stable hair.
Don't pick a wide crown base for a narrow part. That extra Coverage just adds bulk right where your client still has good hair density. That makes the Hair Topper way harder to hide.
Front-Recession Bases and Fringe Blend Considerations
Clients can totally wear a Hair Topper even when their Thinning Hair reaches the very front hairline. But the base has to stretch far enough forward to hide that sparse fringe area. A crown-shaped oval usually leaves the front edge exposed, making the transition pretty obvious.
Pick a shape that matches the frontal recession and leaves enough surrounding hair for a smooth blend. Always check the final look using the client's usual part and fringe direction. Both of those can easily reveal an edge that looked totally hidden during a simple straight-back fitting.
Accounting for Head Curvature: Why Flat Measurements Fail
A straight ruler only measures the flat distance across the head. It doesn't capture the actual curve a base needs to hug. So, if you're wondering, "How do you measure your head for a Hair Topper?" — here's the trick. Outline the spot with Thinning Hair, and just run a flexible measuring tape right along that shape.
If you go with a flat measurement for the base size, it might pull tight at the edges or bunch up in the middle. Always test the template against your client's scalp before ordering from Bono Hair. Plus, wrapping around that larger curved surface naturally gives you more visible volume.
Managing Base Size vs. Hair Density: Preventing the "Wiggy" Look
A bigger base on a Bono Hair Hair Topper holds more hair across a wider space, even if the density percentage stays exactly the same. When you put that on a client with fine bio hair, the extra bulk often creates an obvious ridge right where the piece meets their natural hair.
If you want a realistic result, just match the base directly to the Thinning Hair area. Keep the perimeter density light enough so it transitions smoothly. Make sure to check on the client again during their refits, since their hair loss might eventually spread past today's Coverage zone.
Future-Proofing the Size: Sizing for Progressive Hair Loss
For clients dealing with progressive androgenetic loss, don't add a fixed expansion margin to their initial Hair Topper base. Just measure the exact hair loss area you see today. An oversized base often leaves a visible edge, making it much harder to blend with Thinning Hair.
Make sure to record the outline using a measuring diagram or a quick photo during the consultation. Then, compare it every time they come in for a refit. If the loss spreads past the edges, simply resize their next piece instead of trying to guess what might happen down the road. From there, the base material decides exactly how that measured piece will sit and attach.
Comparing Base Types: How Base Material Affects Sizing and Realism
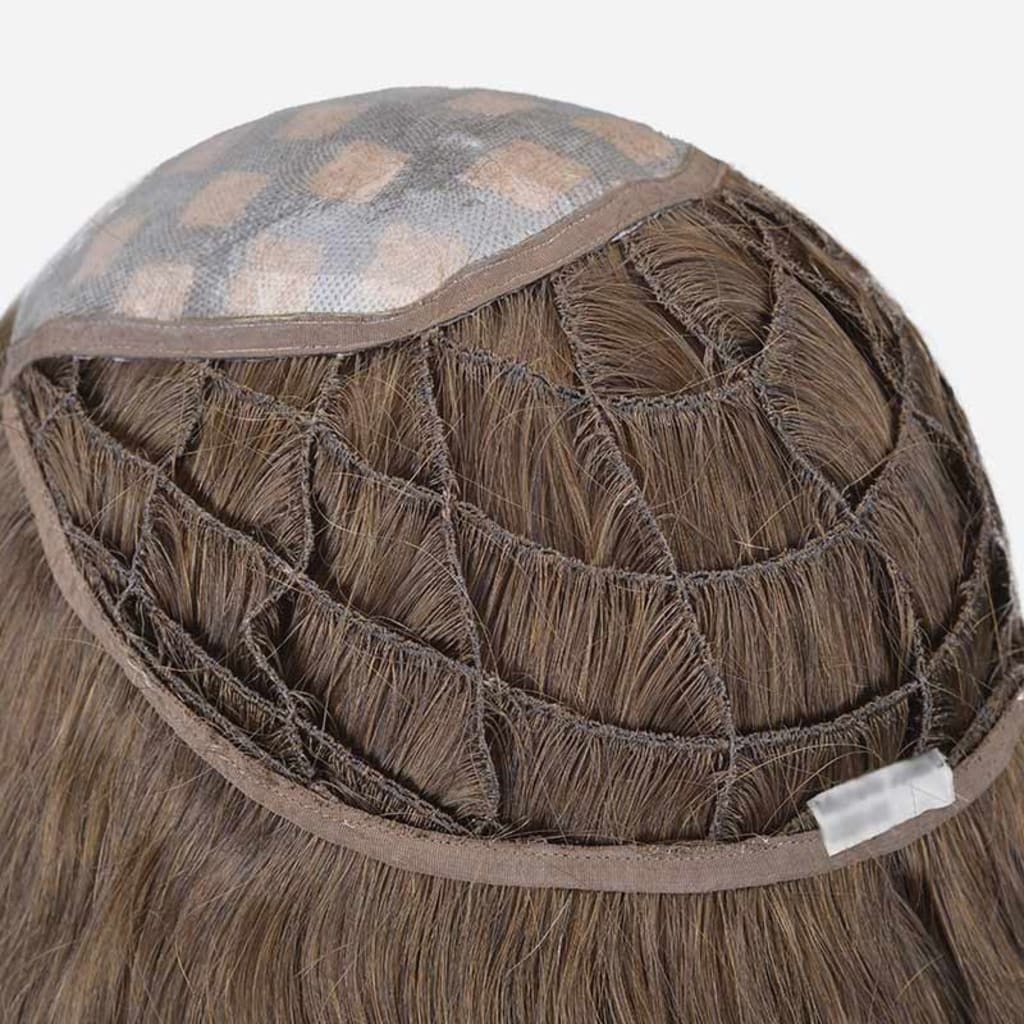
The base material actually changes how the exact same dimensions act on a client's scalp. A 6 x 6 inch lace base can easily flex right around a curve. But a silk top of that exact same size usually sits a bit flatter.
During your Full Wig vs. Hair Topper consultations, make sure to match the material to the Coverage and attachment method. Don't just rely on the measurements alone.
Silk Base vs. Lace Base: Scalp Realism and Edge Flexibility
Silk bases give you a really realistic, scalp-like part since the knots are hidden under a layered top. But here's the catch. That firmer panel might not settle perfectly over a sharp curve on the head, which leaves a pretty obvious edge if the base is too big.
Lace is a lot more flexible. It hugs irregular head shapes better and lets the outer edges move naturally. Most of the time, lace looks better at the edge, while silk wins for that true scalp-like part.
Monofilament and Poly (PU) Borders for Attachment Security
You'll want to use a monofilament base with a poly (PU) edge when your client needs reliable, repeatable clip placement and a solid outer boundary. That firmer border gives Pressure Sensitive Clips a much steadier grip than a soft edge ever could.
Poly does cut down on flexibility at the edges, so definitely don't use it to make up for a Hair Topper that's just too big. Always double-check that the base actually matches the Coverage outline before you place an order. The base material helps with the overall fit, but it can't magically fix the wrong dimensions. Simple.
Common Topper Sizing Mistakes and How Stylists Fix Them
Base material can't fix a bad size choice. During a fitting, a Hair Topper that's too small pulls on weak surrounding hair. But an oversized base just flattens fine bio hair.
Here are the two biggest errors that cause constant refits, plus how to actually fix them.
Mistake #1: Buying Exactly the Size of the Thinning Area
You need a base that stretches past the patch of Thinning Hair. This way, every clip grabs onto healthy anchor hair instead of resting right on the edge. If you just match the bare spot, the clips will yank on fragile strands. That creates scalp tension and makes the piece pop off when you move around.
If you're wondering how much bigger to go, just map out the clip spots on a fitting diagram. Every single attachment point needs stable hair. Simple as that.
Mistake #2: Over-Sizing and Overwhelming Fine Bio Hair
People often panic and wonder, "What happens if I pick a Hair Topper base that's too small?" This fear usually leads to going way too big. A massive base spreads clips out across fine bio hair. It ends up looking bulky, or worse, it shifts around at the edges.
Just trace your exact Coverage boundary on a diagram. Then, pick the smallest shape that still locks down tight. Doing this quick pre-fit check catches both sizing mistakes before the consultation is even over.
Diagnostic Checklist: Is Your Client's Bio Hair Ready for This Base Size?
A topper base really only works if every clip has healthy bio hair to hold onto. So before you place the order, make sure to double-check the Coverage boundary, the base shape, and exactly where the clips sit on your fitting diagram.
How do you figure out what size Hair Topper to get? As a stylist, check that the base stretches past the Thinning Hair, but without covering up more fine hair than it needs to. Verify your client has solid anchor hair at every single clip point. After that, just compare your diagram with a measurement video or a visual template. A quick visual review makes the final choice way easier for your client to trust.
Stylist Walkthrough Video Placeholder: Real-World Sizing Demo
Make sure the video shows the measuring tape sitting completely flat across the area of Thinning Hair. From there, stretch it out into the healthy bio hair at every single clip point. That extra margin gives the Hair Topper a really solid grip. Plus, it keeps the base from getting way too big.
Next, show a quick, gentle tug test right after you place the template down. Once you've locked in those dimensions, just pick a total hair length that seamlessly blends with your client's natural bio hair. That's it.
Choosing the Right Hair Length Relative to Bio Hair
Always pick a Hair Topper length that matches your client's bio hair before you even start styling. The right length lets you blend things easily without thinning the ends too much.
Go for hair that's just a bit longer than the final look. Then, trim and add layers only where you have to. Match up the texture and their usual part. But remember, a base that's too small will still make that Coverage edge stand out.
What Happens If a Hair Topper Base Is Too Small?
If a Hair Topper base is too small, it leaves the area of Thinning Hair completely exposed. It also makes the Coverage edge really obvious. Your clients might end up constantly tugging or shifting the piece around just trying to hide that line.
Plus, the clips will pull on a really narrow section of their natural hair. This causes tightness, sore spots, or even traction stress. Make sure to bring up these warning signs during the consultation. It helps first-timers actually get why taking accurate measurements is a big deal before they pick out a base shape.
How to Help Clients Transition to Their First Hair Topper
That first fitting is all about setting the right expectations. A Hair Topper might feel a little obvious to the client at first, and the base has to provide full Coverage over their Thinning Hair without pulling on any healthy strands. This guide comes in handy right when the stylist uses a tape measure to nail down the exact base shape and size.
Try showing a head diagram or a quick measuring video, and then ask your client to repeat the steps. Bottom line: getting a reliable fit depends entirely on working with a supplier like Bono Hair, where the bases actually hold their true shape and size.
Manufacturing Quality and Base Consistency: The Factory Perspective
A topper's stated Base Size is only reliable when the factory actually controls the production process. The Base Material has to lie flat. Also, things like ventilation, knot sealing, and edge finishing shouldn't pull or warp the outline.
Perimeter shifts can make a measured base sit wider, shorter, or uneven on your client's scalp. So, ask suppliers how they check the final outline against the approved template once the hair gets added. These simple checks easily cut down on avoidable refits.
Partnering with Bono Hair for Custom Base Sizes and Wholesale Solutions
Bono Hair helps salon owners and distributors by offering custom Base Size templates, which makes repeat ordering a breeze. A stylist or hair replacement expert can simply send in an approved template. From there, you just confirm the base material, outline, and construction details before production starts.
写作建议
From the Manufacturer's Desk: Consistency really comes down to checking every finished base against the approved template right after the ventilation and edge work. Make sure to ask for clear approval records on every OEM order. It's especially important when you're reordering for the same client.
Frequently Asked Questions About Hair Topper Sizing
Should a hair topper be longer or shorter than your hair?
Neither. Match your bio-hair length first. A topper that's too short or too long forces aggressive cutting and thinning, which ruins the blend.
Can people tell if you are wearing a hair topper?
Not if it fits. Visible edges, bulk, and shifting clips give it away. Bono Hair toppers need stable anchor hair beyond the thinning area—not an oversized base.
About the Creator
Leo
Passionate men's hairstylist with a keen eye for detail and a knack for creating on-trend looks. Dedicated to delivering hair restoration education that enhances individual style.
Enjoyed the story? Support the Creator.
Subscribe for free to receive all their stories in your feed.
Comments
There are no comments for this story
Be the first to respond and start the conversation.