
How can I tell if real hair system photos look natural? Look for the Scalp Visibility
Hair System Before & After: Real Customer Stories & Photos
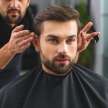

How can I tell if real hair system photos look natural? Look for the Scalp Visibility
A hair system's realism really comes down to one core test: can the eye spot the scalp, especially in photos?
How much scalp you see shows how naturally light passes through the base and the hair's thickness. And pictures? They quickly expose the tiny flaws that cameras love to exaggerate. These basic details are exactly what separate a high-quality system from an obvious hairpiece.
Key Takeaways
Inspect the scalp closely: Hair should appear to grow directly from the pores, utilizing bleached knots or V-looping for maximum realism.
Zoom in on parting lines to spot edited photos; seek natural skin texture and avoid artificial, solid "walls of hair" at the hairline.
Select the right base: Ultra-thin poly skin mimics natural scalp reflection, while lace provides a highly undetectable, breathable front.
Judge realism using raw, user-generated photos taken in natural sunlight, as studio lighting hides crucial flaws.
Invest in a professional "cut-in" to seamlessly blend the hair system's length and density with your natural hair.
The Detective’s Guide to Hair System Realism: Why Scalp Visibility is the Ultimate Litmus Test
A great Hair Replacement System doesn't fool people with the hair itself—it convinces them with the scalp. An expert eye goes straight to Scalp Appearance. Why? Because that's exactly where fake pieces fall apart under bright lights and close stares. When the scalp looks right, the whole Natural Look follows. But if it doesn't, nothing else will save the piece. To judge it properly, just look at how the hair actually meets the skin.
The "Pore Effect": Does Hair Emerge From the Skin?
Realism starts right at the root. With natural growth, Real Hair looks like it grows straight out of tiny pores. It doesn't just sit flat on top of your head. Lots of cheap systems fail here because you can actually see exactly where the hair is tied or looped into the base. That creates a weird lift or pattern that catches the eye immediately.
Advanced methods like V-looping and Injected hair help fix this problem. V-looping feeds hair right through the base without using any knots. On the flip side, injected techniques push strands straight into a skin-like layer to mimic real follicle depth. Both tricks cut down on that fake "attached" look to give you a softer, natural blend.
When this pore effect is dialed in, the illusion holds up perfectly, even under harsh lighting. That brings us to the next checkpoint. You need to look closely and see if the attachment points are visible.
Knot Transparency and the Science of Bleached Knots
Dark knots are the biggest dead giveaway in a Lace base hair system. Every single strand gets tied down with a knot. Without the right treatment, these little knots look like tiny black dots scattered across the scalp. And it's especially obvious on lighter skin tones.
Bleached knots solve this issue by lightening the knot color so it naturally matches the scalp. The process strips pigment right out of the hair at the base. This makes each knot way harder to spot. When experts do it right, the knots practically vanish. It genuinely looks like the hair is growing directly out of your skin.
But bleaching definitely has limits. If you over-bleach, you weaken the hair and ruin its lifespan. Under-bleach it, and those dots are still staring right back at you. It's all about balance. The knots need to be clear enough to hide, but strong enough to actually last. When those knots fade out properly, the entire base gets much harder to detect. And that brings us to how well the whole system completely blends into your natural scalp.
Spotting "Marketing Magic": How to Identify Edited or Fake Photos
A polished hair system photo can easily hide flaws that are instantly obvious in real life. Heavy filters, studio lighting, and edited shots usually blur the exact details you need to judge realism. Your job is to look past all that shine. You need to check what the camera is trying to hide—especially scalp visibility in photos. Start with a close look at the parting line and skin texture.
The "Zoom Test": Inspecting the Parting Line and Skin Texture
The fastest way to catch an edit is by zooming right in on the parting line. Open up the highest-resolution image you can find. True macro photography spots what normal viewing hides. When you zoom in, look for uneven pores, slight color shifts, and natural variation in skin-tone matching. Real scalps just aren't perfectly smooth or one flat shade.
Edited photos usually blur these details out entirely. You'll spot overly soft skin, zero visible pores, or a weird, plastic-like shine right across the part. The hair might even look like it floats above the base instead of actually growing right out of it. And if every single strand sits a little too perfectly, that's another big red flag.
Next, check the contrast. In real images, your scalp and hair have subtle transitions, not sharp, harsh cutoffs. If the blend looks heavily airbrushed, you can safely assume post-processing is doing all the heavy lifting.
This matters the most at the very front, where flaws are the hardest to hide. And that leads us straight to density.
Red Flag: The "Wall of Hair" vs. Graduated Density
A natural frontal hairline is never just a solid block. Real hair density starts lighter at the front edge and slowly builds as it moves back. We call this graduated density, and it perfectly matches the age-appropriate density you see in real people.
Fake-looking systems often give you a harsh “wall of hair.” The front edge looks thick, completely straight, and uniform from temple to temple. No gaps. No variation. It's just a dense line that grabs unwanted attention right away. It might look “full” in photos, but in person, it totally stands out.
Look closely at the individual strands. A natural hairline always has irregular spacing, with a few finer hairs mixed in for good measure. That slight randomness is exactly what makes things believable.
But creating that soft transition isn't just about good styling. It depends heavily on how the system is actually built, which is exactly where materials and construction come into play next.
Choosing the Right Foundation: Lordhair Base Materials and Scalp Realism
Base material decides how real your scalp actually looks, way more than density or styling ever will. When looking at Lordhair systems, you mostly pick between skin (poly) and lace. They both act totally differently when light hits them. Skin gives off that natural scalp reflection if done right. Lace just lets your actual skin peek through. It's a choice that directly impacts how visible your part and hairline are. Simple.
The 0.03mm Ultra-Thin Skin: The "Second Skin" Effect
The Lordhair Ultra-Thin Skin features a poly base roughly 0.03mm thick. That super-low profile is exactly what gives it a "second skin" vibe. Because the material lays completely flat on your head, you won't see any weird edges or lifting up front. Light bounces smoothly across the surface. It copies how a real scalp shines in the sun, avoiding that fake, plastic glare completely.
This is a massive deal for non-surgical hair replacement. The whole illusion relies on a smooth transition, not just having nice hair. Once the base vanishes from sight, the hair looks like it's growing straight out of your head. You secure a clean, seamless hairline, even when someone stands right in front of you.
But there's a trade-off with airflow. Poly bases hold onto more heat and sweat than lace does, especially if you live somewhere hot or hit the gym hard. You'll notice that comfort gap after wearing it all day. That's exactly why people usually weigh it against lace next.
French vs. Swiss Lace: Achieving a Natural Hairline with Lordhair
Lordhair lace systems tackle realism from a different angle. They literally let your own scalp show right through the mesh. Swiss lace is thinner and a lot finer. That makes it the absolute closest thing to an invisible front hairline you can get. It breaks up light instead of bouncing it back, so you rarely spot a shine line up front.
French lace rocks a slightly thicker weave. That extra structure boosts durability and makes the whole thing easier to handle. Still, the hairline might show a bit more under harsh lights. You get a longer lifespan and better stability, but you do trade off a tiny bit of invisibility.
Bottom line: go with Swiss lace for max realism, or grab French lace if you want something lower maintenance that lasts longer. And once you finally decide, lighting becomes the ultimate test. Sunlight, harsh indoor LEDs, and camera flashes will always reveal these materials in totally different ways.
Environmental Factors: How Scalp Visibility Changes Under Different Light
Lighting changes everything. A hair system might look perfect inside, but slightly weird out in natural sunlight. That's because light variables—like direction, brightness, and color—change how the base reflects against your scalp. Indoor LED bulbs usually soften the fine details. Outdoor light, on the other hand, exposes every edge and density shift. If you're after true scalp realism, you have to judge it where the flaws actually pop up. It all starts with the sunlight test.
The Sunlight Test: Why Raw Photos Matter
Natural sunlight gives you the absolute most honest view of any hair system. It's bright, direct, and nearly impossible to fake. That's exactly why raw pictures matter way more than polished studio shots. Studio lighting is tightly controlled to hide shine, weird density gaps, and visible base edges. Real-life photos don't.
User-generated content is your best filter here. Hunt for real-life pictures taken outside, especially right around midday when the sun beats down the hardest. You'll see exactly how the base acts—whether it actually looks like skin or noticeably stands out. Make sure to check the hairline, the part, and the crown under that bright light. Those specific spots give everything away.
But even the best-looking system in photos still needs one last step to look totally natural for daily wear. That's where professional finishing steps in.
The Role of the "Cut-In" in Blending and Realism
A cut-in is what actually turns a decent system into a believable head of hair. A professional stylist trims and shapes the piece to perfectly match your natural bio-hair. They focus heavily on blending the transition zones, especially around the sides and the back. Without this step, even a flawless base is going to look completely separate from your real hair.
Blending isn't just about the length. It also covers density control, texture matching, and how the hair drops under different lighting. The stylist tweaks these little details so the system acts exactly like your own hair, whether you're inside a bright office or out in the sun.
So there's your full path: look at raw photos in natural sunlight, pick the right base, and then let a professional stylist finish the cut so it actually holds up in the real world. Simple.
Frequently Asked Questions About Hair System Naturalness
Is your scalp supposed to be visible through a hair system?
Yes. Real hair naturally shows some scalp. If you see a solid wall of hair with zero gaps, it's a dead giveaway. You need graduated density that builds up slowly from the front edge.
What is the most undetectable hair system base for the hairline?
Lace or ultra-thin poly skin. Lace gives an invisible front if the knots are bleached. Poly mimics natural scalp reflection. Both use tricks like V-looping to make hair look like it grows directly from pores.
How can you tell if someone is wearing a hair system in person?
Look at the roots. Cheap lace pieces have unbleached knots that look like tiny black dots on the skin. A harsh, straight-across density line at the front without natural graduation also screams fake.
Can you swim and exercise with a natural-looking hair system?
Yes. You just need the right adhesive. Lace breathes best for heavy sweaters. Give the glue a full 24 hours to cure before hitting the pool or gym. Once set, it stays put.
About the Creator
Leo
Passionate men's hairstylist with a keen eye for detail and a knack for creating on-trend looks. Dedicated to delivering hair restoration education that enhances individual style.
Enjoyed the story? Support the Creator.
Subscribe for free to receive all their stories in your feed.
Comments
There are no comments for this story
Be the first to respond and start the conversation.