
Can I touch up only the front hairline or do I need to remove the whole hair system?
How to fix your hairline if the hair system lifts

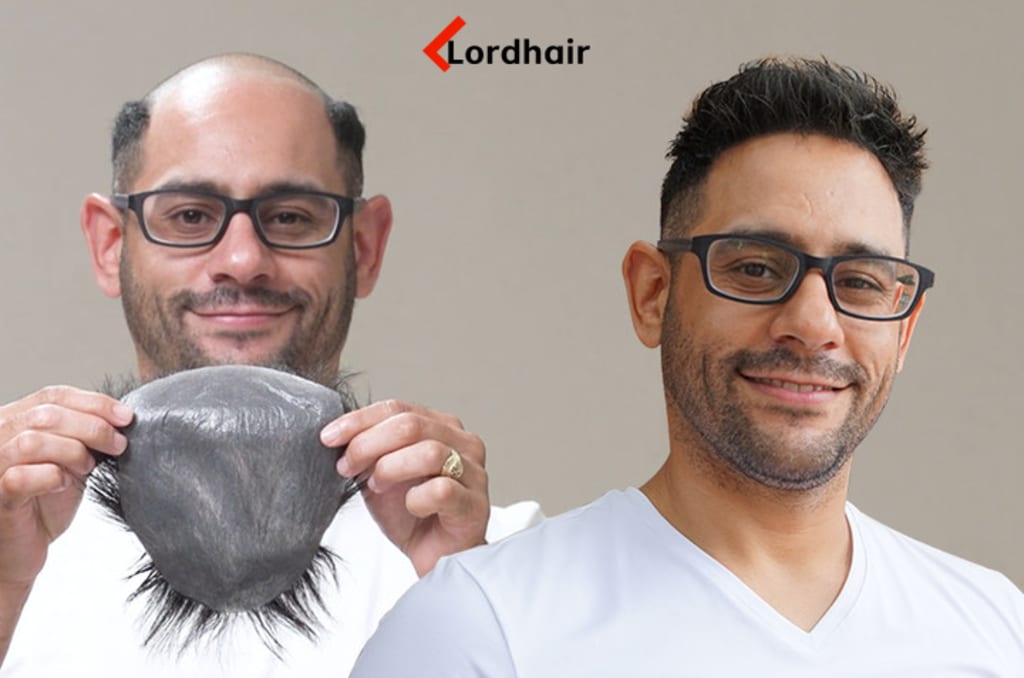
Can I touch up only the front hairline, or do I need to remove the whole hair system?
Doing a quick touch-up on the front hairline definitely saves time. But it's not always a safe bet if you aren't careful. Small fixes only really work when the base is still secure and clean.
Here's how to refresh your front hairline without lifting the full Lordhair system. We'll also cover when it's actually smarter to just stop and redo the entire bond for a safer, longer-lasting hold.
Key Takeaways
Touch up only if bond secure, scalp calm, recent reinstall.
Any lifting or irritation means full removal is safer.
Front touch ups save time but deliver shorter hold.
Frequent touch ups cause adhesive buildup that weakens the bond.
Precise tools and prep prevent solvent spread into secure areas.
Immediate Direct Answer: Can You Touch Up Only the Front Hairline?
Yes, you can touch up just the front hairline. But you should only do this when the rest of the bond is solid and your skin is completely calm. A safe partial fix really depends on three things: no lifting beyond the front edge, zero irritation, and a recent full reinstall. Simple.
Condition 1: The Perimeter Bond Remains Completely Firm
Your hair system needs to be strapped down tight on the back and sides. That means absolutely no lifting or squishy spots around the outer edges.
If any part shifts under light pressure, a front fix will fail fast. It'll actually end up spreading that lifting across the whole base.
Condition 2: The Scalp Is Free from Itching and Irritation
Your scalp has to feel normal. No itching, redness, or burning at all—especially right under the front skin base area.
Irritated skin ruins the glue's grip. It also bumps up the risk of an uneven bond or early peeling right at the hairline.
Condition 3: The Last Full Reinstall Was Within 14 Days
A front touch-up is really only going to work well if your last full reinstall happened within the past 14 days.
Older bonds naturally break down from everyday oil and sweat. Because of that, patching just the front hairline won't hold for very long.
Front Hairline Touch-Up vs. Full Removal: Direct Comparison
A front fix gets the job done faster, but a full reinstall hits the reset button on everything. Should you take off the whole hair system or just patch up the front? Bottom line: touch-ups save you time, while full reinstalls take the prize for durability.
It really comes down to your time, how strong you need the hold to be, and your scalp health. Both methods have their trade-offs. Just match your choice to your schedule and how well your current bond is holding up.
Time and Maintenance Effort Needed
Touching up a hairpiece usually takes about 10–20 minutes. A full reinstall often runs 60–90 minutes once you factor in cleanup.
You'll save time right now with a quick touch-up. But keep in mind that frequent fixes can really add up over the course of a week.
Average Bond Longevity and Hold Strength
A fresh full reinstall with liquid adhesive or hair system tape holds longer and gives you a much more even grip. It spreads the tension right across the entire base.
A front-only fix just restores the hairline for a little while. You should expect shorter wear times before the next lift pops up.
Scalp Hygiene and Adhesive Buildup Risks
Repeated front repairs end up trapping adhesive and residue right along your hairline. All that buildup can make the edge look dull and feel pretty tacky.
Taking the whole thing off clears away old adhesive all over your scalp. Plus, it cuts down on odors, itching, and uneven bonding zones.
Key Advantages of Performing a Front-Only Touch-Up
A front-only touch-up keeps your hairline looking fresh without having to take off the whole system. It brings back that natural look right where people actually look first.
The big win here is targeted upkeep. You get less disruption to your daily routine, but the most visible area stays clean and secure.
Drastic Reduction in Daily Maintenance Time
A quick front touch-up cuts your routine down to minutes instead of an hour. You're only tweaking the hairline attachment, not the entire hair replacement.
Fewer steps just mean less daily work. You stay looking great without having to plan out full resets.
Extended Lifespan of the Hair System Base
Limiting those full removals really cuts down the stress on your base materials. Both lace base and skin base options hold their shape a lot longer with fewer full detachments.
Less handling means you get fewer weak points over time. Your system stays intact through regular wear. That's it.
Potential Risks of Over-Relying on Partial Touch-Ups
Front touch-ups definitely save time, but skipping full removals too often creates hidden buildup right under the base. That short-term convenience easily turns into long-term attachment issues and hygiene headaches.
The core problem is accumulation. Old adhesive layers, natural oils, and daily debris stack up. This weakens your hold and makes future maintenance much harder. Knowing about these risks helps you pick the right tools to keep residue under control.
Invisible Sweat and Oil Trapped Under the Base
Sweat and oil don't just stop at the hairline. They move under the base and sit flat against your scalp, especially when you sweat heavily.
Over time, this trapped moisture messes with your scalp's balance. It can lead to annoying itching, irritation, and a weaker adhesive grip. That means you'll see more lifting along the areas you haven't touched up. Not fun.
Ghosting and Discoloration of Liquid Adhesive
Liquid glue can actually change texture when it's layered over and over without a full clean-up. Products like ghost bond might turn white or get gummy instead of drying clear.
This buildup completely ruins your bonding strength. It creates uneven spots where new adhesive just can't cure right, making the whole attachment less reliable every single time you do a touch-up.
Essential Tools for a Front Hairline Touch-Up
Getting clean results at the front hairline comes down to using the right tools, not just having good technique. The main goal is control. You want to remove only what you need, then stick it back down without messing up the rest.
A precise touch-up kit keeps buildup in check. It protects your scalp and stops you from weakening areas that are still holding strong.
Solvents and Adhesive Removers
A targeted solvent or adhesive remover just loosens the front edge without bleeding into your secure zones. Controlled formulas stop accidental spreading and protect your existing bonds.
It really comes down to a trade-off between speed and precision. Fast solvents work quickly, but they can travel. Thicker removers stay exactly where you put them, but you'll need to give them a bit more time to break down the leftover residue. Simple.
Scalp Protectors and Isopropyl Alcohol
Isopropyl alcohol wipes away scalp oils so your new adhesive can actually grip properly. It dries super fast and leaves a perfectly clean surface with zero residue.
Using a scalp protector adds a thin barrier to cut down on irritation and give you a better hold. Sure, the downside is an extra step. But it usually extends how long the system stays attached at the hairline.
Base-Specific Adhesives and Tapes
Hair system tape gives you a quick, clean placement for the front edge. On the flip side, liquid adhesive creates a much thinner, natural-looking hairline.
Tape is just way easier to handle when you're making small fixes. Liquid adhesive blends better, but you have to apply it carefully so you don't end up with thick buildup or harsh visible edges. That's the trick.
Preparation Steps Before Lifting the Front Hairline
Getting a clean separation at the front hairline starts before a single drop of solvent touches your hair system. Good prep work is the difference between a precise lift and a messy spread.
The main rule here is control. You need to keep loose fibers out of the way and shield the bonded areas so nothing shifts while you work. Do this right, and you'll avoid accidentally loosening things while keeping your overall hold completely intact.
Securing Existing Hair Away from the Hairline
Pull both the hairpiece fibers and your own hair back from the front edge so the boundary line stays visible and clean. This is what keeps that natural look intact while you handle the touch-up.
Just make sure to use light tension. If you pull too hard, you can easily stretch the base and make the hairline sit unevenly when you go to reset it. That's it.
Protecting Surrounding Secure Areas from Solvent
Set up a clear barrier around the bonded zones near the crown and sides before you even reach for the solvent. This stops the liquid from spreading too far and protects your existing bond.
Keeping a tight edge puts the solvent exactly where you want it. This means only the front edge lifts up, while the rest of your hair system stays firmly stuck down.
How to Lift the Front Hairline Without Disturbing the Bond
A clean front lift is all about precision, not force. Do it right, and you can fix a lifting edge without messing up the secure spots behind it. It's really that simple. Just release the first few millimeters so the rest of the bond stays fully intact.
Applying Solvent via Micro-Dosing
Grab a fine-tip applicator or a cotton swab to put tiny drops of solvent right along the front edge. This stops the adhesive remover from sneaking into areas you don't want it to touch.
Too much liquid spreads fast. That weakens the bond behind the hairline. Keeping the doses small limits the lift to the exact spot you're working on.
Gently Peeling Back the Front Edge
Slowly lift the edge, stopping about 0.5 to 1 inch back from the hairline. This depth works perfectly for both lace base and skin base systems.
Go any further, and you'll risk loosening parts that are still holding on tight. A short, careful peel means the rest of your Lordhair system stays stable and perfectly aligned.
Cleaning Adhesive Residue from the Scalp and Base
Leaving old adhesive on your skin or base ruins your next bond and leaves an obvious edge. If you want to clean residue from a lace front hairline, you need to break down the glue completely first. Then, just lift it away without pulling.
Get this right, and you'll protect both your skin and that delicate base. Plus, a completely clean surface is the secret to making your next attachment hold tight and look natural.
Clearing Residue from Poly and Lace Bases
Poly bases can take a bit more friction. That means you can gently rub the softened residue away with a cloth. But lace front hairlines need blotting instead. Otherwise, you risk tearing the mesh.
A good solvent loosens buildup on both materials, but lace takes real patience. You can wipe poly down pretty quickly. Lace, though, needs light tapping so you don't ruin it.
De-greasing the Scalp Edge
Grab some 91% isopropyl alcohol and wipe down the scalp edge to clear out any leftover oils or solvent film. This simple step stops your next bond from slipping.
The alcohol dries fast, which is great. But don't overdo it, or you'll irritate your skin. One light pass is all it takes to reset the surface without drying you out.
Applying New Adhesive for a Seamless Hairline Attachment
A clean surface gets you ready, but getting that front edge bonded right is what actually makes the whole thing look natural. Bad glue placement just leads to obvious shine, gaps, or thick buildup right where everyone can see it.
You really just want to use the bare minimum. Put the product exactly where you need it. That way, the hairline melts right into your skin without any messy overflow.
Applying Thin Layers of Liquid Glue
Grab a small brush and paint the liquid adhesive on in super thin, even coats right along the edge. Make sure each layer turns totally clear before you add another one. This stops gross buildup.
Doing it this way gives you a softer, practically invisible hold. But it definitely takes a bit more time and a steady hand to keep things from seeping or getting shiny.
Placing Contour Hairline Tape
Line up your pre-cut tape strips right along the natural curve of your front edge. Keep them tucked just slightly behind the hairline so they stay totally hidden.
Tape is way faster and definitely cleaner than using glue. It can feel a little thicker, though, and it's not quite as flexible if you're working with a super fine lace front.
Re-attaching and Pressing the Hairline for Maximum Hold
Nailing that front hairline is what turns a good install into a natural look that lasts all day. Small mistakes here show up fast.
The goal is pretty straightforward: place the edge exactly where it belongs, then lock down the bond so it stays flat, hidden, and strong during daily wear.
Aligning the Hairline Position
Line up the front hairline with your original placement marks or skin crease. Even a tiny 2-3 mm shift makes the edge stand out.
Look into a mirror at eye level and slowly lower the unit from the center out to the sides. This keeps everything perfectly even across the front.
Curing and Pressing Techniques
Press the base firmly using the pads of your fingers for 30-60 seconds per section. Work in small zones so the bond sets evenly.
Hold steady pressure instead of rubbing. After that, just leave it alone for 5-10 minutes. This lets the attachment fully cure and stay flat.
The Two-Touch-Up Rule for Hair System Maintenance
Keep it to just two partial hairline touch-ups before doing a full reinstall. This stops buildup from weakening the bond and exposing the edge. That's it.
If you're wondering how often to do a hairline touch-up on your hairpiece, aim for every 3 to 7 days. But always do a full reset after that second fix.
When Is Partial Hairline Maintenance No Longer Sufficient?
Two touch-ups are usually the max. But the real cutoff happens when lifting spreads past the front. If the glue gives up in several spots, a full reinstall is your safest bet.
The second that failure hits the crown or traps moisture under the base, spot fixes just won't work anymore. At that point, the risks go up.
Signs of Total Bond Breakdown at the Crown
Crown separation means your hair system's grip is giving out across the back edge. You might feel it shift when you press down, or maybe you notice gaps popping right back open a few hours later.
Gluing down the front again won't keep the unit stable at this stage. The seal is totally broken. So, a complete reset is the only way to get your hold back.
Odor or Moisture Accumulation Under the Unit
A smell that won't go away usually means sweat and bacteria are trapped on your scalp, rather than just basic surface buildup. If that odor comes back a day after you clean the edge, the problem is hiding under the base.
Moisture turns your glue soft and can really irritate the skin. Take the whole unit off, give everything a deep clean, and put it back on. This gets things fresh again and keeps the base from getting ruined.
Differences Between Lace Front and Skin Base Touch-Ups
The base material changes exactly how you handle a partial hairline fix. Lace needs a gentle touch to protect the fine mesh. Skin bases, on the other hand, are super sensitive to pressure and stretching.
Get the method wrong, and you risk tearing, lifting, or cutting your Lordhair unit's lifespan short.
Special Touch-Up Steps for Ultra-Thin Skin Bases
A skin base—especially an ultra-thin poly one—stretches really fast under tension. Just press the adhesive down lightly and keep the lifted area as small as you can.
Stick to short strokes and don't pull. Even a tiny tug can warp the edge or cause small tears that get worse over time. That's it.
Handling Delicate Swiss and French Lace Fronts
Lace frays if you rub it too hard. Because of this, you have to keep your residue removal under control. Just dab some solvent on a cotton swab and gently lift the buildup right off the lace front hairline.
Let the solvent do the heavy lifting. If you scrape or wipe across that mesh, you'll loosen the hair knots and thin out the front edge.
How to Touch Up a Lifting Hairline Without Removing the Whole System?
Fixing a peeling front edge without taking off your entire hairpiece is all about speed and precision. Just clean the specific spot that lifted, brush on a thin layer of adhesive, wait for it to get tacky, and press it down firmly for 10 to 15 seconds.
It's a quick fix. Plus, it puts way less stress on the base. But keep in mind that doing this too often will leave a buildup of residue, which actually weakens your bond over time.
How Often Should You Do a Hairline Touch-Up on Your Hairpiece?
Most wearers need to refresh the front edge every 3 to 7 days. If you're wondering, "How often should I do a hairline touch-up on my hairpiece," that's your practical baseline for keeping things clean.
Frequent touch-ups keep the hairline looking completely natural, but you'll deal with adhesive residue building up a lot faster. Stretching it out longer cuts down on that buildup. But it definitely raises the risk of the edge lifting up and becoming visible.
Can You Apply Liquid Adhesive Over Old Tape for a Quick Hairline Fix?
Putting liquid adhesive right over worn-out tape just doesn't work well, and it can actually ruin your base. If you're wondering, "Can I use liquid adhesive over old tape for a quick hairline fix," the short answer is no. Glue simply won't stick to old residue.
Just take off all the old tape and clean the area with solvent. Let your skin dry completely, then put on some fresh adhesive so you get a tight, secure hold. That's it.
Best Way to Clean Adhesive Residue from a Lace Front Hairline
The trick to getting adhesive residue off a lace front hairline is using a mild solvent. You want something that breaks down the glue without stretching out the lace.
Just apply a small amount and let it sit for 30 to 60 seconds. Then, gently dab and lift the leftover glue away with a soft cloth. Harsh chemicals might work faster, but they can easily ruin the hair knots. Milder options take a little more time, but they keep your lace safe. Simple as that.
Is It Better to Remove the Whole Hair System or Just Fix the Front?
A simple front touch-up does the trick when only the hairline lifts about 3–5 mm and the rest of the base still sits totally flat.
So, should you pull the whole hair system off or just patch the front? You'll want to do a full reinstall if that lifting spreads, buildup gets thick, or the hold drops to under a few days. Simple.
How to Prevent the Front of a Hair System from Lifting Early?
Clean skin and a bit of oil control will stop early lifting right at the hairline. Most problems actually start before you even put on the adhesive.
Put the adhesive down in thin, even layers. Let each coat get tacky for 20–30 seconds, and don't touch the front for 24 hours. Simple. Managing your daily sweat and washing gently will keep that bond holding strong for much longer.
Does Sweating Cause the Front Hairline of a Hair System to Lift?
Yes, sweating can definitely make the front hairline of your hair system lift. Moisture and salt from your scalp naturally break down the adhesive, and this happens mostly right at that thin front edge.
You can cut down on this by keeping scalp oil in check, grabbing a stronger adhesive for the front, and skipping any heavy workouts for the first 24 hours after putting it on. It's really that simple.
Mistakes to Avoid During a DIY Front Hairline Touch-Up
Tiny slip-ups at the front edge can completely ruin an otherwise great bond. Any good DIY guide for fixing a men's toupee hairline has to focus on what not to do just as much as the right steps.
These common blunders cause lifting, unwanted shine, and early failure. Skip them, and your touch-ups will last longer and look a lot cleaner.
Using Too Much Solvent Near Secure Bonded Areas
Pouring too much solvent or adhesive remover is a bad move. It spreads right under the sections that are still holding strong, weakening your entire perimeter.
Keep the liquid strictly on the lifted edge. If you soak the area, the remover creeps backward and ruins bonds you never even meant to touch. Simple as that.
Rushing the Adhesive Tacking and Drying Time
Pressing down on wet liquid glue traps moisture right inside. That leaves you with a really weak hold.
You have to wait until the glue turns clear and sticky. Slapping it down too early leads to lifting, nasty shine, and a much shorter hold time.
Impact of Scalp Oil Production on Front Hairline Lifespan
Your natural scalp oil actually breaks down front hairline bonds a lot faster. When you have high sebum levels, the adhesive gets soft, which causes the system to lift way earlier. So, instead of getting the usual 5–7 day hold, you might only see 1–3 days.
Plus, oily skin adds unwanted shine right at the edge and slowly ruins the grip. People with drier scalps usually get longer wear. But you still need to prep the area carefully so the bond doesn't turn brittle.
How Weather and Humidity Affect Front Hairline Bonding
Humidity messes with the adhesive at your front hairline because it pulls moisture right into the glue layer. When it's really humid, the tack softens up, and your hold won't last nearly as long. On the flip side, super dry air can actually over-cure the glue, leaving it stiff and less flexible.
Heat breaks things down way faster. Once temperatures climb past 85°F, you'll start noticing the front lifting earlier than usual. But when the weather stays cool and steady, the glue keeps a solid grip and gives you much cleaner edges. Simple as that.
Choosing the Right Solvent for Partial Hairline Cleanups
Fast-evaporating solvents are your best bet for those tiny front-edge touch-ups.
Grab a light adhesive remover that evaporates in 30–60 seconds. It pulls up the leftover residue without completely soaking the base. Alcohol-based ones dry perfectly clean, but they can be a bit rough on the skin. Citrus blends? Much gentler, but you'll be waiting a little longer for them to work.
How Daily Styling Habits Cause Premature Hairline Peeling
Daily tension is the quickest way to lift a hair system's front hairline. Most peeling actually starts with tiny, repeated pulls.
Brushing hard away from your face, combing tightly right at the edge, and constantly changing your style all tug at the bond. Heat tools and rough finger styling just make things worse. They loosen up the adhesive with every single pass.
Specialist Guidance and Support Options from Lordhair
Lordhair gives you direct, expert help when it comes to maintaining your hair replacement system. That means one-on-one consultations and custom care advice.
You'll get clear guidance on picking the right adhesives, building a solid cleaning routine, and planning your wear schedule. This really helps cut down on mistakes. But keep in mind, you still have to put in the consistent work on your end to keep things looking good.
Frequently Asked Questions About Hair System Maintenance
How to remove a hair system?
Slow. Rushing rips lace. Apply solvent, wait 30–60 seconds, then gently lift—don't pull. Residue must be fully broken down or you'll damage knots. Most mistakes happen from impatience, not technique.
How much does a non-surgical hair replacement cost per year?
$800–$2,500 a year. Systems, glue, maintenance. Cheap setups exist, but they look it. Premium lace plus regular upkeep pushes you past $2K fast.
How long should you wait to wash hair after a hairline touch-up?
24 hours. No shortcuts. Adhesive needs that full set time or the front lifts early. Wash sooner, expect peeling within days.
Will touching up the front hairline damage delicate lace knots?
Yes—if you're rough. Lace frays easily. Dabbing solvent gently keeps it safe; rubbing or harsh chemicals will wreck knots fast.
Can sweating cause the front hairline to lift within days of application?
Yes. Easily. Sweat + oil break adhesive down. Normal hold is 5–7 days, but heavy sweating can drop that to 1–3 days.
About the Creator
Leo
Passionate men's hairstylist with a keen eye for detail and a knack for creating on-trend looks. Dedicated to delivering hair restoration education that enhances individual style.
Enjoyed the story? Support the Creator.
Subscribe for free to receive all their stories in your feed.
Comments
There are no comments for this story
Be the first to respond and start the conversation.