
Can I cut in a hair system myself?
How to Cut the Base of Your Hair System for a Perfect Fit

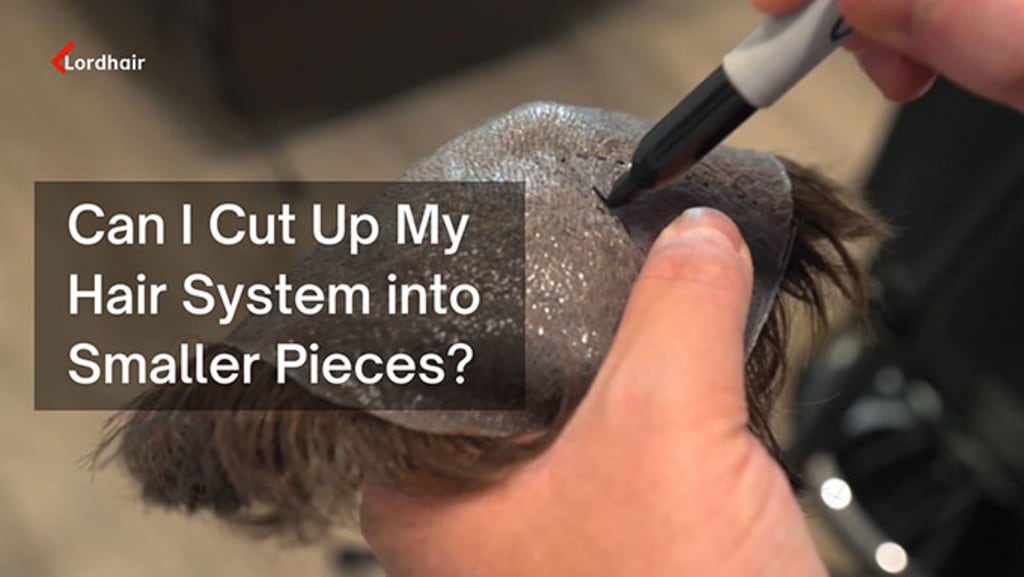
Can I cut in a hair system myself?
Trying a DIY hair system cut-in can save you money, but doing it yourself takes some real skill. Trimming the base and styling a hairpiece on your own is doable, even if you're just starting out. But before you grab the shears for your Lordhair unit, you need to get a clear handle on the "Incremental Method" and the risks that come with it.
Key Takeaways
- Cut hair gradually using the "10% Rule" to prevent irreversible mistakes.
- Use professional thinning shears instead of household scissors to softly blend the system with your natural hair.
- Eliminate blind spots by setting up a 3-way mirror and bright LED lighting.
- Always cut the hair system completely dry, as wet hair stretches and leads to over-cutting.
- Apply the 3-2-1 clipper method on your natural sides to create a seamless transition zone.
- Consider professional pre-cutting services for a ready-to-wear style without the DIY risks.
The Fearless DIY Cut-In: Balancing Risk and Reward
Taking scissors to your new Lordhair unit can feel scary. One wrong snip and you could mess up a perfectly good system. Deciding between DIY / Self-Installation and booking a Hairstylist / Professional really comes down to how comfortable you are and how complex the look is that you want.
Cutting your own hair cuts down ongoing costs, but it takes patience and a clear plan. We call this the Incremental Method. Instead of removing big chunks at once, you trim tiny amounts until it looks right. It's a slow, careful approach that helps protect your investment. Before you make that first cut, you need to gather the right tools that act as your safety net.
Assessing the Difficulty: When to DIY vs. See a Pro
Simple buzz cuts or evenly messy styles are solid options for doing it yourself. But if you're aiming for a complex fade, textured layers, or a sharp undercut, it's probably better to let a pro handle the initial cut-in.
Your decision also depends on the materials. Synthetic fibers act differently than real hair. They don't stretch or forgive mistakes as easily, which makes DIY cutting a bit less flexible. Human hair systems give you more freedom when styling, but they still need careful handling so you don't thin out the base too much.
Routine maintenance matters too. Keeping up your non-surgical hair replacement is a lot easier if you know how to trim the edges yourself. A professional can create the base shape, and you handle the small touch-ups at home. Either way, doing these trims safely means having the right tools on your bathroom counter.
The "10% Rule": Why Incremental Cutting is Your Best Friend
You can always cut more hair, but you can't put it back. That's the whole idea behind the 10% Rule. When you start trimming your system, only take off about 10% of what you think needs to go.
Check the mirror, comb it through, then remove another 10%. This helps you avoid the dreaded "too short" mistake that ruins the blend with your natural hair. Getting a natural look takes time, and rushing it almost always leads to a noticeable hairline.
Slow, steady snips keep the transition between the system and your bio hair looking seamless. You don't need salon experience to make this work. You just need patience. And to make those small, controlled cuts without damaging the base, you'll want a proper set of specialized tools.
Essential Tool Kit for a Successful Home Installation
Go ahead, grab your kitchen scissors—and then put them right back. Regular household shears crush the hair cuticle and leave behind harsh, unnatural lines that instantly look like a DIY job. If you're aiming for a clean Lordhair installation, you'll need proper grooming tools made for the task.
Your starter kit should include professional-grade cutting scissors, sturdy sectioning clips, and a fine-tooth comb. But the real must-have is a good pair of thinning shears. These tools give you the control you need to make clean, steady cuts without risking damage. Using the right gear protects your investment and helps your system look like it’s growing straight from your scalp. Once your tools are ready, the next step is prepping the base.
Why Thinning Shears are the "Eraser" for DIY Mistakes
Thinning shears are basically your safety net when cutting in at home. Regular scissors remove a solid chunk of hair, but thinning shears work differently—they have teeth that only cut part of the strands.
That design makes them ideal for blending the dense hair of a new Lordhair system with your natural hair. If you slip up slightly with regular scissors, it shows right away. With thinning shears, the softer, staggered cut hides those small mistakes and smooths everything out. They really do work like an eraser for beginner errors.
Use them only in the transition areas where your system meets your natural sides. Make small snips near the ends instead of cutting close to the base. That helps preserve the root density. Still, even the best tools won’t do much if you can’t actually see what you’re doing.
The Necessity of a 3-Way Mirror and Proper Lighting
Using just a bathroom mirror is a guaranteed way to mess up the back of your hair system. You can’t blend properly by guessing or constantly twisting around trying to see.
What you need is a 3-way mirror to get rid of blind spots completely. These fold-out mirrors let you see the back and sides of your head at the same time, giving you a full 360-degree view. Add bright, front-facing LED lighting so shadows don’t hide uneven areas.
This setup isn’t optional—it’s essential for both the initial cut and regular upkeep. When you can clearly see every angle, it’s much easier to match lengths without guessing. Once your mirror is set up and the lighting looks right, your workspace is finally good to go. Now it’s time to move on to preparing the hairpiece itself.
Preparing the Foundation: Cutting the Hair System Base
Size the foundation before you touch any hair. A clean, accurate base cut makes sure your Lordhair unit lines up with your balding pattern. Once the base fits using a template, the attention moves to the hair itself.
Creating a Precise Template of Your Scalp
Press plastic wrap over your head and secure it with tape. Trace your exact receding hairline using a marker.
This outline shows your coverage area. From there, you place the template directly onto the product.
Trimming the Perimeter with the "Safety Buffer" Technique
Keep a small margin when doing your first base cut. Synthetic bases tend to fray faster than human hair systems, so go carefully.
This extra buffer gives you room for small errors. Take your time before moving from the base material to styling the hair.
Mastering the Blend: Integrating System Hair with Bio Hair
Now your base fits right, the real challenge starts. Getting the Lordhair unit onto your head is only half the job. Making it look like it actually grew there is where most DIY beginners trip up.
The toughest part of any self-cut is blending the system hair with your own bio hair. Get this wrong and you’ll see a harsh line that breaks the illusion. The hair should move naturally from the piece into your sides and back.
Blending takes patience and a good feel for how hair falls. You can’t just start snipping and hope it works out. You need a clear, step-by-step way to handle those edges safely. Techniques like the 3-2-1 rule are what give you that seamless finish.
Mapping the "Transition Zone"
Take a close look at where your Lordhair unit meets your natural hair. That key 1-inch perimeter is the transition zone. This tiny area decides whether your look feels natural or ends up looking like a heavy shelf.
This is where beginners often mess up. If you cut the system hair to exactly match your bio hair, it creates a ridge. That 1-inch band needs to be treated differently from the rest of the piece.
Your goal here is simple: reduce bulk gradually. The system hair should thin out just enough to sit flat against your own hair. That’s what makes everything blend in without a trace.
You’ll need a steady hand to do this at home. Go in without a plan and you might cut too high and expose the base. That’s why the next step matters.
The 3-2-1 Method for Seamless DIY Blending
Blending your system into your sides doesn’t have to be guesswork. The 3-2-1 method uses specific guard sizes to build a clean, reliable gradient. It stops you from taking off too much hair too fast.
Start with a #3 guard on your clippers. Move it upward along your sides, stopping just below the transition zone. Then switch to a #2 guard and trim the lower half of that same section.
Finish with a #1 guard right at the bottom near your ears and neckline. This gives you a smooth taper that builds up the sides. When you start blending the system hair, it now has a solid fade to sit over.
This approach keeps your bio hair neat while leaving enough length on top to connect everything. Just keep in mind, the texture of your Lordhair unit plays a big role in how it all turns out. Comparing hair types will help you fine-tune this fading technique.
Material Matters: Cutting Synthetic vs. Human Hair Systems
Different fibers react to scissors in their own way. A human hair system stretches when it's wet, while synthetic fibers keep their exact length. That’s what makes upkeep a bit tricky. Trimming a synthetic hairpiece feels smooth, but human hair needs more tension to handle properly. Cutting your unit completely dry is the safest move. Here’s why wet styling tends to backfire.
Why You Should Always Cut Your Hair System Dry
Wet hair can stretch up to 30%. If you try DIY styling right after washing, you're cutting based on a length that isn’t real.
Once it dries, the hair pulls back. That’s what leads to serious over-cutting during self-installation. Cutting it dry removes the guesswork and lets you see the true length right away.
One wrong snip can ruin the whole piece. If that feels like too much risk, Lordhair offers professional pre-cutting services to take care of the style before it’s shipped.
Professional Results Without the Risk: Lordhair Add-on Services
Cutting your unit means you're gambling your whole investment on one bad snip. But you don't have to take that risk. Lordhair offers pre-cut services that give you ready-to-wear, custom-styled hair systems straight out of the box.
Zero risk.
This service gets rid of the stress of DIY trimming. Here's how to lock in that flawless look before your order even ships.
How to Use Lordhair’s "Picture-Perfect" Styling Service
Want a specific fade or a classic taper? Just send a reference photo.
Lordhair stylists recreate your exact look on a standard styled hair system. You upload a clear picture during checkout, and the pros take care of the cutting. The unit shows up trimmed and ready to apply right away.
Now it's just about weighing the one-time cost of this service against the long-term expense of buying clippers and fixing DIY mistakes.
Troubleshooting: What to Do if You Cut Too Much
You grabbed the scissors and trimmed your hairpiece yourself, and now the fade looks uneven. Don't panic. First rule of damage control: stop cutting right away. Trying to fix a bad cut usually just thins out the density.
If you took off too much length, a matte clay can add texture and soften harsh lines. For small over-plucked areas, switching your part is the quickest fix. Regular upkeep helps keep the remaining hair in good shape, but a serious mistake often means you'll need a full replacement.
Synthetic fibers can't handle heat styling to hide flaws, while human hair gives you more room to work with. If you're still not sure how to save your Lordhair unit, you probably have a few questions. The most common ones are up next.
Frequently Asked Questions About DIY Hair System Cutting
Can a regular barber cut a hair system?
Yes, but it is a massive gamble. Most barbers cut it like growing hair. One bad snip and the system is ruined forever. Find a replacement specialist or just use Lordhair's pre-cut service before shipping.
Is it possible to cut the hair of a toupee while wearing it?
Absolutely. It is the smartest way to check the blend. Just keep the hair completely dry. Wet hair stretches. You will over-cut and ruin the unit. Set up a 3-way mirror to kill blind spots.
What are the best guard sizes for a seamless hair system fade?
Guards 3, 2, and 1. That is your holy trinity. Use the #3 right where your bio hair meets the system. Fade down to #1 at the neck. Creates a flawless transition zone.
How do you use the 3 2 1 method for DIY hair system blending?
It is a simple clipper countdown on your natural sides. Run a #3 near the top edge. Drop to a #2 halfway down. Hit the nape with a #1. Forces a smooth blend into the unit.
What to do when a hair system toupee starts getting loose?
Remove it entirely. Spray remover around the edge and peel from the back to minimize pain. Clean your scalp with an alcohol-based cleanser. Reapply a maximum of three thin coats of adhesive.
About the Creator
Leo
Passionate men's hairstylist with a keen eye for detail and a knack for creating on-trend looks. Dedicated to delivering hair restoration education that enhances individual style.
Enjoyed the story? Support the Creator.
Subscribe for free to receive all their stories in your feed.
Comments
There are no comments for this story
Be the first to respond and start the conversation.