
Deconstructing 'Wind Up' - A Look At The Four Main Elements
Track Breakdown


Welcome to my first track breakdown!
I started my composition Wind Up around the middle of 2018. I was studying music composition at the time and our class had just been given our major assignment, which was to produce/compose/whatever about 20 minutes of music to play or perform at our end of year concert.
The rules for these 20 minutes of music were “there are no rules” and our teacher was encouraging us to get weird with it, so I decided to approach the assignment in a different way to how I normally would. And that’s how Wind Up was born.
After I finished my degree, I was so sick of the music I had made during the course that I put most of it into a folder and hid it away, with the exception of Wind Up. Something about it was really fun to listen to and I liked how I’d gone about creating it, so I decided it would be the first piece I was going to put out into the world to mark the beginning of this fear facing expedition I’d set out on.
As I’m trying to promote celebrating all stages of the creative process, I thought it would be a cool idea to break it down and talk about how it came together, production-wise. My projects are always unnecessarily messy in some way or another, and although this project contains very few tracks, it’s no exception.
This post is a bit of a long one, but I’ve included pictures of processing chains and other shit to make it a bit more exciting. If you’re curious, read on!
What is Wind Up?
Wind Up is essentially four different elements that have been twisted up to become something strange, dramatic and tense, climbing in intensity until the end. I had no idea where it was going to go when I started but making the decision to keep the track count really low was the main focus.
Overall there are about 7 or 8 channels in the project, but the main four are doing 99.9% of the work. They are:
- A synthesised reese bass in NI Massive
- A percussion kit from Heavyocity’s ‘Damage'
- A cello section from EastWest Symphonic Orchestra
- A weird sound from Omnisphere
These have been processed quite a bit externally to get as much out of them as I could. I didn’t go ridiculous with the processing, because my piece of shit computer can’t handle much and you have to draw the line somewhere, but there’s enough there to make it interesting and (I think) somewhat unique.
So, I’m going to go through each of the four main elements one by one and show you what I did as best I can. Hopefully it inspires you to get some shit done!
*I usually use Logic Pro X, but sometimes I use Ableton if I need a change. This project was created in Ableton but the mix was finalised in Logic – don’t ask me why.
Pt 1: Reese
As I said, the reese was created in NI Massive. It’s a pretty basic patch:
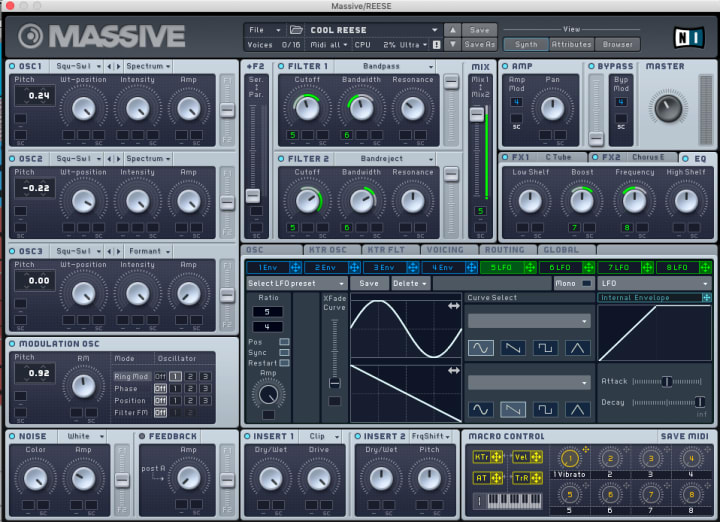
The basic approach to getting a reese is to detune two sawtooth waves. Once you have that you’ve got a good base to work from, so you can start fucking with all kinds of shit to get some cool sounds. In this piece, you can see there’s a bit of automation going on in the synth, but most of the interest comes from the external processing, in my opinion.
The sound comes in around bar 17 and drives the piece, at least until it kind of disappears and the percussion takes over. The reese is responsible for the excitement of the build-up and the movement of the second half, when the ‘wind up’ kind of starts again. It plays two notes over the entire piece: one at bar 17, and then once again an octave lower when things start to get really intense.
Processing
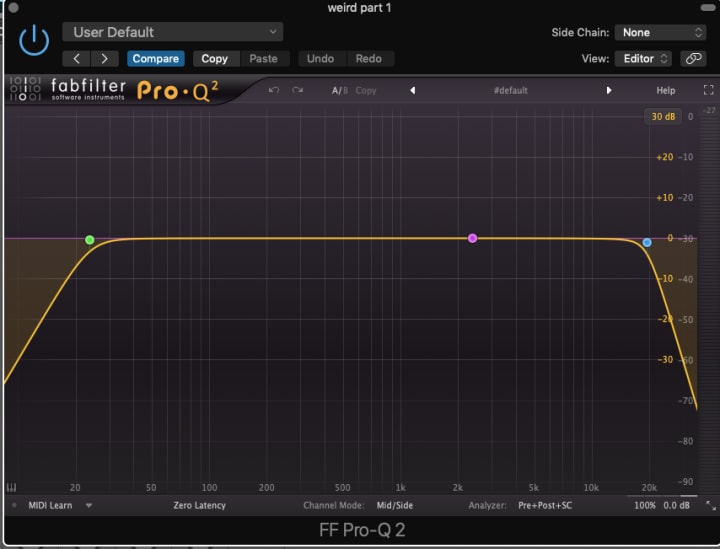
Here’s a bit of a look at what’s going on with the processing for this channel:

And then:

And then:

Mostly, this is just automation. I’ll just make a quick few notes about the important stuff:
- The automation on the flanger is that whining, unsettling sound running through the track over the reese. To me, it sounds almost like a separate sound, but it’s not.
- The notches in the EQs and filters are responsible for that kind of big and far away sound, as well as a lot of the movement.
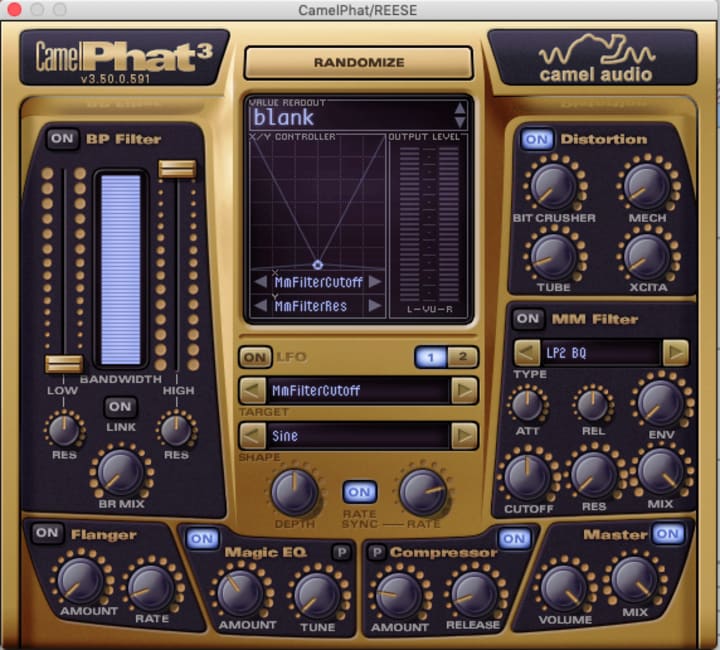
- The OTT and CamelPhat help bring the sound forward and keep things under control (in the way we want). It’s also putting some weight into the low end with the Magic EQ. Here are the CamelPhat settings:
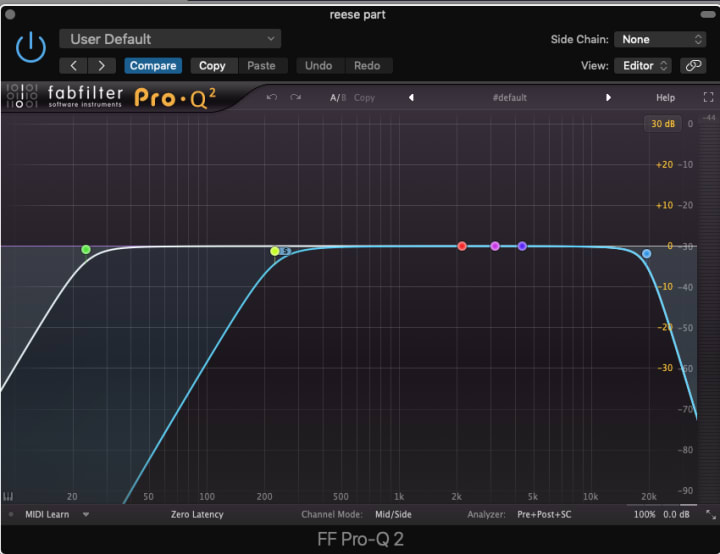
That was all the processing in Ableton – here’s what went down in Logic Pro X after that:

^ Some automation on an EQ band, to manually bring down some frequencies that were hurting my ears and clashing with other elements.

^ This was just to bring down the transient at this bit – it was a bit much.

^More EQ band automation, for the same reason as before.

^And again…
There was also a compressor on the channel to control the sound a bit more, and a bit more EQing:
^If you can’t tell, this is mostly just to take the sides out of the low end of the signal, because it was all over the shop.
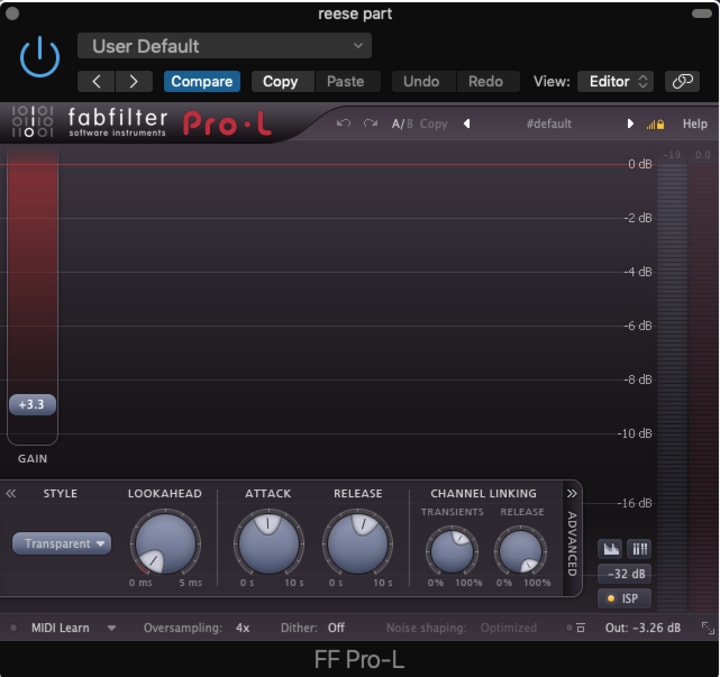
Finally, a limiter for a last bit of control.
And that’s it for the reese part. Essentially it’s a lot of automation contributing to either the movement or control of the sound.
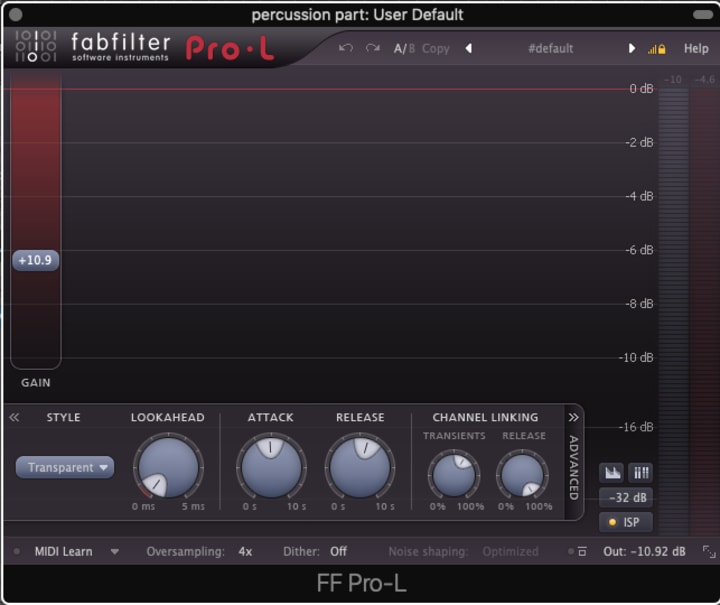
Pt 2: Damage
This is one of the standard ‘kits’ in Damage. I don’t think I changed anything at all inside the instrument itself, and MIDI-wise there’s not much going on at all. Again, the external processing is doing a lot of the work to change this sound over time.
Here’s the MIDI info:
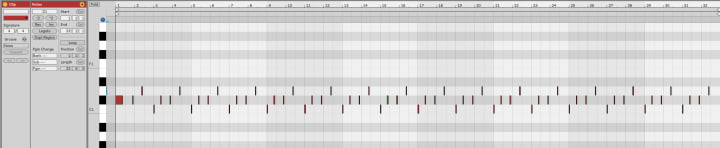
^Before this, there are a few one shots every couple of bars, so not even worth showing. But this is the pattern than runs through the track – super basic.
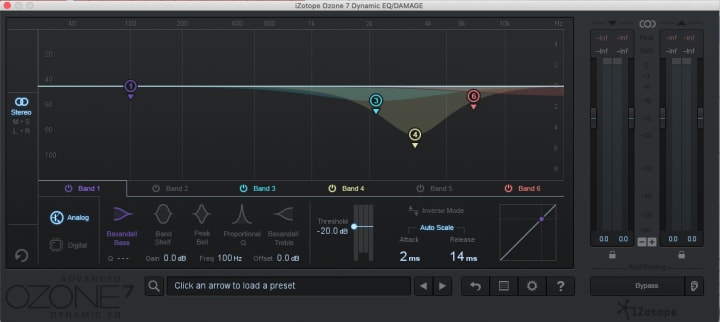
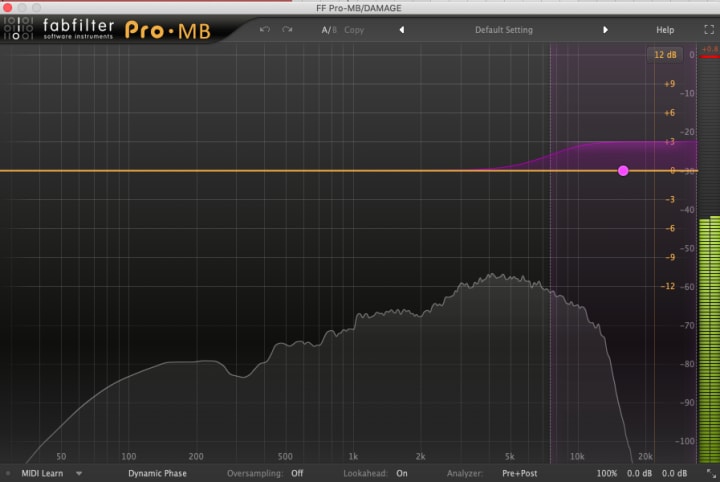
Processing
Here’s what makes it move:

And then:

As you can see, automation is key here. If you just fuck around with automating different things, you’ll almost for sure get interesting results.
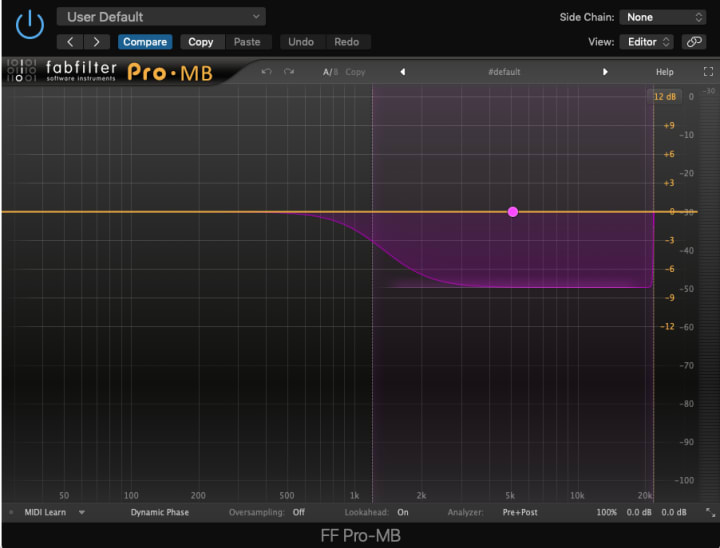
The dynamic EQ is bringing some frequencies down when they’re too loud:
And the Pro MB is being used as an expander, to bring out the high stuff only when it needs it:
Once this was moved into Logic, I did something similar to the processing in Logic for the reese:


^The first three are manually automating EQ bands again – like the reese part – but the last one is automating the threshold of a compressor. I did this because I wanted the drums to be controlled but I didn’t want to squash it too much towards the end. There’s a lot of dynamic range in this piece and I didn’t do much planning while creating it, so I had to do a lot of work after to get it to a place I was happy with.
There’s also a bit more EQing, taking out some high end:
And a limiter, for that last bit of control again:
And that’s half the track done!
Pt 3: Cello
The cello was made up three different articulations: tremelo, staccato, col legno. Don’t ask me how each of those is playing their part, because I don’t know. There isn’t a ton of processing on this sound, so maybe I chose to use extra sounds to add some interest.
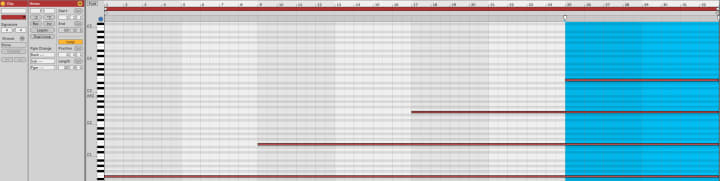
Here’s the MIDI – again, unbelievably simple:

^This for the start, then:

Adding intensity in bits by adding an extra note every now and then, building up towards the end.
Processing

And then:
Not a whole lot going on. This part and the next part aren’t major players compared to the reese and the percussion – they didn’t need to shine as much, so they didn’t require as much processing.
Once this got moved to Logic, there wasn’t much left to do:

^A tiny bit of volume automation at the beginning to bring out the first hit. Then:
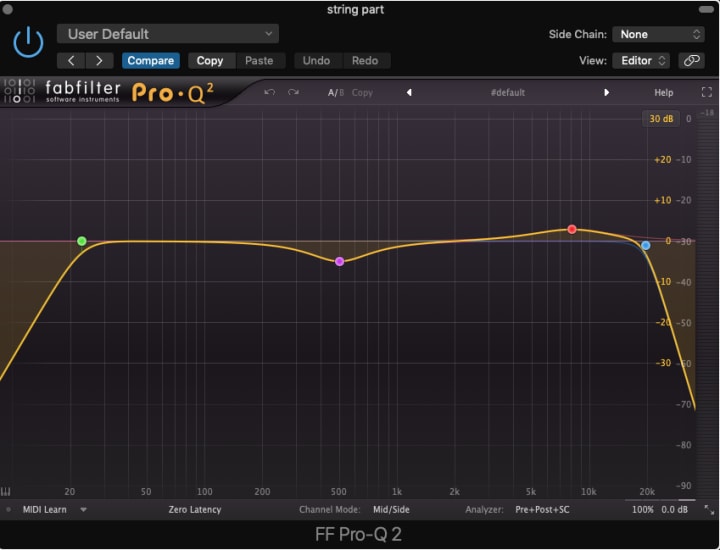
A bit of what I would call one typical EQ approach for strings (in this kind of music anyway) in general.
And that’s it!
Finally…
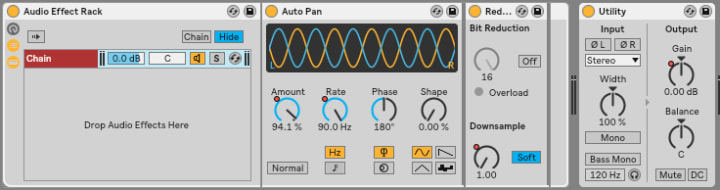
Pt 4: Weird
To be honest, I don’t even know what this sound is. I know it’s from Omnisphere, but when I tried to load it up again the sound was gone, so we’ll just have to make do.
This sound is quite important for the first half of the piece, but it kind of fades into the background for the second half after it’s done its job of creating a weirdly disturbing setting for the listener.
So, I can’t show you the patch, but I can show you the MIDI (as always, really simple) and the processing:
^You can see what’s going on here. Like the strings, adding intensity as things move along. Then:
Processing

And then:

Honestly, at the point I’m guessing, but I think the grain delay is doing a lot here. The rest of the FX speak for themselves.
*As you can see – which I haven’t mentioned yet – there’s a pattern of using the autopan to go wild in the stereo space available, which really helps to move things around and not let the elements crash into one another too much. There might be some general panning used too, but I know this piece relied heavily on the automation to give it space.
The redux/bitcrusher is getting a bit of use as the piece gets toward the end, as well. I like this effect because it’s a cool way of ‘fucking things up’ and bringing everything to a messy, distorted end. I think it’s a great way to finalise this piece, because the whole thing is – in a way – out of control and bringing in the redux kind of says ‘everything has totally fucked up’.
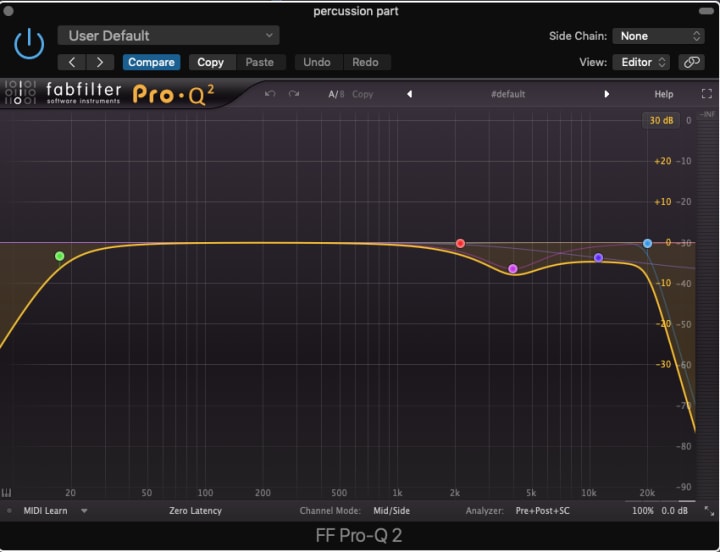
All that’s left to show on this channel is a bit of EQing and multiband stuff:
^This is just lopping off the super lows and highs, for headroom and cleanliness.
^This is just to bring down the highs when they’re too much. I found the high end was building up a lot because all four elements – at some point – had a lot of high end in them.
And that’s my first track breakdown!
I hope that’s given you a bit of an idea of how it came together. The main reason I wanted to discuss this is because, aside from a couple of tiny audio FX channels, this is the whole piece, and it shows you don’t need a ton of channels to make something interesting and fun.
Other than what I’ve included here, there are maybe a couple of compressors doing tiny little things here and there to control peaks and stuff. But that’s it! The master is dry, peaking at -5.1db (to allow room for mastering) and there are no sends/return tracks or any funny business going on behind the scenes.
I realise this isn’t a piece of music that would appeal to a large audience, but I like it and I think there’s something cool about using just a few tracks to create something whole. I look forward to trying this out again in future.
If there’s anything you think I missed or want to know more about, please let me know! I’d be happy to answer any questions and update the post if needed. I’m still new at this, so go easy on me
I’ll be doing another track breakdown as soon as I feel there’s enough interesting stuff to share, so keep an eye out for new stuff! I might do some videos, too.
If you’re interested, you can listen to the track here or on any of the other main streaming services.
Thanks for reading.
Cheers! 🙂
About the Creator
Alex Eynstone
Music Producer | Composer | Coach.
I make music, write about things I care about & help independent artists build an online presence.
The Awakened Creative Co - theawakenedcreative.co
Keep reading
More stories from Alex Eynstone and writers in Beat and other communities.
These Music Production Habits Fucked Me Over, Bigtime
In my previous post 7 Music Production Tips I Wish I’d Paid More Attention To, I talked about 7 pieces of advice that I should have listened to but didn’t. In this post, I’m going to talk about the things that I did (or still) do that I wish I hadn’t.
By Alex Eynstone4 years ago in Beat
Victim or Survivor
TW: Mention of self harm and suicide attempts I'll preface this article with I have never listened to any other songs by Citizen Soldier. I had never heard of them until I found out from an Icon for Hire stream where they told fans about an "upcoming collab," being with Citizen Soldier. As soon as I saw that it was on Spotify, I listened to it over and over... And over because of the lyrics.
By Rene Peters8 days ago in Beat
Major Lee: The Youngstown Prodigy Making Waves in the Music Industry
Major Lee, a talented artist hailing from Youngstown, Ohio, has been captivating audiences and making waves in the music industry since he was just 11 years old. His journey into music began with a passion for writing and an insatiable drive to learn everything he could about the art form.
By VocalMedia Editor's3 days ago in Beat


Comments
There are no comments for this story
Be the first to respond and start the conversation.