
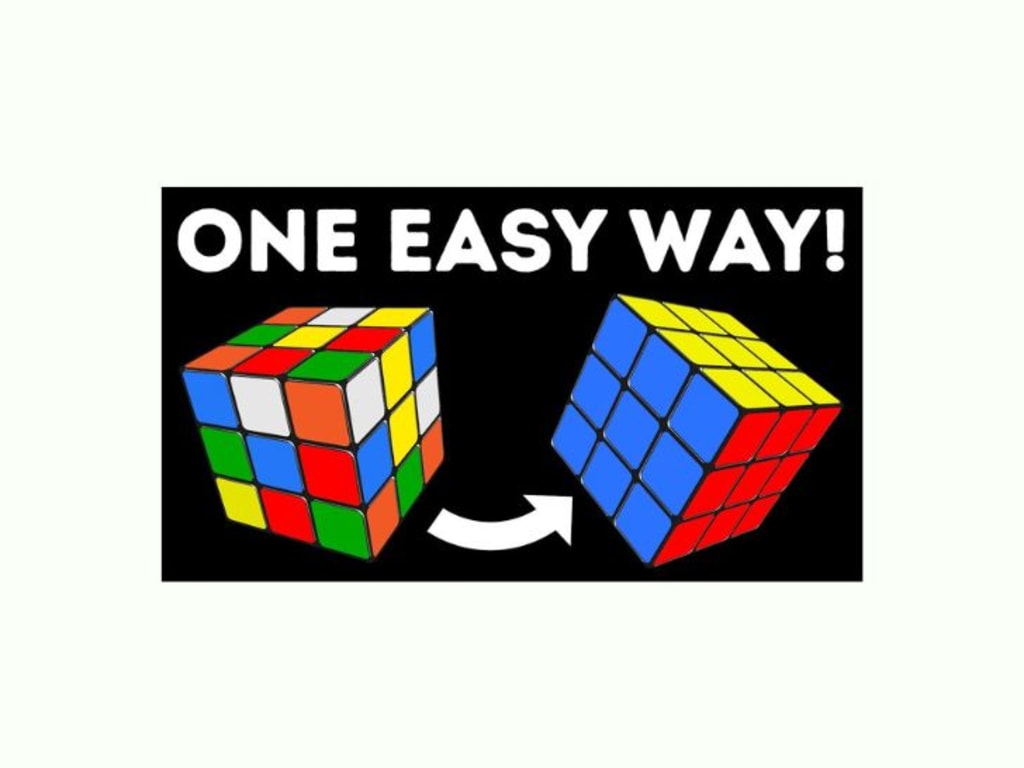
The Simplest Tutorial: Quickly Solve a 3x3 Rubik's Cube
The Easiest Tutorial for Solving a 3x3 Rubik's Cube
finally giving up, but what if I told you that anyone can solve the Rubik's Cube using a single algorithm? I tried it out, and it's incredibly simple; check it out! First, let's look at what a 3x3 cube is made of; it has three basic parts. To comprehend how these algorithms operate, you must get familiar with the Rubik's Cube vocabulary. Moves are listed using letters that represent for one 90-degree cube rotation, such as right L left you up d down F front. When there is a number, an apostrophe indicates that the layer should rotate 90 degrees counterclockwise; a non-apostrophe indicates that the layer rotates clockwise.
The number next to the letter indicates how many turns you should complete in the algorithm I'll be demonstrating to you today. You can now pause the video to practice the rotations. Here is the main algorithm for your right hand. It will be far you are'you apostrophe and once more are you are apostrophe you apostrophe. It is exactly the opposite for your left hand. L apostrophe you'l you and once more L apostrophe you apostrophe L you. Now let's see how that appears in practice.
Left hand L apostrophe you're you're you're you're you're you're you're you're you're you're you're you're you're you're you're you're you're you're you're you It's a good idea to pause the video and then repeat the phrase with an apostrophe: you and again L apostrophe you apostrophe L year. You'll go through seven stages in today's algorithm, starting with the white cross on the bottom, moving up to the bottom corners, the middle layer, the yellow cross, the top layer, the top corners, and the final objective, which is to put together a white cross and align its edges with the bottom corners. Practice until you can perform all of these moves pretty much automatically.
Try it out for yourself, and don't worry about needing any specific algorithms. Rotate the top layer while wearing the Daisy. It does the same thing by rotating this layer 180 degrees and aligning the right colors of the layers with the color of the center. To solve the four corner pieces on the bottom at this point, you'll need to place the lower corners of the cube in the proper locations, and the white side of the cube will be solved. This is where you'll use that are you are'you apostrophe algorithm for your right hand, rotating only the top layer of the cube to find a solution.
At the conclusion of this stage, you should have tiny upside-down tees on all sides finishing at the centerpiece. Number three: Solve the four edge pieces in the middle layer During this level, you'll need to solve the four edge pieces in the middle layer. the remaining middle layer so that the outer blocks are the same color as the center in the first case the layer you'll be working on is to the left on top of the target position you must match it with the right color here's how you can do it: turn the upper part to the left use the algorithm for the right hand rotate You must match it with a comparable color by turning the upper portion of the target so that it is to the right of the top.
Rotate the cube to the right using the algorithm for the left hand, then back again using the algorithm for the right hand. with all of the sides and you're finished [Music] number four solve the yellow edges on the top layer first you put together a yellow cross on the yellow side of the cube start using the algorithm as soon as you see the yellow line but only a random set of yellow edges. Solve the four edge pieces to get over number five, starting with the yellow line, using the same procedure. It's crucial that just one edge of the corresponding color matches the edge; if two match, use a only one edge should coincide in color; keep that one in front of you and use the same technique until the others are mixed. A slightly modified algorithm to mix the edges [Music] The remaining borders are properly positioned [Music] Number Six: At this point, you must position the yellow corners with the top layer facing up. In this case, the corner is even turned appropriately, but that is not crucial. Locate the corner that is already in place and use a little different color to shift the nearby centers into the appropriate positions.
solve the yellow corners on the top layer [Music] done number seven and you're almost done. all that's left to do is turn the cube so that the yellow side is facing you and solve the corners. You'll need the Upper-right corner: Let's solve it corner by corner; don't rotate the cube and proceed step by step; many people make mistakes at this point and have to restart; be careful. Use the algorithm you already know in a slightly modified order until the corner is solved; after you've finished one move, rotate the side that is facing you and apply the same algorithm. [Music] rotate the top layer in order to Now that you know how to solve a traditional 3x3 Rubik's cube, you can also use this technique to solve additional 3x3 cubes.
The real kicker is that it also aids in the resolution of more difficult problems, so keep practicing and you'll master it in no time. How quickly were you able to solve the cube using this algorithm? If you had another method, please share it with me. However, what if I told you that anyone can solve the Rubik's Cube with just one algorithm? I tested it myself, and it's quite simple to use. Check it out. To begin with, let's look at what a 3x3 cube is made of. It has three basic components.
When there is a number next to a letter, it stands for the number of turns you should make in the algorithm I'll be showing you today. You'll only work with the ones in this yellow zone. You can now pause the video and practice the rotations. Here is the main algorithm for your right hand. It'll be as follows: Right L Left You Up D Down F Front And Be Back. For your left hand, apostrophe it's the exact opposite: L apostrophe you'l you, and once again, L apostrophe you apostrophe L you. right hand are you are apostrophe you apostrophe and once more are you are ', observe how that appears in real life. Before continuing, you'now apostrophe with your left hand, you'L, and once more with an L. Pause the video and keep practicing these motions until you can perform them all almost naturally.
Okay, so you will go through seven stages that will assist you later. The algorithm used now places a white cross at the bottom, the corners at the bottom, and the centre. Goal number one is to remove the white cross from the bottom of the work by resolving layer number four, the yellow cross, layer number five, the top layer, layer number six, and layer number seven.Start by assembling this sequence that resembles a daisy by placing the proper colored center on each side of the board. I'll mix it all up first. Try it out for yourself, and don't worry about needing any specific algorithms. Rotate the top layer while wearing the Daisy. It does the same thing by rotating this layer 180 degrees and aligning the right colors of the layers with the color of the center.
To solve the four corner pieces on the bottom at this stage, you must position the cube's lower corners in the proper locations and use the remaining whites to create a white cross at the bottom number. that is the same color as the Centers of the other sides, and then apply the algorithm to move the corner until it is in the proper location [Music]. Repeat for the remaining corners. You should have tiny upside-down tees on all four sides, leading to the third centerpiece, at the conclusion of this stage. once you've solved the middle layer's four edge pieces, the remaining center layer must be solved in order for the In the first example, the layer you'll be working on is to the left and is at the top of the target location. You must match it with the correct color by following these steps.
You must match it with a comparable color by turning the upper portion of the target so that it is to the right of the top. Rotate the cube to the right using the algorithm for the left hand, then back again using the algorithm for the right hand. with all of the sides and you're finished [Music] number four solve the yellow edges on the top layer first you put together a yellow cross on the yellow side of the cube start using the algorithm as soon as you see the yellow line but only a random set of yellow edges. Solve the four edge pieces to get over number five, starting with the yellow line, using the same procedure. It's crucial that only one edge matches; if two match, you should mix the edges using a slightly modified procedure. To align an edge that is already in place with the correct color, rotate the top layer of the cube. Once more, only one edge should be color-coordinated; keep that edge in front of you and apply the same technique until the other edges are in the proper places.
Number Six: At this point, you must position the yellow corners with the top layer facing up. You only need to move them into position to solve them; use the proper colors of nearby centers. yet locate the already-present corner. use a slightly modified algorithm till the corners are where they should be and proper but that's not important. [Music] Done number seven: solve the yellow corners on the top layer. You're almost done. Let's solve the corners. Rotate the cube so that the yellow side is facing you. We'll start with the upper-right corner. Don't rotate the cube. Instead, solve it step by step. Many people make mistakes at this point and have to start over. Be careful. Use the algorithm you already know in a slightly modified order until the corner is solved.
Now that you know how to solve a standard 3x3 cube, rotate the front layer so that the cube's colors match. The real kicker is that this strategy also assists in solving various types of 3x3 cubes, in addition to Rubik's cubes. Did you able to solve the cube? There are even more complex ones so just keep practicing and you'll have it down in no time. If you learn how to achieve it using this approach or if you have another method, please share it in the comments. Eventually, something gives up, but what if I told you that anyone can solve the Rubik's Cube with a single algorithm? I tried it out for myself, and it's quite simple.
The letters used to represent moves are right L left you up d down F front, which stand for one 90-degree cube rotation. and I'll be back. An apostrophe indicates that the layer should rotate 90 degrees counterclockwise; a lack of an apostrophe indicates that the layer should rotate 90 degrees clockwise; and when a number appears next to a letter, it denotes the number of turns you should make in the algorithm I'll be showing you today. You can pause the video now and practice the rotations. Here is the main algorithm for your right hand. It will be far you are'you apostrophe and again are you are apostrophe you apostrophe. It is exactly the opposite for your left hand.
Before you continue, it's a good idea to pause the video and practice until you can do all these movements pretty much automatically. It'll help you later on. Okay, so you'll go through seven stages in today's algorithm number one white cross on the bottom number two the b number three the c number four the d number five the e number six the f number seven the g number seven the h number eight the q number nine the l number ten the m number eleven the I'll mix everything together first, then let's place a white cross and match its edges with the proper colored Center on each side. begin by assembling a sequence that resembles a daisy; it is very simple and doesn't involve any complex methods; once you have done so, move on. align the right colors of the layers with the color of the center, then rotate the top layer with the Daisy on it.
In order to achieve a white cross at the bottom number to solve the four corner pieces on the bottom at this stage, you'll have to put the lower layer of whites on top of the top layer and rotate it 180 degrees corners To discover a corner, you must simply spin the top layer of the cube with your right hand using the "you" apostrophe method. that is the same color as the Centers of the other sides, and then apply the algorithm to move the corner until it is in the proper location [Music]. Repeat for the remaining corners. You should have tiny upside-down tees on all four sides, leading to the third centerpiece, at the conclusion of this stage. once you've solved the middle layer's four edge pieces, the remaining center layer must be solved in order for the In the first example, the layer you'll be working on is to the left and the outer blocks are the same color as the center.
You can do it by rotating the cube to the left using the method for the right hand and turning the upper section to the left using the algorithm for the left hand in the second case, the layer you'll be working on is to the right of the top of the target position; you must match it with a corresponding color. Rotate the cube to the right using the algorithm for the right hand, then repeat with all the sides until you're finished. In order to solve problem #4, you must first construct a yellow cross on the yellow side of the top layer. if the yellow line isn't visible but Solve the four edge pieces on the top layer (saw the yellow line start using the same procedure; this is how you get over number five); now we need to arrange the In order to align the edges of the yellow cross so that the second color matches the color of that side, let's identify one edge that is already in place and rotate the top layer of the cube to do so.
Important that only one edge coincides in the edges; if there are two matches, you need use a slightly modified approach to mix the edges. do the same procedure on that one while keeping it in front of you until the other edges receive Now that number six is complete, the goal is to position the yellow corners on the top layer using the find the corner that is already in place in this example it is even rotated appropriately but that's not crucial and use a little modified technique until the corners are in their positions. If you have the correct colors of surrounding centers you'll only need to move them into place you're not solving them just yet.
If you can solve the yellow corners on the top layer and rotate the cube so that the yellow side is facing you, you're almost done. Let's start with the upper-right corner and solve it corner by corner without rotating the cube.the subsequent step is to rotate the layer in front of you using the same method, starting with the side that is facing you. The colors of the cube must match, and then you have successfully solved a classic 3x3 Rubik's cube. This method also works to solve more complex 3x3 cubes, so keep practicing and you'll have it down in no time. Did you successfully solve the cube using this algorithm? If you have your own method, please share it in the comments.
Thank you for watching and always, like and share
About the Creator
Johnica Lopina
giving you a better vocabulary, sparking creativity, reducing stress, and fostering empathy
Keep reading
More stories from Johnica Lopina and writers in 01 and other communities.
15 Incredible Phone Features You Didn't Know Existed
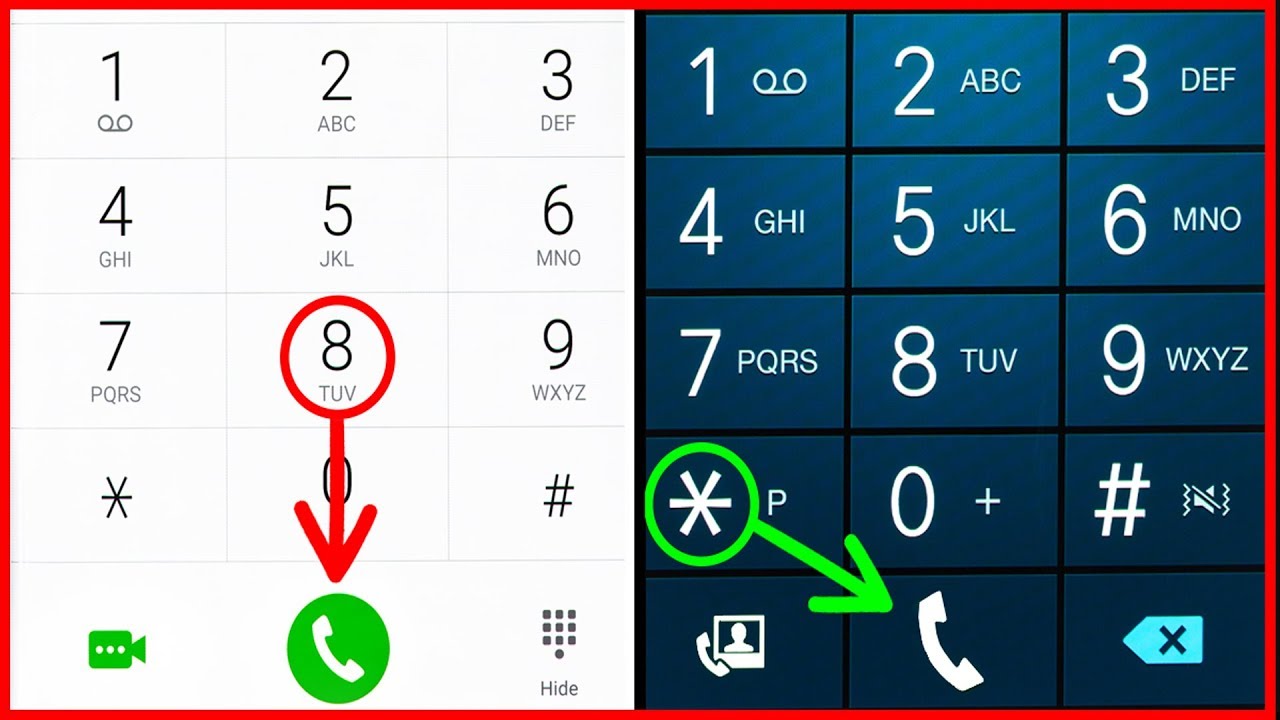
There are 15 incredible phone features you didn't know about the bright side team has compiled the most intriguing key combinations that will give you access to the hidden functions of your phone. Did you know that you can access hidden features of your phone by pressing certain key combinations? There are many of these codes; some of them work with all phones, while others only with specific models, but all of them allow you to try some cool and useful features. This straightforward code, "pound zero six pound" with an asterisk, is you may see your international mobile equipment identity by pressing it, which is accessible to users of both iPhones and Android devices. Number, or simply imei, is a special code for your phone that can be very helpful in many situations. For instance, if you lose your phone or it is stolen, you can easily block it from your service provider's network and, if necessary, the police will use this number to identify you.
By Johnica Lopina11 months ago in 01
Maximizing Efficiency and Precision in Chromatography: Exploring HPLC Detectors
High-Performance Liquid Chromatography (HPLC) stands as a cornerstone in analytical chemistry, empowering scientists across diverse fields to unravel the mysteries of compounds with unparalleled precision. At the heart of every HPLC system lies a crucial component: the detector. These detectors serve as the eyes of the chromatographic process, converting chemical signals into measurable data. In this article, we delve into the realm of HPLC detectors, exploring their types, functions, and the advancements driving analytical excellence. for more advance technologies made by berthold visit their website berthold.com.
By Service VA7 days ago in 01
The Growing Significance of Mobile App
In the modernized era, which is highly dependent on technology, mobile applications are crucial means to facilitate access to communication options, productivity, and entertaining moment and commerce. Smartphones in our daily lives are everywhere with their amazing features. new behaviors in our relationships with technology as well as in the way we carry out daily activities have been created by their increasing use. The article is going to hinge on the principal pillars of mobile app development, highlighting different techniques, benefits, periods of development and the latest technologies affecting the field.
By Christine Kocharyan4 days ago in 01


Comments
There are no comments for this story
Be the first to respond and start the conversation.