apps
A guide to all things app; 01 Media recommends the best applications to fit your needs and maximize your device's functionality.
Full Stack Development Frameworks: Comparing the Top Options!
Full stack development has gained significant popularity in recent years due to its ability to provide end-to-end solutions for web and mobile application development. A full stack developer is responsible for both front-end and back-end development, as well as handling database management and DevOps.
By Echoinnovate IT4 years ago in 01
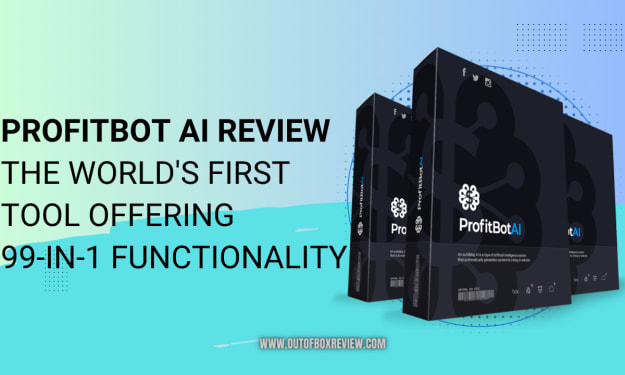
ProfitBot AI Review The Worlds First Tool Offering 99-In-1 Functionality
ProfitBot AI review, we take a closer look at the world's first tool offering 99-in-1 functionality for web scraping, data extraction, data analysis, and more. We evaluate the tool's features, benefits, ease of use, performance, customer support, and pricing, and include feedback from users who have already tried it. Read on to find out if ProfitBot AI is worth your time and money.
By outofboxreview4 years ago in 01
How App Development Companies Can Help Grow Your Business?
The emergence of smartphones has completely revolutionized the world today. The primary factor contributing to the massive growth of smartphones is the availability of a wide range of mobile applications with outstanding features and utilities. Mobile applications have revolutionized the digital world with unique features and incredible utilities. By developing a mobile app for your business, you can not only improve your brand identity but also boost your competitive edge in the digital era. In this blog, we will provide you with insights on how to leverage mobile app development services to help your business grow and generate more revenue.
By Hepto Technologies4 years ago in 01
Top 10 Staff Augmentation Companies Worldwide
IT staff augmentation services allow you to survive in this competitive market. The potential team of industry experts delivers your project successfully with flexibility and efficiency. The staff augmentation company provides staff augmentation consulting to identify the gap and fill it with experienced talent. They also provide benefits such as scalability, and cost-effectiveness, reduce the hiring time and provide you with the best talent that aligns with your business requirement.
By Fixdax Technology4 years ago in 01
How to Switch to Canary Channel on Your Chromebook
Home How To How to Switch to Canary Channel on Your Chromebook How to Switch to Canary Channel on Your Chromebook Currently, there are five update channels supported on Chrome OS, including Stable, Long-term support (LTS), LTS candidate (LTC), Beta, and Dev. However, if you want to be on the bleeding edge and access features that are still in development, you need to switch to the Canary channel on your Chromebook. The Canary channel is much more buggy and crash-prone than your standard update releases, but you get to tinker with unannounced and experimental features on ChromeOS. So in this guide, let’s look at the step-by-step process for how to switch to the Canary channel on a Chromebook. Switch to Canary Channel on Chromebook (2023) Here, we have added detailed instructions on how to switch to the Canary channel on a Chromebook. Further, in case you find the Canary channel unpalatable, we have explained how to leave the Canary channel and move back to the Stable build. On that note, let’s jump to the steps. Table of Contents Turn on the Developer Mode on ChromeOS In order to switch to the Canary channel, you first need to turn on Developer Mode on Chromebook. Note that Developer Mode is different from the Developer channel. Developer Mode relaxes most security settings, so you can debug your apps and tinker with Chrome OS easily. Moreover, you can move to Developer Mode from any Chrome OS channel — be it Stable, Beta, or Dev. But bear in mind that enabling the Developer Mode will wipe out your local files, so make sure to back up all your important files. With that out of the way, let’s take a look at the steps: 1. Make sure you have ample charge left on your Chromebook. Now, press the “Esc + Refresh + Power” buttons at once. This will take you to the Recovery screen. You can perform this action while having your Chromebook turned on or off. Switch to the Canary Channel on a Chromebook (2023) 2. Next, use the “Ctrl + D” shortcut, and it will ask you whether you want to enable “Developer Mode”. Press “Enter” to confirm. Switch to the Canary Channel on a Chromebook (2023) 3. Now, your Chromebook will reset, and Developer Mode will be enabled. This process takes up to 10 to 15 minutes, so keep patience. If you get an “OS verification is OFF” message on the screen, wait for the beeping sound. After that, it will start the reset process. You can also press “Ctrl + D” again to bypass it instantly. Switch to the Canary Channel on a Chromebook (2023) 4. Once done, the Chromebook will reboot to an onboarding setup. Enter your email address and set up everything like you normally do. Switch to the Canary Channel on a Chromebook (2023) 5. Keep in mind every time you reboot your Chromebook with Developer Mode enabled, you will get a warning screen that will stay for 30 seconds or so. Your laptop will also make a beeping sound. To skip it, press “Ctrl + D” to continue the boot process normally. Switch to the Canary Channel on a Chromebook (2023) Switch to the Canary Channel on Your Chromebook 1. After setting up everything, press “Ctrl + Alt + T” to open the Crosh terminal. Crosh allows you to tinker with the ChromeOS layer and change several system-level and security settings. crosh 2. Once here, paste the below command and hit Enter. Press “y” and hit Enter again to confirm your action. This will change the default update stream to the Canary channel. live_in_a_coal_mine Switch to the Canary Channel on a Chromebook 3. Now, you will need to update your Chromebook. For that, open Settings (using the cogwheel icon) from the Quick Settings panel in the bottom right corner. settings 4. Next, move to “About ChromeOS” under “Advanced” in the left sidebar and click on “Check for updates” in the right panel. The device will start downloading the latest build from the Canary channel. check for updates 5. Once the update is installed, reboot your Chromebook, and you will switch to the Canary channel. Now, you can try out features like the new Material You theme that’s being tested on Chromebooks.
By Surya Kumar4 years ago in 01
NTFS vs ReFS File System: What’s the Difference?
Home What is NTFS vs ReFS File System: What’s the Difference? NTFS vs ReFS File System: What’s the Difference? Last Up After many years of inactive development, Microsoft seems to have added support for the ReFS file system on Windows 11. It has reignited the debate between NTFS and ReFS, and which file system is better for Windows. So if you are not aware of Microsoft’s new file system, we have come up with an explainer on what is ReFS and in what aspects it’s better than NTFS. Apart from that, you can learn about ReFS file system working model, performance metrics, and maximum storage limit. So on that note, let’s go ahead and compare NTFS vs ReFS. NTFS vs ReFS: Comparison (2023) In this comparison between NTFS and ReFS, we have explained ReFS, its working mechanism, key feature differences, and its current development. You can expand the table below and move to any section you want. Table of Contents What is ReFS (Resilient File System)? Before we find the differences between the two file systems, let’s briefly learn about ReFS and its development timeline. ReFS or Resilient File System is a proprietary file system developed by Microsoft. It was conceived to replace Microsoft’s popular file system — NTFS (New Technology File System). In fact, ReFS was first added to Windows Server 2012 and later to Windows 8.1 in 2016. However, ReFS support was removed from Windows 10 in the 2017 Fall Creators Update. CAN CONFIRM THAT WINDOWS 11 BUILD 25281 INSTALLS ON REFS WITH ABSOLUTELY NO PROBLEM. VIDEO WITH THE INSTALLATION PROCESS COMING SOON! PIC.TWITTER.COM/JJSIHETGT8— NTDEV @[email protected] (@NTDEV_) JANUARY 21, 2023 Fast forward to now, and it seems Microsoft is again testing ReFS on Windows 11. With Windows 11 21H2 (22557) build and the recently released Windows 11 25281 build in the Dev channel, ReFS v3 boot support has been added to Windows 11. But what is ReFS and how is it better than NTFS? To briefly answer the question, ReFS has been designed to improve on the shortcomings of the popular NTFS file system. ReFS can conveniently scale with large data, includes built-in features to correct errors and avoid data corruption, offers data integrity on-the-fly and can perform better in some scenarios. How Does Microsoft’s ReFS Work? ReFS is not a new file system developed from the ground up. It actually uses some of the NTFS code and has derived most of the features too. Unlike the B-tree structure in NTFS, ReFS utilizes B+ trees, which include root, internal nodes, and leaves. The root can be a node with multiple children or a leaf. The on-disk structure for both metadata and file data is based on B+ trees. Apart from that, ReFS uses an allocation-on-write (also called copy-on-write) strategy for metadata to avoid data corruption during an unexpected shutdown. In a single instruction, it can read and write data on files, lowering disk input and output operations, and bringing disk usage, memory, and power consumption down. NTFS vs ReFS: Key Features Differences Resiliency to Data Corruption The first and foremost feature that makes ReFS a resilient file system, unlike NTFS, is the built-in ability to accurately detect corruption and fix them without rebooting the system. Basically, ReFS can automatically repair data corruption, making it stand on par with competing file systems like Btrfs and ZFS. It employs something called integrity streams that basically analyze the checksums for metadata to precisely detect the error. In fact, it can also optionally inspect the checksums for file data, which may take more time, but the data can be fully validated. Apart from that, ReFS comes with Storage Spaces integration, which repairs the errors automatically. It does so by using the alternate copy of the mirrored data provided by Storage Spaces. Not to mention, the disk or volume can be in use while correcting the error, a key feature offered by ReFS. So you don’t need to reboot your computer to run the “chkdsk” command-line tool to repair Windows disk errors. In fact, you don’t need to run any tool for error correction as it has a self-repairing ability. And in case, there is no mirrored copy of the corrupt data, it removes the namespace from the local area, but ensures to keep the volume online. Finally, there is a scrubber in ReFS that periodically analyzes the volume, checks for corrupt data and corrects them. Better Performance in Some Workloads As you all know, ReFS was first introduced on Windows Server 2012, so accelerated VM operation is one of the important features of the new file system. It can significantly improve the performance of virtualized workloads using Block cloning and Sparse VDL. Block cloning allows the server to speed up the copy operations which results in the quick merging of VM checkpoints. Plus, Sparse VDL helps in creating fixed virtual hard disks (VHDs) within mere seconds. Effectively, on the consumer side, you are going to get better VM performance in Hyper-V. Apart from that, ReFS has this unique feature that splits the volume into two logical storage tiers, optimized for either Performance or Capacity. If you want to quickly write data to the disk, they will go to the Performance tier and will be efficiently moved to the Capacity tier. For data that is rarely accessed, they are transferred to the Capacity tier. Scalability NTFS was developed roughly 30 years ago and at that point in time, dealing with large sets of data was not something of concern. However, now, servers and computers regularly handle petabytes of data so Microsoft needed a scalable file system and ReFS aims to deliver exactly that. To give you an idea, NTFS supports a maximum file size of 256 TB whereas ReFS can go up to 35 PB. That’s 35000 TB of data. Similar are the figures for volume size as well. And now with ReFS version 3.7, it also supports volume compression just like other modern file systems. ReFS vs NTFS: Advantages and Disadvantages Here we will learn about the advantages and disadvantages of ReFS and NTFS. Refer to the below table for a quick overview. NTFS ReFS An established file system compatible with a host of systems Relatively new, mostly used in Windows Server Supports maximum file and volume size of 256 TB Supports maximum file and volume size of 35000 TB Very stable There are bugs that need to be ironed out No self-repairing ability Supports self-repairing and avoids data corruption Can’t work on online disks Can work on online disks Supports BitLocker encryption Supports BitLocker encryption Supports Access-control lists and File IDs Supports Access-control lists and File IDs No Block clone and Sparse VDL support Supports Block clone and Sparse VDL for faster performance No File-level snapshots Supports File-level snapshots Supports file system compression No file system compression Bootable using removable media Officially not bootable using removable media as of now Will ReFS Replace NTFS on Windows? After FAT, we have known NTFS as the default file system on Windows for decades. However, with the introduction of ReFS in 2012, things started to look a bit different, and it seemed like the “next-generation” file system is coming to Windows. However, ReFS (especially vs the NTFS file system) didn’t go that way despite featuring the self-repair ability. Eventually, it was removed from Windows 10 in 2017. There were many reasons behind this decision. First, ReFS was unstable for a consumer release and was failing without any warning. Experts said that recovery in such a scenario can get very hard. Apart from that, the thin volume of ReFS was expanding to a full-size ReFS partition despite the data being static. And in some cases, it was unreliably correcting file errors. As on Windows 11, though users can boot the OS reliably, they are unable to install Microsoft Store apps on a ReFS volume. So I would say, it’s a long way before ReFS becomes the standard file system on Windows, replacing NTFS.
By Surya Kumar4 years ago in 01
How to Save Instagram Story With Music (3 Methods)
author-Arjun ShaArjun Sha - Last Updated: March 16, 2023 11:41 am While you can create stunning Instagram stories with photos, videos, music, filters, stickers, texts, and much more, it doesn’t allow you to download the story with music. Why, you ask? It has mostly to do with music licensing and free distribution. Nevertheless, if you still wish to save an Instagram story with music, there are a few simple ways to do so. Our guide here will help you download Instagram stories with music, even without posting the video. In addition, you can save Instagram stories with music without making your account public. So, on that note, let’s jump in and learn about the various methods to save an Instagram story with music in your gallery. Save Instagram Story With Music (2023) In addition to stories you have posted recently, you can also download old Instagram stories using our instructions. Expand the table below to find all the methods. Table of Contents Download Your Own Instagram Stories With Music (Easy Method) With this nifty trick, you can download Instagram Stories with music to your smartphone without using a third-party app. The best part is that it works flawlessly and without any limitations. The quality of the video also remains intact and private accounts are also supported in this method. You can basically save an Instagram story with music without posting the same. Now, having said that, let’s move to the steps. 1. First, open Instagram and create a story with photos, videos, stickers, and all. You can also add music if you want. Now, don’t publish the story. Instead, tap the three-dot menu in the top-right corner and choose “Save“. Save Instagram Story With Music (2023) 2. As we all know, the story will be saved to your iPhone or Android device, but without music. 3. Now, open Instagram again and swipe left to enter the Messages section. Here, open one of the chats with your close friend and tap the “camera” icon at the bottom-left corner. 4. Now, choose the video you just downloaded. 5. Finally, swipe up and add the music to your story. After that, make sure “Keep in chat” is selected at the bottom-left corner. After that, tap on “Send” in the bottom right. 6. After the message is delivered, tap and hold on the video to see a host of options at the bottom. Here, tap on “More” and select “Save” to download the video to your gallery. 7. That’s all. You have successfully downloaded the Instagram Story with music on your smartphone. Save Your Instagram Story with Music After Publishing the Story In case you have already published the story or want to save an old Instagram story with music from the archives, you can do that as well. Again, this will also work for private accounts without any reduction in quality. Follow the below steps to learn how it works: 1. Open the Instagram app and move to your profile. Here, tap the hamburger menu in the top-right corner and open “Archive“. Archive saves all your past stories in the cloud. 2. Now, choose the story you want to download. After that, tap on the three-dot menu and select “Save Video” from the pop-up. The story will be saved to your camera roll but without music. 3. Now, just like the above method, send the story (downloaded video) as a message to one of your close people in DM and then add music. After that, enable the “Keep in chat” option in the bottom left corner. Finally, send the video to your friend. 4. After the message is delivered, tap and hold the video message and select “More” from the options that appear. Then, go ahead and save the Instagram Story with music. Download Instagram Stories with Music via Third-Party Websites Apart from the native way, you can save Instagram Stories with music using third-party online services as well. However, note that your Instagram account must be public to use any of the services. I would discourage users from using third-party apps as most of them force users to log in with a username and password. You must not enter your Instagram password on third-party apps to safeguard your account from any kind of mischief. That said, let’s look at two tools that you can use: StorySaver.net 1. First, head over to storysaver.net (visit) and enter your Instagram username. After that, click on “Download” here to retrieve all your Instagram stories. 2. Next, scroll down to find all the recent Instagram stories posted by you. Click on “Save as Video” here, and the story will be saved on your device with music. 3. In case you want to save older stories, click on “Show #Highlights” and save the story you want. Snapinsta Apart from that, you can use Snapinsta to quickly download Instagram stories with music to your phone gallery. But again, you will need to have a public account. that said, here’s how it works: 1. Launch the Instagram app and open the story you want to save with music. Now, click on the three-dot menu and copy the link. 5. Open snapinsta.app (visit) in your mobile browser and move to the “Instagram Story Download” tab. Now, paste the link here and hit “Download”. 6. Finally, go ahead and download the story with music. Repost Instagram Story With Music on WhatsApp & Other Socials So this is how you can save Instagram stories with music, both using native and third-party methods. For most users, the first trick will do the job as it does not compromise on any front and gives you the video without any reduction in quality. Anyway, that is all from us. If you are facing DM issues on Instagram, follow our article to find a possible solution. And if you want to turn off suggested posts on Instagram, head to our linked tutorial. Finally, if you have any questions, let us know in the comment section below.
By Surya Kumar4 years ago in 01
How to Stream Netflix Video on Discord
Are you an avid gamer looking for ways to watch your favorite movies and TV shows while playing? Or are you someone who appreciates the convenience of streaming Netflix while chatting with friends? Either way, Discord has come up with a great solution to allow users to stream their favorite content right in a chatroom. All it takes is a few clicks on the app and you can be watching your favorite movie or show with friends, even if they're miles away! In this article, we'll explain how easy it is to get started viewing Netflix content from within Discord. Continue reading to learn all about streaming Netflix on Discord!
By Danny White4 years ago in 01
[2023 Ultimate Guide] How to Get Amazon Prime Free Trial
Do you want to save money while getting all the benefits of Amazon Prime? If so, then a Amazon Prime free trial might be just what you need. With an Amazon Prime trial, you can access millions of products at discounted prices, get two-day shipping on eligible items, and stream movies and music from their library without spending a dime! In this blog post, we’ll give an overview of what comes with an Amazon Prime free trial membership and explain how to sign up for one in no time. Continue reading for more details about taking advantage of this great offer today!
By Danny White4 years ago in 01
Building a GDPR-Compliant Architecture on AWS
Data is the new gold in the modern digital age, and organizations are becoming more and more dependent on it to run their operations. The GDPR (General Data Protection Regulation) was designed to protect the privacy and personal data of EU citizens and includes robust requirements that raise and harmonize standards for data protection, security, and compliance.
By ZenBit Tech 4 years ago in 01