


At the end of this tutorial you’ll be able to train your own classifier to detect any object in real time. The tutorial is divided in three sections:
Configure an Install TensorFlow 2.0 GPU (CUDA), Keras, & Python 3.7 in Windows 10
Configure TensorFlow To Train an Object Detection Classifier
How To Train an Object Detection Classifier Using TensorFlow
Deep learning is a group of exciting new technologies for neural networks. Through a combination of advanced training techniques and neural network architectural components, it is now possible to create neural networks that can handle tabular data, images, text, and audio as both input and output. Deep learning allows a neural network to learn hierarchies of information in a way that is like the function of the human brain.
What is Deep Learning
There is very little difference between how a deep neural network is calculated compared with the first neural network. We’ve always been able to create and calculate deep neural networks. A deep neural network is nothing more than a neural network with many layers. While we’ve always been able to create/calculate deep neural networks, we’ve lacked an effective means of training them. Deep learning provides an efficient means to train deep neural networks.
What is Machine Learning
Machine learning is a method of data analysis that automates analytical model building. It is a branch of artificial intelligence based on the idea that systems can learn from data, identify patterns and make decisions with minimal human intervention.
Traditional Software Development — Programmers create programs that specify how to transform input into the desired output.
Machine Learning — Programmers create models that can learn to produce the desired output for given input. This learning fills the traditional role of the computer program.
We can use machine learning to create predictive modelling, for computer vision and time series.
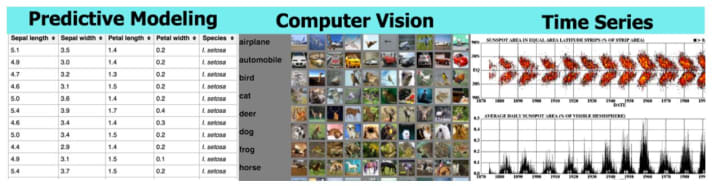
Predictive Modelling — Several named input values allow the neural network to predict another named value that becomes the output. For example, using four measurements of iris flowers to predict the species. This type of data is often called tabular data.
Computer Vision — The use of machine learning to detect patterns in visual data. For example, is an image a picture of a cat or a dog.
Time Series — The use of machine learning to detect patterns in time. Typical applications of time series are financial applications, speech recognition, and even natural language processing (NLP).
Regression
Regression is when a model, such as a neural network, accepts input, and produces a numeric output. Consider if you must to write a program that predicted how many miles per gallon (MPG) a car could achieve. For the inputs, you would probably want such features as the weight of the car, the horsepower, how large the engine is, and other values. Your program would be a combination of math and if-statements.
Machine learning lets the computer learn the “formula” for calculating the MPG of a car, using data. We can use regression machine learning models to study this data and learn how to predict the MPG for a car.
Classification
The output of a classification model is what class the input most closely resembles. For example, consider using four measurements of an iris flower to determine the likely species that the flower.
Beyond Classification and Regression
One of the most potent aspects of neural networks is that a neural network can be both regression and classification at the same time. The output from a neural network could be any number of the following:
- An image
- A series of numbers that could be interpreted as text, audio, or another time series
- A regression number
- A classification class
Hardware requirements
The following GPU-enabled devices are supported:
NVIDIA® GPU card with CUDA® Compute Capability 3.5 or higher. See the list of CUDA-enabled GPU cards.
Software requirements
- The following NVIDIA® software must be installed on your system:
- NVIDIA® GPU drivers — CUDA 10.1 requires 418.x or higher.
- CUDA® Toolkit — TensorFlow supports CUDA 10.1 (TensorFlow >= 2.1.0)
- CUPTI ships with the CUDA Toolkit.
- cuDNN SDK (>= 7.6)
- (Optional) TensorRT 6.0 to improve latency and throughput for inference on some models.
Installing all the Drivers
Before we begin installing Python and TensorFlow we need to configure your GPU drivers. If this step in done incorrectly the rest of the installation wont work.
Identify your GPU
The first thing we need to determine is your GPU version and name. To be able to do this in windows just use the following command
Windows + X
and click Device Manager
From there go to:
Display Manager
and you will see you GPU version and name.
In my case I using a NVIDIA Gforce GTX 965M
Download NVIDIA GPU Driver
CUDA 10.1 requires 418.x or higher, so just go to the following webpage. Input the corresponding GPU into the form and download it, install it and proceed to the next step. Download the version 10 and choose the option exe(local)

Install CUDA toolkit
TensorFlow supports CUDA 10.1 (TensorFlow >= 2.1.0), for this build I used all the version 10.1 and it works. Download the CUDA toolkit and install it.

Install CUPTI
When you install CUDA toolkit it should automatically install CUPTI, if later in the tutorial you see an error that has the name CUPTI just install it from here but every time I install the CUDA toolkit, CUPTI is included so don’t worry. You can skip ONLY this one

Install cuDNN SDK
The NVIDIA CUDA® Deep Neural Network library (cuDNN) is a GPU-accelerated library of primitives for deep neural networks. For this one, you will need to create an account and fill up some forms but don’t worry is FREE.

Download the same version you are using the previous drivers, so if you have everything with version 10.1 download cuDDN version 10.1
For the cuddnn, you will need to manually paste it to another folder so it can work. So once the download is over, you will create a new folder in
C:\tools
Once you create the new folder just copy paste the cuda folder in it and that’s it. There is no fancy installer, just paste it into the folder and you are done
CONFIGURE PATH
With all of this advanced drivers and deep learning you still have to create the path so your system can use it. Without this step, Tensorflow will not find the drivers and show errors.
Go to your environment variables and select Path in system variable

Just copy paste the following, you need to create a new variable for each one so this step you need to do it 4 time.
C:\Program Files\NVIDIA GPU Computing Toolkit\CUDA\v10.1\bin;
C:\Program Files\NVIDIA GPU Computing Toolkit\CUDA\v10.1\extras\CUPTI\libx64;
C:\Program Files\NVIDIA GPU Computing Toolkit\CUDA\v10.1\include;
C:\tools\cuda\bin;
and that’s it for the drivers. Now we are going to install Python, TensorFlow and the libraries that TensorFlow needs.
For Part 2, we will be installing all the libraries for TensorFlow and configure everything.
About the Creator
180NF
Building the world's largest nutritional database, the decentralized app for nutrition and fitness.
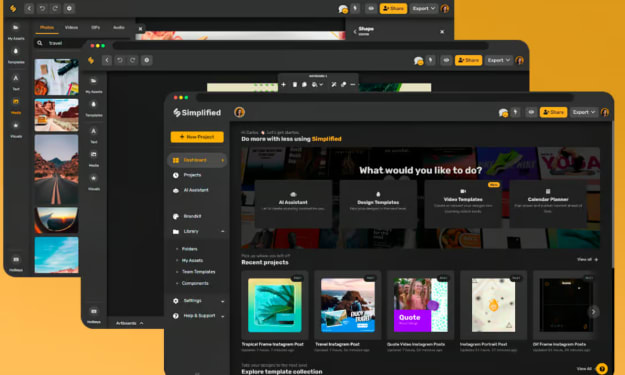
AI Photo Caption Generator: Simplified's Innovative Solution
In this digital age, images play a crucial role in capturing attention and conveying messages. However, coming up with descriptive and engaging captions for photos can be a challenging task. This is where the AI Photo Caption Generator comes into play, revolutionizing the way we add context to visual content.
By Cal inhibes7 days ago in 01
Frankie's Song of the Week: Espresso - Sabrina Carpenter
A little something different from me while I deal with the strain of writers block. I thought I'd do a song of the week, because I have been surely annoying my neighbours and my friends with this absolute musical GEM. I am of course talking about Espresso by Sabrina Carpenter.
By Frankie Martinelli7 days ago in Beat


Comments
There are no comments for this story
Be the first to respond and start the conversation.