
Your Car's Lights Are Trying to Tell You Something Here's How to Fix Them Yourself
Burnt-out bulbs, yellowed headlights, lights that point at the sky instead of the road car lighting problems are among the most common issues drivers deal with, and also among the easiest to fix yourself.

Burnt-out bulbs, yellowed headlights, lights that point at the sky instead of the road, and car lighting problems are among the most common issues drivers deal with, and also among the easiest to fix yourself. Most of these jobs take under 30 minutes, cost almost nothing, and save you a workshop labour bill for something you genuinely don't need a mechanic for.
Here's how to handle the most common ones.
A Bulb Has Gone. Now What?
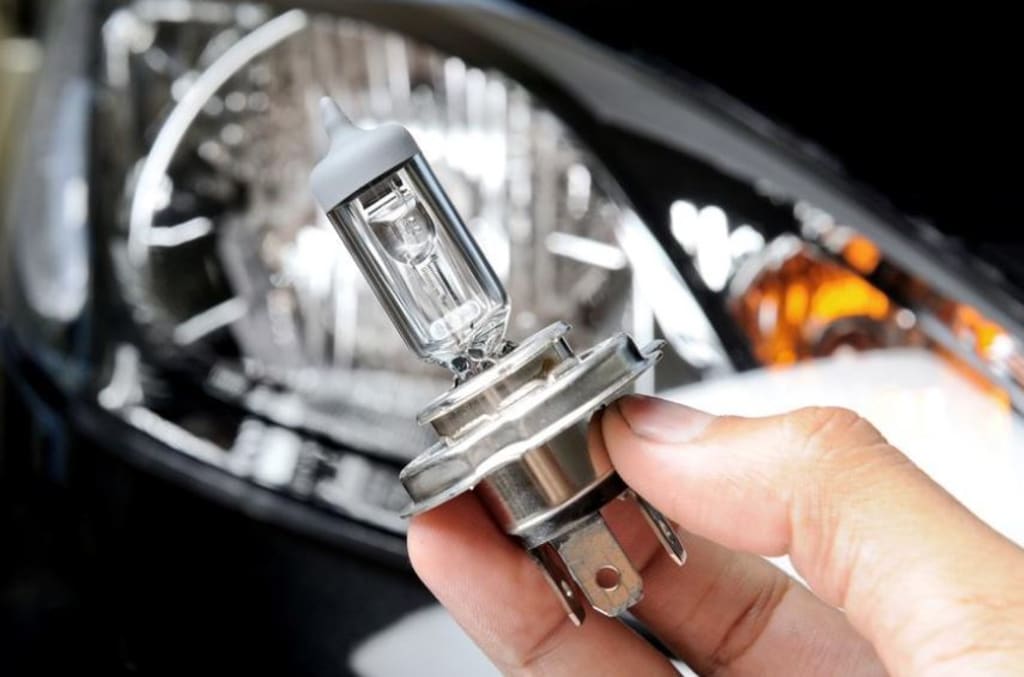
This is the one that catches most people out because it feels more complicated than it is. Pop the bonnet and locate the back of the headlight assembly. You'll see the wiring connector going into it. Unplug that connector, twist off the bulb retaining cap or ring, and the old bulb pulls straight out.
For taillights, you're usually working from inside the boot. Open it up, pull back the trim panel or carpet lining, and the back of the light assembly is right there.
When fitting the new bulb, there's one rule that catches people out every time: do not touch the glass of a halogen bulb with your bare fingers. The oils from your skin transfer onto the glass and create a hot spot when the bulb heats up, which causes it to burn out far sooner than it should. Handle it by the plastic base or use a clean cloth. It sounds fussy, but it genuinely matters.
Once the new bulb is in, turn the lights on before you put everything back together. Thirty seconds of testing now saves you from taking it all apart again if something isn't seated correctly.
Yellow, Foggy Headlights Are Killing Your Night Vision
If your headlights have that cloudy, yellowed look, the kind that makes them look permanently dirty no matter how often you clean them, the plastic lens has oxidised. UV rays and road grime do this to virtually every plastic headlight lens over time, and it's not just an aesthetic issue. Severely oxidised lenses can cut your nighttime visibility significantly, which is a genuine safety problem.
For a quick fix that buys you some time, mix a small amount of toothpaste with baking soda. The gritty texture acts as a mild abrasive. Apply it to the lens with a microfiber cloth, work it in with circular motions, and rinse off. WD-40 wiped onto the lens works similarly for a temporary clear-up. Neither of these is a permanent solution, but they're useful if you need the car looking better for an inspection or a long night drive.
For a fix that actually lasts, you need a headlight restoration kit. They're inexpensive and come with progressively finer grits of sandpaper plus a UV-resistant clear coat. Tape off the surrounding paintwork carefully so you don't accidentally scuff it, sand the lens starting with the coarsest grit and working up to the finest, wipe it clean, and apply the clear coat. Done properly, this gets you lenses that look close to new, and the UV coating stops them from going yellow again quickly. ChrisFix on YouTube has an excellent step-by-step video on the permanent sanding method if you want to see the process before attempting it.
The Maintenance Stuff Most People Skip
Washing your headlight and taillight lenses every time you wash the car sounds obvious, but most people ignore them. Dirt and grime sitting on plastic lenses act as a mild abrasive every time something brushes against them, gradually scratching and dulling the surface over time. A microfiber sponge and regular car soap are all it takes.
Check your headlight aim occasionally, too. Headlights that point too high blind oncoming drivers; headlights aimed too low barely illuminate anything ahead of you. Most headlight housings have small adjustment screws, usually accessible from the engine bay, that control the vertical and horizontal aim. Your vehicle's manual will tell you where they are and how to set them correctly.
Finally, if a light isn't working but you've confirmed the bulb is fine, check the fuse box before assuming anything more serious. Every light circuit has a corresponding fuse, and a blown fuse is a five-minute fix that costs almost nothing. Your owner's manual has a diagram of the fuse box showing which fuse controls which circuit.
Car lights are one of those things that are easy to let slide, a slightly dim headlight here, a bit of yellowing there, until they become a problem significant enough to get you pulled over or, worse, affect your safety at night. None of these fixes is difficult. They just require a little time, the right materials, and the knowledge that you don't need to pay someone else to do them for you.
Half an hour on a weekend afternoon, and your lights can look and perform as well as they did the day the car was new. That's a pretty good return on a small investment of time.
About the Creator
Mark Lim
Hi I am mark an automotive student and a car, tech and food enthusiast ! Im gonna try and post daily & hope you enjoy what I write and do share my page with people you know. I would gladly appreciate it! Cheers
Enjoyed the story? Support the Creator.
Subscribe for free to receive all their stories in your feed.
Comments
There are no comments for this story
Be the first to respond and start the conversation.