
Installation Secrets for Hair Extensions with Beads and Wefts from Professional Stylists
The Art of Installing Beaded Weft for a Seamless Look

Installation Secrets for Hair Extensions with Beads and Wefts from Professional Stylists
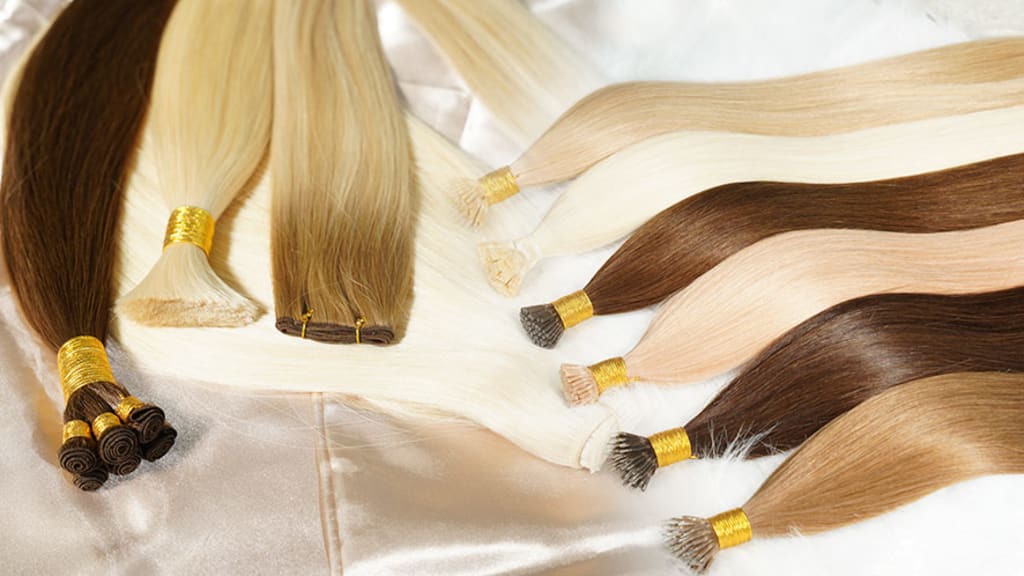
Beaded Weft Extensions mix micro-link beads with sewn wefts to create a solid, low-tension base that hides easily under natural hair. For pro stylists, this hybrid method is the gold standard for lasting wear and keeping things invisible. But it only works if you nail the spacing, tension, and sectioning. Getting that exact precision relies on having the right tools, which we'll look at next.
Key Takeaways
- Match bead size to hair density, using smaller silicone-lined beads for fine hair to prevent bulk.
- Create 1-cm sections and stay 1.5-2 cm from the hairline to balance weight and conceal the install.
- Map the foundation track along the occipital bone to provide natural structural support.
- Verify tension with a slide-and-tap test; beads must move slightly without pinching the scalp.
- Double-loop thread on the first and last beads to anchor corners and prevent early lifting.
- Reshape and round out beads during removal instead of crushing them to avoid natural hair breakage.
The Masterclass Toolkit: Essential Hardware for Beaded Foundations
Clean installs kick off with tools made for control, not just guesswork. Silicone-Lined Beads, a C-Curved Needle & Nylon Thread, and a Bead Loader/Threader dictate how flat your rows lie and how well tension spreads. Cheap tools just cause slippage and bad weight distribution. But the right gear keeps everything stable, making removal a breeze without stressing the hair out. It all begins by picking the correct beads.
Selecting the Right Silicone-Lined Beads for Hair Texture
Fine hair absolutely needs smaller Silicone-Lined Beads to avoid bulk and keep the weight totally balanced. Coarse hair, on the other hand, can hold larger beads without creating harsh pressure points.
Always match your bead size to strand density, rather than just looking at section width. The silicone lining needs to grip nicely without crushing the hair cuticle.
Placement naturally follows that choice. Smaller beads sit closer to the scalp and stay hidden, perfectly setting you up for clean sectioning.
Why Professional Stylists Choose Bono Hair for Premium Wefts
Bono Hair wefts bring a steady thickness to the table, helping tension stay even across every single row. Hand-Tied Wefts feel much lighter to wear, while Genius Weft options cut down major bulk right at the seam.
That consistency is a really big deal during both installs and removals. Less variation just means fewer stress points when you're cutting or sliding those beads out.
Top-notch materials always back up a clean technique. Next up is sectioning, which is exactly where all that precision really shows.
Secret 1: The 1-cm Rule for Precision Sectioning
Clean sectioning really controls everything. We're talking weight distribution, tension, and long-term scalp health. You'll find the sweet spot right around 1 cm per section. Go wider and the row ends up bulky. Shrink it down too much, and you create way too many anchor points just pulling on fragile strands. This happy medium keeps pressure perfectly even across the scalp, but it still gives plenty of support for the weft. Once you nail that spacing, placement is your next big move.
Mapping the Foundation: Where to Place Beaded Weft Extensions
Your foundation track has to follow the natural curve of the occipital bone. That ridge gives you built-in support. Because of it, the weft doesn't slip or just collapse under the extra weight.
Got a flatter head shape? You'll need a slightly higher placement to dodge sagging rows. But more prominent bones can handle a lower track without adding stress. Hair sectioning isn't just random guesswork here. You map it strictly to the bone structure. That specific placement controls exactly how tension behaves across every single bead.
Avoiding the Hairline: How Far Should Extensions Be Placed?
Always keep extensions a good 1.5 to 2 cm away from the hairline and nape. This little buffer hides the install entirely whenever the hair gets tied up. Plus, it protects those delicate edges.
A pro stylist respects this perimeter no matter what. It keeps the whole look seamless and stops beads from poking through. Push it too close, and exposure gets really obvious fast. Once you lock in that safe spacing, your next job is dialing in the bead tension.
Secret 2: Mastering Tension Theory and the "Tension Test"
Bead tightness dictates if extensions stay put or just stress out the scalp. Good Tension Management keeps beads firm enough to stop slipping, but never so tight that they squeeze follicles and kill comfort. You're aiming for a stable grip with absolutely zero pinch. That balance protects Scalp Health and creates a perfect base for the weft. Once the tension feels right, a fast physical check confirms you're ready to start stitching.
The Professional Tension Test: A Stylist’s Physical Check
A pro stylist checks tension using a quick slide-and-tap move. Just gently nudge each bead along the hair strand about 1 to 2 mm, then tap it right back into place. It should move a bit when you push it, but it shouldn't drift on its own. That's what proper Tension Management looks like.
After that, press lightly against the bead itself. Your client shouldn't feel any sharp pressure or grabbing. Have them tilt and turn their head around a bit—tight spots always show up fast the second they move.
If a bead feels totally stuck or causes pain, it's way too tight. You have to reset it before any sewing starts. No exceptions.
Identifying Signs of Poorly Installed Beaded Extensions
Downright discomfort is your first big red flag. Things like lingering soreness, headaches, or a constant "pulling" feeling usually mean over-tight beads are messing with Scalp Health.
Look closely at the alignment. Beads that tilt, stack crookedly, or sit way too close to the scalp just create unwanted pressure points and wobbly rows. Clients might even complain about itching within the first day or two.
Then there's slipping, which is the exact opposite problem. If beads slide around easily or drop down within a week, the tension was definitely too loose. Both extremes ruin the foundation. And that directly affects how secure your stitching will hold up during the next step.
Secret 3: The Anchor Stitch and the "Corner" Secret
Corners are the first thing to lift when your stitching lacks a solid anchor. Even if your tension is spot on, weak end points let the weft peel away from the Foundation/Track over time. The fix really comes down to how you start and finish each row using a C-Curved Needle & Nylon Thread. Lock those points correctly, and the whole row holds its shape much longer. It all starts with securing those first and last beads.
Double-Locking the Ends for Maximum Longevity
Kick off every row by looping twice around the first bead. Then pass the needle right through the Foundation/Track before you tighten it. This creates a fixed anchor rather than a sliding stitch. Do the exact same thing at the final bead—two loops, plus a firm pull to lock it down.
This double-lock trick cuts down on early lifting during Maintenance/Move-up appointments. As a Professional Stylist, you'll spot way fewer loose corners and much better row alignment after 4–6 weeks.
Corners naturally stay flat because the tension gets spread out, instead of resting on just a single stitch. That stability sets up the next step: making sure the hardware visually disappears.
Hand-Tied vs. Genius Wefts: Choosing the Right bono hair Product
The weft you pick totally changes how well your anchor work stays hidden. Hand-Tied Wefts are super thin and flexible, helping them lay flush against the Foundation/Track. But they can't be cut. Placement needs to be exact.
Genius Weft options from bono hair actually solve that limitation. They stay nice and thin like hand-tied wefts, but you can trim them without worrying about unraveling. That gives you a lot more control at the corners where bulk usually builds up.
The main difference between hand-tied and machine wefts really just comes down to bulk and flexibility. Machine wefts are naturally thicker, making them a lot tougher to conceal right at those anchor points.
Pick the right weft, and your secure stitching won't just hold tight. It'll completely disappear into a clean, invisible finish.
Secret 4: Bead Color Blending and Hidden Knots
Perfect installs don't just hold. They completely disappear. When you match the bead color to your client’s root and thread clean rows using a Bead Loader/Threader, you get a true Seamless Look. This works even when the hair moves or lifts into an updo. But getting the color right won’t save you on its own. The final touch matters just as much. It all starts with how you hide every single thread end.
Burying the Thread: The Hidden Knot Technique
You get a clean finish by burying the knot right inside the track instead of leaving it out in the open. Grab a C-Curved Needle & Nylon Thread to loop through that last bead. From there, pass the needle back under the weft twice before you tighten it down. This locks the stitch deep inside the foundation. That way, absolutely nothing sits on top.
Your clients shouldn't feel any bumps when they run their fingers over the row. If they complain about bumps, your knot is sitting way too high. When you bury knots the right way, that Seamless Look survives styling, washing, and everyday wear. Plus, a clean finish makes post-install adjustments much easier later on.
Maintenance and Troubleshooting: Preventing Bead Slip
A slipped bead doesn't mean you have to redo the entire row. Just isolate the loose bead. Rethread it with a Bead Loader/Threader, and clamp it right up against the scalp while keeping the tension even. This trick keeps your track perfectly aligned without messing up the beads next to it. Simple as that.
Most slipping happens because of under-clamping or oily roots. When clients come in for Maintenance/Move-up visits, take your time. Check the tension bead by bead instead of rushing through the row. Keeping your spacing consistent and your closures firm stops future shifting in its tracks. Yes, tight installs are great. But controlled tension is what actually protects the foundation and gets everything ready for a safe removal.
Non-Damaging Removal: The Professional Standard
Removal is the exact moment you either save or ruin your client's natural hair. Honestly, a flawless install means zero if the takedown leaves them with breakage or scalp tension. Real pros treat removal like a carefully controlled operation, not a rushed teardown. The goal is pretty straightforward: let go of every anchor point without pulling or snapping a single strand. That begins with opening the beads, and then it's all about how you handle the thread.
Tool Selection for Zero-Damage Bead Opening
Using the right tools is what really protects Scalp Health. Proper pliers will reshape Silicone-Lined Beads instead of just crushing them. You basically want to "round out" the bead—reversing that very first clamp—so it slides right off without dragging any hair with it. If you crush the bead, you end up flattening those metal edges. And that's exactly what snags and snaps strands during the takedown.
Clean installs make this part so much easier. When you have even tension and neat bead placement, things release smoothly without needing much force at all. It's really that simple. That connection matters because a messy application will always haunt you at the removal stage.
Thread Snipping Safety: Protecting the Natural Hair
Safe thread removal is all about visibility. A pro stylist isolates the stitch line first. Then, they use fine-tip scissors to cut only the Nylon Thread that was originally placed with a C-Curved Needle & Nylon Thread setup. You never just dig blindly into a row.
Just one wrong snip can nick the natural hair and weaken that whole section. Slow, controlled cuts keep your client's foundation perfectly intact. Plus, it gently sets you up for the final assessment before deciding on the next service.
Frequently Asked Questions About Beaded Weft Installs
How do you sleep with beaded weft extensions?
Braid them. A loose low braid prevents root matting and takes tension off the beads. Silk pillowcases are non-negotiable. Cotton causes friction and pulls the install right out while you sleep.
What not to do with beaded extensions?
Never apply conditioner at the roots. It lubricates the silicone beads causing immediate slippage. Don't rip a brush through the scalp either. Anchor the weft base with one hand while detangling the ends.
Which hair extension method is the least damaging for thin hair?
Tape-ins or micro-keratin bonds. Heavy beaded wefts will snap fragile strands. Tape spreads the weight flat across a 1.5-inch section. Tension is the ultimate enemy of thin hair. Keep the install lightweight.
What is the newest method of hair extensions?
UV light extensions. Stylists use an LED tool to cure a tiny adhesive drop in seconds. Completely invisible with zero bulk. V-light systems are dominating the industry right now for seamless hairline work.
About the Creator
Alex Morgan
Written by Bono Hair’s content team — experts in professional hair replacement solutions and advocates for confidence, authenticity, and self-expression through modern hair systems.
Enjoyed the story? Support the Creator.
Subscribe for free to receive all their stories in your feed.
Comments
There are no comments for this story
Be the first to respond and start the conversation.