
Dry Bag or Waterproof Backpack? Choosing the Right Setup for Camping
A small dry bag is useful when you mainly need to organize and protect selected items inside another carrier.

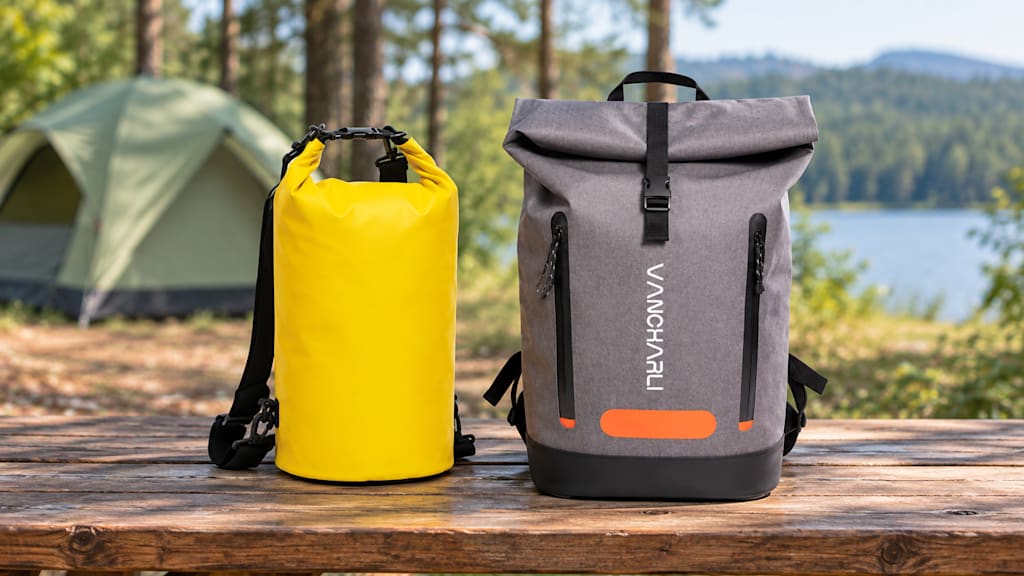
Choose a waterproof backpack when the protected bag itself must be comfortable to carry between the vehicle, trail, and campsite. Many camping trips benefit from both: a suitable backpack handles the load, while smaller dry bags keep sleeping clothes or other vulnerable items separate. The right answer depends on how you move your equipment and which belongings need their own protected space.
The names overlap. A large dry bag with shoulder straps may be sold as a dry backpack, and a conventional hiking pack may include water-resistant fabric without being a waterproof enclosure. Rather than deciding from the product label, examine two questions separately: how the bag is carried, and how its contents are protected. Keeping those questions separate prevents an attractive closure from distracting you from an uncomfortable harness, or comfortable straps from obscuring an unsuitable opening.
Understand what each bag is being asked to do
A small dry bag usually works as a module. It groups clothing, contains a sleeping bag, or protects selected items within a larger load. It may have no carrying system beyond its closure or a simple attachment loop. A waterproof backpack combines a protected compartment with straps and a shape intended for carrying. Its usefulness depends on both parts working together with the amount of equipment you need.
A drawstring stuff sack belongs in a different category. Sea to Summit explains that its dry bags use sealed seams and a roll-top, while its stuff sacks use an unsealed drawstring opening and untaped seams. That distinction is helpful when sorting camping organizers: a pouch can group equipment effectively without protecting it from water. Choose the protection required by the contents rather than expecting every small fabric bag to do the same job. [1]
Match the system to the trip
At a campsite beside the vehicle, internal organization may matter more than a sophisticated carrying system. Separate bags for sleeping clothes and spare layers can be lifted into the tent without unpacking everything. On a trip involving repeated walks between a parking area and camp, a backpack can make the movement simpler. If the route includes longer hiking, evaluate the complete loaded fit as carefully as the weather protection.
A boat-access campsite changes the balance again. Equipment may be exposed to spray during transport and then carried over a short landing or path. A substantial dry backpack may be useful there, but its specific water-protection claim still matters. Do not assume that a backpack suitable for rain is designed for immersion. Select around the actual exposure and transport method rather than buying the most rugged-looking option for every kind of trip.
Camping situation
Practical starting setup
Main decision
Vehicle beside the campsite
Organizers and dry bags inside a carrier
Protect selected gear without adding unnecessary bulk
Short walk to camp
Waterproof backpack with small inner bags
Balance carrying comfort with simple organization
Long hiking approach
Well-fitting pack with appropriate internal protection
Prioritize fit and keep vulnerable items separately dry
Boat transfer and short carry
Dry backpack suited to the expected exposure
Check closure instructions and carrying arrangement
Mixed wet and dry equipment
Separate removable storage for each group
Prevent damp return gear from sharing the dry zone
Distinguish internal organizers from exposed gear
A lightweight sack that works well inside a backpack may be a poor choice for repeated contact with a rough campsite surface. SealLine distinguishes its lightweight packing-system sacks, intended to go inside a larger bag, from dry bags developed for exposed aquatic use. The useful lesson is to read the intended application. Weight savings make sense when another carrier supplies protection from abrasion; they need a different justification when the bag becomes the outside layer. [2]
For a retailer developing a camping range, this distinction is a useful starting point when speaking with a dry bag manufacturer. Vancharli Outdoor’s dry-bag page includes both roll-top dry bags and backpack-style designs. A product brief should say whether the item will organize another pack, serve as the main carrier, or move between those roles. That decision affects the material, carrying attachments, opening, and the sample the team should prepare.
Compare the shape after the bag is closed
Measure what you need to pack, then compare usable dimensions and closure space. A cylindrical bag may suit a soft sleeping system but leave gaps around rectangular containers. Several smaller bags can fit around other equipment, although too many modules add openings to manage and items to keep track of. The aim is not a perfectly color-coded collection. It is an arrangement in which each essential item has a predictable place.
Check how a manufacturer states size. SealLine specifies that its listed roll-top dimensions describe the bag with the top properly closed, but that should not be assumed for every supplier. Ask whether dimensions are open or closed when the distinction is unclear. When trying a sample, use the actual contents and close it as instructed. A bag that accepts everything only when its top is left open is too small for that packing job. [2]
Keep one part of the load reliably dry
Decide which items should remain protected until the tent is ready. Sleeping clothes, spare socks, and insulation are reasonable candidates for a dedicated dry zone. REI’s rain-camping guidance recommends keeping dry camp clothing protected until shelter is available and describes liners and smaller dry sacks as useful ways to protect vulnerable gear. Its advice also notes that waterproof pack material does not necessarily mean the seams and openings are sealed. [3]
Build that idea into a simple routine. Keep the sleeping kit together, and place the clothing you may need during a break somewhere else. When rain starts, you should not have to open the entire nighttime kit to retrieve a single layer. At camp, move the protected module into the sheltered space before opening it. This is a practical organization strategy, not a claim that any particular sack can withstand unlimited exposure.
Give damp equipment a separate return route. A wet tent fly, muddy footwear, or used clothing should not go into the same small bag as the items you have kept dry. If a damp item must travel inside the main carrier, contain it separately and unpack it when conditions allow. Avoid treating a sealed bag as a drying system; its job during transport is to keep different groups of equipment from mixing.
Check the backpack as a backpack
Load a candidate backpack with a realistic mix of soft and rigid gear. Adjust the straps and walk with it long enough to notice pressure, sway, or awkward access. Check whether the bag length suits your back and whether a rigid object pushes through the rear panel. A waterproof shell with two straps is not automatically comfortable for the distance you intend to walk, and a padded appearance does not answer the fit question.
Look at where the load sits and how it changes as supplies are used. Compression straps can help manage unused space when they are part of the design, but they should not distort the closure. Consider whether water and frequently used items have accessible positions. If every stop requires removing the backpack, opening the main compartment, and rearranging the sleeping kit, the design may be better suited to short transfers than an all-day trail routine.
A conventional hiking pack with internal dry storage remains a sensible option when it fits your body and equipment well. REI identifies pack covers, liners, and lightweight dry sacks as different layers of rain protection. Choose the combination that fits your trip instead of assuming that replacing a comfortable pack is the only way to improve the system. The protected contents and the carrying structure can be selected separately. [3]
Avoid the common packing shortcuts
Do not use the final folds of a roll-top as extra storage space. Do not place sharp equipment loose against a thin bag wall, and do not assume exterior pockets have the protection of the main compartment. Keep the closure area accessible so it can be formed correctly. If the bag is difficult to close in a calm room, it will not become easier when the tent is wet and daylight is fading.
Another mistake is making every item equally difficult to reach. Camp footwear and a snack do not need to share the protected space reserved for sleeping clothes. Group equipment by both moisture sensitivity and timing of use. A small number of meaningful groups is easier to maintain than a complicated arrangement that is abandoned after the first night. Labeling or using different colors can help, but the system should remain understandable without an inventory sheet.
Frequently asked questions
Can a large dry bag replace a camping backpack?
It can for some short transfers if it has a suitable carrying arrangement. For longer walking, consider fit, support, access, and how the packed load behaves. Volume and weather protection alone do not establish whether it will work comfortably as the main carrier.
Should every item go in a separate dry bag?
No. Protect the groups that need it and use simpler organizers where appropriate. Excessive subdivision can make packing slower and create unused gaps. Sleeping gear, spare clothing, and a small protected personal-items group may be enough for a straightforward camping setup.
Will a waterproof backpack protect everything in its outside pockets?
Not necessarily. External pockets can use different materials and openings, including mesh or water-resistant zippers. Read the description for each compartment. Keep moisture-sensitive belongings inside the protected section unless a pocket is explicitly designed for that purpose.
Can I compress a dry bag as tightly as possible?
Use only the compression method intended for the design. Leave room for the closure and avoid forcing rigid items against the fabric. A bag with a purge valve or dedicated compression straps works differently from a simple roll-top organizer.
How do I evaluate a setup before the first trip?
Pack the actual equipment, close every bag, and rehearse a few common tasks: retrieving a layer, carrying the load, and moving the sleeping kit into shelter. This reveals access and fit problems without making unsupported assumptions about water performance.
Build the setup around your camping routine
Choose the carrier for the distance you travel, then add enough separate storage to keep the important dry items organized. Brands planning a camping collection can explore Vancharli Outdoor dry bags to compare organizer and backpack formats, then discuss materials, closure construction, and carrying features for a specific use case. Bring a realistic gear list to sample development so the finished arrangement is judged by how it works when packed, not only by its empty appearance.
References
[1] Sea to Summit. What are the differences between Stuff Sacks and Dry Bags? n.d.
[2] Cascade Designs / SealLine. Frequently Asked Questions. n.d.
[3] REI Co-op. How to Go Backpacking in the Rain. n.d.
About the Creator
Enjoyed the story? Support the Creator.
Subscribe for free to receive all their stories in your feed.
Comments
There are no comments for this story
Be the first to respond and start the conversation.