

I started painting about a year and a half ago after my boyfriend bought me my first easel and acrylic set.
I had been watching Bob Ross to help me relax and fall asleep, but I never thought I would be able to do anything so amazing.
To be honest. I still can't. But I have some tips which people will forget to tell you that I have learnt while I have been painting. They won't make you a master, but they will help you get started.
These tips are to help with getting started with acrylic painting. Bob Ross is known for his oil painting which is what I did predominantly since I started but there are several reasons why I think most people would enjoy acrylic more. (I think I am going to write an article about this too, watch this space!)
1. Knowing your tools
You will need:
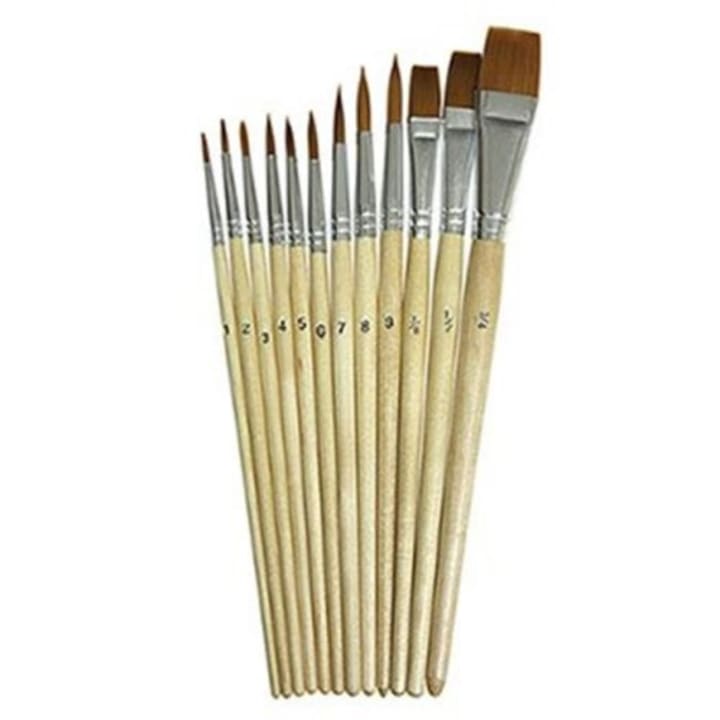
- Brushes
- Paints
- Canvas/ Canvas Board/ Mixed Media Paper (Pad)
- Easel (not always necessary - you can just sit at a table)
- Paint Palette
- Painting knives (use these to mix paint colours - save your brushes!)
- Cup for water (I use a Kilner Jar.)
This list is not extensive - there will be other things which you will find helpful or that other people will suggest. This is just the absolute bare minimum to get started.
In each of these there are a few more break downs.
With brushes I would suggest having a range of sizes from a 2 inch square brush to do larger spaces, all the way down to thin detail brushes. I would also suggest having a fan brush or two as these work really well when painting trees. I would also suggest having a round fluffy brush as these work well for absorbing water and blending acrylics.
With paints you can buy a whole range of colours, but the most important colours to have are white, black, and the primary colours - as you can make any colour with these! (See below.) You can buy most colours in packs but buy a big tube of white - you'll need it!
2. Buying these
You can buy everything on the list fairly cheaply from craft stores and even from general stores. It varies based on country, but in the UK I got a lot of my cheaper stuff from Wilkos, The Works and The Range, and some more of my mid range price stuff from Hobby Craft. Amazon also offers a large range of art supplies at different costs - and this is usually a good place to buy from as you will be able to read reviews.
Sometimes you will surprise yourself by picking up something cheaply but it might really work for you. For example; I bought a set of canvases from a shop in the UK called Aldi who were temporarily selling art supplies. I was actually really impressed by the quality as the fabric was really smooth.
3. Canvases/ Canvas Boards/ Pads
As mentioned above, to paint on you will need either stretched canvases, canvas boards or a mixed media pad. You cannot use normal paper or this will buckle.
Stretch canvases are generally the most expensive as this is a piece of cloth tightened over a wooden frame. Canvas boards are similar to canvases in the way that the painting surface feels however these are just thin pieces of cloth on a reinforced cardboard-like base. As they are not chunky like a canvas they are easier to store and better for beginners. Canvas boards are also thin enough to be put into a frame, however this can't be done with canvases. Both of these come in a range of shapes and sizes.
Mixed media pads generally come in different sized square or rectangular shaped pads. The issue with this being once you commit to buying one all your paintings have to be that size unless you have a few on the go. Painting in these feels very relaxed and more personal because the paintings in them generally aren't to be displayed. The paper in these can still buckle and I would not suggest using oil paints in them due to the amount of time it takes for oils to dry. All other paint types are generally fine.
In a way it is worthwhile having all three. The pad to plan paintings and just generally paint. The canvas boards as a cheap alternative to stretched canvases, which can still be framed and displayed. And stretched canvases for practised pieces you want to show off.
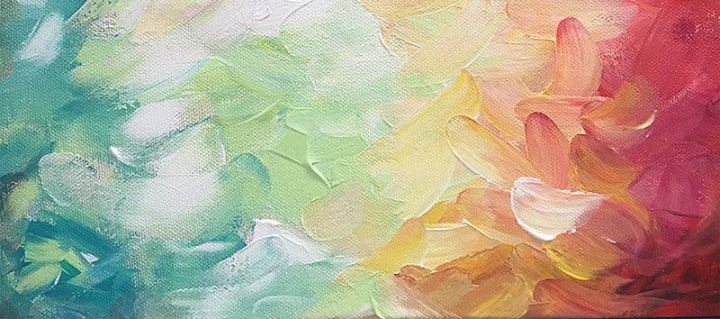
4. Paint Colours
As mentioned above you can just buy the primary colours, black and white, however if you can get a full range of popular colours this would be best.
Mixing colours is relatively easy and lots of fun, its not something you should really ever listen to advise on - just do it and have some fun!
Tips I have learnt which might help are:
Know what will happen before you mix. Red and blue make purple. Easy, you learnt this when you were five. But remember this before you start going ham on different colours trying to make one particular hue.
If you want to make a pastel colour for a sunset hue use a lot of white and start by making a light pink as the base for other colours such as orange and lilac.
Red, blue and yellow make brown, add white to make a creamy colour.
If you want to make something darker or duller don't mix in black - mix in the opposite colour on the colour wheel.

5. What the heck is Gesso?
You have everything! Great - time to get started.
But before you put paint to canvas you need to apply a layer of 'gesso'.
Gesso is a type of fast drying paint which when you put it on canvas or canvas board it creates a layer which stops the texture from the canvas from showing through the paint.
The best colours of gesso to use are white (for just every general painting) or black (its best to practise with this first as it can be tricky. Works well as a base for a night scene or on the bottom half of you canvas for a waterfall scene.)
Some canvases will say "pre-Gesso." For most canvases you will still need to apply one layer.
6. Understanding how paint works
This may seem obvious but it is something I didn't really think about until more recently.
When painting with Bob Ross using oil paints, he suggests using oil paint thinner to thin the paint to get smoother lines when doing detailed pieces of a painting when there is already a lot of paint on the canvas.
With acrylic you can do something similar - with water.
Watercolour is made to naturally vary dependent on the ratio of water to pigment. But acrylic is also a water soluble medium so you can use water to thin acrylic paints (to an extent.) Water will make the acrylic easier to blend and an amazing tip is to wet a large, round fluffy brush and layer on colours from light to dark, then use another dry fluffy brush to blend these.
Acrylic drys insanely fast, so adding water does give you a little more time to be able to work with the paint. But be aware if you put paint onto a surface it starts to dry straight away and will leave marks if you try to move it after it has dried - this is why I would never suggest squeezing paint straight onto canvas unless you are prepared to work very quickly to move it around.
If you are running low on a colour I would also suggest using a little water as it will make it go further.
7. Drawing?
Some artists make the most beautiful art which they pre-sketch. But you do not need any drawing talent to be a talented painter.
If you paint landscapes all you need to know is some simple techniques to be able to draw every part of the scene.
> The sky - use 'palettes' from a quick google search as inspiration for colour, simply put on colours and blend to form a sky. It doesn't really matter how far you go down the page with this as you can set your horizon line once this initial layer has dried - but do keep in mind the blend in case you intend to cut off the lower colours.
> Clouds - use quick circular motions with a smaller rounded brush, blend in other tones while still wet, then go over these in part to make it look more natural and although it has some shadows. Vary sizes and proportions.
> Mountains - nothing more than little rolling hills and big pointy triangles! Its easiest to highlight and lowlight these with white for snow and a very light blue as like a shadows snow, but you can do something similar with greys and greens to make a more warmer climate.
> Water - for water get a large square brush and pull softly from the outside of the canvas in on both sides, leaving a white space in the middle (not one that is completely straight) and small white spaces through the strokes to look like glimmers.
> Perspectives - think about what is close and what is further away, add in trees and bushes and anything you would like.
> Trees - draw a straight line, use a fan brush going down the tree in an S shape back and forth to create a fir tree. Layer with a lighter colour like white for snow.
If you do want something in your foreground draw it after you have painted and the paint has dried. The paint doesn't take long to dry and it will look more natural than if you leave a space for it and paint around it.
8. Tutorials
Online there are so many amazing artists who are so unbelievably talented. This can be a blessing and a curse for someone just starting off.
They can help with issues you may be having and be a source of inspiration, but similarly they can put you off because you begin to think: how could I ever achieve that?
My advise would be to watch artists sparingly, use them as your inspiration but don't compare or copy.
If you do copy another artist, tag them!
This is all the tips I can think of that will get you started painting. Painting is all about happiness, and that is the main reason I do it. I have never done art at school apart from when I was very young so I have no qualifications in it. But I have watched online classes and painted almost every day for almost two years, so I have picked up a couple of things.
If you use any of these tips or have anymore questions get in touch on my art page on Instagram: @artsplattersbymeg
Happy Painting!
About the Creator
Meghan McKenna
Instagram - @megroisin (Follow me! I have a cute dog!)
Keep reading
More stories from Meghan McKenna and writers in Lifehack and other communities.
The Radiance Within
In the heart of a bustling city, where skyscrapers kissed the clouds and neon lights illuminated the streets at night, there lived a young woman named Maya. She was a dreamer with a heart full of ambitions, but amidst the chaos of her daily life, she often neglected the one thing that mattered most her skin.
By Muhammad Qadeer3 days ago in Lifehack
Be your Creator.
Learning new skills, habits, attitudes, and behaviour helps to become a self-creator. But, it is all about Mindset. Your mind is a powerful weapon playing a vital role in it. It needs creating good habits, consistency, positive thoughts, focus and self-discipline.
By Sandeep Sahooabout 3 hours ago in Lifehack
Was I a Model in Japan?
During my time in Nagoya I worked and lived at the strangely famous hostel and café Nagonoya. With its chequered floors and florescent lighting it felt quite dated, but I think that was supposed to be part of the charm. The dorms were always fully booked on weekends with domestic tourists and there was always a buzz in the downstairs café. Camera crews were constantly in and out of the place interviewing the Japanese staff members who worked the café. I think it had something to do with the egg sandwiches. At least that was what was on most of the merchandise, except for that one dishcloth with the owner’s face on it. Was I being employed by a local celebrity?
By Susanna Kiernan6 days ago in Wander


Comments
There are no comments for this story
Be the first to respond and start the conversation.