Mastering $2 Centerpieces 💐
For any occasion

I’m the resident event planner amongst my friends and, in total, I’ve voluntarily planned 13 weddings (and I don’t know how many other events)—all on shoestring budgets. I’ve cut costs by doing everything from drapping huge rolls of plastic instead of cloth across ceilings of gyms for a few hundred dollars, to coming up with ten centerpieces for only $20 (for all ten centerpieces). You name the budget issue, I’ve tackled it.
So what does it take to save money during your wedding, baby shower, birthday, or low-budget gathering? Easy! It just takes some resourcefulness, a touch of imagination, and creativity!
So how do YOU create an impressive centerpiece on a budget? Here’s my 3-step guide.
FIRST: start with your base. Every centerpiece needs an anchor. I find that centerpiece vases or bases are typically the second most expensive part of the centerpiece (other than flowers). To save money on this, I take advantage of all of the FREE and readily available things around my house.
Everything these days comes in packaging. It’s incredible how many product packages can be repurposed to create centerpieces. For example: empty tin cans, empty boxes wrapped with paper as a “stand,” Tissue boxes wrapped with fabric, wine bottle boxes wrapped in shiny dollar-store paper and bedazzled with dollar store diamond ribbons, empty glass jars, empty plastic bottles, empty soap dispensers, soda bottles, milk cartons, pickle jars, amazon boxes, you name it. If it’s a somewhat sturdy structure, you can repurpose it!
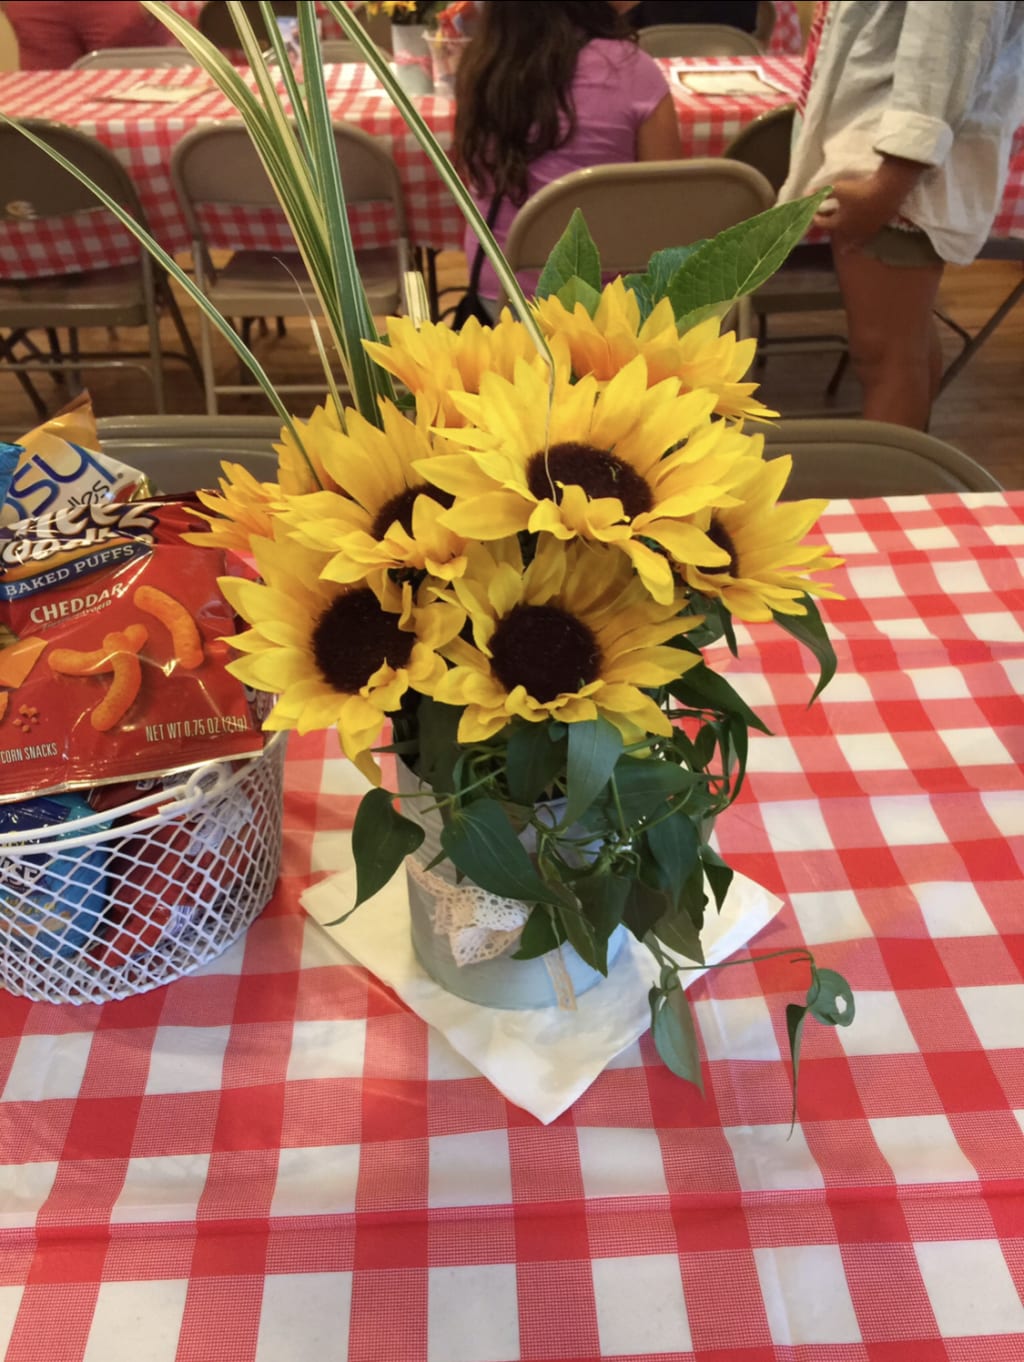
SECOND: bedazzle your base! The easiest way I bedazzle my bases is with either paint or wrapping paper. For the pictured centerpiece, I used leftover chalk paint from a furniture project to paint tin cans. After the cans dried, I used ribbon I had laying around to tie a simple bow around the center of each can.
THIRD: Fill your vessel with something attractive or fun! I’ve topped my centerpieces with everything from giant tissue paper roses (take 5 sheets of tissue paper, fold back and forth like a paper fan, secure in middle with a string, and then separate the tissue until you have a “half-rose” to set on top of a wrapped box or jar full of Hershey’s kisses!), to flowering weeds—no lie!
For the centerpiece above, I bought 2 bunches of dollar store sunflowers for $1.00 per bunch and then I scavenged my back yard for green plants to cut and add to the arrangement to give it a fresh flower look. I ended up deciding on some tall grass looking thing (I’m not a plant expert) and some pretty green vines that were plentiful in my backyard. I simply arranged them as I normally would a completely fresh-cut arrangement and that was it! The nice thing about this way of doing things is that you can do the arrangements the night before and not worry about the flowers wilting!
Winter time and no green plants to cut? Why not paint sticks white or a color of your choice to add to dolllar store flowers!? On even LESS of a budget than $2.00 per centerpiece? Google how to fold origami flowers to lay in the center of your tables. You can make your paper flowers with anything from old papers you have laying around to wrapping paper to colored construction paper.
The key to saving money is to be a LEADER, not a follower! Create your own artistic vision and go for it! There’s no limit to what you can do if you look around your home, yard, or area and use available resources!


Comments
There are no comments for this story
Be the first to respond and start the conversation.