


Tie tying is an ancient art that all men should know. In a job interview, formal occasion or just in general updating your everyday outfit, knowing how to tie a tie in easy steps can be a good thing to do. Although it is important, the problem is that many beginners fail, as most of the tutorials are either too complex or contain irrelevant information.
The following guide will address this issue. You will be taught how to tie a tie with the Four-in-Hand knot - in a step-by-step manner which is the easiest to learn. Each step contains a single corresponding image so that you can have a visual of what is going on, without confusion.
At the conclusion of this paper you will know how to tie your tie within a minute or so.
Why Use the Four-in-Hand Knot?
To start with, one should know why this knot is suggested:
- It is the simplest knot of the tie that is easy to learn.
- Fits well with the majority of shirt collars.
- Marginal asymmetrical appearance brings a contemporary feel.
- Extensively used in America and globally.
- Fast to master and ideal in everyday usage.
What You Need
All you need to begin with this easy way to tie a tie are some basic supplies:
- A necktie
- A collared shirt
- A mirror (useful to beginners)
The way to tie a tie step-by-step
This step-by-step instruction on how to tie the knot will make you perfect the knot with a lot of ease:
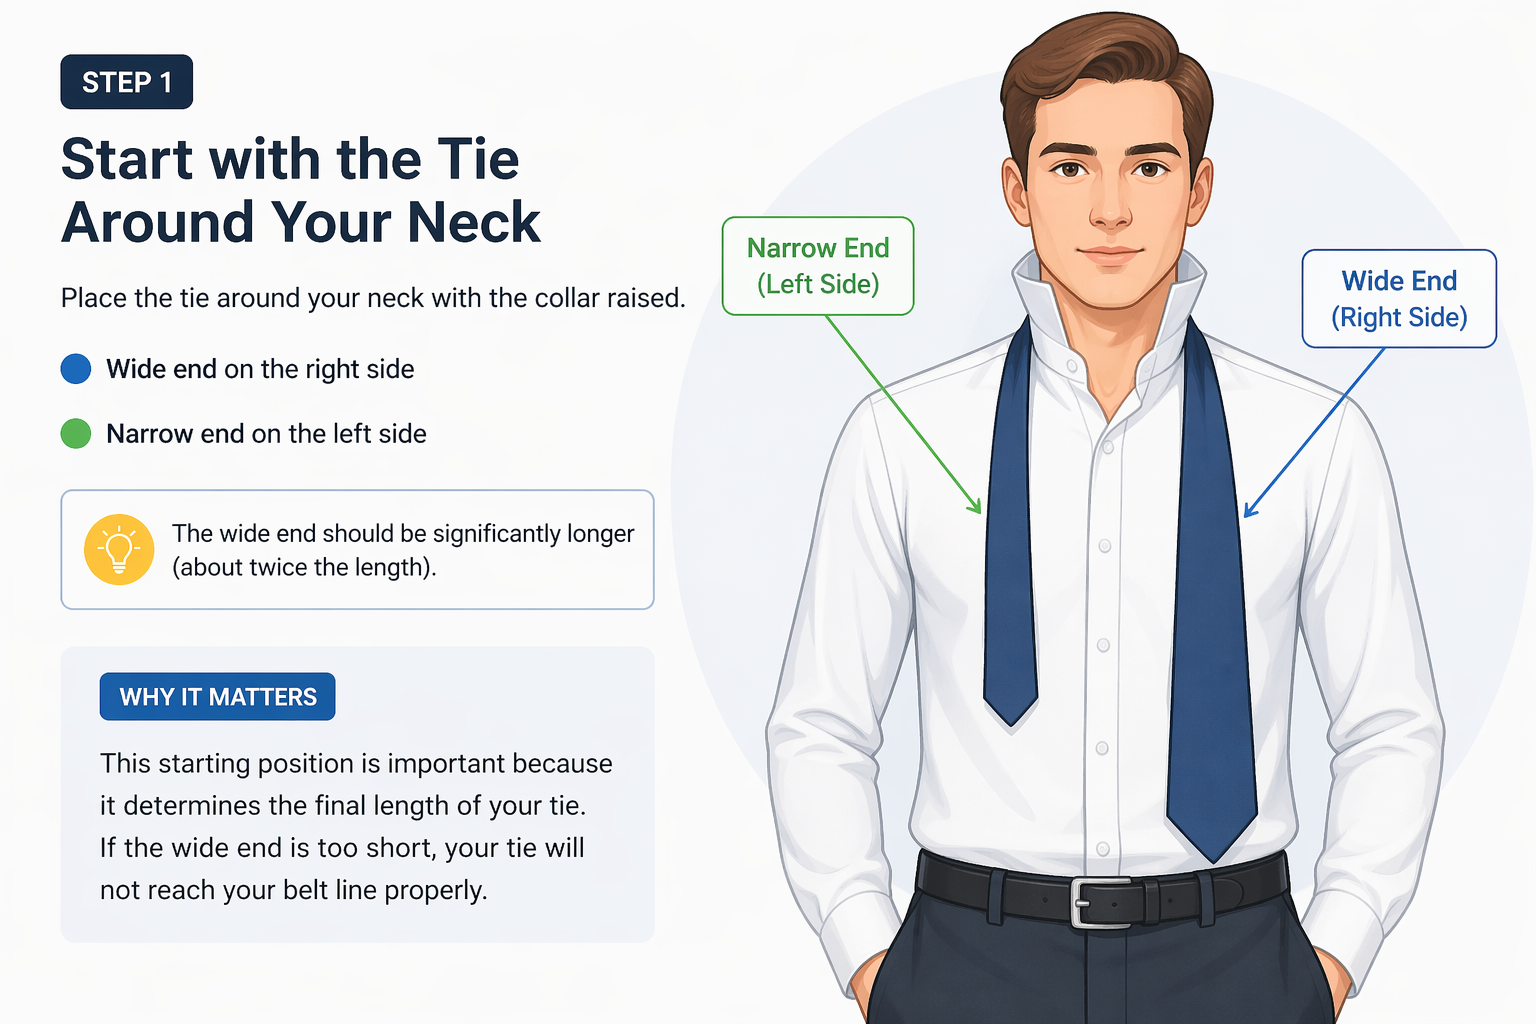
Step 1: Tie Around Your Neck.
Begin by wrapping the tie around your neck leaving the collar up.
- The broad side must be on the right hand side.
- The left side should have the narrow end.
- Ensure that the wide end is much longer (twice or more)
This starting point is crucial as it defines the ultimate tie length. In case of shortsightedness by the wide end, your tie may be too short to reach your belt.
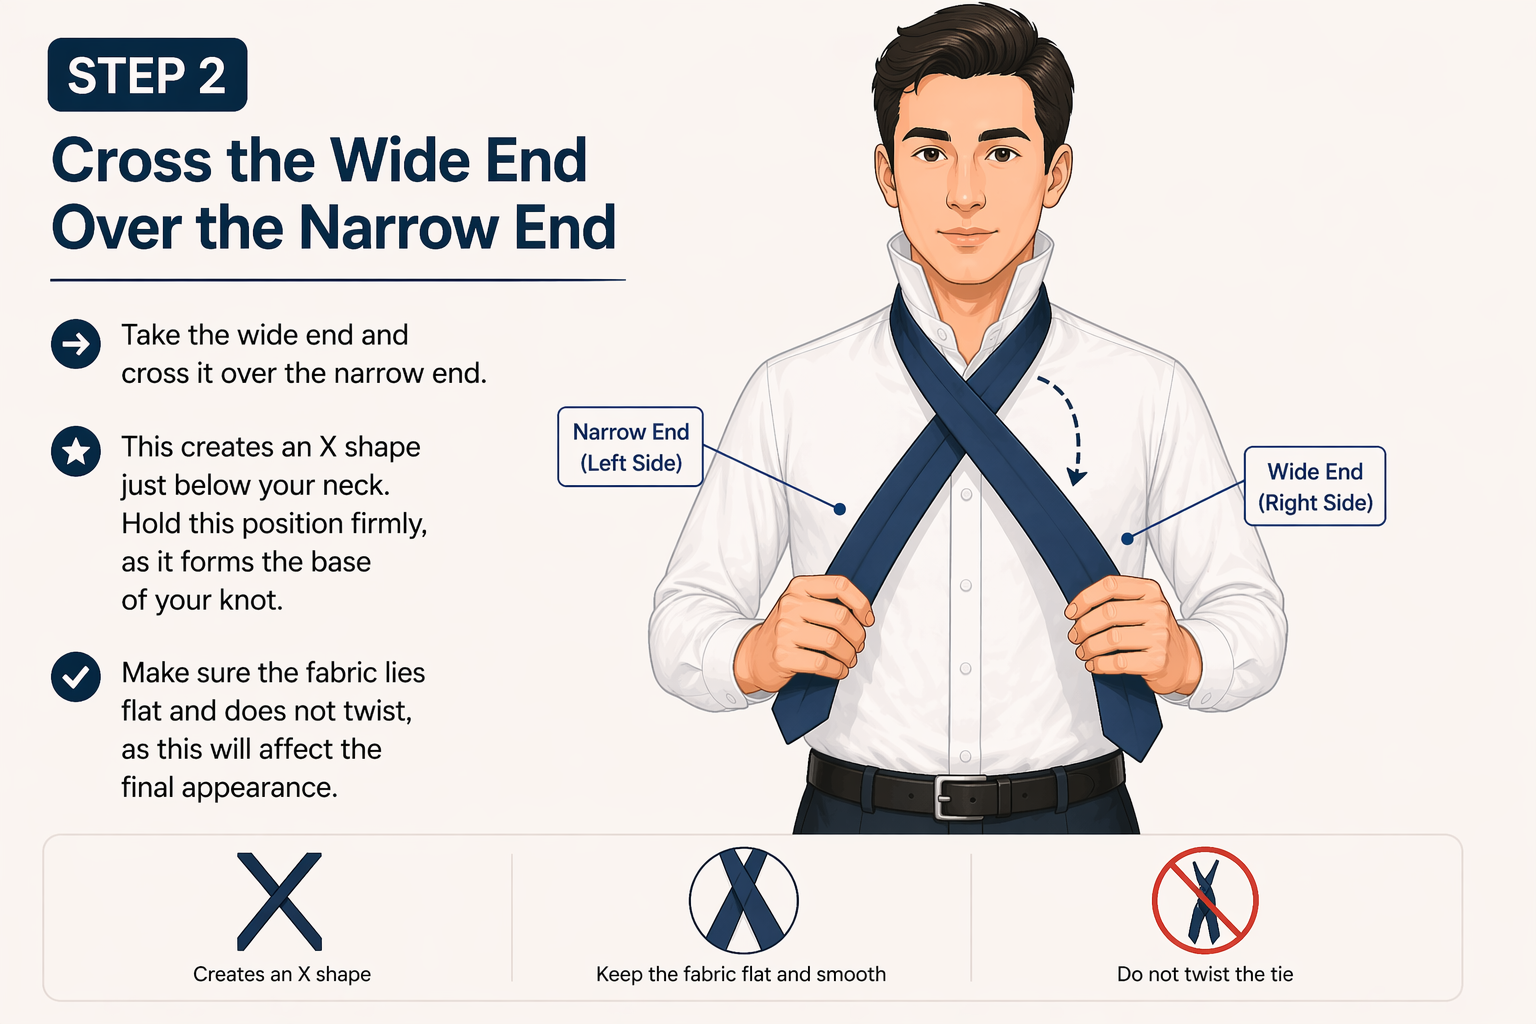
Step 2: Cross Over the Narrow End over the Wide End
- Cross the narrow end with the wide end.
- This forms an X Shape around the area right under your neck. Keep this in all its steadfastness, which is the foundation of your knot.
- Ensure the cloth is not twisted, but it is a flat piece of cloth or this will also create a difference in the end result.
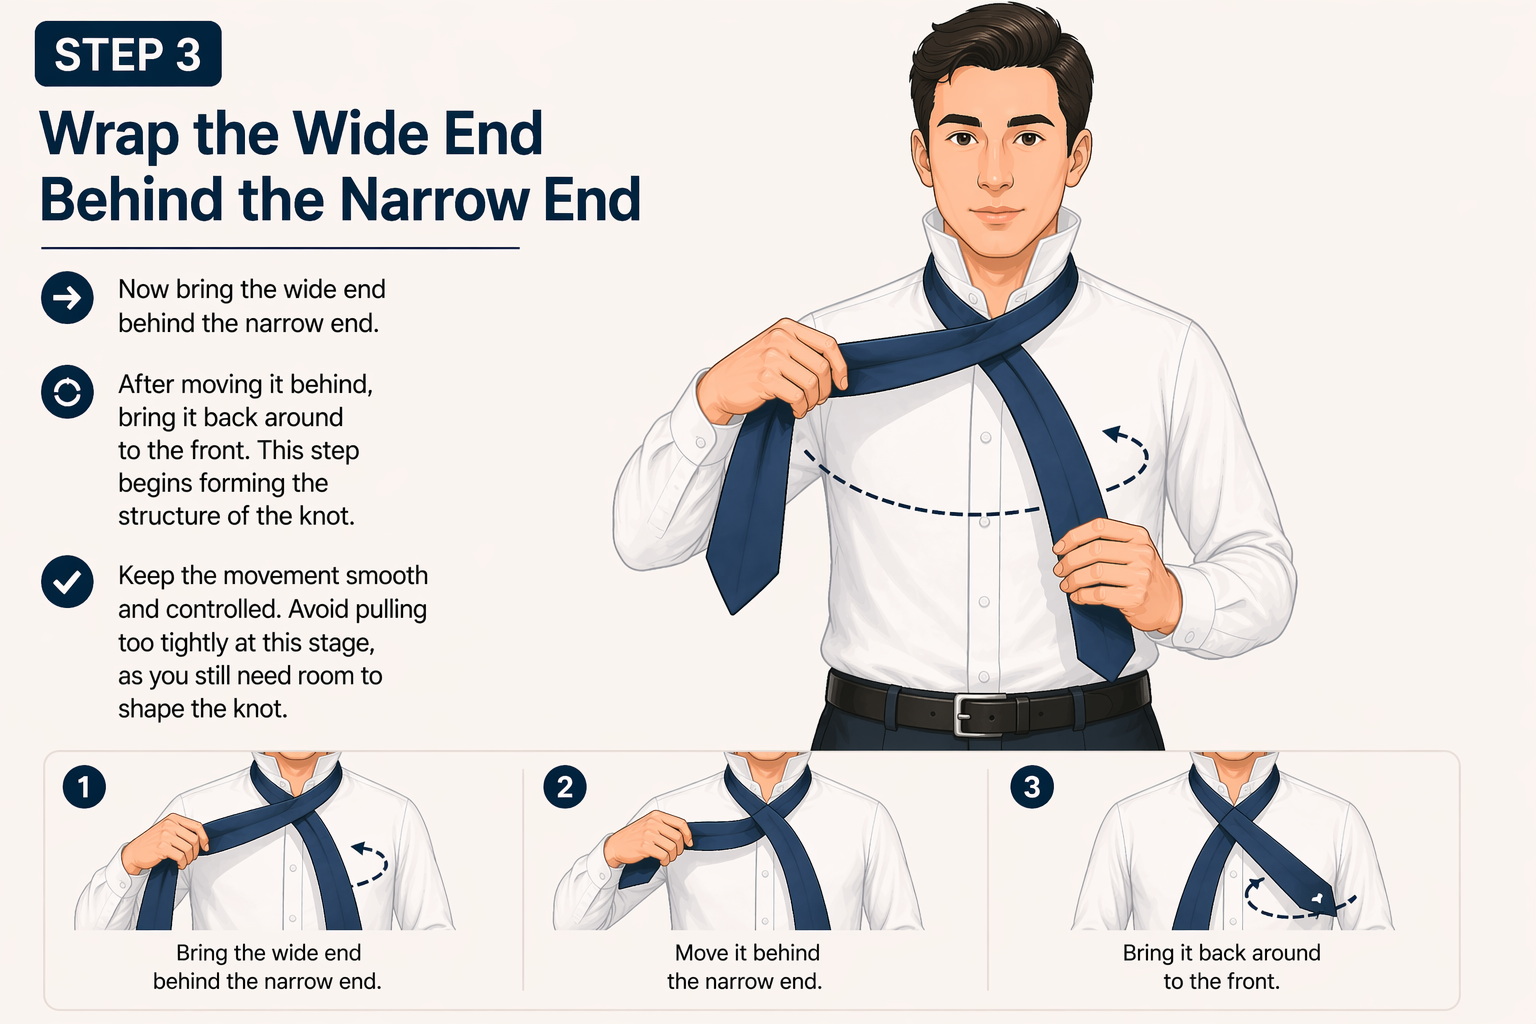
Step 3: Take the Wide End Over the Narrow End
- Now take the broad end round the back of the narrow end.
- Moving it behind, bring it around to the front. This is the first step that initiates the knot structure.
- Remember to move slowly and softly. You should not be pulling too hard now, but you have to have some space with the knot.
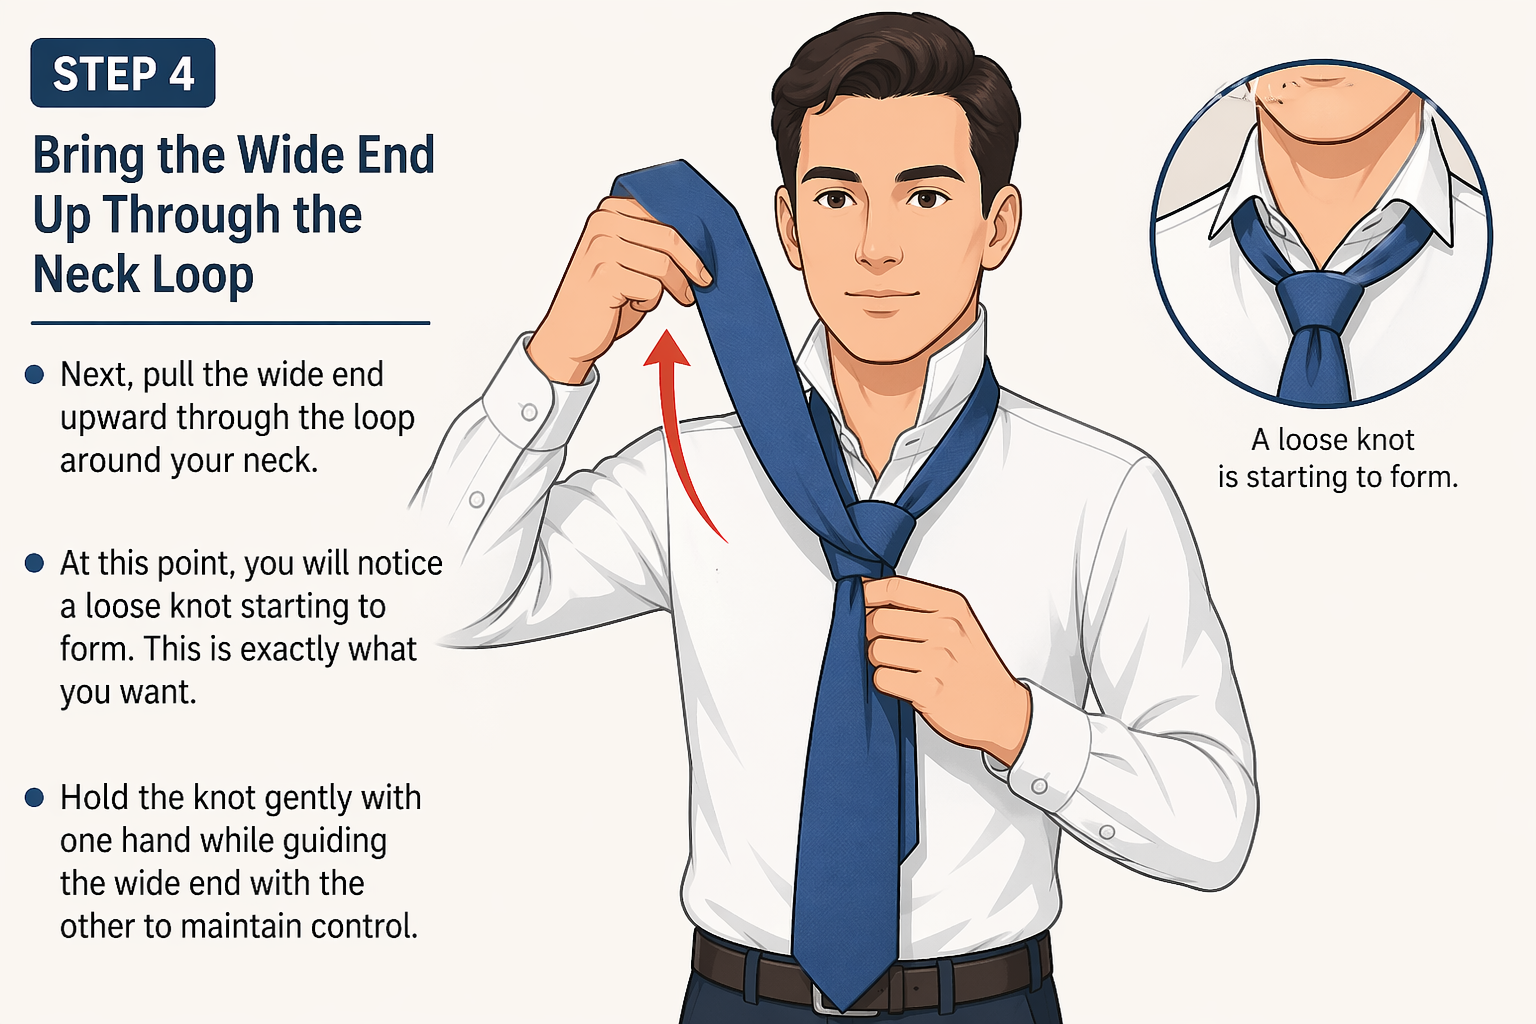
Step 4: Pull the Wide End Up into Neck Loop
- Pass the broad end up the loop around your neck.
- At this stage, a loose knot will begin to develop. This is what you desire.
- Take control of the wide end with the other hand but use the knot with one hand to ensure control.
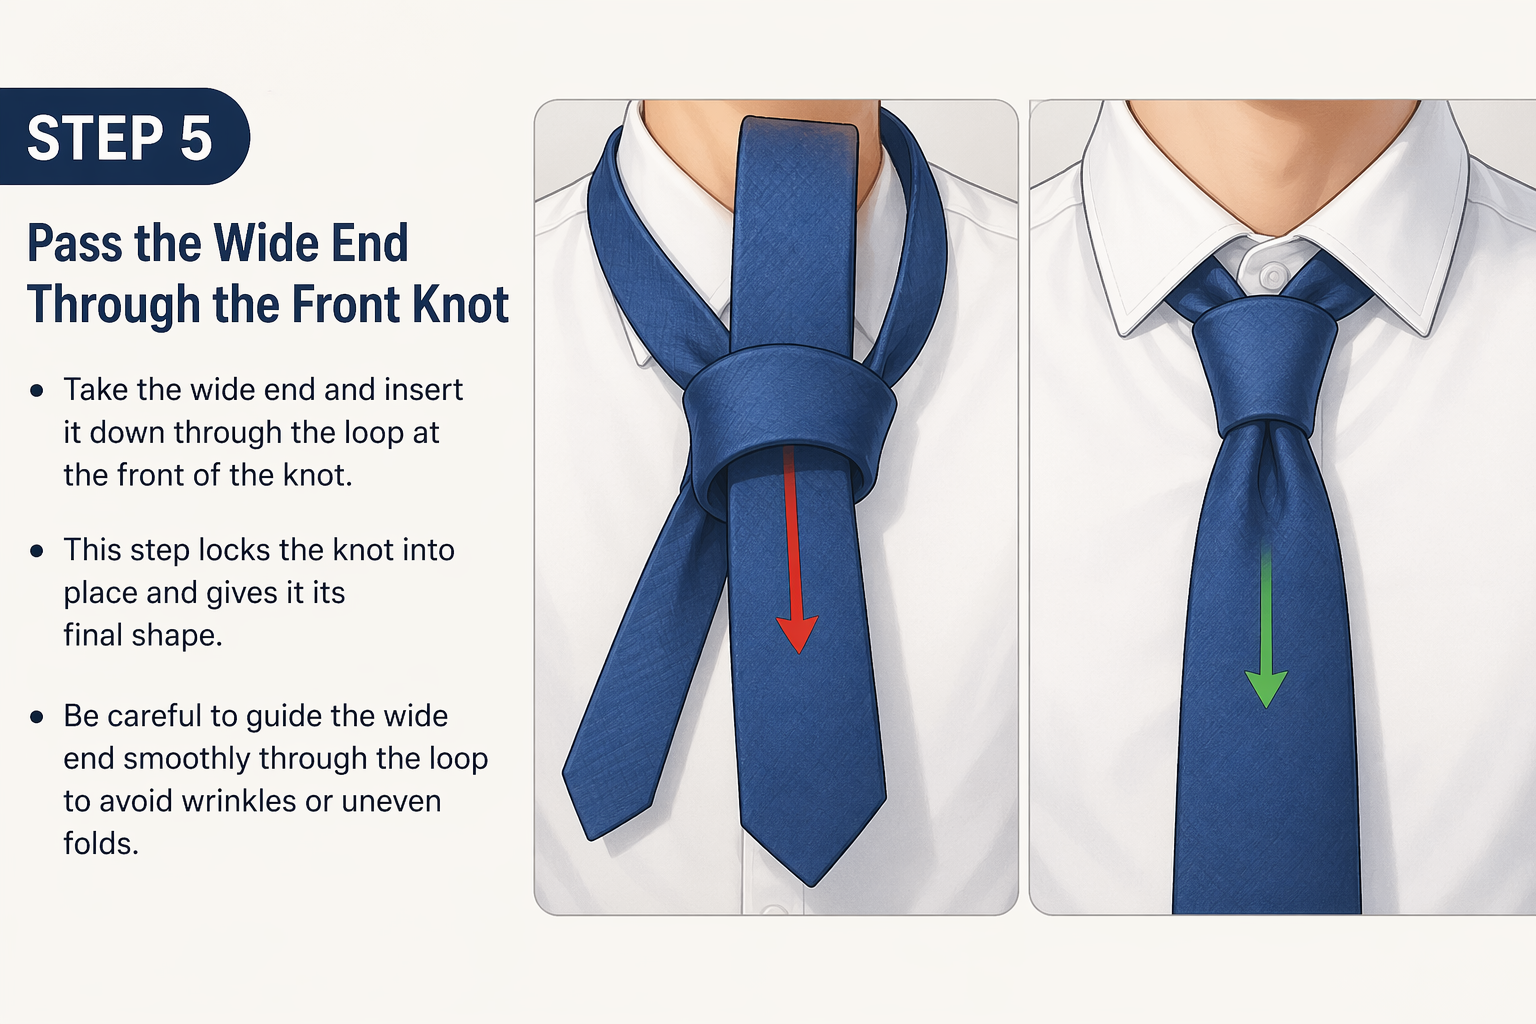
Step 5: Wide End through Front Knot
- Use the large end and push it down through the loop on the front of the knot.
- This is the step which fixes the knot and gives it its last form.
- Remember to amuse the wide end to have a clean and professional tie knot appearance.
Step 6: Tie and Adjust Knot
Grasp the narrow end in one hand and with the other, slide the knot up to your collar.
Tilting the knot until:
- It fits snugly in the middle of your collar.
- The end of the tie goes up to your belt.
- The fabric appears smooth and symmetrical.
To make it appear more professional, make a tiny dimple right below the knot. This is the last thing that makes your tie appear sharp and stylish.
Mistakes to be avoided
Even in the case of learning how to tie a tie easily, the beginner is likely to commit some errors:
- Tying the tie too short or too long.
- Tying the knot too fast.
- To have the fabric twist.
- Hurrying up the procedures.
The answer is easy, take your time and practice. The process will be natural after a few tries.
How to wear a tie perfectly
To have a sharp and professional tie, follow these tips:
- The right length of the wide end is always to begin with.
- Learn using a mirror.
- Remember to move fluidly.
- Select ties that suit your outfit and event.
- Be confident by practicing.
FAQ
How to tie a tie easily?
The Four-in-Hand knot is regarded as the simplest knot to tie to beginners.
Learning time?
With some practice, most people are able to learn it within 5 to 10 minutes.
At what point should the tie be?
The end of your tie must be slightly below your belt buckle.
Final Guide Recap
Learning how to tie a tie can be challenging, though, with the proper technique, it can be a fast and easy process. The Four-in-Hand knot is a good knot to start with as it is simple to learn, useful and fashionable.
Using this step-by-step guide to tying a tie, you will be able to tie your tie on your own in no time.
A knotted tie is not merely a garment, but a symbol of details and personal image.
About the Creator
R.Freya
Poetry is my soul's language, and I wield words like a paintbrush. From heartbreak to hope, I capture emotions and spin them into verse.
Enjoyed the story? Support the Creator.
Subscribe for free to receive all their stories in your feed.
Comments
There are no comments for this story
Be the first to respond and start the conversation.