
How to Replace the Crankshaft Position Sensor on a 1997 Ford F-150 4.6L
A straightforward repair guide for replacing the CKP sensor, protecting the A/C system, and restoring reliable engine operation

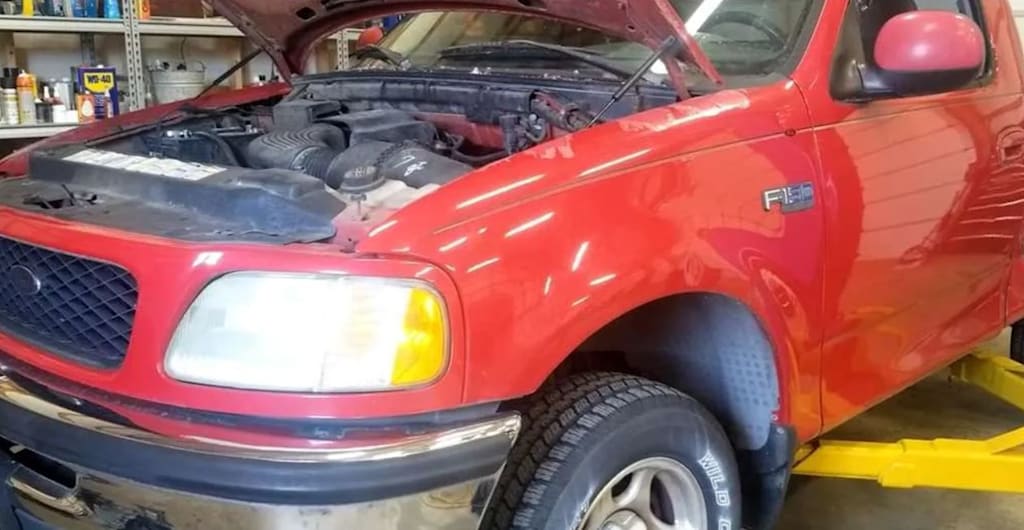
Replacing the crankshaft position sensor on a 1997 Ford F-150 equipped with the 4.6-liter V8 is a relatively simple repair, although access to the sensor can be limited. The job requires removing the serpentine belt and temporarily moving the air-conditioning compressor aside. The refrigerant lines should remain connected throughout the repair.
The procedure generally takes 30 to 90 minutes and is rated easy. The instructions below apply specifically to the 1997 Ford F-150 with the 4.6L V8. Similar steps may apply to certain 1997–1999 F-150 and Expedition models with the same engine, but always verify the replacement sensor’s fitment before beginning.
Symptoms of a Faulty Crankshaft Position Sensor
A failing crankshaft position sensor can cause several engine-performance problems, including:
The engine cranks but will not start
Random stalling or sudden engine shutoff
Intermittent hard starting
A check engine light
A crankshaft-position-related trouble code
Misfiring or rough running
Hesitation or poor acceleration
Loss of engine power
No engine-speed signal while cranking
Because these symptoms can also be caused by fuel, ignition, wiring, grounding, or other sensor problems, do not replace the CKP sensor based on symptoms alone.
Check These Items First
Before removing any parts, scan the truck for diagnostic trouble codes and record the results. Disconnecting the battery may erase some information from the vehicle’s memory.
Next, inspect the crankshaft position sensor wiring and electrical connector. Look for damaged insulation, corrosion, loose terminals, oil contamination, or broken wires. If your scan tool displays live data, check whether the engine computer is receiving an RPM signal while the engine is cranking.
Also inspect the vehicle’s fuel and ignition systems before concluding that the CKP sensor is defective.
Tools and Parts Required
You will need:
Replacement crankshaft position sensor
Clean engine oil
8 mm socket
10 mm socket
1/4-inch ratchet
1/2-inch ratchet or serpentine-belt tool
Extensions
Swivel or universal-joint adapter
Bungee cord, rope, or suitable support
Safety glasses and gloves
A serpentine-belt tool may make it easier to release the tensioner in the limited space around the front of the engine.
Before removing the belt, take a photograph of its routing or locate the belt-routing diagram under the hood.
Step 1: Disconnect the Battery
Park the truck on a level surface, place the transmission in Park or in gear if it has a manual transmission, and set the parking brake. Make sure the vehicle cannot move while you work.
Disconnect the negative battery cable and position it where it cannot accidentally touch the battery terminal.
Step 2: Release the Serpentine Belt
Insert a 1/2-inch ratchet or serpentine-belt tool into the belt tensioner. Rotate the tensioner to relieve tension from the belt.
Slip the belt off the A/C compressor pulley and move it out of the way. Do not release the tensioner suddenly, and keep your fingers clear of pinch points.
Before continuing, confirm that you remember the correct belt-routing pattern.
Step 3: Remove the A/C Compressor Mounting Bolts
The A/C compressor blocks access to the crankshaft position sensor, so it must be moved aside temporarily.
Remove the three 10 mm compressor mounting bolts. The rear bolts may be more difficult to reach, so remove them first and leave the more accessible front lower bolt until last.
Do not loosen or disconnect any refrigerant-line fittings. Opening the air-conditioning system can release refrigerant and may require specialized recovery and recharging equipment.
Step 4: Move and Support the Compressor
Carefully move the compressor downward and away from the engine while keeping all refrigerant lines connected.
Support the compressor with a bungee cord, rope, or another suitable support. Never allow it to hang from the refrigerant lines. Do not kink, sharply bend, stretch, or place excessive force on the lines.
Turning the steering wheel fully toward the driver’s side may improve access, depending on the truck and the tools being used. Make sure the ignition is off before turning the steering wheel.
Step 5: Disconnect and Inspect the CKP Sensor
Locate the crankshaft position sensor and disconnect its electrical connector.
Inspect both the connector and the nearby wiring. Check for corrosion, damaged insulation, loose terminals, oil contamination, or signs that the wiring has been rubbing against another component.
If the connector is dirty, clean it with an appropriate electrical-contact cleaner and allow it to dry before reconnecting it later.
Step 6: Remove the Old Sensor
Remove the CKP sensor retaining bolt with an 8 mm socket.
The sensor is sealed with an O-ring and may be tight in its opening. Gently twist the sensor to loosen the O-ring, then pull it straight out.
Avoid prying aggressively against the sensor or surrounding components. The sensor housing may be plastic and can crack if excessive force is used.
Step 7: Compare the Replacement Sensors
Before installing the new sensor, compare it with the old one. Confirm that the following match:
Electrical connector
Sensor body
Mounting tab
Overall length
O-ring position
Mounting-hole location
If anything appears different, stop and verify the part number and vehicle application. Installing the wrong sensor may prevent the engine from starting or create additional problems.
Step 8: Lubricate the New O-Ring
Apply a thin coating of clean engine oil to the new sensor’s O-ring. Do not use excessive oil, grease, or an unsuitable lubricant.
Make sure the O-ring is properly seated in its groove. Light lubrication helps prevent the seal from rolling, pinching, tearing, or becoming damaged during installation.
Step 9: Install the New Sensor
Push the new sensor squarely into its opening. It should slide into place without excessive force.
Reinstall the retaining bolt and tighten it until the sensor is secure. Avoid overtightening, because the sensor housing and mounting area may be damaged by excessive torque.
If a manufacturer torque specification is available, use it. Otherwise, tighten the fastener carefully and avoid forcing it.
Step 10: Reinstall the A/C Compressor
Move the compressor back into position. Start all three mounting bolts by hand before tightening any of them.
Once all bolts have engaged their threads, tighten them evenly. This helps prevent alignment problems and reduces the risk of cross-threading.
Reconnect the CKP sensor’s electrical connector and confirm that it is fully locked.
Check that the sensor wiring is routed safely and will not be pinched by the compressor or contact moving parts.
Step 11: Reinstall the Serpentine Belt
Rotate the belt tensioner and route the belt around the pulleys according to the diagram or photograph taken earlier. Slip the belt over the A/C compressor pulley, then slowly release the tensioner. Inspect the belt carefully. It must be centered in every pulley groove. A belt that is correctly positioned on one pulley may still be misaligned on another.
Step 12: Reconnect the Battery and Test the Repair
Reconnect the negative battery cable and tighten the terminal securely.
Before starting the engine, check the following:
The CKP connector is fully locked
The A/C compressor is securely mounted
The refrigerant lines are not kinked or strained
The sensor wiring is not pinched
The belt is centered on every pulley
No tools or loose objects remain in the engine compartment
Start the engine and listen for abnormal noises. Watch the belt as it operates, but keep your hands, clothing, and tools away from all moving components.
Check for warning lights, unusual belt movement, or continued symptoms. Scan the truck again for trouble codes and confirm that the original crank-no-start, stalling, or rough-running problem has been resolved.
Common Mistakes to Avoid
Avoid these frequent errors:
Replacing the sensor without checking the wiring
Installing an incorrectly matched sensor
Disconnecting an A/C refrigerant line
Allowing the compressor to hang from its lines
Installing the new sensor without lubricating the O-ring
Overtightening the sensor retaining bolt
Tightening one compressor bolt before starting the others
Pinching the CKP wiring
Routing the serpentine belt incorrectly
Leaving the belt one rib off a pulley
Assuming every 4.6L modular V8 has identical access or hardware
Final Inspection Checklist
Before considering the repair complete, confirm that:
The battery cable is secure
The CKP connector is locked
The sensor retaining bolt is secure
The A/C compressor is properly mounted
The refrigerant lines are undamaged
The wiring is clear of moving components
The serpentine belt is correctly routed
The belt is centered on every pulley
The engine starts and runs normally
No abnormal belt noise is present
The original symptoms have disappeared
No related trouble codes return
Replacing the crankshaft position sensor is manageable for many home mechanics, but work carefully around the A/C compressor and refrigerant lines. If the truck continues to crank without starting after the replacement, continue testing the fuel system, ignition system, wiring, grounds, and engine-control components rather than replacing additional parts without diagnosis.
About the Creator
Mark Lim
Hi I am mark an automotive student and a car, tech and food enthusiast ! Im gonna try and post daily & hope you enjoy what I write and do share my page with people you know. I would gladly appreciate it! Cheers
Enjoyed the story? Support the Creator.
Subscribe for free to receive all their stories in your feed.
Comments
There are no comments for this story
Be the first to respond and start the conversation.