
How To Refinish Kitchen Cabinets
My wife and that I decided to embark upon the challenge of refinishing our kitchen. you'll say, I can tell you'll spend 1,000,000 dollars for an refinishing kitchen.

My wife and that I decided to embark upon the challenge of refinishing our kitchen. you'll say, I can tell you'll spend 1,000,000 dollars for an refinishing kitchen. I'm exaggerating a touch, but a number of the salespeople I talked to were definitely reaching between 50,000 and $100,000.
With that shocking fact in mind, we began to check out purchasing cabinets from the local IKEA or home depot store. Again we were shocked, that to exchange our cabinets with more modern cabinets of an equivalent quality that we only have, we could easily spend $10,000. I believed there has got to be a far better way.
Not being one to retreat from a challenge, I made a decision to undertake to refinish our kitchen cabinets. with great care you recognize, I'm not a cupboard maker. I even have done small projects finishing wood, but nothing so visual as a group of kitchen cabinets. Let’s just say it’s been a learning experience.
Right now as I write this text, I’m well into the refinishing project. I do believe that I’ve got staining down. Well, nearly as good as an amateur can. immediately I’m learning the way to varnish. But I’m getting before myself.
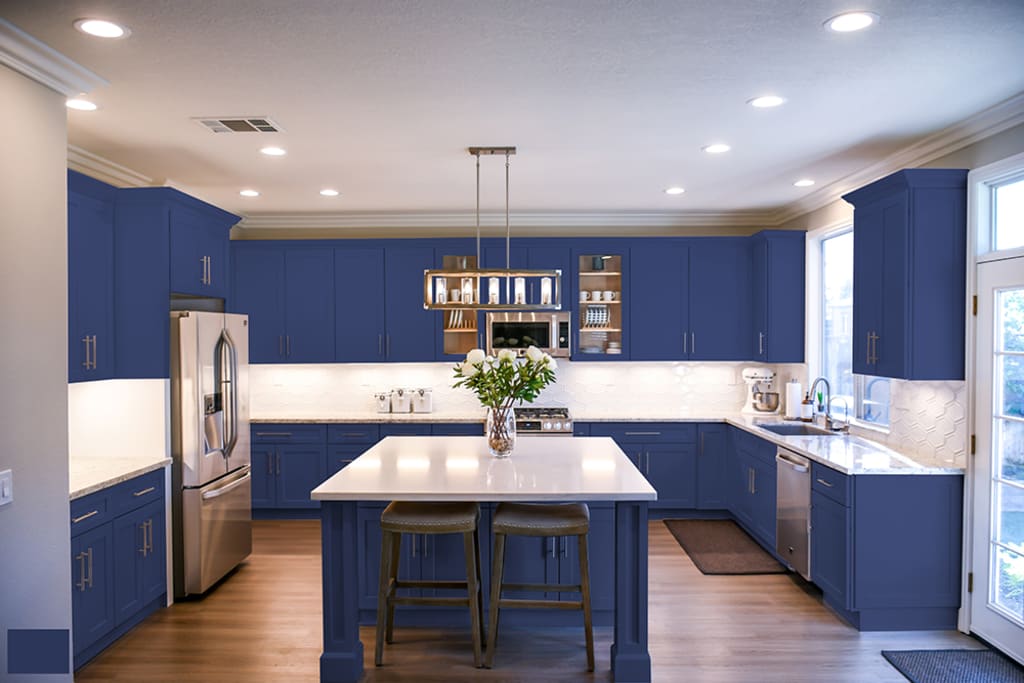
Our current cabinets are literally pretty fine condition. They were manufactured within the 80’s and that they are made from oak. The finish is straightforward, just a straight varnish. Unfortunately, though the varnish has yellowed over time. So it's very old and tired due to that.
Refinish Kitchen Cabinets – Removing the Varnish
So before I can refinish kitchen cabinets, the varnish that's currently on the cupboards must be removed. This in itself is a stimulating exercise. I found the absolute best method is employing a chemical stripper.
I would apply the chemical stripper with an upscale paintbrush. I let that stripper sit for about 30 seconds to a moment, then apply a second coat of the stripper. I might then use a skinny punny knife with a 1 inch blade and punctiliously scrape off the primary coat of varnish.
I would than immediately apply a second layer of the stripper. Again I might use the spatula to scrape off subsequent layer of varnish. I might continue this process until no more varnish was coming off. For non-flat surfaces, like grooves within the cabinet’s face, I’m employing a spatula that has grooved edges.
Also for non-flat surfaces, I’ve began to use plastic scrubby pads that you simply would use for cleaning pots and pans. Just confirm it that they’re the important cheap ones.
You know once you have removed all the varnish, once you cannot see any shiny surfaces or varnish edges against a robust light on the wood. I’ll warn you, this is often an extended process. It can take you many weeks to strip your cabinets. you can't be during a rush. Otherwise, you'll gouge the wood.
If you’re considering staining the cupboards after like I'm, I might advise against using sandpaper unless you’re compared to sand the entire surface thereupon same grit. Uneven sanding will cause you big grief once you attempt to stain the wood.
If you’re proud of the design of your old cabinets and just want to vary the door style, simply measure the old doors and order new ones an equivalent size. Have 35mm holes drilled within the back of the doors if you would like to use concealed hinges just like the ones we’re using?
To achieve the more contemporary look we show here, you’ll need to order larger doors to hide more of the cupboard front (face frame). It’s not as simple as just ordering larger doors, though. Since the doors will overlap the frame farther than a standard hinge allows, you’ll even have to order a special concealed “cup” hinge that matches into a 35mm hole within the back of the door (Photos 13 and 14). The hinge is attached to the face frame of the cupboard with a separate piece called a mounting plate. Mounting plates are available in several sizes (1/4, 1/2, 5/8, 3/4, 1, 1-1/8, 1-1/4 and 1-3/8, and 1-3/8 to infinity) counting on how far you would like the door to overlap the face frame. Photo 4 shows the way to measure each door opening for the correct-sized mounting plate.
We used Blum Compact 33 hinges (available at woodworking stores or online), but other brands are available.
The easy thanks to size and measure for the new doors is to get out the door and drawer spacing on the old cabinet face frame (Photo 2). Use 1/2-in. masking paper to represent the space between doors and drawers. Measure carefully once you install the tape because you’ll use it to work out door and drawer sizes (Photo 3). The masking paper allows you to see the spacing and compute details before you order the doors.
Determining the spacing between doors is essentially a design decision, but there are a couple of things to think about. The hinges we used allow the doors to be hung as little as 3/8 in. apart, but spacing doors this close requires accuracy that’s hard to realize on older cabinets. The closer the doors are to every other, the more visible any deviation within the spacing becomes. We chose 1/2-in. spacing because it allowed us a touch of “cheating” room and still achieved the contemporary look we were after.
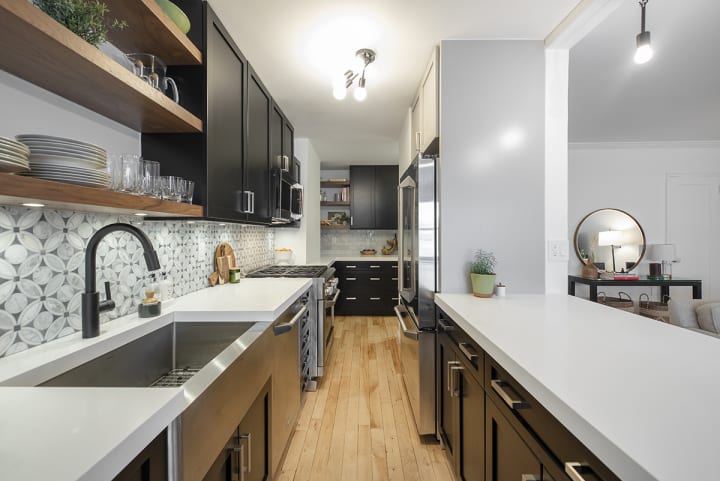
This is an excellent time to form changes to your cabinets, since you’ll be painting the frames and may easily fill seams and nail holes. We reduced the dimensions of the wall cabinet doors to the left of the stove and added a narrow open shelf for cookbooks (Photo 8). We also eliminated the cutting boards so we could make the drawer fronts taller, and added 3/4-in. strips to the cupboard above the stove to enhance door alignment.
When you’re proud of the spacing and have double-checked the within corners to make certain drawers won’t collide after you’ve added the new pulls, you’re able to measure for and order the doors and drawer fronts (Photo 3). Order doors from a corporation that focuses on building cabinet doors, or find an area cabinetmaker to create them. Search online for “kitchen cabinet doors.” Visit local cabinet showrooms and appearance at cabinet door literature to settle on a door style you wish.
Let the cupboard door maker know which brand of 35mm hinge you plan to use and ask him or her to bore the holes for you. This service is well well worth the small extra charge. Otherwise you’ll need to buy an upscale 35mm bit and use a drill press or jig to bore the holes. Order special doors to simply accept glass panels.
Door prices will vary, counting on wood type and door style, with cherry and fewer common hardwoods the maximum amount as twice the value of oak.
Tips for a Smooth, Durable Paint Job
Once the doors are ordered, you'll get to the business of painting. Follow the steps in Photos 5 – 11 for a smooth, durable finish. We used paint (alkyd) on the cupboards, but high quality (i.e.: the foremost expensive) acrylic or water-based oil finishes do exactly also if applied properly.
If you employ paint and therefore the paint seems thick or sluggish, thin it with up to six ozs. of Penetrol paint conditioner per quart until it flows on smoothly. Two or three thin coats of paint end in a stronger, smoother finish than one thick coat.
Whenever you employ products with organic solvents, like shellac or alkyd paint, provide many ventilation and wear a NIOSH-approved organic vapor respirator.
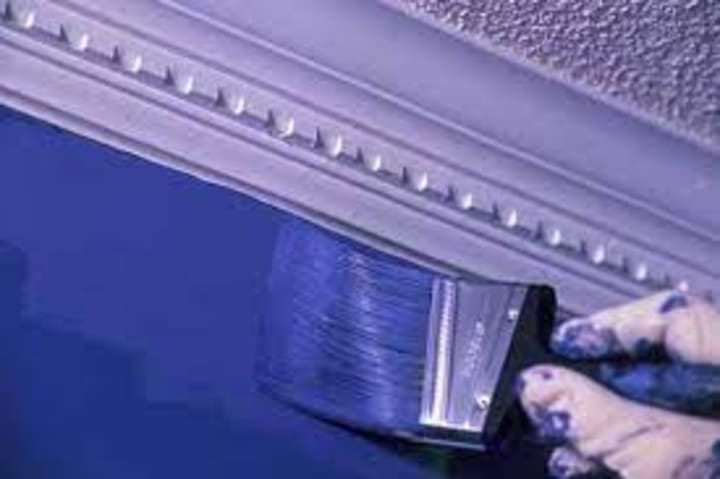
The first requirement for a durable paint job is that each coat of paint bond well to the previous layer. confirm the first cabinet finish is bonded tightly to the wood by making alittle “X” with a knife and sticking a bit of Scotch tape over the “X.” Now rip the tape off and see if it pulls any finish with it. If it does, you ought to strip off the first finish before painting. Clean and sand the cupboards as shown in Photo 5 to make sure an honest bond to the first finish. We chose shellac as a primer for its ability to cling tenaciously to most finishes. If you employ products aside from what we’re recommending, follow the manufacturer’s recommendations and confirm they’re compatible with one another.
For a flawless paint job, you want to start with a wonderfully smooth surface, and maintain a dust-free environment while you’re painting. Follow the filling, sanding and vacuuming procedures shown in Photos 6 – 8. Fill large holes and chipped edges with a two-part hardening-type filler like Minwax High-Performance Wood Filler, 12-Ounce Can #21600, available through our affiliation with Amazon.com. It’s more durable, hardens quickly and won’t shrink like spackling. Sand carefully, employing a bright light to see your work.
Paint the insides of cupboards first, then start at the highest of the face frame and work down. Lay paint on quickly, then smooth it out with long, light brush strokes. Always work from dry areas into painted areas. Work quickly and complete a neighborhood before moving on so you’re never brushing over partially dried paint. If paint sneaks onto a neighborhood you can’t get to soon (around a corner, for example), use a rag dampened with mineral spirits to wipe the paint off. If a run or sag develops, or a hair or speck gets within the paint, let the paint dry and sand it out before recoating.
Simple Door Hanging with Stylish Concealed Hinges
By now you’ll be pretty good with a paint brush, and just in time, because the new doors will get to be sealed (Photo 12). you'll be ready to avoid this task by ordering prefinished doors. We finished our doors with one coat of prestain conditioner, one coat of stain, and two coats of polyurethane varnish. The prestain conditioner helps prevent uneven stain penetration on blotchy woods like cherry, pine and birch. Lightly sand and vacuum between varnish coats for max smoothness.
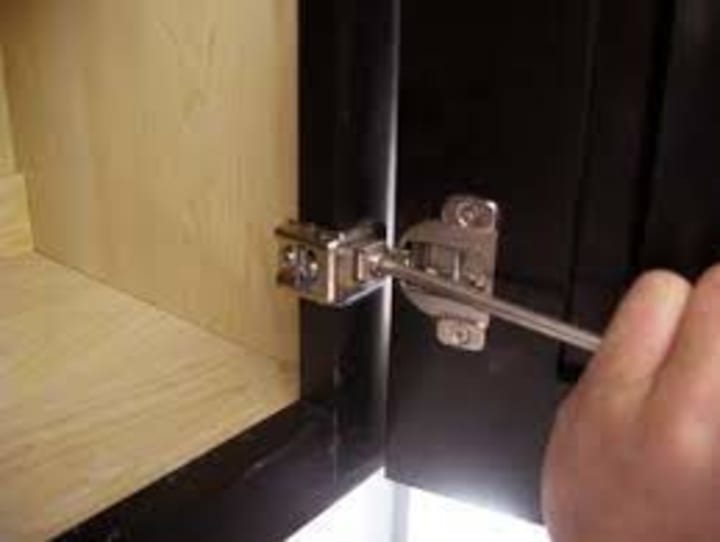
Photos 13 and 14 show the way to install the hinges and hang the doors. This is often the instant of truth when you’ll determine if the doors you ordered really fit as planned. Single doors usually don’t present a drag, but pairs that take part the middle are tricky. Don’t panic if they’re too tight or have overly large a niche between them. If the hinges don’t adjust far enough to correct the matter, change the mounting plates. for instance, if the doors are too tight with 3/4-in. Overlay plates, change the plates on one door to 1-in. overlay.
Tip: Order a couple of extra pairs of mounting plates with subsequent larger and smaller overlay to permit maximum flexibility when you’re hanging the doors.
In a pinch, you'll also increase the space by chiseling a notch within the fringe of the face frame for the mounting plate to drop into, or put alittle shim under a mounting plate to scale back the space.
Adjust the doors up and down by moving the mounting plate, and sideways by loosening the adjusting screw on the hinge. The adjusting screws appear as if Phillips head screws but are literally designed to be used with a special Pozi screwdriver. Pozi screwdrivers are available where hinges are sold. Install and adjust the doors before installing the drawer fronts. When all the doors and drawers fronts are on and adjusted, return and add the second screw to the hinge mounting plate and tighten all the adjusting screws.
Now all that’s left to try to do is install the drawer pulls and door handles (Photo 17). Once things start looking this good, it’s hard to resist making a couple of more changes. We filled the massive space above the upper cabinet doors with cherry boards, and added galvanized sheet to the backsplash area. The new countertops are prefabricated laminate (available through lumberyards, home centers or online).
About the Creator
Sanjuana Cuellar
Hey! I am Sanjuana and welcome. I am an individual who is positive about every aspect of life. I am a contant writer.
Keep reading
More stories from Sanjuana Cuellar and writers in Lifehack and other communities.
Masking Tape Vs Painters Tape – Tips To Get The Best Fit For Your Need
People have, for therefore long, crossed swords about whether regular masking paper is often a substitute for painter’s tape. Masking Paper Vs Painters Tape – Is there any difference between them, if yes, what exactly is it? What are all the opinions about? and the way are you able to choose a tape that completely matches your personal preference? The answers are ready right here.
By Sanjuana Cuellar3 years ago in Lifehack
Rejuvenate Your Space
In a world that frequently focuses on comfort and utilization, the idea of upcycling furniture has arisen as a reference point of imagination and supportability. Instead of disposing of old pieces, why not reinvigorate them and release their secret potential? Go along with us on an excursion of change as we investigate the specialty of upcycling furniture, share moving genuine models, and uncover how you can imbue your space with character and appeal while thinking about Search engine optimization and key viral words.
By Sharon Adhiambo2 days ago in Lifehack
Top 10 Essential Oils for Stress Relief and Relaxation
In our fast-paced and demanding world, stress has become an all-too-familiar companion. Fortunately, there are natural remedies that can help alleviate stress and promote relaxation. Essential oils, derived from plants and renowned for their therapeutic properties, can be valuable in your self-care routine. In this blog post, we'll explore the top 10 essential oils for stress relief and relaxation, along with their benefits and ways to incorporate them into your daily life.
By Jain Perfumersa day ago in Lifehack


Comments
There are no comments for this story
Be the first to respond and start the conversation.