
How to Record a Podcast on Your Mobile Phone
How to Record a Podcast


Do you want to record a podcast, but are not sure how? Surprisingly, it is easier than you think! Here is everything you need to know to start your first podcast the easy way.
Recording at home, in your office or outside?
Home or office studio setups are ideal for recording podcasts. You have control over your surroundings with fewer distractions and better equipment, something you don't get when you record outside.
Plus, home recordings sound much more professional in a quiet area with everything already set up and ready to go.
However, there are better opportunities when taking your podcast to the location. For example, recording interviews on your phone adds a little variety and a new perspective to your shows. Record outdoors using iPhone voice memos or Android voice recorder to capture interesting conversations on-site, then send them to your computer for editing.

Software you need to record a podcast
Whether you're recording at home or on the go, you still need editing software to smooth out the audio from your podcast. For this guide, we are using Audacity.
It is free, easy to use and works with Windows, Mac and Linux systems. However, if you want to stretch your legs with something different, we recommend the following:
Audacity - Free and easy to use, Audacity is the most widely used amateur recording software for Windows, Mac and Linux systems.
GarageBand: Widely used by musicians and podcasters alike, GarageBand is the de facto recording and editing software on Mac.
Adobe Audition - Packed with great features, this subscription-based service is a must-have for professionals (though it does come with a steep learning curve!).
In addition to these well-known recording and editing programs, there are others less well-known such as Hindenburg and Pro Tools. They're both on the professional side of things, but it's worth checking out.
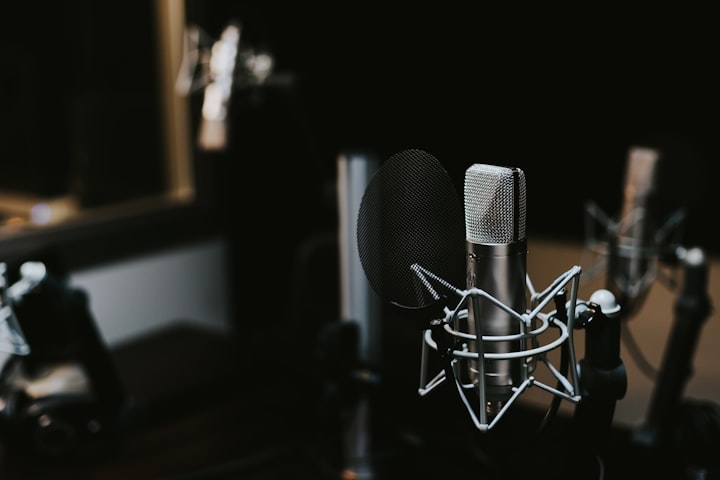
Choosing the Best Microphone
More importantly, you can't record a podcast without a good microphone, but which one is right for you? Personally, you should start basic and move on, starting with what you have available, such as a built-in microphone.
Built-in Microphone: The built-in microphones were not designed to record professional audio. Consider them a temporary solution to record your first few episodes before moving on to something better.
USB Microphone: USB microphones, like the Rode Podcaster, are easy to use from the start. They connect directly to your computer and just work.
Dynamic Microphone - Dynamic microphones are designed to focus on your voice. Like the Rode Podcaster, the Shure SM7B is dynamic and ideal for the spoken word, as it ignores distant noises. If you have multiple presenters, some of these connected to a mixer will be the perfect solution.
Condenser Microphone - Considered the industry standard by professionals, the Rode NT1-A Condenser records natural sounds. As a result, it picks up silent audio, so you can use one of these to record multiple presenters.
By the best external microphone for android phone on techmong.com
Recording your Podcast
You can't go wrong with Audacity, the software chosen for this guide. Start by downloading it here. Once opened, it should look like this ...
Audacity, free recording and editing software.
By default, Audacity uses its built-in microphone for recording. Make sure the one you want to use is selected from the drop-down menu next to the microphone symbol (in this case it's the Rode Podcaster).
Choose a microphone to record.
Works correctly? Control the volume levels of your microphone by clicking on the input level bar.
Checking microphone levels.
When you're ready to start recording your podcast, click the red button. Then when your program is done, click the stop button.
Forgot something you want to add to your podcast? Clicking the red button again starts a new audio track from the beginning. Instead, pause the recorded audio so you can continue where you left off.
Pause and continue
The recordings don't always go as planned. Even podcast professionals say what they say and need a break. Gather your thoughts and save when editing audio loads with Audacity's pause feature.
Select the pause symbol to take a break from your podcast. When you're ready to start a backup, simply click the pause button again.
Record, pause and continue your show.
Once you are finally done, click the Stop button to end your current audio track.
Exporting your Podcast
When you're happy with your recording, package your podcast by exporting it. Go to File> Export Audio.
Add the name of your podcast episode and choose your file type. We recommend M4A (AAC) or MP3 as they are industry standard and most popular among podcast hosting platforms like iTunes.
Exporting audio.
If you have multiple audio tracks (from stop to start), you will be asked to mix them into a single mono channel. Confirm to continue. Then enter your program information (known as metadata) as artist, title, and year, then continue.
Audio and metadata savings.
You can download this from Audacity for Windows or Mac. The same applies to M4A (AAC) files as you need the FFmpeg library to export. Add it in Audacity> Preferences> Library, then select Locate. Download the file following the instructions and confirm at Audacity.
Finally, confirm to export your program. Must be available to listen in your downloaded area.
Edit your podcast
Podcasts rarely sound better without a little editing magic. Whether you're cutting a misspelled word, cutting out dead air, or reducing distant background noises, it's best to clean up your audio before posting. Import recorded audio to Audacity by selecting File> Import> Audio.

One of the most common problems podcasters have is a lack of silence. The presenters may pause for a few seconds to collect their thoughts, but it is not an interesting listen. Cut sections with truncated silence.
Highlight your entire recording, then go to Effect> Truncate Silence. Eliminate dead air using the following settings:
Level: -20dB
Duration: 2
Truncate to: 0
Choose the duration of the truncation.
The length of your waveform must be shortened. The setting removed any audio that is less than -20dB and greater than 2 seconds.
Truncating the silence in your audio.
If you notice that the audio sounds abrupt or just doesn't sound right, try adjusting the settings slightly and preview the audio.
There are many things you can do on Audacity to improve your podcast. For example, amplify or normalize the audio for consistent audio levels, add fade in / out, and remove background noise. For more vlogging tips and guides, be sure to check out https://techmong.com/.
About the Creator
Noor Muhammad Khan
Noor is a photographer, vlogger, and medical researcher who loves to help the community around him.
Keep reading
More stories from Noor Muhammad Khan and writers in Lifehack and other communities.
Mastering Clear Skin
Are you tired of dealing with pesky breakouts, dullness, or uneven skin tone? Achieving clear, radiant skin is within reach with the right strategies and a bit of dedication. Achieving clear skin can take time, typically 2-3 months, so patience and consistency are essential for achieving lasting results. In this comprehensive guide, we'll walk you through expert tips and techniques to help you master the art of clear skin.
By PureProgress3 days ago in Lifehack
Boxwood Green Velvet: A Verdant Addition to Your UK Garden
Title: Boxwood Green Velvet: A Verdant Addition to Your UK Garden With its lush foliage and timeless elegance, Boxwood Green Velvet stands out as a quintessential choice for gardeners across the United Kingdom. Renowned for its versatility, resilience, and aesthetic appeal, this evergreen shrub has earned its place as a staple in British gardens. In this article, we delve into the beauty and benefits of Boxwood Green Velvet, offering insights into why it's a must-have addition to any UK garden.
By Kavya Organic Gardena day ago in Lifehack


Comments
There are no comments for this story
Be the first to respond and start the conversation.