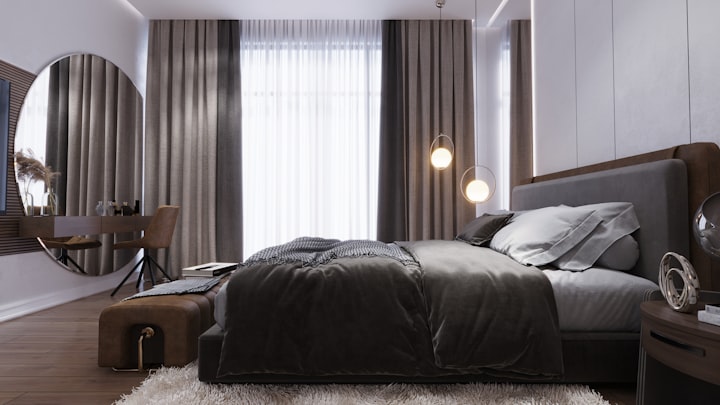
How to Make Interior Design Renderings
A step-by-step guide to interior design rendering

Interior design renderings are a powerful tool that allows designers to showcase their ideas to clients and stakeholders. These 3D visualizations are created using specialized software, which can be daunting for beginners. In this article, we will guide you through the steps on how to make interior design renderings in more detail.
Step 1: Gather Information
Before you start creating your interior design rendering, it is important to gather as much information as possible. This includes floor plans, elevations, materials, and furniture specifications. This information will serve as a foundation for your rendering and will help ensure accuracy in your design.
Floor plans are essential in creating the 3D model for the rendering. It will provide the measurements of the space, the layout, and placement of windows, doors, and other structural elements. The elevations are also important as they will show the height of the walls, ceiling, and floor to ceiling windows, which will help in creating the 3D model.
Having access to materials and furniture specifications is important as it allows you to create an accurate representation of the design. You can use pre-built libraries of furniture models or create your own custom models.
Step 2: Create a 3D Model
The next step is to create a 3D model of your design using 3D modeling software. This software allows you to create a digital representation of your design, including walls, floors, ceilings, and furniture. This will serve as the base for your rendering and will be used to create the final image.
There are several 3D modeling software options available in the market. Some popular ones include SketchUp, Revit, 3DS Max, and Blender. Each software has its own unique features, and it is important to find one that fits your needs and skill level.
When creating the 3D model, it is important to keep in mind the dimensions of the space and to use accurate measurements. This will help ensure that the final rendering accurately represents the design.
Step 3: Apply Materials and Lighting
Once you have created your 3D model, the next step is to apply materials and lighting. This includes textures for walls, floors, and furniture, as well as lighting to create the mood and atmosphere of the space. This step is critical in creating a realistic and accurate rendering.
There are several pre-built material libraries available in 3D modeling software programs that can be used. You can also create your own custom materials to match the design. It is important to use realistic textures for floor plan design, walls and furniture to create a more accurate and realistic rendering.
Lighting is also critical in creating a realistic and accurate rendering. Experiment with different lighting setups to create the mood and atmosphere of the space. You can use different types of lighting, such as ambient, task, and accent lighting, to highlight different areas of the design.
Step 4: Set Camera View and Render
The final step is to set your camera view and render the image. This involves positioning the camera to show the desired view of the space and adjusting the settings to produce the final image. This may take some trial and error to achieve the desired result.
When setting the camera view, it is important to consider the composition of the image. Composition techniques, such as the rule of thirds, can be used to create a more visually appealing rendering. This involves dividing the space into thirds horizontally and vertically and positioning the camera and objects accordingly.
When rendering the image, it is important to consider the resolution and file format. A higher resolution will produce a more detailed image, but it may take longer to render. It is also important to save the file in a format that is compatible with the software you are using.
Final Words
In conclusion, interior design renderings are a powerful tool that can help designers bring their ideas to life and communicate them effectively to clients and stakeholders. By following the steps outlined in this article, designers can create accurate and realistic 3D models, apply materials and lighting, and set camera views to produce stunning renderings of their designs. With the right software and attention to detail, designers can create visual representations that accurately reflect their design vision and help bring their projects to life.
About the Creator
Hamza Ahmad
Hamza Ahmad is an SEO Expert and affiliate blogger. I share my knowledge on different topics.


Comments
There are no comments for this story
Be the first to respond and start the conversation.