
How To Layer Nail Polish For A Unique Custom Color
Colors Queen Nail Polish

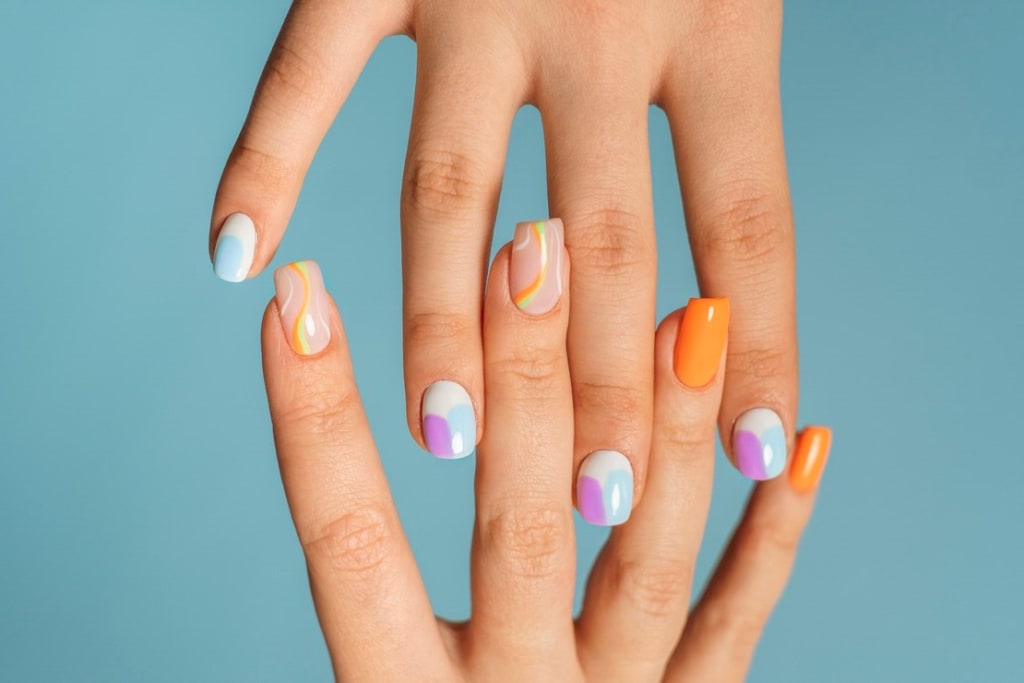
Nail polish is an incredible way to express your creativity, but sometimes, finding the perfect shade that matches your style can be challenging. Fortunately, with a little bit of experimenting and layering, you can create your own custom nail polish color that’s entirely unique to you. Whether you're mixing different shades, adding glitters, or playing with textures, layering nail polish opens up endless possibilities for creating personalized colors. Here's how to layer nail polish for that perfect, custom shade.
1. Start with a Base Coat
Before you begin experimenting with layers, make sure to start with a clean base. Apply a base coat to protect your nails from staining and to create a smooth surface for the nail polish to adhere to. This step will ensure that the layers of polish you apply stay in place and last longer.
2. Select Your Nail Polishes
The fun part of creating a custom color is picking out the nail polishes. You can mix different shades to create your own color palette or combine textures and finishes. Here are a few ways to layer your nail polish:
Mixing Colors: Choose two or more colors that you think will blend well together. Try picking contrasting or complementary shades. For example, mix a bright pink with a coral shade or a navy blue with a rich burgundy for a deeper, mysterious color.
Layering Shimmer or Glitter: Adding a coat of shimmer or glitter over your base color is an easy way to change the look and feel of a nail polish without actually altering the color. If you want a unique shine, layer a translucent glitter polish over a bold color to give it some sparkle and dimension.
Try Different Textures: If you're feeling bold, experiment with different textures like matte, glossy, or even satin finishes. For instance, apply a glossy base coat and top it off with a matte top coat to create a contrast between the matte and shiny areas.
3. Apply the First Layer
Begin by applying your first layer of nail polish. If you're mixing two colors, start with the lighter color as a base layer. Apply a thin coat of nail polish to each nail and allow it to dry completely before moving on to the next step. This ensures the layers don’t smudge or mix together prematurely.
4. Layering the Second Color or Texture
Once the first layer has dried, it's time to apply the second color or texture. For example, if you started with a pastel pink base, you can layer a slightly darker pink or coral over the top. Use the same application technique as the first layer—apply a thin, even coat and let it dry fully.
For Glitter/Top Coat Layering: If you're adding a glitter top coat or shimmer effect, apply a light coat over the second layer to ensure the glitter disperses evenly across the nail. If you want more coverage, feel free to add additional layers of glitter until you achieve the desired effect.
For a Two-Tone Effect: If you want to create a two-tone effect, where one color shows around the cuticle or the edges, use a striping tape to define where the second color will go. Apply one color at the bottom half and another color at the top, creating a chic and bold design.
5. Experiment with Nail Art Tools
For a more complex, custom look, try using nail art tools to enhance your layered nail polish design. Here are some ideas:
Nail Brushes and Dotting Tools: Create intricate designs such as swirls, polka dots, or stripes with the help of nail art brushes or dotting tools. You can even combine two or more colors in a gradient effect to make your nails stand out.
Sponge Gradient: For a smooth gradient effect, use a makeup sponge. Apply your chosen colors to the sponge and gently press it onto your nail to blend them together for a beautiful ombre effect.
6. Seal Your Custom Color with a Top Coat
After you’ve finished layering your nail polishes and created your custom design, the final step is to seal everything in with a top coat. A clear top coat will not only give your nails a high-shine finish but will also protect your layered design from chipping. For extra durability, you can use a gel top coat for a longer-lasting manicure.
7. Let Your Nails Dry Completely
It’s crucial to give your nails plenty of time to dry between layers. If you’re in a rush, you can use a quick-dry top coat to speed up the process. However, the best way to ensure your custom color doesn’t smudge is to let each layer dry thoroughly before applying the next. When you’re finished, allow your nails to dry completely to avoid dents and imperfections.
Tips for Layering Nail Polish:
Use Thin Layers: Apply thin layers of nail polish to avoid clumping or bubbling, which can ruin your design. Multiple thin coats will give you better coverage and a smoother finish than one thick layer.
Don't Overcrowd Your Nails: While layering is fun, it's important not to overdo it. Too many layers of polish can make your nails look heavy and thick, so aim for a balanced design.
Choose Polishes with Similar Consistencies: To make layering easier, try to pick polishes that have similar consistencies. If one polish is very thick and another is runny, it might be hard to blend them smoothly.
Experiment with Transparent Layers: For a creative effect, use transparent polishes or holographic glitters between solid colors. This creates depth and dimension without overwhelming your design.
Custom Nail Polish Layering Ideas:
Peachy Glow: Layer a soft peach color as the base, then add a shimmering gold or bronze glitter top coat for a glowing, sun-kissed effect.
Midnight Blue: Start with a deep navy base, then add a sheer black top coat with silver or holographic glitter for a sparkling night-sky effect.
Ombre Gradient: Choose colors that blend well together, like pink and purple, or blue and green. Apply each color to a makeup sponge and create a gradient that fades seamlessly from one shade to the other.
Metallic Magic: Layer a bright metallic shade, such as silver or gold, over a dark purple or navy base for a bold, edgy look.
Conclusion
Layering nail polish is a fun and creative way to personalize your nail art and create unique shades that reflect your style. Whether you're blending colors, adding textures, or creating intricate designs, experimenting with different combinations will give you endless possibilities for one-of-a-kind nails. Don't be afraid to mix and match—your custom colors are only limited by your imagination!
About the Creator
Colors Queen
Colors Queen has taken on the responsibility of carrying on the legacy of excellence in the beauty industry by providing the best, most reasonably priced cosmetics.
Enjoyed the story? Support the Creator.
Subscribe for free to receive all their stories in your feed.
Comments
There are no comments for this story
Be the first to respond and start the conversation.