
How to Enhance Video Quality with Topaz Video AI
Most Comprehensive Tutorial for Topaz Vi

When it comes to enhancing video quality, you may find yourself pondering two fundamental questions: What is the best way to enhance video quality? And which video quality enhancer stands out from the rest? Among the available options, Topaz Video AI is one of the best video quality enhancers, favored by numerous users encountering the situations outlined below:
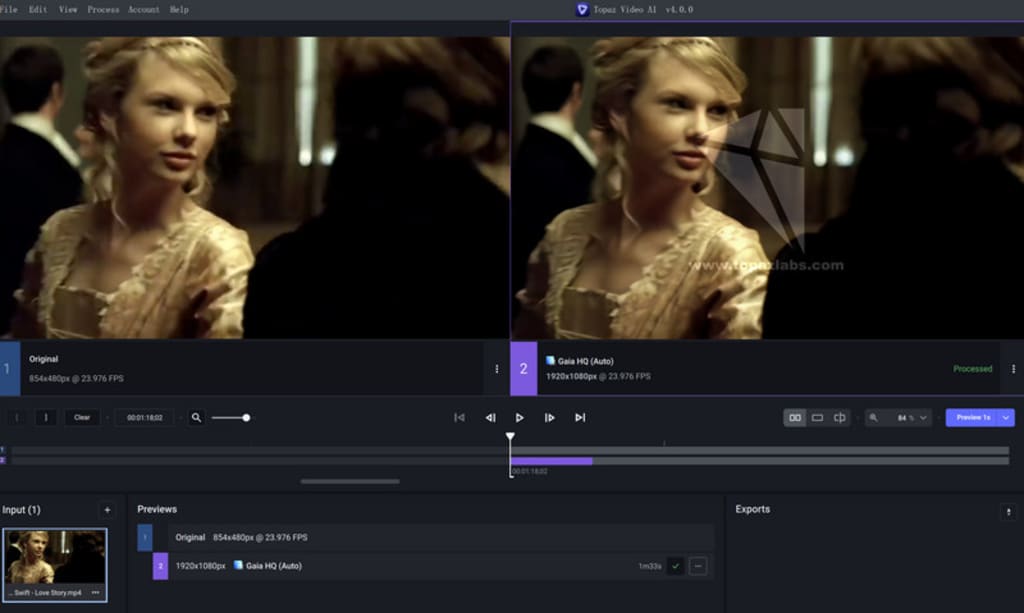
1. You downloaded the low-resolution videos that lack visual quality from platforms like YouTube. Take, for instance, Taylor Swift's "Love Story" music video, filmed back in 2008. The currently available version is limited to a mere 480p resolution. However, thanks to video quality enhancers, we now have access to stunning 4K remastered versions.
Let's enjoy the 4K remastered version of Taylor Swift's "Love Story" and Michael Jackson's "We Are The World".
2. You recently copied digital versions of family VHS tapes, DVDs or VCDs, but the output video turned out to be very fuzzy, noisy, interlaced, and low resolution. You are seeking a good video quality enhancer that can magically transform them into high quality.
For those who come across the situations mentioned above and seeking to enhance video quality using Topaz Video AI, keep reading to discover this most comprehensive tutorial for more valuable insights and guidance. Here we take V4.0.0 as the demonstration.
Topaz Video AI: Everything You Need to Know Before Getting Started
- 1. Hardware Requirements
- 2. Trial
- 3. Price
- 4. Main Interface
- 5. AI Filters
- 6. AI Models
Step-by-Step Tutorial on How to Enhance Video Quality with Topaz Video AI
Preview the Video Enhancement Effect Produced by Topaz Video AI
Final Words: Should You Select Topaz Video AI?
Topaz Video AI: Everything You Need to Know Before Getting Started
To begin our exploration of how to enhance video quality by using Topaz Video AI, let's first get to know the program's user interface and familiarize ourselves with its AI Filters and their corresponding AI Models. By doing this, you will gain a comprehensive understanding of the main features before diving into the techniques for enhancing video quality.
1. System And Hardware Requirements
Before get started, please make sure your Windows has a dedicated GPU (NVIDIA GTX 900 or higher, AMD Radeon 400 or higher, Intel UHD 600 Graphics or higher) with at least 4GB GPU memory, or your Mac has M1 or M2 chip.
Topaz Video Enhancer AI supports both Windows 10, or 11 and macOS Catalina 10.15 or higher.
2. Trial
The demo version will export the video with a watermark.
3. Price
$299, one-time payment, plus the upgrade fee for each year.
4. Main Interface: Detailed Explanation
After importing a video, you will see the interface as shown below. It seems a little bit confusing at first glance but it is still easy to get started. The interface was more complicated before V3.0.0.
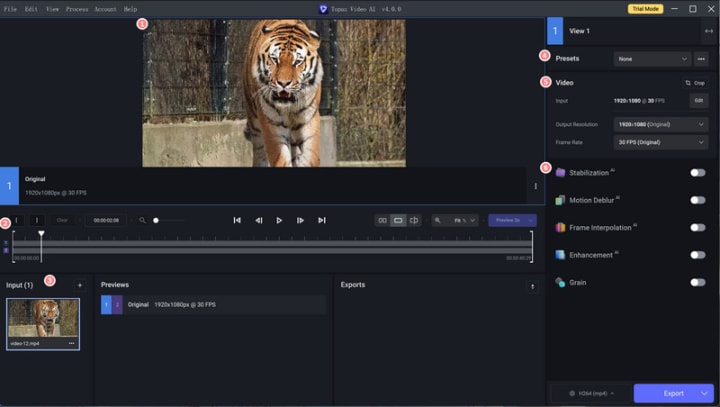
① Video playback and preview window: you can play the original video here, or preview the effect between the original and enhanced video.
② Video editing tool: you can trim video by frame.
③ Video input window: you can click + to add more video files or remove current video.
④ Presets: 8 different ready-made presets allow you to process video without any configuration.
⑤ Video-In and Video-Out menu: the "Video-in" menu displays the input video's resolution, aspect ratio, and frame rate, while the "Video-Out" menu allows you to alter the output video's resolution and frame rate.
⑥ Filters: 5 filters tailored for your different video enhancement needs (4 AI filters and 1 non-AI filter).
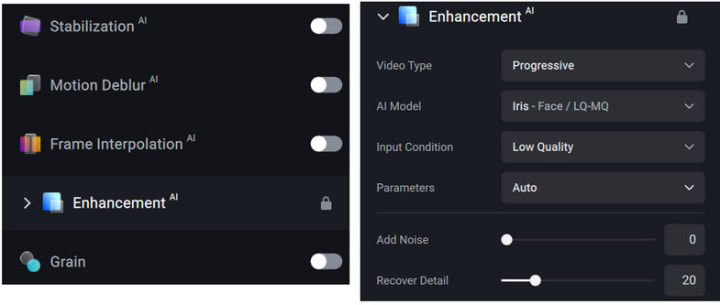
5. AI Filters
Stabilization: The stabilization model, first introduced in V3.0.0, can reduce shaky or jittery motion that often results from an unstable camera.
Motion Deblur: Reduce motion blur by camera shake.
Frame Interpolation: Create new frames for FPS conversion or slow motion effect. For example, you can select this filter to convert FTS from 30 to 60 or create 2x, 4x, or 8x slow motion.
Enhancement: Improve the visual quality of the video. This filter is tailored to improve the quality of three kinds of videos, including progressive, interlaced, and interlaced progressive video. If you are not sure which one you should choose, please refer to the following explanation.
① Progressive: if your video sources are listed with the letter p, for example, 480p, 720p, or 1080p, you can select the video type as "Progressive".
② Interlaced: If your video sources are listed with the letter i, for example, 480i, 720i, or 1080i, you can select the video type as "Interlaced". Interlaced video displays obvious lines on the screen.
③ Interlaced progressive: As for the Interlaced Progressive, it can be only used if your video sources have been previously converted to progressive without de-interlacing it at the time.
④ Grain is an extra option you can use to add visual texture to make the output video less smooth plastic AI look.
6. AI Models
Topaz Video AI V4.0.0 offers 9 AI models in total. It removes some outdated models and organizes all models by AI filters since V3.0.0, thus allowing its users can choose the right AI models more easily than before. If you are still trying to figure out the difference between the models and have no idea about what model to use, you can look at the explanations for each model.
Proteus - Enhance MQ: Upscale and sharpen middle-quality video, fix compression artifacts, remove noise, and anti-alias/deblur.
Iris - Face /LQ/MQ: Iris is Topaz's first face enhancement AI model, released in June 2023. It is recommended for very low-resolution and medium-resolution videos and works best on interlaced, noisy, or compressed footage with degraded faces.
Nyx - HQ Denoise: The denoise model reduces noise and fixes compression artifacts. It is optimized for denoising high-resolution videos captured in dark lighting conditions with high ISO settings.
Artemis - Denoise/Sharpen: Enhance and upscale low-quality videos with high noise or severe compression artifacts, and produce smooth video output with much less detail flicker.
Gaia - Upscale HQ: Upscale video footage to HD and 4K resolution.
Theia - Details/Fidelity: Upscale or sharpen input video with more details, with parameters (sharpen, fix compression, reduce noise) for fine-tuning.
Themis: Pairs well with the Stabilization model to reduce camera shake and jerkiness.
Apollo: The Apollo model can create slow-motion effects in videos that do not have non-mechanical movements, so it is better for video with more non-linear (less predictable) motion.
Chronos: The slow motion/FPS conversion model to convert frame rates. It gives the best results with linear motion video.
Step-by-Step Tutorial on How to Enhance Video Quality with Topaz Video AI
Let's ready to read this step-by-step guidance for using Topaz Video AI to enhance your video quality effectively, whether you're already a user or considering the trial version.
Step 1: Download and Install
Download the installation package based on your computer’s operating system.
Please wait while the Setup Wizard installs Topaz Video AI. Once the installation is complete, launch Topaz Video AI to step in the welcome interface in which you can select to activate the program so as to access the full version or try the app for free.

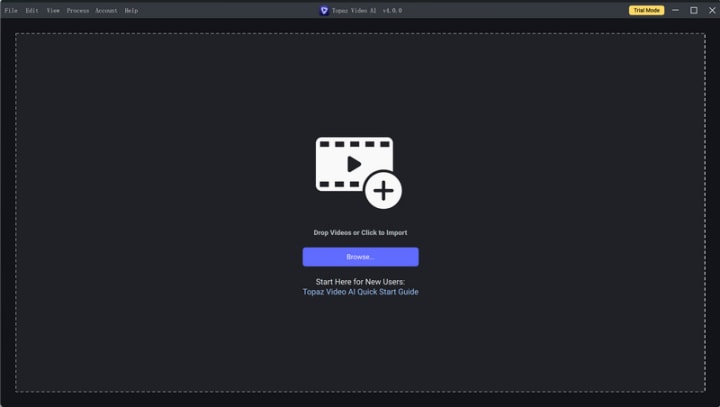
Step 2: Browse to Import a Video File
There are two ways to import videos into Topaz Video AI: select "Browse" or drag-and-drop files directly into the program.
Step 3: Select the AI Filters and AI Models You Prefer
There are two ways to select the AI filters before rendering:
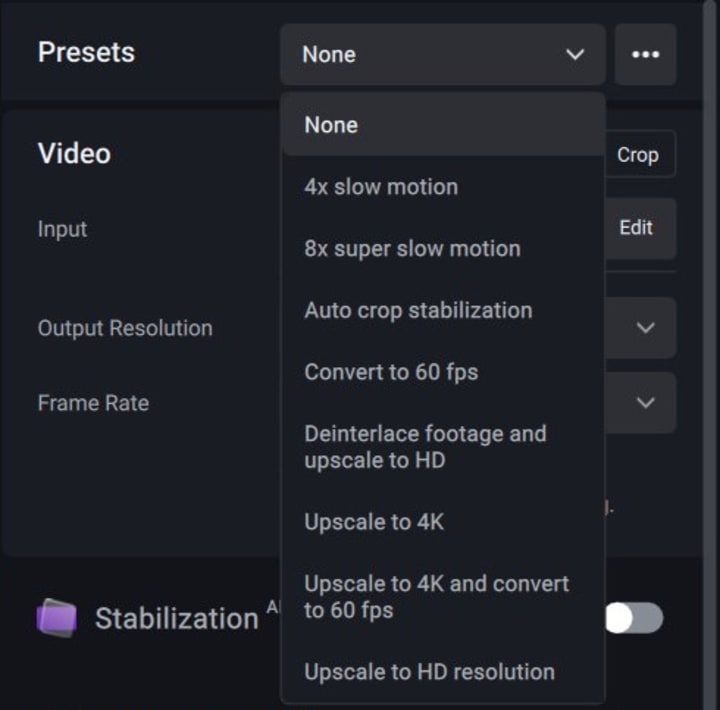
1. Select a Preset:
The PRESET is designed to simplify program setup for an easier testing experience.
Select a Preset: From the Presets window, choose a preset that fully fits your requirements. Here we take "Upscale to 4K" as an example. By choosing "Upscale to 4K" as the preset, the corresponding enhancement filters, output resolution, and output format will be activated automatically.
Once you have made your selection, you can proceed to click the "Preview" button or view the improvements between before and after, or click the "Export" button to initiate the video export process.
Tips: You also have the ability to add a new Preset independently, empowering you to customize your own experience.
2. Manual Configuration
If you are already familiar with the program, you can take control of the program by manually choosing AI filters, AI Models, Video Type, and tailoring the output (resolution, bitrate, quality level, format, and more) to your exact preferences.
By organizing each AI filter with customizable and fine-tuning options, you have the flexibility to simultaneously select multiple filters. For instance, you can upscale video to 4K and convert it to 60 FPS by selecting both Frame Interpolation and Enhancement as the AI filters.
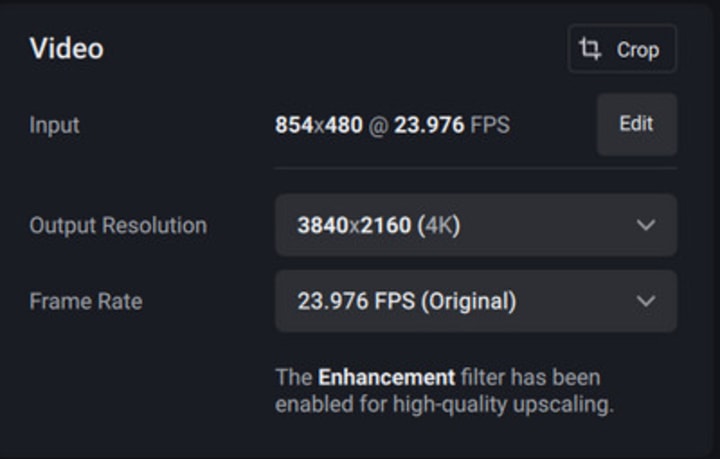
Step 4: Customize the Output Settings (Output Resolution, Frame Rate, and More Output Settings)
To configure the AI Filters and AI Models, you have two options: selecting a Preset or manually adjusting the settings yourself. Once you've made your selection, click the button next to "Export As" to open the output settings window. Here, you can customize various aspects including the Encoder, Profile, GPU, Bitrate, Quality Level, Audio Mode, and Container.

At last, don't forget to select your preferred output resolution and frame rate if you manually choose the AI Filters and AI Models. This step is crucial to ensure that you achieve the desired results for your project.
Tips: To ensure optimal compatibility with media players, Windows users should opt for MP4 as the container and H.264 as the encoder. On the other hand, Mac users should select MOV as the container, and choose between H.264 or ProRes as the encoder. Following these guidelines will guarantee the proper playback of the output media files.
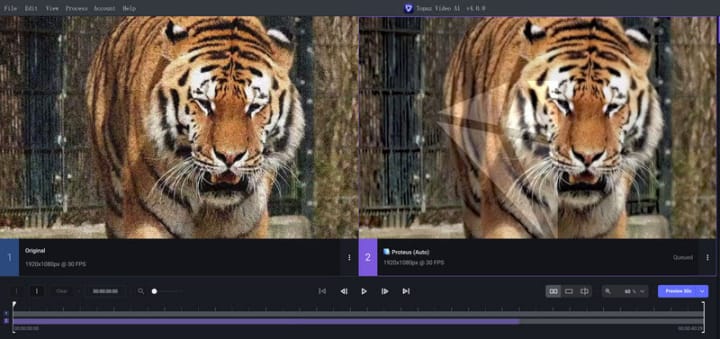
Step 5: Preview the Enhancement Effect
After all configuration is done, you shall start the preview of the enhancement effect to make sure the outcome is what you expected. Generally, previewing 30 frames should tell you the obvious improvements between before and after. Here we pick up the default option "Preview 2s" to start the preview.
Note: Choosing a longer preview time will result in increased loading time to process the request. It's important to keep this in mind as you make your selection.

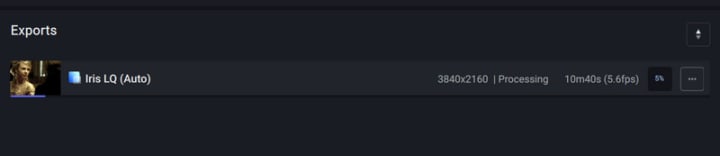
Step 6: Start Exporting the Enhancement Video
If the outcome is as great as you expected, click the "Export As" button to start rendering the video.
Preview the Video Enhancement Effect Produced by Topaz Video AI
Now that we have covered nearly everything you need to know before starting the video quality enhancement by Topaz Video AI, the quality that Topaz can output is no exception, as well as your first concern before opting for it. In this part, we will demonstrate the quality comparison between before and after. We will use as many as source footage as possible for a comprehensive and convincing comparison.
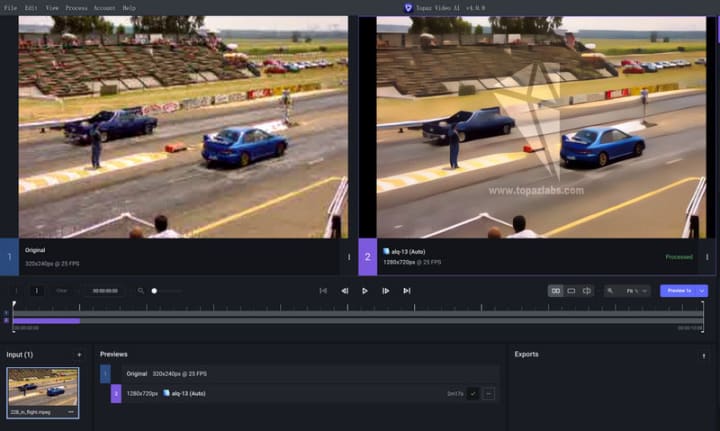
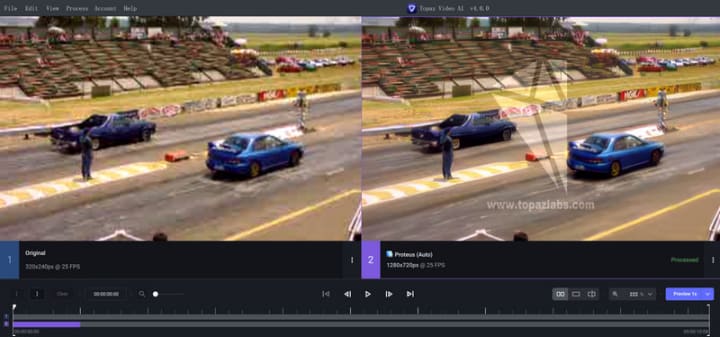
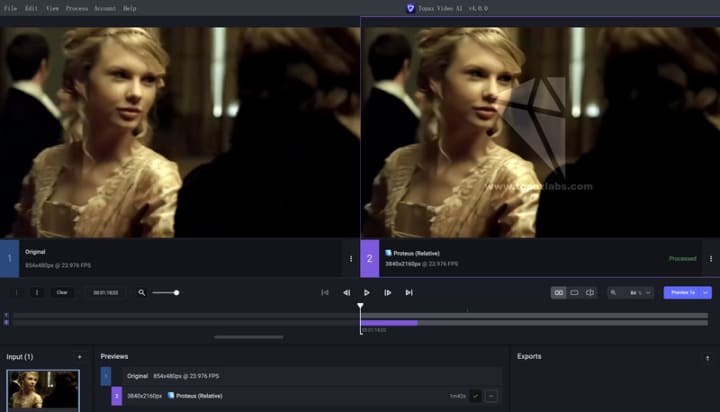
Proteus - Enhance MQ: To denoise medium quality video.
Outcome: Remove noise from the video, with details kept.
Artemis - Denoise/Sharpen: To denoise low quality video.
Outcome: Too smooth, unnatural, and less details.
Tips: To improve the denoising effect for this low-quality video, and keep more details, you may try to switch the model to Proteus - Enhance MQ.
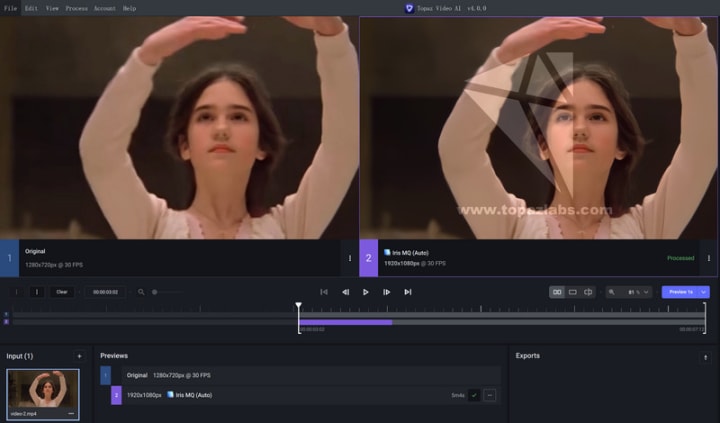
Iris - Face /LQ/MQ: For Face recovery & Refinement.
Outcome: Can make the blurry faces clearer than before, with natural output.
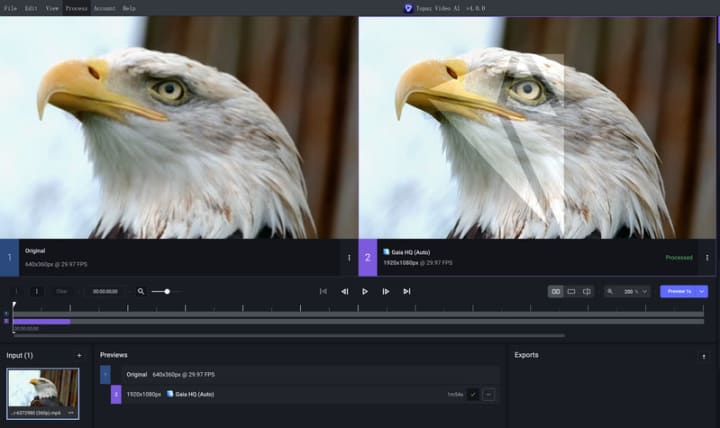
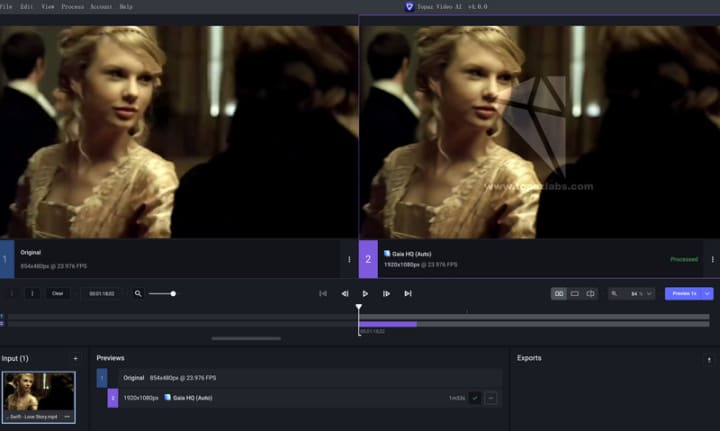
Gaia - Upscale HQ: Upscale video footage (640x360) to HD (1920x1080).
Outcome: Crisp HD quality, the parrot feathers turned out to be clearer.
Gaia - Upscale 4K: Upscale video footage (854X480) to 4K (3840x2160).
Outcome: Naturally, but no obvious improvements visually.
Tips: Switched the model to Proteus - Enhance MQ can get better results.
Final Words: Should You Select Topaz Video AI?
Honestly, Topaz Video AI is a great video enhancement software that is worthy of your trial. The greatest points are the good enhanced quality and more fine-tuning options available. The product also does a good job of increasing/changing the frame rate. The drawback is that it is a bit hard to figure out how to actually use AI models to improve an older video. In other words, it takes more time to understand the options and do many rendered previews. What's more, the product takes a bit longer time to load the preview effect, even though we selected preview 1s.
Obviously, Topaz Video AI is an impressive video enhancement software that is definitely worth trying out. It offers several notable advantages, such as enhanced video quality and a wide range of fine-tuning options. Moreover, the product also does a good job of increasing/changing the frame rate.
On the downside, it can be a little challenging to navigate and utilize the AI models for improving video quality, which may require additional time and multiple rendered previews. Additionally, the preview effect takes slightly longer to load, despite selecting the 1-second preview option.
Overall, Topaz Video AI provides powerful features that can significantly enhance video quality, while offering room for improvement in terms of usability and preview loading speed.
Finally, if you find Topaz Video AI too complex to figure out, consider giving AVCLabs Video Enhancer AI a try. Its user-friendly interface and advanced capabilities make it a great alternative.
Source page: https://www.avclabs.com/video-enhancer/enhance-video-quality-with-topaz-video-ai.html
About the Creator
Joker Young
An editor from a software indusrty.
Keep reading
More stories from Joker Young and writers in Lifehack and other communities.
How to AI Upscale Classic TV Shows to 4K with Quality Enhanced
Old TV shows usually have a quality lower than 480P. If we cannot increase the quality of a video file in traditional video editing software, then is there any way can upscale old TV shows in HD or even 4K quality?
By Joker Young2 years ago in Lifehack
How Think and Grow Rich Changed My Life: A Journey of Transformation
When I first stumbled upon Napoleon Hill’s “Think and Grow Rich,” I had no idea how profoundly it would impact my life. Like many, I was drawn to the promise of financial success, but what I discovered within its pages went far beyond mere monetary gains.
By Sachin Bhagata day ago in Lifehack
Reflecting Beauty: The best Vanity mirror on the market
Introduction: In the realm of beauty and self-care, the ritual of preparing oneself for the day ahead or winding down in the evening is an intimate and cherished practice. At the heart of this ritual lies the vanity mirror, a quintessential tool that not only reflects our physical appearance but also serves as a conduit for self-expression and empowerment.
By Xavier Robertsa day ago in Lifehack
A Digital Pandemic.
After a long day in the department, Emily dropped her worn and tired dark leather bag on the counter before navigating through the small and disordered kitchen to grab a cold beer from a contrarily empty fridge. She hadn't had a chance to unpack since moving from Newcastle to Glasgow, let alone shop for sustenance, except for cold brews naturally.
By Billie Whytea day ago in Chapters


Comments
There are no comments for this story
Be the first to respond and start the conversation.