

Turns out, customizing your skateboard can be fairly simple and easy.
This project can be also really cheap, especially if you already own a skateboard but want to change it. Also, buying a secondhand board is a solution! I procured a complete skateboard from a friend. The old board design didn't matter, as it's easy to remove it.
1. Materials
To start you'll need:
- Paper Tape
- Acrylic Paint (you can use spray paint too)
- Brushes
- Sand Paper
- Grip Tape For Skate
- Varnish
- Photo Transfer Liquid
- Design Printed With InkJet. Remember To Print It Inverted
- Tools To Take The Trucks Off
- And Of Course, A Skateboard
Step 2: Plan your design.
Design and colors depends on you, of course. There is a huge variety of ways and designs you can apply to your skate/longboard. You can use spray, acrylic, chalk paint, do the photo transfer (this you can do on all kinds of material-wood, aluminum, glass). You can use adhesive tape to "play" with design etc. All depends on you. Just remember to varnish it after all for firm ending and to protect the design.
I used the PHOTO TRANSFER technique based on acrylic paint, and this is what I will talk about today.
Having all the material, you're ready to go! All preparation time can take two-24 hours (depending on drying time—I used hair dryer to make it faster).
Take into account that the lighter colors you use, the easier it will be to make the photo transfer. My primary idea was to paint the board with black, then white color and clean the surface a bit with the sandpaper, so it would look "old" and would be easier to transfer photo. But, I fell in love with the board once I saw it in black haha. That's why it was real pain in the ass to do it. First, I had to put some white background for easier photo transfer.
The grip tape. With this you don't have to do anything, just cut it off using a cutter. I haven't put it on the video as I forgot to record that part...ooops! Sorry! But you can find hundreds videos about changing skate grip tape. It's easy too, always if you haven't cut the complicated design there—I've seen there some pretty awesome grip tape designs.
Step 3: Prep the deck.
I'm sure there's somewhere you can buy a blank deck with no finish and all the hardware for a reasonable price, but I couldn't find it. I picked up a complete deck from a friend instead and sanded off the design.
First, remove all the hardware, the trucks and wheels, and set them aside (in a box or bag so you don't lose any pieces). I didn't take a picture of it, but since most of you skaters will know how to do it, and if I could...anyone can ;)
Next, I started sanding (for your own safety put on some eye, ear, and breathing protection). If you're doing it at home not a garage (I do not have garage), make sure you protect your floor/furniture from dust and paint. That breathing protection is important, you're making really fine particles of who knows what and you probably don't want to breathe them in!
Starting with rough grit paper and moving to progressively finer grit, removing the design turned out to be surprisingly easy. The result was nice and clean and ready for a new design.
You can use painter's tape all the way around the edge to keep the paint in its place. I wanted it aaaall black, that's why I didn't use it finally.
Using the paint roller will leave the smoother finish I used the brush, to have this "wooden" kind of finish. I don't know, I found it cooler and as well the pic would end up kind of "oldish" in a way...
I did my best to keep this to look as nice as possible as it was made for a gift. If you do it for yourself, I guess all effort depends on you.
Step 4: Design Preparation
As I mentioned I used PHOTO TRANSFER technique.
You'll need a laser printed copy of your photo on copier paper, the copy should be the mirror image of how you would like it to appear on the wood. This ONLY works with laser copies. It won’t work with ink jet. (Make sure this is printed on regular paper, not photo paper.)
- Photo transfer liquid
- A sponge brush
- Scissors to cut out your photo
- A rag to soak your photo
- A cup or plate to pour your liquid into
- A boning tool or plastic card to get the air bubbles out with
Follow these steps:
- Print out the image you would like to transfer using a laser printer. Unfortunately, ink jet printouts won’t work for this project. Most copy stores use laser printers. You may want to mirror your image as the transfer will make your image the reverse of how it is printed.
- Trim your image to the size that you want it to be on the board.
- Put a thin layer of photo transfer liquid on the printed side of your photo and on the skateboard.
- Lay the paper photo side down onto the wood. Use your plastic card or boning tool to remove any bubbles of liquid from between the paper and wood by smoothing the card over the paper pushing excess to the outer edges. Make sure all of your corners are stuck to the wood. If it’s not stuck, it won’t transfer.
- Wipe away excess liquid from around photo, then leave to dry for at least four hours. To speed up the drying process, you can use hair dryer (bit risky that transfer won't stick too good).
- Four plus hours later, once the paper has completely dried, dampen a rag with warm water and and lay it over top of your photo. Leave for approximately five minutes.
- Once the paper is damp comes the fun, but time-intensive part of this project. Wet your fingers with water and slowly start rubbing your finger over the paper, almost using your finger like sandpaper. The photo copy is going to appear to split in half. The white part of the paper will start to lift away and the paper with the ink will stick to the wood. Take this part very, very slowly. If you go too fast the ink will lift away from the wood and you will be left with bare patches. That actually happened to me byaah, but my excuse is that it was my first time...
Step 5: Finish the details and fix the mistakes.
With a project of this magnitude and taking into account it was my first project of that kind, it was inevitable that I'd make at least a couple of mistakes. Fortunately, I was able to pretty easily fix them!
Once you are happy with the effect, you can finally varnish the whole board. Make sure you'll do it well in case to protect your design. I put like five thin layers on it...
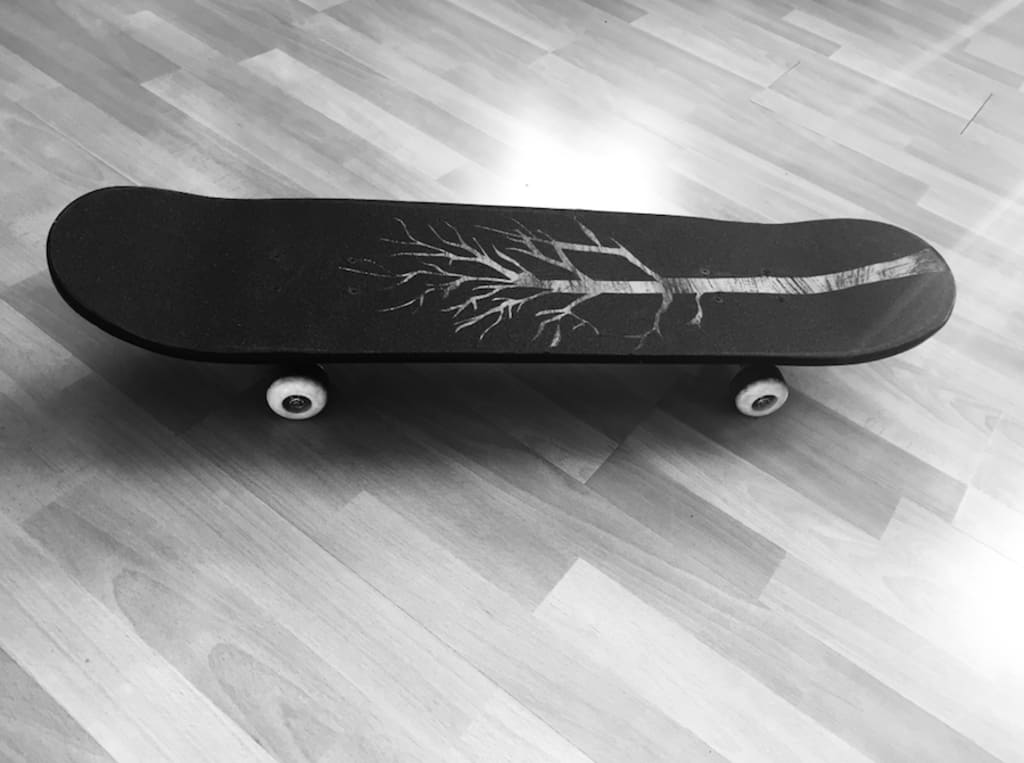
Take a look at the video and some pics!


Step 6: Final Thoughts
Thanks as always for stopping by! I'd love it if you took a minute to share this with a friend, favorite, and check for all my future projects and articles!
I was really happy with how this turned out and I definitely enjoyed doing it a lot! As I mentioned before, my projects don't usually look super great so it was pretty fantastic to see the results here.
About the Creator
Julita P
"If you don't understand my silence, you won't understand my words"
STUCK AT A REMOTE CORNER OF NORTH EAST INDIA, AGAIN!
It had been a great outing up to this point, to one of the remotest and unique pieces of Arunachal Pradesh. We had quite recently crossed the Gorsham stupa coming back to Tawang from Zimithang, scarcely a couple of kilometers from the Indo - China line, when I previously felt it. Initial, a slight wobble, which I attempted to disregard figuring it very well may be a result of the non-existent street that we were driving on. Then, at that point, areas of strength for a.
By prashant sonia day ago in Lifehack
Navigating Bariatric Surgery Eligibility: What Can Disqualify You?
Deciding to undergo weight loss surgery is a significant step towards reclaiming your health and well-being. However, not everyone is a suitable candidate for bariatric surgery. Understanding the factors that may disqualify you from this procedure is crucial for making informed decisions about your weight loss journey. Let's explore these considerations in detail.
By Safwan A. Tahaabout 9 hours ago in Lifehack


Comments
There are no comments for this story
Be the first to respond and start the conversation.