


Want some last minute Halloween DIYs? Or live a spooky life and want some easy crafts for all year decor? I have some quick and easy crafts you can make to add a spooky touch to your Halloween decor!
I love crafting especially during the autumn season as it’s my favourite and the colours make the house look cosy and cute during the cooler months.
I’ve made a few Halloween/Autumn DIYs recently and I want to share them with you as they’re easy to create and make gorgeous conversational pieces when family or friends come over that will last for years and years to come! They’re also quick pieces to make just in time for Halloween.
No Sew Pumpkin Garland
You Will Need:
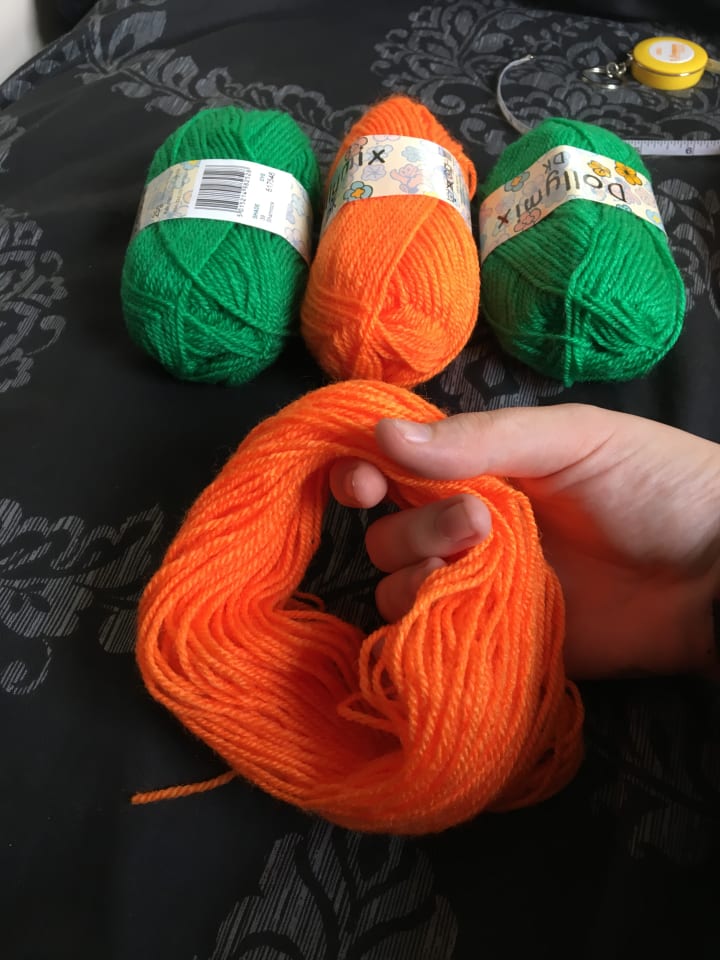
- Green wool / yarn (I used DollyMix in shade 39 Shamrock)
- Twine (optional if you want to make a garland)
- Book (mine measured 7”)
- Fabric scissors
Directions
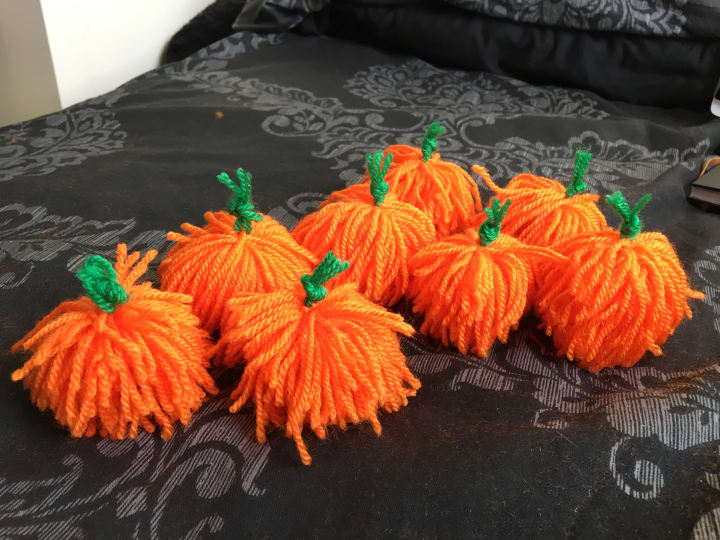
You will be making 4 pumpkins at a time.
1. Wrap your orange wool around your book about 100 times.
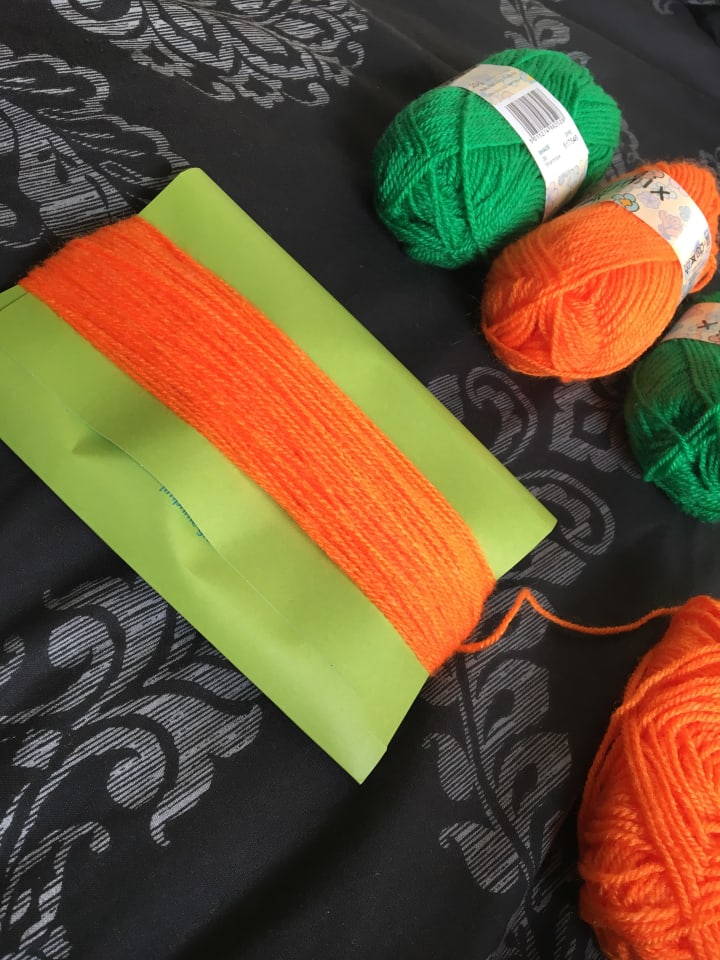
2. Carefully, slide the wool off the book whilst maintaining the loop shape.
3. Cut 4 pieces of 12” orange wool and use this to tie the ends and opposite ends of the loop as shown in the picture below. Tie this tightly and in a double knot.

4. Using your fabric scissors cut in between each piece of tied wool, you will end up with 4 pumpkins. Keep the 12” piece of wool long and hold onto this to trim your pumpkins into shape.

5. Cut 8 pieces of 12” green wool and place 2 pieces across the middle of the pumpkin, double knot the 2 pieces of orange wool tightly around the green wool. Trim the orange wool to keep with the pumpkin shape.

6. Gather all 4 pieces of green wool that is attached to the pumpkin and tie a loose slip knot to create the stem of the pumpkin.

7. OPTIONAL! Once you’ve finished your pumpkins you can leave them as they are to dot them around the house or you can continue on to make the garland to do that cut a piece of thread and thread this through the stems of the pumpkins, by doing this will make it 100% movable so you can move the pumpkins to centre them.

Whether you decide to leave the pumpkins as they are or make them into a garland, they are a fun, easy way to decorate for autumn this is because they are pumpkins and can work as autumn and Halloween decor, so you can leave them up all season long.
Halloween Felt Ornaments

You Will Need:
- Felt (I used 9”x9” sheets) in the colours; orange, green, white and black
- (Pillow) stuffing
- Thread in the colours; white, orange, green and black
- Fabric scissors
- Pumpkin, Bat & ghost templates
- Glue
- Twine

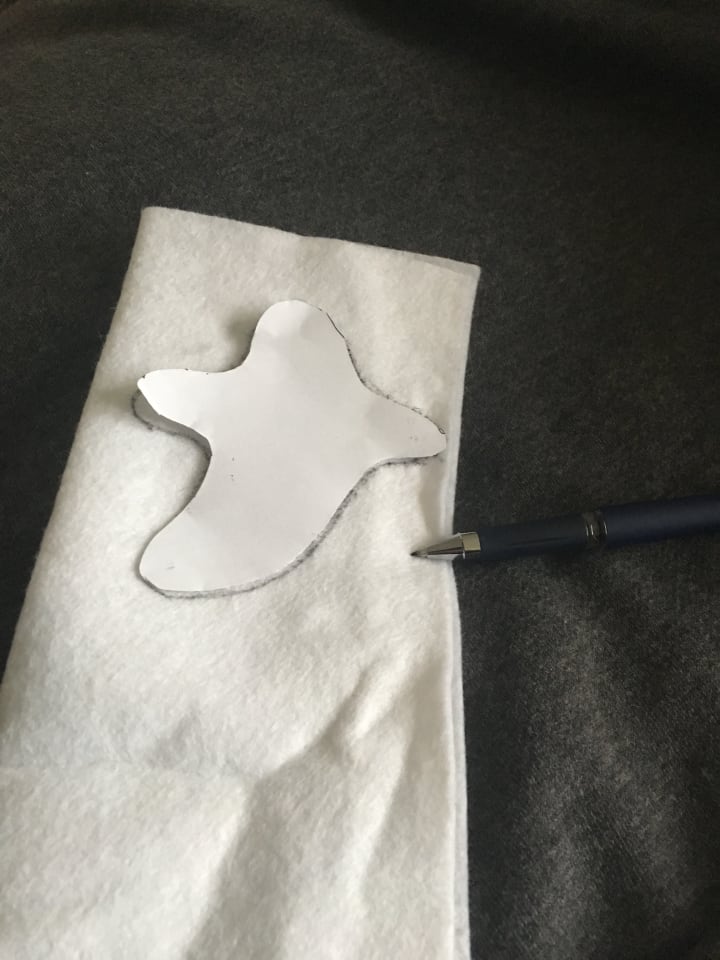
1. Firstly, print out or draw you’re templates for the decorations. You can make any Halloween character you want but I have chosen a ghost, a pumpkin and a bat.
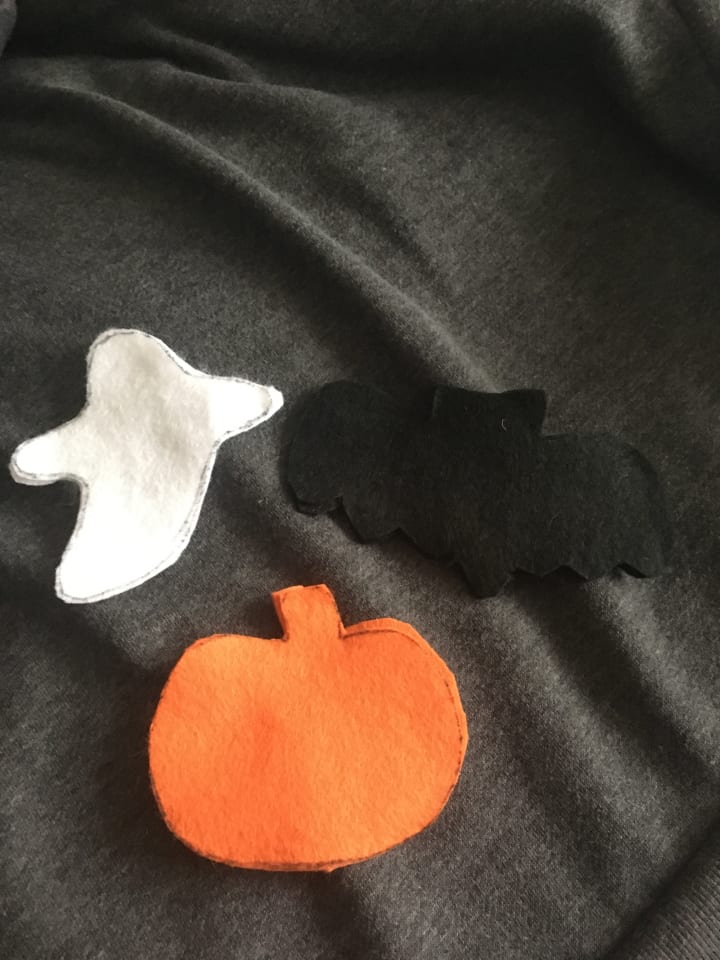
2. Cut these templates out and trace the outline on the the coloured felt.
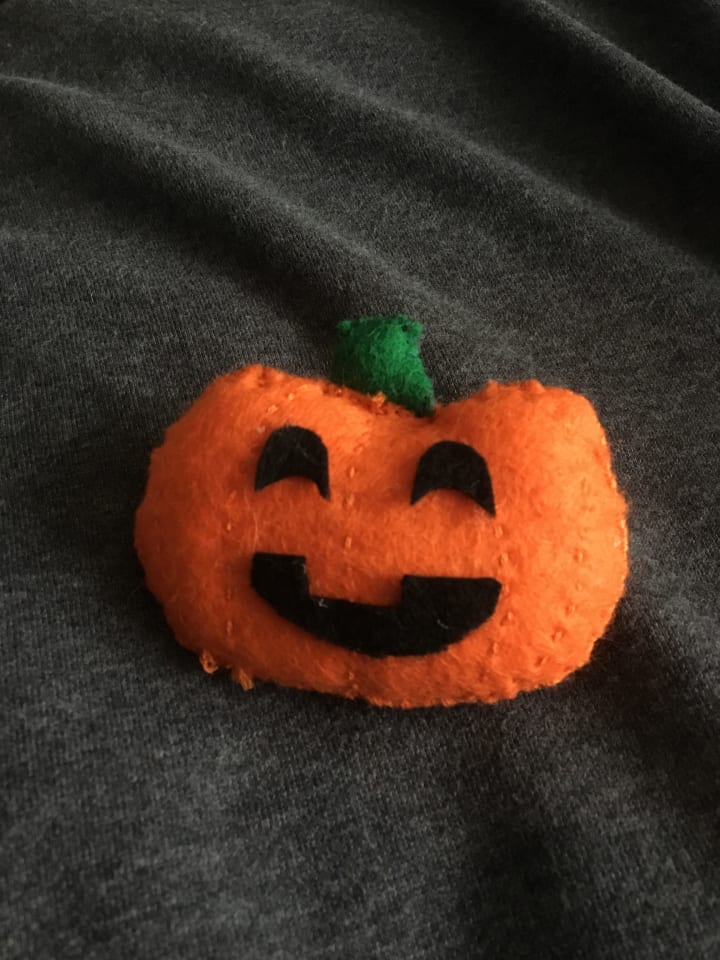
For the pumpkin I used a lighter orange and green felt (for the stalk) you will need two of each shape to make it 3D!
For the ghost I simply used the white felt (we will be making the boo banner later) and cut out two ghost shapes. And yes you’ve guessed it I used the Black felt to cut out two bat shapes.
3. Now we get to the fun bit, starting with the pumpkin, start by making the lines of the pumpkins with a running stitch (we will add the face details later) using orange thread.

4. Next, begin to sew the two pieces of orange felt together using a blanket stitch with the orange thread again, leaving a gap at the top to stuff your pumpkin.
5. Now use the two pieces of green felt and use the blanket stitch again with green thread to create the stalk of the pumpkin. Now cut out the eyes and mouth of the pumpkin with black felt and stick them on with fabric glue.
6. Use the blanket stitch to see the ghost together with white thread, leaving the top open once again to stuff then sew back up!

To create the boo banner cut out 3 triangles from orange felt and use a black pen to write the letters “B” “O” “O”, then glue to some twine and then glue to the ghost with the fabric glue. Cut out two eyes from the Black felt and glue those on too for the eyes of the ghost!
7. Now for the bat. Use orange thread and use a running stitch to create the “bones” of the bat, this will give it more definition. Create arches with the thread instead of straight lines so that it looks a little more realistic. Next use the white thread to create two round ball for the eyes.

Now put the two pieces of bat pieces together and use the orange thread again with the blanket stitch and leave a hole at the top to be able to add the stuffing then sew it back up.
Now they are all finished you can either use the twine to create individual loops for hanging decorations on a Halloween tree or you could leave them as they are for decoration.
Either way they are simple and cute little crafts that will add a spooky touch to your Halloween decor. These two crafts are quick and easy for a last minute DIY to add some cute decor to your home.
I hope you enjoyed these two crafts and find them enjoying to make
Thanks for reading. X
About the Creator
Abby Grace
Hi I’m Abby, I have a passion for all things gothic. I have a passion for photography and I love my gorgeous corn snake, Topaz ❤️
Keep reading
More stories from Abby Grace and writers in Lifehack and other communities.
Christmas Gift Guide
I like to start Christmas shopping in November so I know I have enough time to get all the presents I need to get. We all need to save some money especially around Christmas time so the gift ideas I’ll give you are inexpensive and will be worth every penny!
By Abby Grace5 years ago in Lifehack
Sky Pencil Holly: Adding Graceful Elegance to Your Garden
Title: Enhancing Your Garden with Sky Pencil Holly: A Touch of Graceful Elegance Intro: In the realm of garden design, few plants offer the elegance and versatility of the Sky Pencil Holly (Ilex crenata). With its striking vertical growth habit, slender form, and vibrant green foliage, this unique cultivar adds a touch of sophistication to any landscape. Whether used as a focal point, a hedge, or a container plant, Sky Pencil Holly stands out for its graceful beauty and easy maintenance. Let's delve into why this plant deserves a prominent place in your garden.
By Kavya Organic Garden5 days ago in Lifehack
What's inside
As a parent I have become aware of how very frustrating it is to be answering endless questions posed by our kids and I now understand why my parents got to the point where they just would not do it any more. They weren’t heartless though and enjoyed our enquiring minds. They had a great solution to both encourage the questions but keep their sanity. They invested in a set of Chambers Encyclopedia plus a massive dictionary. These were strategically located in the dining room behind us so that dinner time questions were always met with “Look it up and tell us all the answer.”
By Anne van Alkemade4 days ago in Lifehack


Comments
There are no comments for this story
Be the first to respond and start the conversation.