
Doomsday Paperwork
How To Make A Disaster Plan


This is the most boring part of getting disaster-ready. Most people often skip this step because it’s not as fun as putting together a food rotation. 32% of preppers do not have a disaster plan in place. Your disaster plan is your family’s road map to any crisis and should cover all potential disasters known in your area. It lays out who does what and where you are supposed to go when evacuating. Here are some tips can use to speed up this task.
Home, Town, State
You’ll never know when a disaster will strike, so you’ll want to inform your family of three major meeting places when evacuating. By establishing what these three places are, the family will know where to go to be found in case you are separated during the crisis. The first location, or home location, should be directly outside the home, either in front of it or behind it. This is the location you will use in a house fire or gas leak situation. The next one, or town location, is the evacuation meeting place for if you have to flee the community. It should be somewhere on your pre-planned evacuation route. This way, you don’t have to make a detour to pick someone up. It should be a well-known spot for the family, like a gas station you use the most or a favorite restaurant. Don’t pick a hospital or police station as these places become overrun with people in a crisis, making it impossible to reach under certain conditions. Last, in a worst-case scenario, you should have a meeting place outside the state, called the state location, for large-scale disasters like nuclear war or a supervolcano. This should be your out-of-state contact, as they will know the best way to reach the others in your party. Having evacuation locations helps you plan the best routes to avoid gridlock traffic and know what to carry in your bug-out bag.
Contacts

Many people depend on their phones to organize numbers these days, but if the phone dies, you’ll lose access to this information. It’ll be a good idea to invest in an address book and update it once a year. You’ll want to start by adding the address and phone number of each member of your prep team, kids’ school/daycare, spouses’ jobs, local emergency services, and each utility company. Next, you’ll want to include the contacts for aftermath services like contractors, dumpster rentals, landscapers, funeral homes, and cleaning professionals. These services will lessen the burden on you should you become injured or overwhelmed. Most independent contractors work on a first-come, first-serve basis, so having their number readily available puts you at the top of their list. You should include an out-of-state contact who will act as the rendezvous point for your family’s calls. They will also be your state evacuation location.
Assignments

You should give each family member a job to do before, during, and after a disaster. This will make them feel included and it will encourage them to take part in other activities related to doomsday prepping. You should encourage kids over 10 years old to put together their own bug-out bag. Teenagers can become HAM radio operators and take a survival class. Bring each member of the household into the menu planning process for help in setting up the food rotation system. Teach older kids how to do basic household repairs and to shut off utilities. If you have babies or pets, assign their safety to someone in the home to ensure they don’t get left behind in the hassle of evacuating.
Paper Or Plastic

This is a personal choice of yours to decide whether you want to write the plan out on paper, or type and save it on a flash drive/portable hard drive. I prefer the handwritten notes stored in a Prepper Binder. I feel having a paper version is more beneficial in the event of an EMP or a power outage. Putting it on a flash drive comes in handy if evacuating with limited space in your bug-out bag. However, you need access to a computer to read it. The cloud and Google Docs are good places to store online files that you can access anywhere there is an internet connection. FEMA and Red Cross have developed apps you can use to store such information on your phone.
The Disaster Layout

This is something a little extra if you choose to do so that will provide you with extra peace of mind. This is the third section of my Prepper Binder. I draft a before, during, and after plan for each known disaster in my area. Along with creating a disaster plan for each of them, I make them their own specialty kit, so I have the proper supplies on hand at all times. This helps out should a specific disaster arise that requires immediate attention. I don’t have to remember the proper steps or wonder where important tools are. I just flip to this section and follow my pre-made guidelines. This is also handy to have on hand should people unfamiliar with your area stop by for a weekend visit or our out-of-town babysitter. I organize the disaster plans from the greatest threat to rare ones so I can find the ones I need faster.
Here's a link to a helpful template: https://www.ready.gov/plan
About the Creator
M.L. Lewis
Welcome to my little slice of pie. This blog will primarily focus on prepping and homesteading skills with a sprinkle of fiction every now and then.
Keep reading
More stories from M.L. Lewis and writers in Lifehack and other communities.
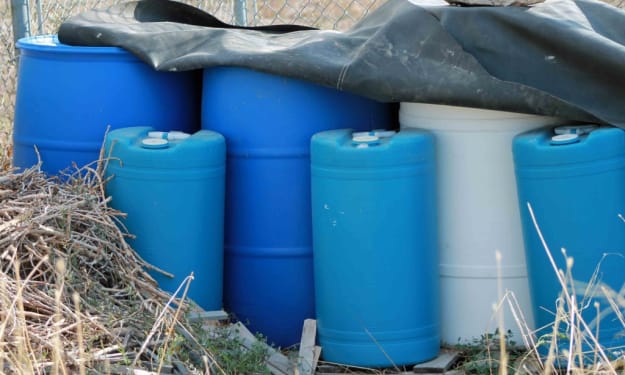
Protecting Your Water
Water is important to us. Without it, you’ll die of dehydration in three days. As mentioned in Prepping 101 (https://vocal.media/lifehack/prepping-101) I recommend you store two gallons of water per person per day. You can’t just put water on a shelf and forget about it. It needs to be taken care of like all your other preps, or you run the risk of getting sick. Here are some handy tips to keep your water in good shape and doomsday ready.
By M.L. Lewis2 years ago in Lifehack
10 EASY DIY SUMMER COCKTAILS
Here are 10 easy summer cocktails. It is party season and it is the summer time and if you are a cocktail enthusiast, you are probably the one that everyone goes to create the cocktails for your parties, so I thought I’d make it easier for you guys and give you guys 10 easy very refreshing crowd-pleasing cocktails to make for your friends and then you can be the hero of all your parties.
By Ngozi Otoechereabout 21 hours ago in Lifehack


Comments
There are no comments for this story
Be the first to respond and start the conversation.