
Clay Heart Craft For Kids
Clay Handbuilding Fun for All

A great project for anyone looking to burn some time and create lasting memories. I will teach you step-by-step how to create a super cute and festive Valentines Day hot plate out of clay. You don't have to be a master potter to create this beauty at home!
Supplies Needed
- Clay - There are a few different types of clay you can choose based on what usability you would like for this project. I advise if you don't own a kiln to choose either polymer clay or air dry clay for this project. Each has its own benefits for usability and can be purchased at a local craft supply store or online.
- Cardboard Template - Find yourself a piece of cardboard that can fit the size of project you would like to make. My Example piece is approximately 12 inches tall and 8 inches wide, but yours can be however large you choose.
- Drawing tool (Pencil or marker)
- Scissors
- Fork
- Water cup
Step 1
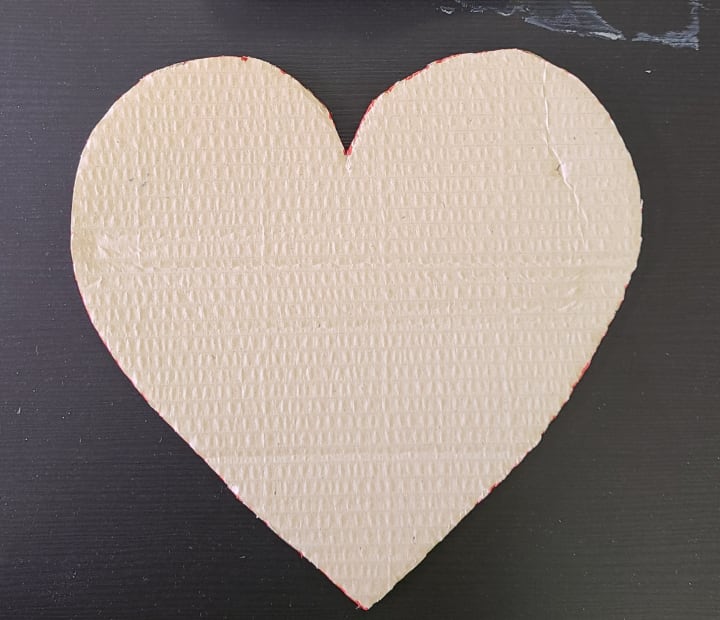
Draw the shape you would like your hotplate to be on your piece of cardboard. The size you draw will be the size of your finished piece. The example provided is a heart but feel free to explore your creativity and do whatever shape suits your taste.
Once the desired shape and size has been decided cut out your cardboard template.
Step 2
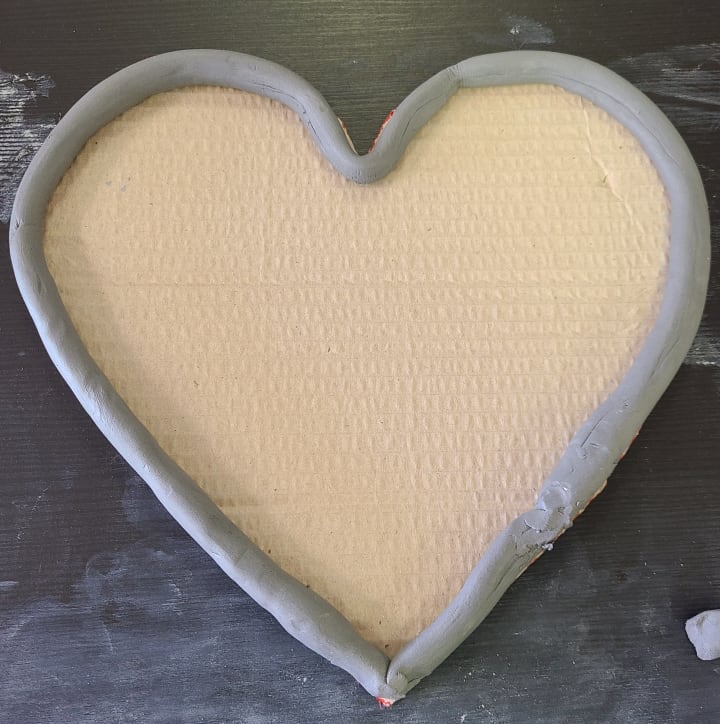
Remember when you were little playing with playdough, forever making "snakes"? Little did you know at the time that "Making snaky's" is actually a very popular method of hand building with clay, also known as the "coils method".
Your next step is to create a "coil" that is just slightly thicker than a pencil crayon and is long enough to fit around the perimeter of your template. Don't worry if the coil isn't quite long enough you can easily connect coils together by attaching them by the ends and smoothing out any seems.
Step 3
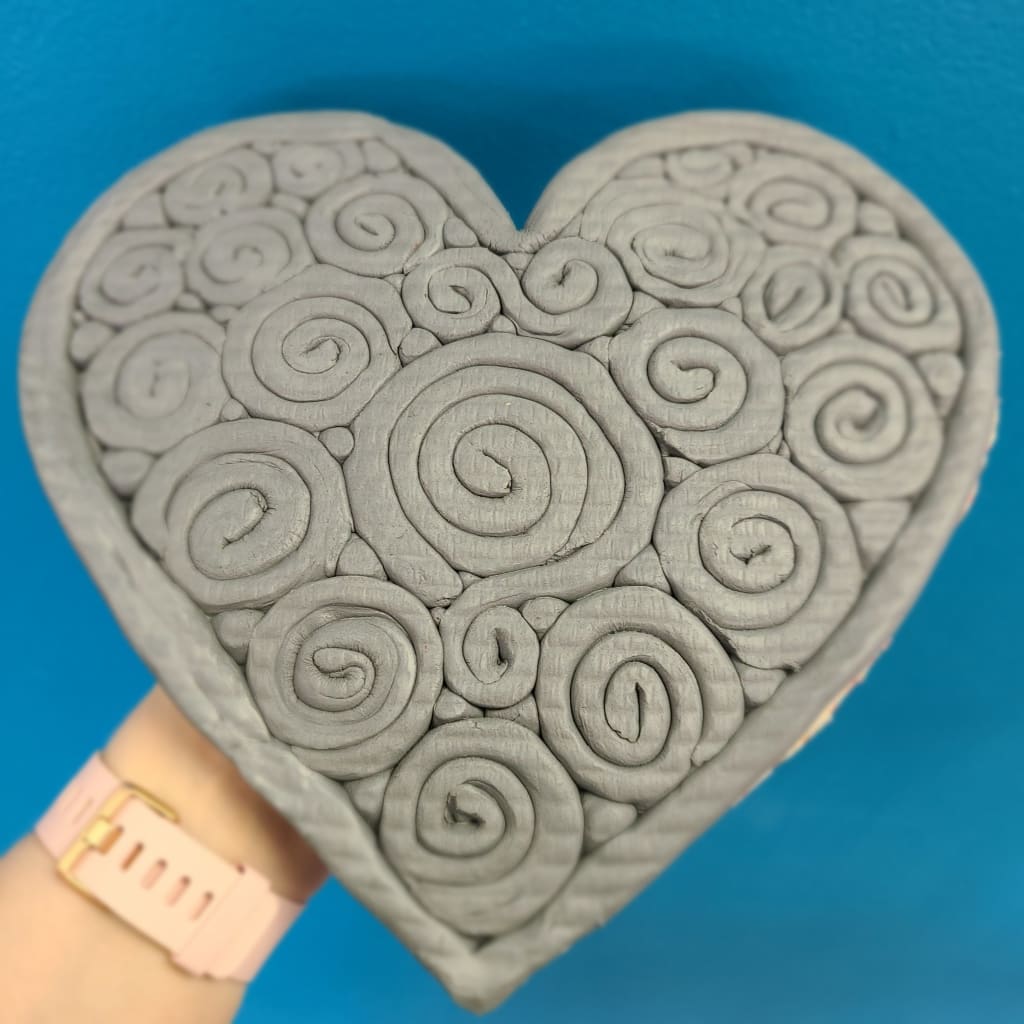
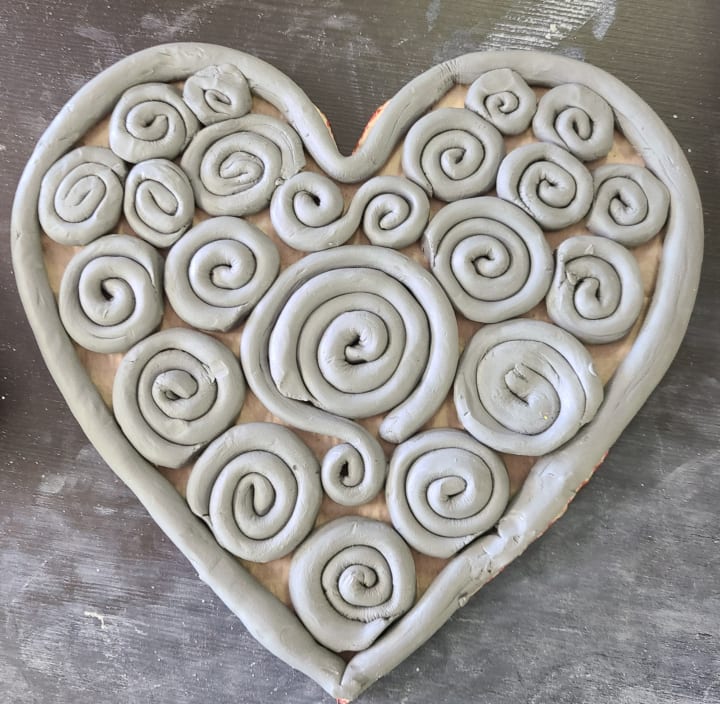
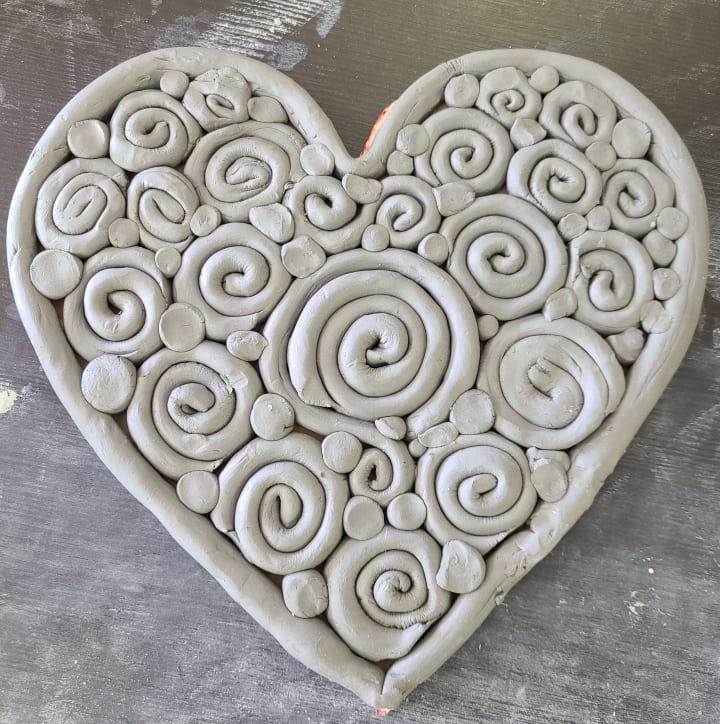
Nows the fun part, designing the inside of your project. Begin by rolling some more coils the same thickness as the one made for your border. Once rolled you're going to begin shaping them into snail shell like shapes. You can make these curls however big or small you like. Don't be shy with this part, these coils can move around each other however you want, creating wave patterns straight lines heart shapes, etc. Your main focus is to fill in the template as much as possible.
Note: The side you are working on is actually the bottom of your project. The side that is against the cardboard will actually be the top.
Step 4
Roll little balls and place them strategically to fill all the gaps between the coils. Once filled you should not be able to see any of your cardboard template poking through.
Step 4 & 5
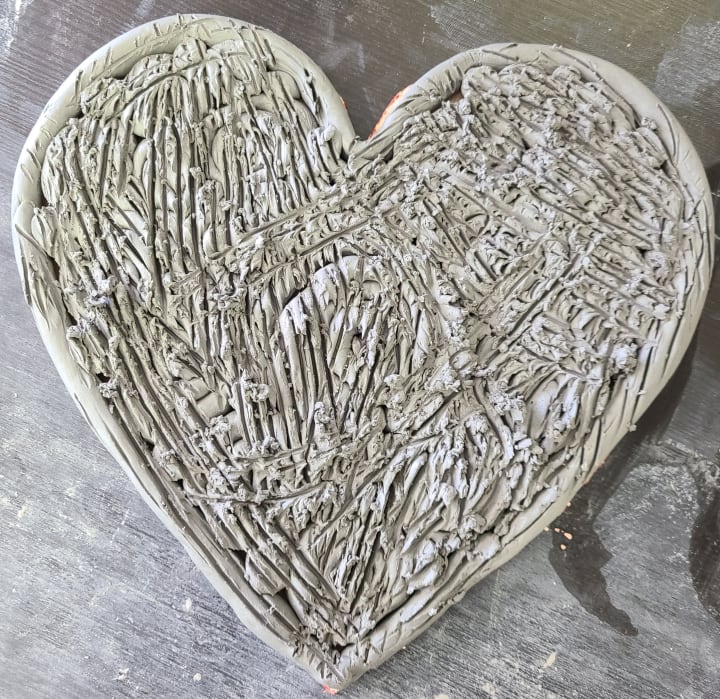
Scratch and Smooth. Using the fork scratch up the entirety of your clay project. Pay special mind not to go too deep with the fork, focusing on scratching up only the top layer.
Now that it's all scratched up it's time to smooth it out. Dip your fingers or a sponge into the cup of water and smooth out the surface until it is the consistency you like. These 2 steps combined will create strength within your project, therefore, making it less fragile.
Step 6
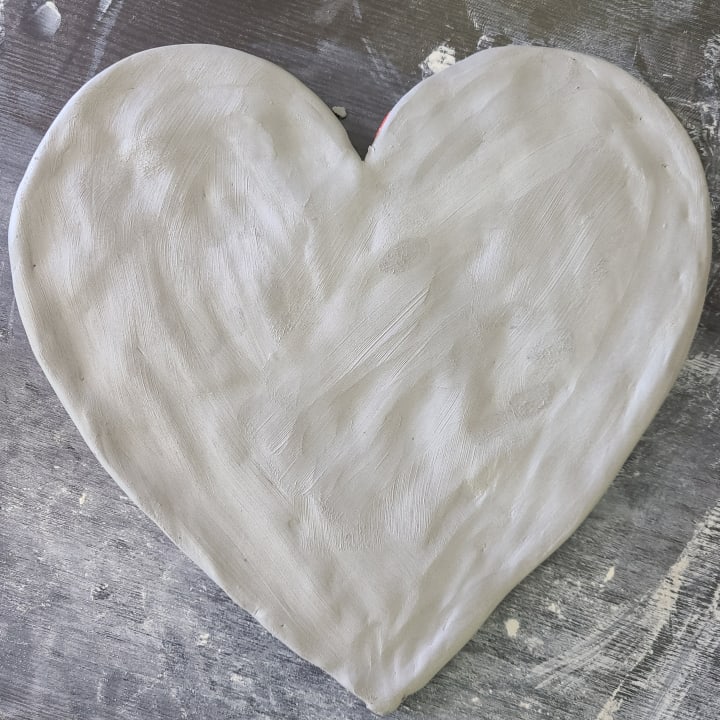
Place a magazine, book, or plate something heavy on your project while you let it dry. I would let the hot plate rest like this for at least 12-24 hours depending on the size and clay you used for this project. Once fully set remove the weighted object, flip over your piece and remove the template. Now you can see your beautiful craftsmanship in all is glory.
Make sure to follow the instructions on the clay you chose if it requires any additional cooking.
Tip: If the edges of your clay craft is a little rough, you can use a damp sponge along the edges for a cleaner finish.
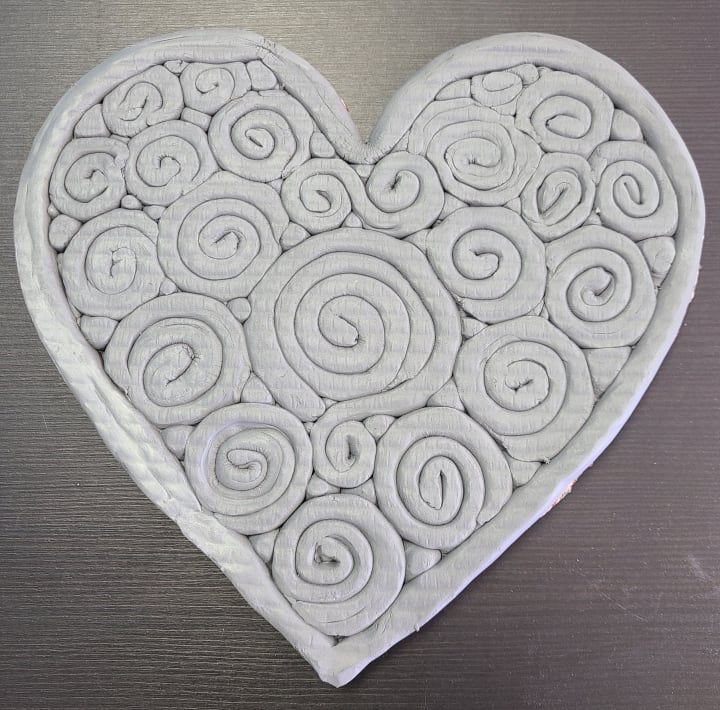
That's it, you are all finished hand-building a beautiful clay heart plate from scratch. Now all you have to do is paint it!
About the Creator
Keep reading
More stories from Victoria Cook and writers in Lifehack and other communities.
What is a Sous Vide? And How it Changed Cooking in Our Home
Let me start this article by informing you that I have no cooking experience and neither does my fiancé. In a modern Canadian society its not uncommon for people our age (mid 20's) to be helpless in the kitchen, when there are so many take-out options readily available to us. Not to mention one of our other challenges was time. Him being a general manager of franchise and myself owning a small business most the time we are two passing ships, rarely home at the same time, and when we are neither of us feels so inclined to volunteer hours of our day off to slaving in the kitchen, when there is so much else that needs doing around the house. We would try once and a while to cook up something special but most efforts were futile and ended with a call to our local pizza place or a frozen lasagna.
By Victoria Cook3 years ago in Feast
The Herb That Stumped Scientists
Introduction: Nestled in fields and meadows, often overlooked and underestimated, lies a humble yet mighty plant known as stinging nettle. Despite its prickly reputation, stinging nettle (scientifically known as Urtica dioica) boasts a wealth of health benefits and therapeutic properties. In this comprehensive guide, we'll delve into the myriad benefits of stinging nettle, its rich historical uses, and explore various ways to incorporate this potent plant into your daily wellness routine.
By Fahmi HARRATH3 days ago in Lifehack


Comments
There are no comments for this story
Be the first to respond and start the conversation.