
A Tale of a Broke Girl Who Could Only Afford to DIY
How I said "f*** you" to gender stereotypes and built a kitchen island by myself for under $250


A creative outlet has always been essential for my mental health.
Sewing, painting, playing piano, writing, making homemade gifts or cards - just anything and everything. I get so obsessed with learning how to create new things that some projects are way beyond reason, making most people respond with, "why? Just why?"
For example, during my 'curious cooking stage' of the pandemic– when I was making ravioli from scratch (even the dough) and bought a mortar and pestle to make homemade curry paste– I also learned how to make butter. Butter? I know, I know. But I was intrigued.
I texted my family group chat about my little butter learning experience and one of my sisters responded by saying, "why? You know you can buy that at the store for $4.00, right?"
I cheekily responded by saying, "Why? Because I'm unemployed and childless."
Disclosure: Your sister, a working (from home) mother of two children under 4 (with a locked-down daycare), will take offense and believe you are rubbing it in her face that you have free time to learn how to make something as boring and unnessisary as butter, while she doesn't have time to even think or have a nap. Sorry sis.
After that, I thought I would try something much more out of my comfort zone.
Woodworking
97.9% of carpenters are male in the United States. I never thought (even as a hobbyist), I would be one of the 2.8% of ladies with power tools– especially without cutting off a finger. I actively try to reprogram the stigmas I subconsciously have about gender roles or assuming physical labor is not as suitable for the female body– because that is bullshit. And after watching youtube vloggers like The Sorry Girls and Mia Maples, it really sparked my creativity and confidence to try doing some DIY projects at home using power tools and wood.
When the pandemic hit us hard, a benefit we had was seeing the housing market plummet. My boyfriend and I were able to move from a studio apartment in downtown Toronto to a two-bed/two-bath apartment for the same price. And when we decided to move, it was the perfect time to make some projects to make our new apartment feel more personalized and custom-made.
The new space was like a puzzle, finding the perfect pieces to optimize every inch of our new place.
After signing the lease and picturing our setup, we realized the kitchen in the new place had a lot less counter space but had a large open concept with room for an island. I started shopping around and found that the cheapest island was found at IKEA for $650 dollars with minimal storage. And a decent-sized one with great storage was often over $1000. That just was too much money for an apartment in our early twenties, so I decided to do my Pinterest and Youtube searching to find some DIY solutions.
After browsing for a while, and drinking too much wine, I found a great idea of converting a dresser into a custom-made kitchen island. And then the project began.
Disclosure: I already owned quite a few power tools and other hardware supplies (paintbrushes, screws, etc.) from other projects I did during quarantine. I didn't factor the prices of those item into the final price. If you are making this without having access to some tools it will be quite a bit more expensive.
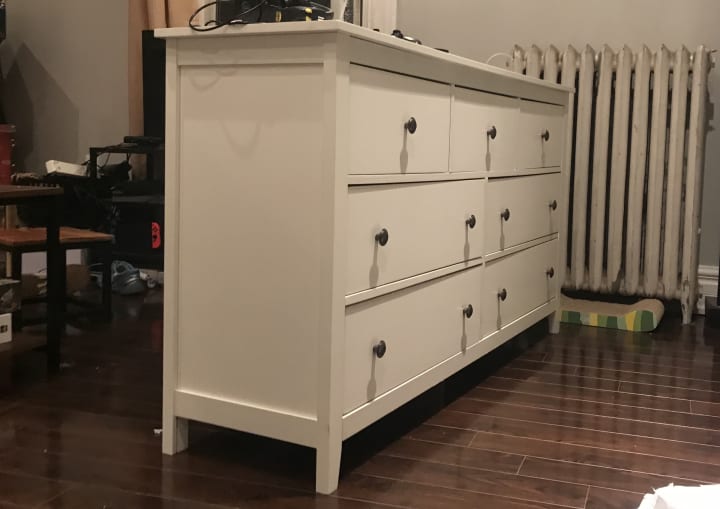
Step One: Find a Dresser or Desk
Supplies I Needed: A measuring tape, a person to help move a dresser (thanks boyfriend), and access to a vehicle.
How I did it: I chose to look for used dressers on Facebook Marketplace. I was really trying to keep the cost to a minimum. (Hence the broke girl titular status.) I found a beautiful white dresser in great shape that was the perfect measurement for my design and space.
Time it took: It took two days of online searching before finding a dresser of good quality and low price.
Cost me: $40 Used Dresser. Two days of obsessively refreshing the Facebook Marketplace browser.
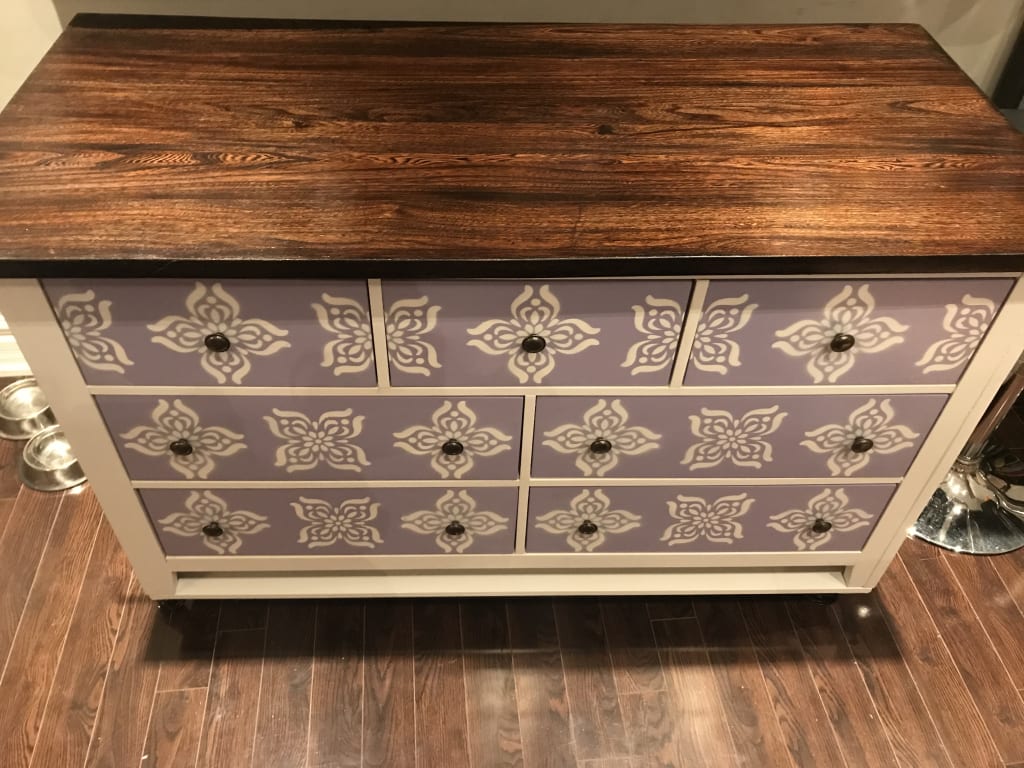
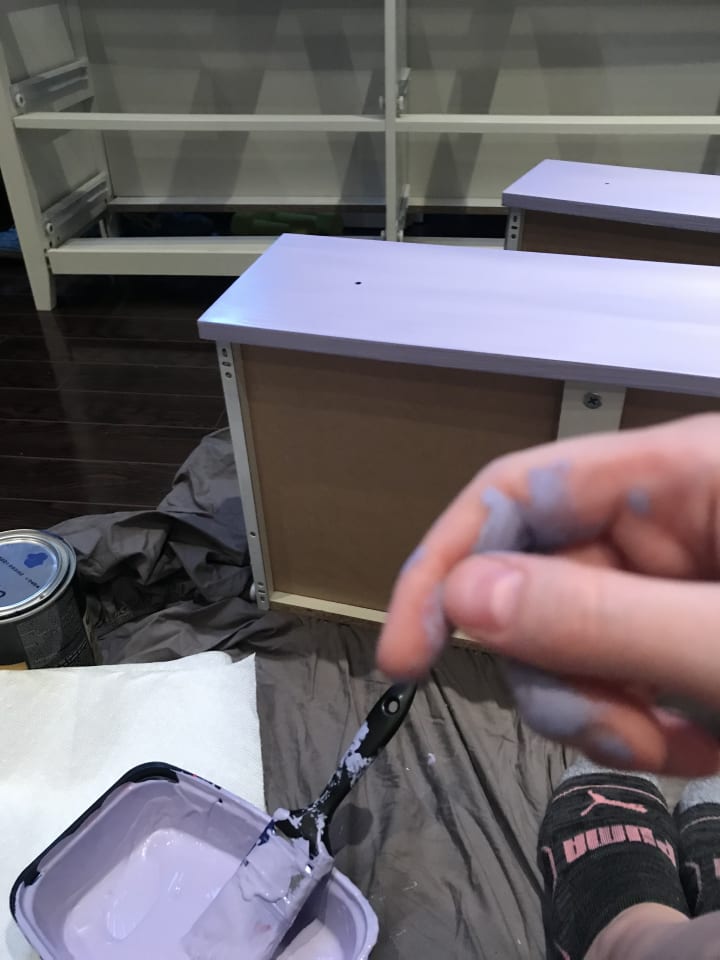
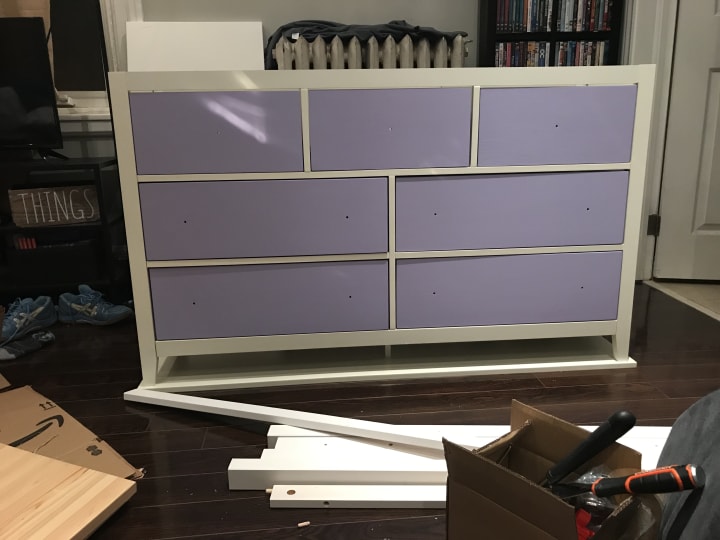
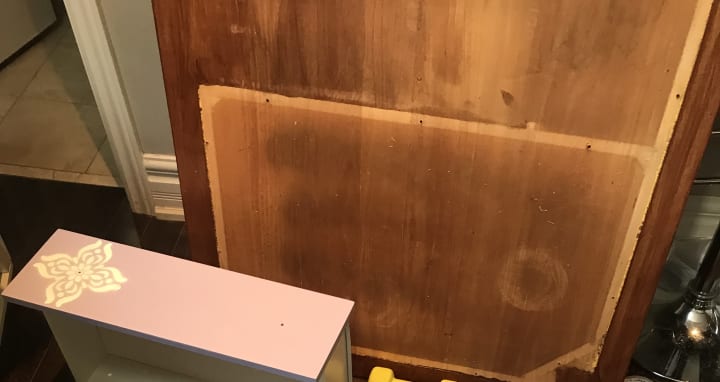
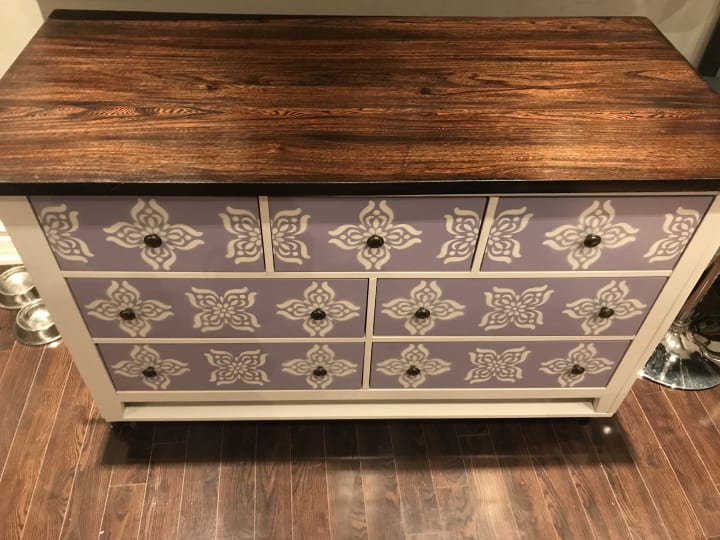
Step Two: Paint the Dresser How You'd Like
Supplies I Needed: paint, stencils, paint brushes, spray paint, scissors, paper, an old sheet to paint on
How I did it: I got paint off of Facebook Marketplace. I knew I wouldn't need a lot and buying a quart of fresh paint is around 40-60 dollars at a hardware store. I ended up getting two half-used cans of blue and red paint from a woman who had leftovers from painting her toddler's bedroom. I mixed them together and made a nice purple color to paint the drawers with. I unscrewed the dresser nobs and painted away. After the three coats of the solid color dried, I cut up a stencil sheet to the exact design I wanted and covered the rest of the purple with cut-up paper so it wouldn't get any spray residue. Then I spray-painted the stenciled design white to make it more me.
Time it Took: Around five hours altogether with lots of waiting in between coats.
Cost me: $10 stencil from Michaels. $8 white spray paint. $10 two half-used containers of wall paint from Marketplace.
Disclosure: This wasn't a great project in winter because I couldn't paint outside. I had to essentially make a sheet tent so the after spray wouldn't get on my couch. But you gotta do what you gotta do.

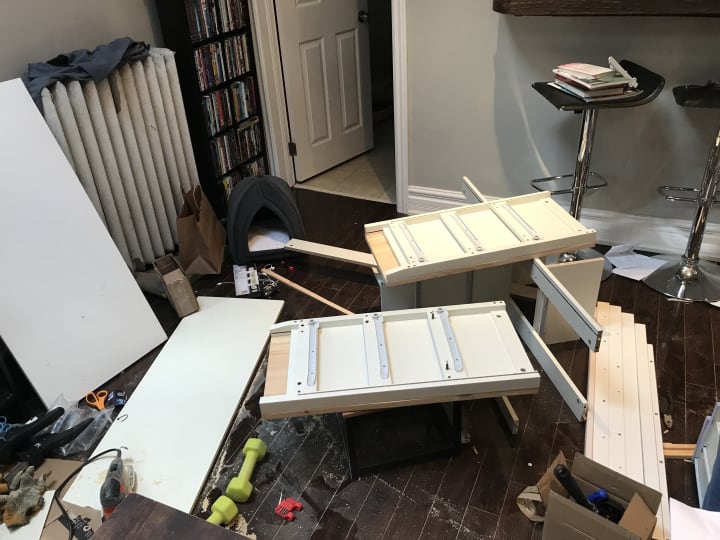
Step Three: Make the Base Sturdy
Supplies I Needed: Gorilla Glue. Drill bits. Screws. Drill. Screwdriver. Clamps. Woodcutting scissors (miter sheers). Thin wooden dowels to cut.
How I did it: When you are making something that you will store a lot of things in, as well as use every day, you want to make sure it is strong. This dresser originally didn't have many screws in it but was pieces together using small wooden dowels. I took the entire thing apart and pieced it back together (excluding the dresser top, since I would put a countertop over it) using gorilla glue and multiple screws to make it invincible. Because it was wood I predrilled holes with my bit so it wouldn't split the dresser when I screwed it together. I also made twice as many dowel holes with my drill bit and cut a long thin wood dowel to the sizes I wanted. I used wood scissors (miter shears) to cut the dowels to the size I wanted. This tool is much easier than trying to saw down something so dense and so small. Plus using wood scissors is very satisfying and quicker. Then after assembling with the glue, dowels, and screws in place, I put the clamps on tightly and let that baby dry overnight so the glue would be fully cured.
Time it Took: Half an hour to make drill bit holes. One hour to take apart. Two hours to glue, install the dowels, put back together, and screw into place. Overnight to dry.
Cost me: $6 Gorilla Glue. (I already had most of the supplies.)

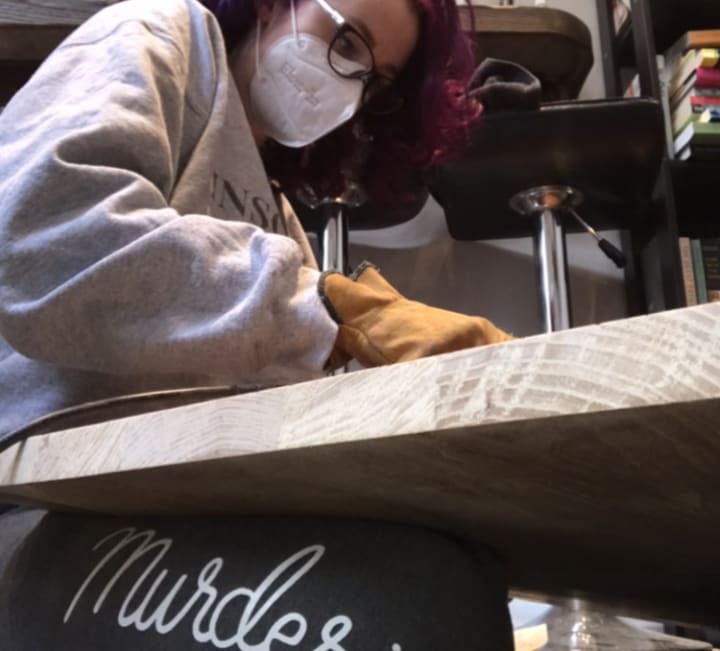
Step Four: The Countertop
Supplies I Needed: Measuring Tape. Old wood table from Facebook Marketplace. Electric saw. Eye protection. Mask (but I assume you have one– ammirite?). Sander. Wood conditioner. Wood Stain. Paintbrush. Food-safe wood finish. (I used polyurethane.) Screwdriver.
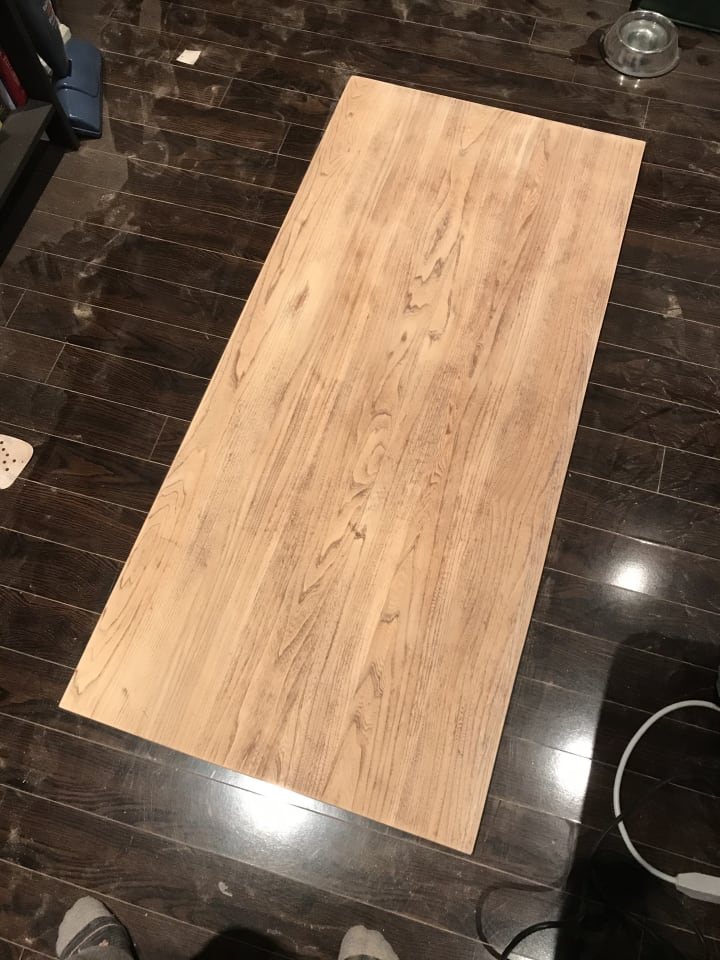
How I did it: After looking at countertops from Home Depot and RONA, I kept running into the same problems. 1. Too expensive. 2. Not the right size. But after a nice sand, stain, and finish, I could make any solid piece of healthy wood look brand new. So I decided to buy an old solid wood kitchen table off of Facebook Marketplace and cut it to the exact size I wanted. I started by taking off the legs of the table and then measuring the exact dimension on my wood. Then I cut the wood into the size I wanted using my electric saw. I sanded all the edges and the entire surface until the previous wood stain was sanded off. I chose to make the size a foot and a half longer than the width of the dresser so I could have an overhand to put stools under. After sanding the wood to its original state, I then conditioned the wood (very important for an even stain) and then stained the wood twice until I got to the color I wanted. I let it try overnight to be sure the stain was set and then the next day I applied three coats of polyurethane and let it cure for 48 hours just to be safe. Polyurethane is a protective finish that keeps the wood waterproof, food-safe, and scratch and stain resistant.
Also to note, at the time I didn't have access to a vehicle and the marketplace seller's house was a 15 minute walk away from where my boyfriend and I was living. So my boyfriend and I got ambitious and said, "we can walk that far... easy!" So we carried a large, solid wood, VERY HEAVY, dining room table down Younge Street in Toronto in the snow. Needless to say, we both agreed next time to pay for an Uber XL. Oh, the things you do to save money.
Time it Took: Three days to find a good quality wood table on Marketplace. One day to cut, sand, condition, and stain. Another day to finish. A few days to cure.
Cost me: One boyfriend (just kidding.) $25 old solid wood dining room table. $15 sanding sheets for my sander. $12 wood conditioner. $12 wood stain. $15 polyurethane finish.
I'm going to shout out an apology to my downstairs neighbors for listening to the sander for an hour. Thanks for not giving me shit.
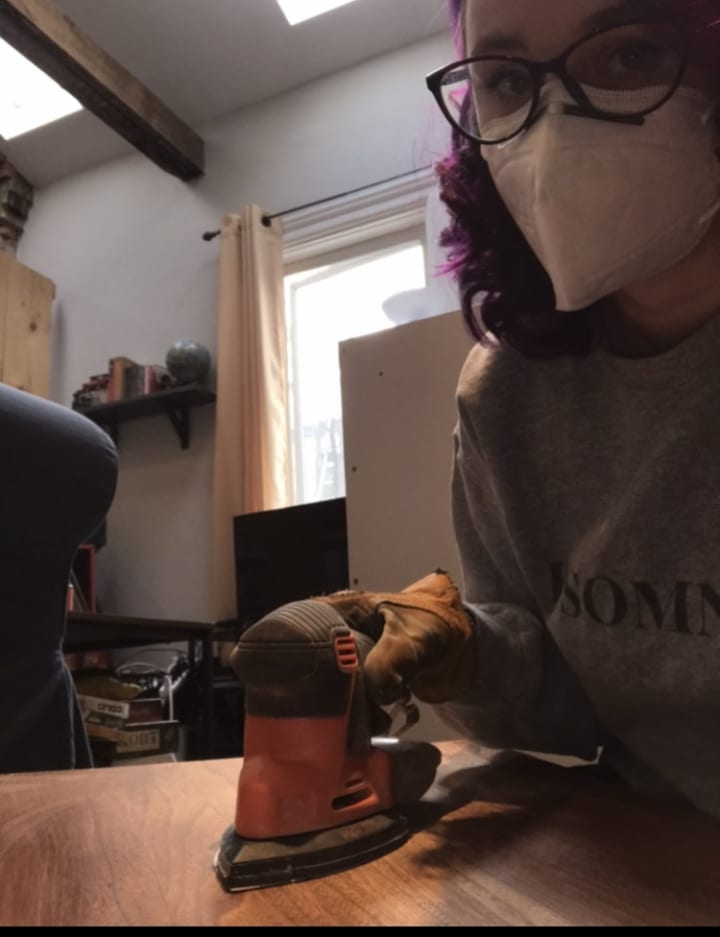
Disclosure: Sanding off a stain takes a really long time and lots of different grits of sandpaper. Be patient and keep going until you get to the clear, light state of the natural wood.
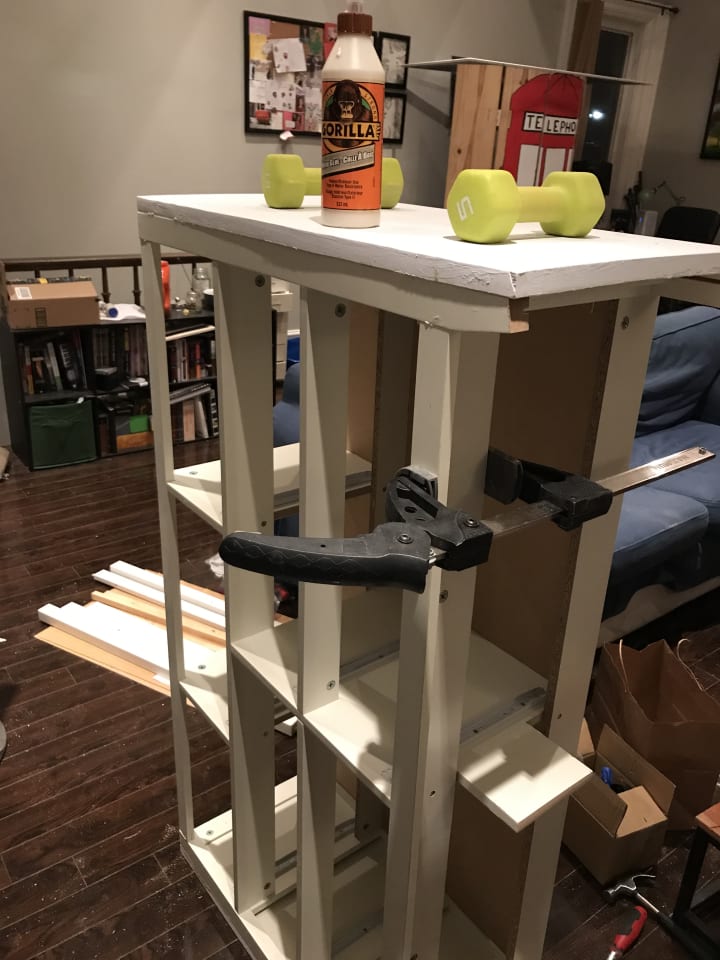
Step Five: Put a Paint Finish on the Island Base. Attach the Countertop to the Base.
Supplies I Needed: Paint finish (I used polyacrylic.) Paintbrush. Gorilla glue. Weights of some sort (since my clamps aren't big enough). Sandpaper.
How I did it: Before I attached the countertop, I gave the base a few coats of a protective finish. I don't want the paint chipping or to get scuff marks easily. I applied with a paintbrush, let dry for the amount on the label, and sanded between coats. Sanding is a very important step to ensure your finish is even and doesn't leave a bumpy texture from air bubbles. I used a very fine grit of 320, although most recommend 240. Do not use an electric sander, gently rub by hand and wipe off the access dust of the finish so it is a clean surface before the next coat. I glued the top of the dresser and laid the stained countertop in place after we moved into the new place to make the move easier. After gluing, I put my workout weights (a very impressive 5 pounds.... plus a whole bunch of books) on top of the countertop to weigh down the top to create a tight seal and let it dry overnight.
Time it Took: One day to apply the paint finish and glue the top. One night to dry.
Cost me: $14 polyacrylic finish.
Step Six: Accessorize and Make it Your Own
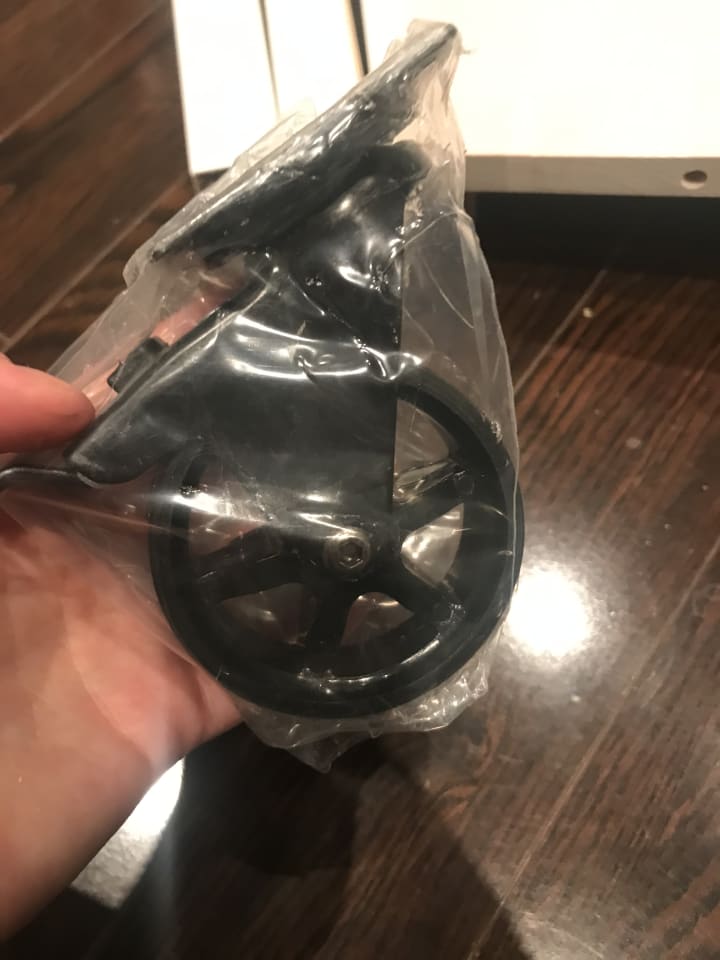
Supplies I Needed: Wheels. Hooks. Paper towel dispenser. Screwdriver. Drill bit. Drill. Measuring Tape. Metal shelf brackets.
How I did it: I wanted the island to be mobile. I wanted to make it easy to move (because it's solid wood and incredibly heavy) and I wanted the wheels to have stops so it wouldn't roll away. I ended up waiting for a sale at my local hardware store and used a coupon to get a really nice set of four industrial wheels with stops that could hold up to 300 pounds. I attached them to the bottom after drilling holes with my drill bit first to make sure there isn't any splitting. After that, I put metal shelf brackets underneath the overhang to have extra support for the counter. I found some on Amazon that I loved but were too expensive. I started scouring Marketplace and I happened to MIRACULOUSLY find the same pair for half the price. (Has anyone else ever had that? It's amazing! I've done it a few times with IKEA furniture as well.) The seller ordered them on amazon and found they were too big and resold them for a much lower price. I was beyond thrilled. Then I attached a paper towel dispenser on the side and hooks on the sides to hang pots and our bag of reusable grocery bags.
Time it Took: An hour to install everything.
Cost me: $25 wheels. (Which was a HUGE steal.) $15 for a 6 pack of simple black hooks. $15 for a black paper towel dispenser. $10 for shelf brackets.
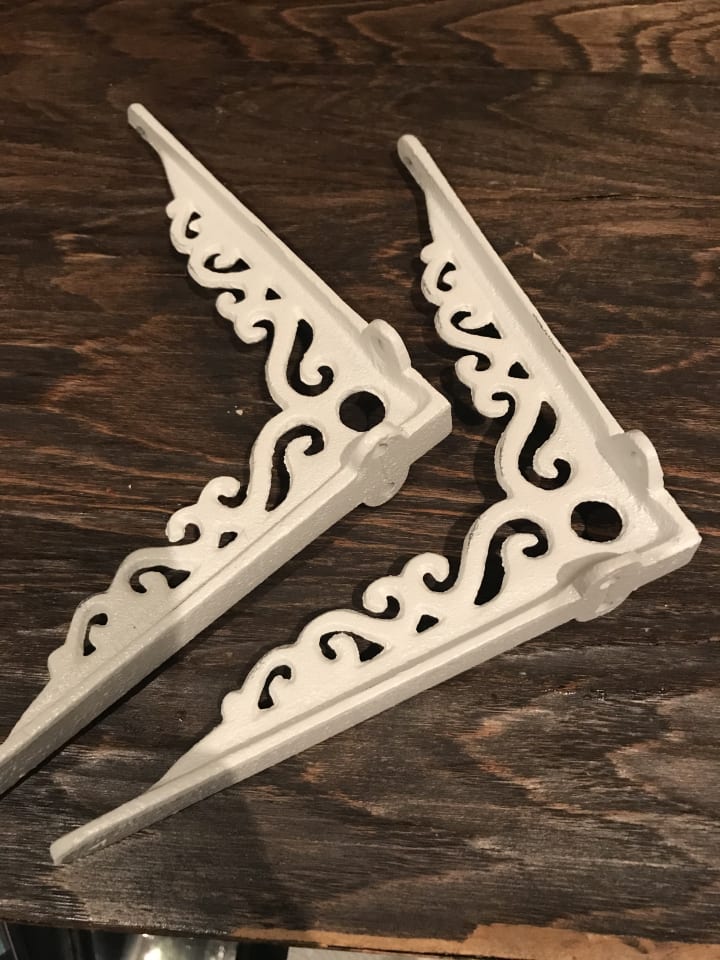
Still can't believe I found those brackets unused and second hand. What a broke girl's dream.
Step Seven: Admire the Final Product and Pray the Movers are Gentle with Your Creation
Now my favorite part– the video tour– featuring my boyfriend, who patiently worked from home (in our previous studio apartment) while graciously letting me use LOUD power tools for weeks while I made this project. And he never complained once. Thanks, I like-like you.
Total cost: Around $232 dollars before tax, two weeks of my time, and five audiobooks to listen to.
I grew up with three sisters. Five girls and my dad. We were never taught that we couldn't do something a man could. Mom would tell us that we could do anything that we set our minds to, and our dad would celebrate each accomplishment we made.
But just because I didn't learn it at home, doesn't mean I didn't learn it from everywhere else. I grew up in a conservative, small-town and the age of social media and television make us believe messages sometimes we don't even know we are consuming. I didn't think I couldn't build something with wood, but I assumed I wouldn't be as capable as a man.
Which is just a load of lies.
My boyfriend worked long days at home while I made these projects all by myself. It was empowering, satisfying, and looking at the work I did, I am really proud of it. We saved hundreds and hundreds of dollars and I got to fill two weeks of unemployed boredom with creativity. Plus, now we have an incredibly personal and special piece of furniture that fits our space perfectly and is tailored to our storage needs.
Plus, I am obsessed with it.
Looking back a few years I would have never guessed I would have gotten into working with wood, but now I find myself doing a project every few weeks. The next one is a giant cat tree for my two kittens.
And here are a few other projects I've done to fill my quarantine days with creative fun.
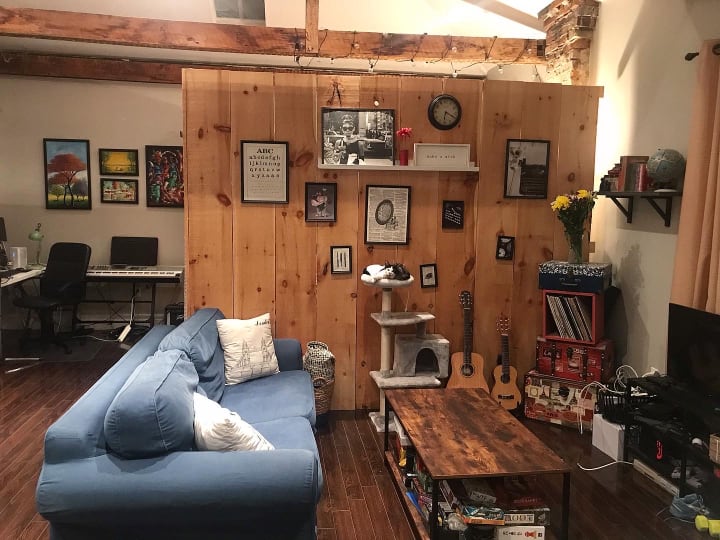
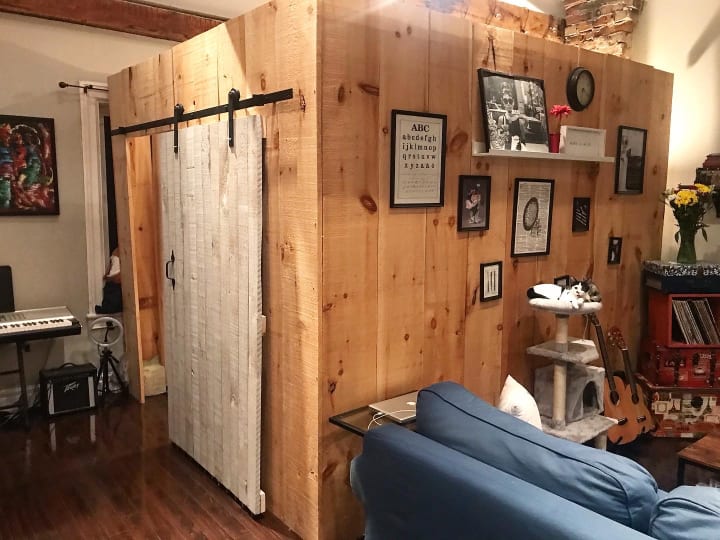
When we lived in our studio loft, I made us a wall with a sliding barn door so we could have a bedroom.
In our new place, we finally decided to purchase a good bed frame with storage underneath. We didn't realize we wouldn't be able to open the drawers with our side tables, so I made some floating nightstands for us.
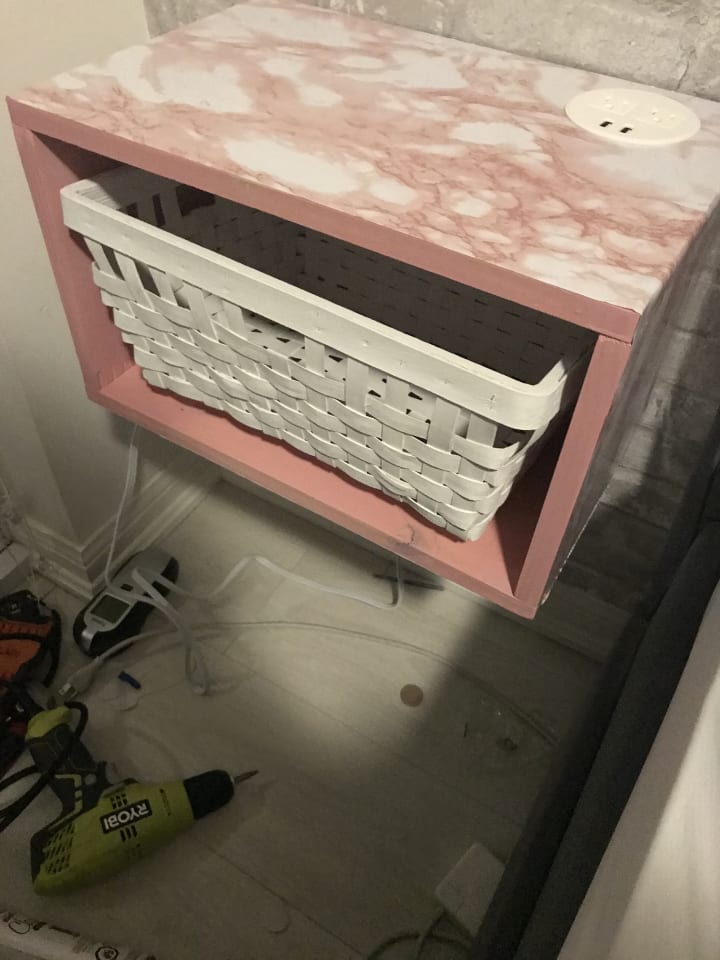
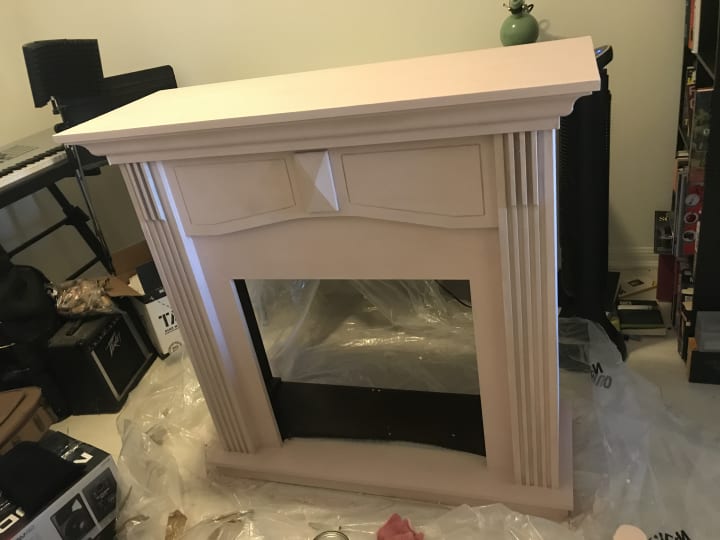
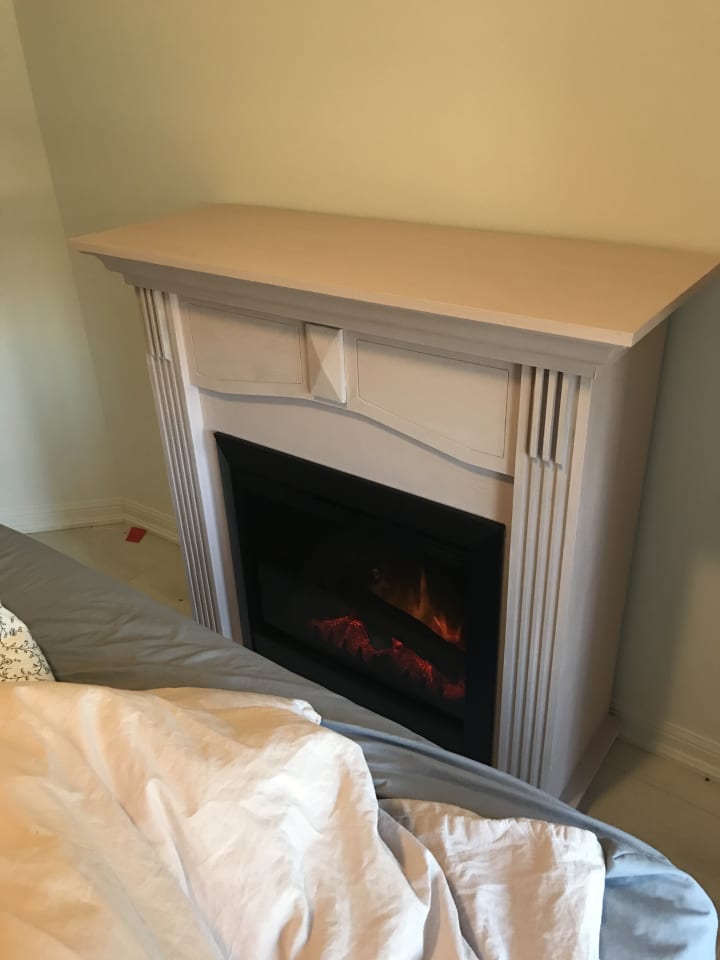
I bought a really nice electric fireplace on Facebook Marketplace for waaaaayyyyy cheaper than it should have been. I painted it pink with chalk paint and put a wax finish on it so it would match a pink blanket we have on our bed. It really completes the room. Plus, pink fireplace? Can't go wrong.
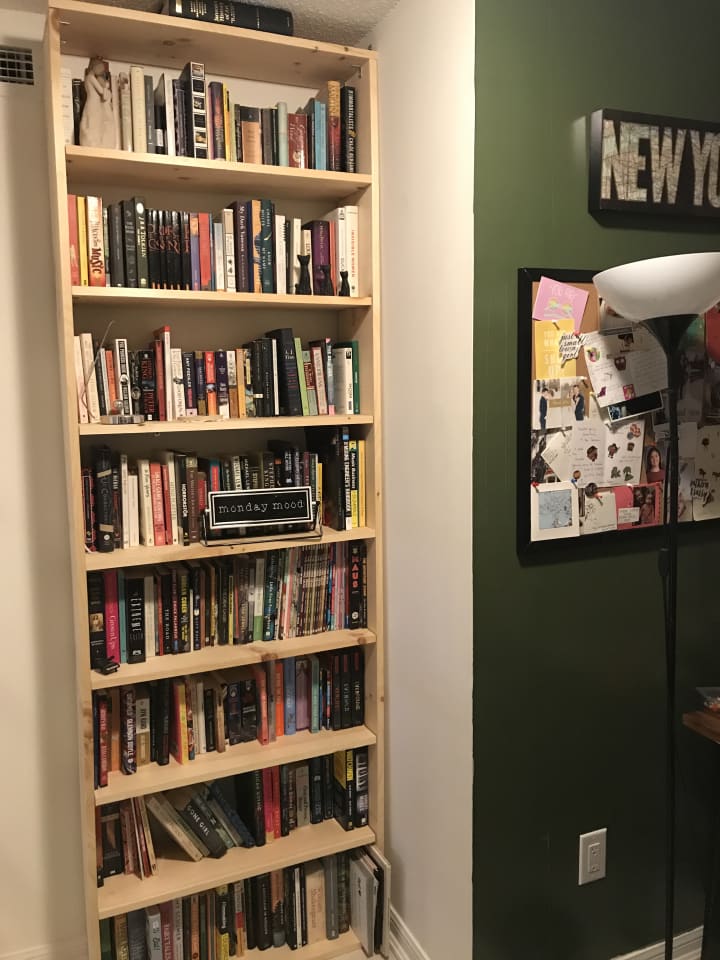
For the new apartment, we had an awkward corner that I wanted a floor-to-ceiling bookcase. To buy that tall of a bookcase is usually over $200 dollars minimum. So I made this one under 100. In the summer I am going to stain the wood on my balcony.
I really never thought I would be able to feel so able to pick up a power tool and plan a project to make out of scratch. Making my own measurements and drawings of the project I am imagining is now a semi-regular part of my life. I am now someone who BROWSES HARDWARE STORE WEBSITES FOR CRYING OUT LOUD!!!
It has only been a year since my first woodworking project, but in that time I have learned so much and gotten better for every project I've done. It is so satisfying that I don't need to search the web to find something to fit my space when I can just make something that is designed for my space.
And I don't need a man's help to do it.
(Except when my boyfriend helps me carry the wood from the hardware store to the car.)
Be that 2.8%
And if you want to have a closet filled with half shoes and half power tools.... no one can stop you!
About the Creator
Flora
𝒯𝑜𝓇𝑜𝓃𝓉𝑜-𝒷𝒶𝓈𝑒𝒹 W𝓇𝒾𝓉𝑒𝓇
𝕗𝕚𝕔𝕥𝕚𝕠𝕟, 𝕡𝕠𝕖𝕥𝕣𝕪, 𝕒𝕟𝕕 𝕙𝕦𝕞𝕠𝕦𝕣
@ꜰʟᴏʀᴀꜱ.ᴀᴜʀᴀ
What Are Ovarian Cysts Signal? Understanding Their Implications
Ovarian cysts are a common occurrence among women, often presenting without any noticeable symptoms. While most cysts are benign and resolve on their own, some may signal underlying health issues that require attention. Understanding the signals and implications of ovarian cysts is crucial for timely diagnosis and appropriate management.
By iDigitize Infotech LLP7 days ago in Lifehack
Composing the Soundtracks of Our Life
Lionel Fabert is an award-winning composer known for bringing movie trailer soundtracks to vibrant life. Fabert has always loved music, beginning when he picked up the guitar at 9 years old. This love of music inspired Fabert to quit a great-paying job in corporate Paris and strike out as a freelance music composer and sound designer.
By Susan Scava2 days ago in Lifehack
Blossom
A dead past does not put a halt to a new future. A year later, Kaffy, a highly intelligent, creative, bookish, and preppy Nigerian-Canadian 15-year-old girl was released from juvenile prison. She was arrested and charged with petty theft and assault, and was sentenced to a year in prison. Her sentence was supposed to be 6 months for stealing a lollipop, a chocolate bar, a pack of playing cards, and a bag of Cheeto's cheesies from 7-Eleven, but she received another 6 months for kicking, punching, and hitting another female inmate across the face during an altercation in the canteen.
By Talia Devora7 days ago in Fiction


Comments (1)
Great work on this. I agree, creativity is an outlet for my mental health as well, including writing. Thank you for your authentic share, and for the step by step on how you put this kitchen island together. I know that this is off-topic, yet I like your cat in the photos. All the best.