
Step by Step Guide to Install a WordPress Theme 2022
Proving detailed step-by-step instructions on how to install a WordPress theme for beginners.


Install a WordPress Theme
Are you looking to install a WordPress theme? As a beginner, you probably have heard about tons of available free and paid WordPress themes. As you’re starting, you may want to try out a few themes on your site until you find the right one that meets your needs.
In this beginner’s guide, we will provide you with detailed step-by-step instructions on how to install a WordPress theme for beginners. We will cover three different ways to install a WordPress theme.
Before You Install a WordPress Theme
Installing a WordPress theme is easy. But keep in mind that if you activate a new theme, then it will change how your website looks and functions. If you’re switching from an existing theme, then you may want to look at our checklist of things you need to do before changing WordPress themes.
Install a Theme using WordPress Admin Theme Search
If you’re looking to install a free WordPress theme from the WordPress.org themes directory, then the easiest way is by using the WordPress admin theme search functionality. The first thing you need to do is log in to your WordPress admin area. Next, click on Appearance » Themes.
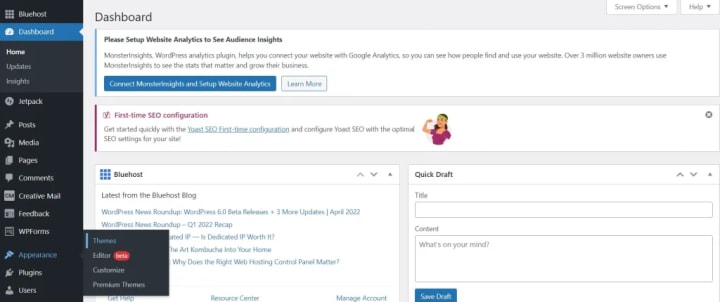
Once you are on the themes page, click on the Add New button at the top.

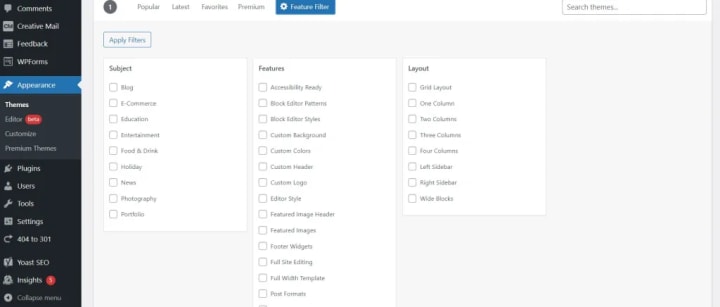
On the next screen, you will have the ability to select from: Featured WordPress themes, popular WordPress themes, and latest WordPress themes, or search for a specific theme, or search for themes with specific features.
Based on your search, you will see a single theme or a list of themes that met your criteria. In our case, we searched for the blogging theme Twenty-Twenty Two theme.
Advertisement When you see the theme that you want to install, simply bring your mouse on top of the image. This will reveal the install button, preview button, and details button. Go ahead and click on the install button.
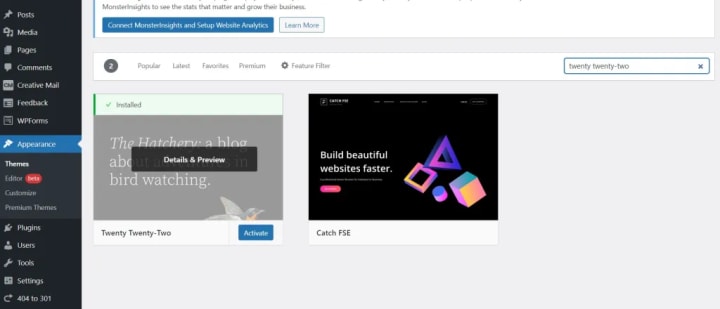
WordPress will now install your theme and show you a success message along with the link to activate or live preview.
Click on the activate button, and you’ve successfully installed and activated your WordPress theme.
Note: Depending on the theme, it may add additional settings options that you may need to configure either through the theme customizer or through a separate options panel.
Install a Theme by using the Upload Method from WordPress Admin
The first method that we covered only allows you to install free themes that are available in the WordPress.org theme directory. But what if you want to install a commercial “premium” WordPress theme from companies like Divi, StudioPress, iThemes, etc.
Or what if you want to install a custom theme? Well, in this case, you would need to install the theme using the upload method from your WordPress admin.
Start by downloading the .zip file of the theme that you purchased from a marketplace or a commercial theme provider. Next login to your WordPress admin area and click on Appearance » Themes.

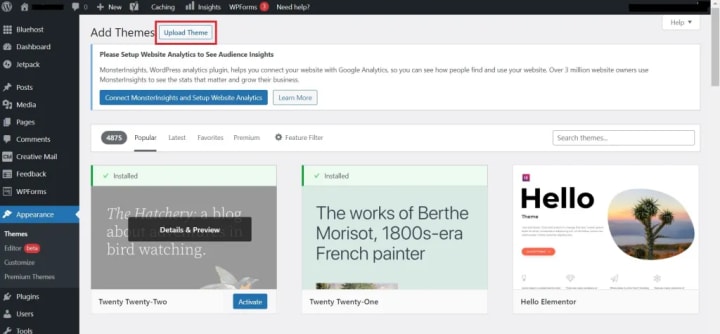
Once you are on the themes page, click on the Add New button at the top.

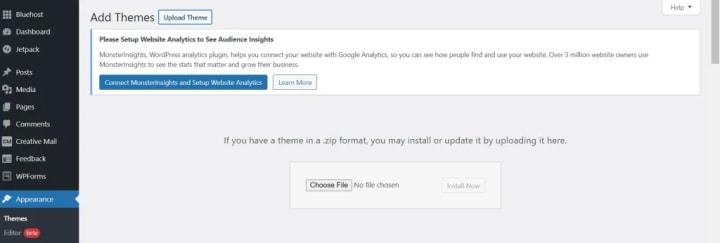
On the next screen, click on the Upload Theme button at the top.
You will be prompted to choose the zip file that you downloaded earlier. Select the file and click Install Now.
Once your theme is installed, you will see a success message along with the link to activate and preview the theme.
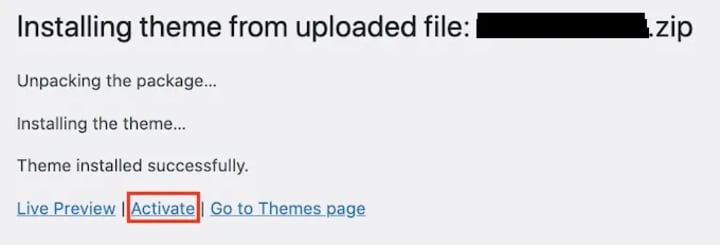
Click on the activate button, and you’ve successfully installed and activated your WordPress theme. Depending on the theme, it may add additional settings options that you may need to configure either through the theme customizer or through a separate options panel.
Note: The theme upload functionality is only available for self-hosted WordPress.org users. If you’re using WordPress.com, then you will not see this option because it limits you. To use the custom theme upload feature, you would need to use self-hosted WordPress.org (See this article that explains the difference between Self Hosted WordPress.org vs WordPress.com).
Installing a WordPress Theme using FTP
If you’re feeling adventurous and want to take it to the next level, then you can learn about installing WordPress themes using FTP. Remember, this is not for true beginners because it is a little bit more advanced.
Now that you have read the article above and installed and setup your FTP program, connect to your host using FTP. You would need to go to the path (/wp-content/themes/). Once you’re there, simply upload your theme’s folder there.
Remember you must unzip the folders before you upload a theme using FTP. Once you have uploaded the theme, you would need to go to your admin area and click on Appearance » Themes.
You should see the theme that you uploaded listed there. Bring your mouse on top of that theme and click on the activate button. We hope this step-by-step guide helped you install a WordPress theme on your site. This article was created using the screenshots of version WordPress 5.9. Since WordPress is constantly evolving, we will try our best to keep this guide up to date. If you notice that something is missing, then feel free to let us know.
About the Creator
WPWhiteBoard
We are designers and developers who used to spend way too much time explaining things to each other. That’s why we made WPWhiteBoard — to familiarize ourselves and you with the WordPress Ecosystem.
Keep reading
More stories from WPWhiteBoard and writers in Journal and other communities.
A Complete Tutorial For An Effortless Migration From EML to Gmail
Are you attempting an easy import of your EML messages into your Gmail account? If you follow this method, you can transfer EML files to Gmail with ease. Learn why it's so important to convert your EML emails to Google Workspace and the advantages of using Gmail for email management.
By Kim Teahyung6 days ago in Journal
Faedaze
Daisy leaned back against the wall of the window bench, the dress she was embroidering on falling to her lap, all but forgotten. Her gaze rested on the trees just beyond the edge of her garden, watching with dreamlike expression on her face, waiting for something others doubted would ever come.
By Kelsey Clarey4 days ago in Fiction


Comments
There are no comments for this story
Be the first to respond and start the conversation.