
Replacing Stock Footage With Your Own Clips in an AI Video: A Practical Guide
AI Videos

Introduction
Stock footage has become a convenient resource for people creating videos for websites, social media, marketing campaigns, online courses, and business presentations. Instead of recording every scene, creators can browse libraries of ready-made clips and add suitable visuals to their projects. While this approach saves time, it does not always produce videos that feel personal, authentic, or closely connected to the intended message.
As AI video creation tools become more accessible, creators have more opportunities to combine automated production with their own recorded footage. Rather than relying entirely on generic stock visuals, they can use personal recordings, product demonstrations, workplace scenes, customer experiences, and behind-the-scenes clips to make videos more relevant.
Replacing stock footage with original clips does not require a complicated production setup. A smartphone, a clear script, basic lighting, and a suitable editing workflow can provide everything needed to get started. AI tools can then help organize the content, generate supporting visuals, and turn written ideas into a structured video.
This guide explores how to replace stock footage with personal clips in an AI-generated video, including preparation, recording, editing, and practical techniques for achieving a consistent final result.
Why Consider Replacing Stock Footage?
Stock footage is useful when creators need quick access to general visuals. However, using the same types of clips found across multiple websites and social media accounts can make videos feel repetitive.
For example, a business explaining its customer support process might use a generic clip of someone wearing a headset. Although the footage communicates the general idea, it does not show the actual people, environment, or procedures used by that business.
Recording original footage offers several advantages.
Greater Authenticity
Personal footage provides a direct connection between the video and its subject. A restaurant can show its actual kitchen, a small business can introduce its employees, and an online store can demonstrate its products using real recordings.
These details help viewers understand that the content represents an actual business, experience, or process.
More Relevant Visuals
Stock libraries cannot always provide footage that matches a specific product, location, activity, or audience. Original recordings allow creators to capture exactly what they need.
For instance, someone producing a tutorial about assembling a particular piece of equipment can record each step instead of searching for generic workshop footage.
Consistent Brand Identity
Businesses often have recognizable environments, products, employees, colors, and working practices. Including these elements in videos helps maintain a consistent visual identity across different marketing channels.
More Creative Control
When using personal recordings, creators can decide how scenes are framed, what appears in the background, and which details deserve attention. This makes it easier to align visuals with the intended message.
Planning Your Video Before Recording
Before replacing stock footage, it is important to understand what the video needs to communicate. Recording random clips without a plan can create unnecessary editing work and result in a video that lacks direction.
Start by reviewing the script and identifying the visual purpose of each section.
For example, consider a short promotional video introducing a handmade product. Its script might contain the following sections:
An introduction to the product.
An explanation of the materials used.
A demonstration of how the product is made.
A close-up showing important features.
A final scene explaining where customers can find it.
Each section requires different visuals. The introduction might need a wide shot of the product, while the manufacturing section could include close-ups of individual production steps.
Creating a simple scene list before recording helps ensure that the necessary footage is available during editing.
Match Every Clip to a Specific Message
Every video clip should have a purpose. A recording that looks attractive but does not support the narration can distract viewers.
Read the script and ask what viewers should see while listening to each sentence. If the narration discusses product quality, show relevant materials, construction details, or testing procedures.
If the video explains a service, record the actual activities involved in delivering that service.
This approach creates a stronger relationship between the spoken message and the visuals.
Recording Your Own Footage With Basic Equipment
Replacing stock footage does not necessarily mean investing in professional cameras or expensive production equipment. Modern smartphones can capture suitable video for many digital projects.
However, a few recording practices can significantly improve the quality of the material.
Pay Attention to Lighting
Lighting affects how clearly viewers can see the subject. Natural daylight near a window can work well for product demonstrations, interviews, and indoor recordings.
Avoid placing a strong light source directly behind the subject unless a silhouette is intentional. Otherwise, the camera may struggle to capture important details.
For indoor recordings, maintain consistent lighting across different scenes so that the final video does not contain noticeable changes in brightness.
Keep the Camera Stable
Shaky footage can make even an interesting scene difficult to watch. A tripod or stable surface can help produce cleaner recordings.
When recording handheld footage, use both hands and move slowly. Avoid unnecessary camera movements, particularly when capturing close-up shots.
For product demonstrations, fixed camera positions are often more effective because viewers can concentrate on the activity rather than the movement of the camera.
Record More Than One Shot
A single recording may not provide enough flexibility during editing. Capture the same activity from different angles whenever practical.
For example, when demonstrating a product, record:
A wide shot showing the complete product.
A medium shot showing how it is used.
A close-up highlighting important details.
A separate shot showing the finished result.
Having several options makes it easier to match footage with different parts of the narration.
Capture Clean Audio
Even when a video uses AI-generated narration, background audio can influence the final experience. If you record interviews or demonstrations with spoken explanations, pay attention to surrounding noise.
Choose a quiet recording environment and position the microphone appropriately. Record a short test before filming the complete scene.
When natural sounds contribute to the story, such as machinery operating or packaging materials being handled, capture them separately when possible.
Replacing Stock Footage in an AI Video Workflow
Once the necessary clips have been recorded, the next step is integrating them into the video.
AI video creation tools can simplify several stages of production. Depending on the platform, users may be able to generate scenes from written instructions, organize media, create narration, add subtitles, and arrange content within an editing timeline.
A script-based workflow is particularly useful when the video begins with a written explanation or narration.
Creators can explore a script to video converter to transform written ideas into video content and develop an initial visual structure. This can provide a starting point for a project that will later include personally recorded footage.
The important point is to treat automatically generated scenes as editable material rather than assuming that every suggested visual must remain in the final version.
Step 1: Generate the Initial Video Structure
Begin with a completed script and divide it into logical sections. These might include an introduction, several main points, a demonstration, and a conclusion.
Use the AI tool to create an initial video structure based on the script.
At this stage, focus on the overall sequence rather than trying to perfect every visual detail. The purpose is to establish how the narration, scenes, and transitions will work together.
Step 2: Review the Automatically Selected Footage
AI-generated video projects may include stock footage or suggested visuals that represent different parts of the script.
Review each scene carefully and identify footage that could be replaced.
Ask the following questions:
Does the clip accurately represent the subject?
Is it too generic for the intended audience?
Would an original recording communicate the idea more clearly?
Does the scene introduce visual details that are unrelated to the message?
Mark scenes where personal footage would provide greater relevance or authenticity.
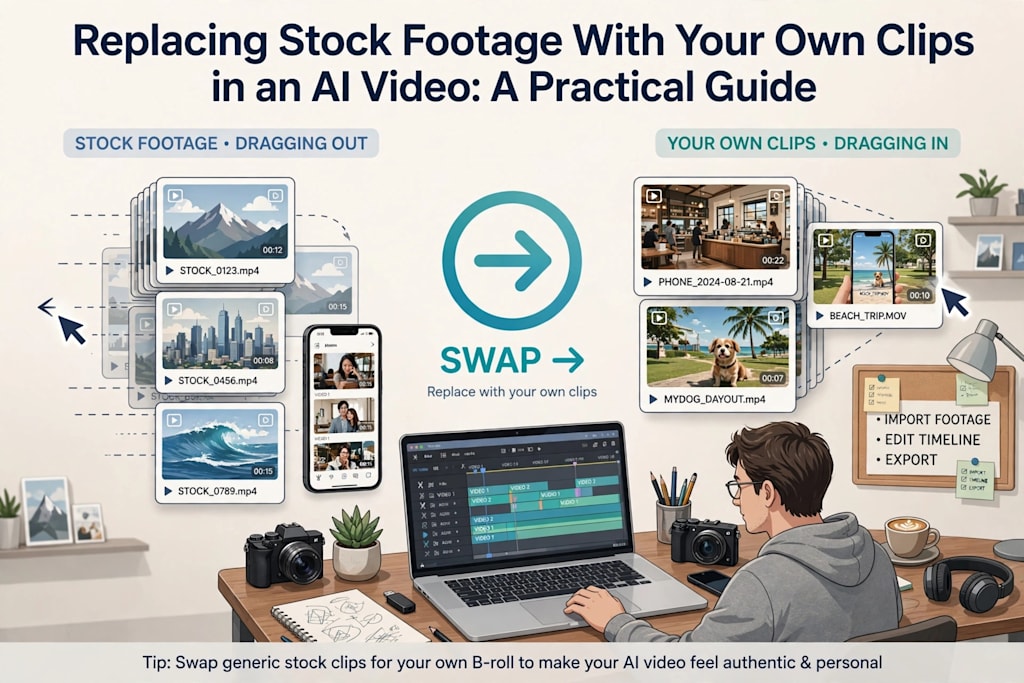
Step 3: Import Your Recorded Clips
Organize your recordings before importing them into the editing project.
Descriptive file names can make this process easier. Instead of keeping files with default camera names, use labels such as "product-closeup," "office-introduction," or "assembly-process."
Create separate folders for different sections if the project contains many recordings.
Once the clips are organized, import them into the editing software and place each recording near the corresponding section of the script.
Step 4: Replace Individual Scenes
Select a stock clip that needs replacing and insert the appropriate original recording.
Check that the replacement communicates the same idea as the narration. If the original scene was used to illustrate a general concept, your personal footage should provide a relevant visual alternative.
Pay attention to the duration of each replacement. A short sentence may require only a few seconds of footage, while a detailed demonstration may need a longer sequence.
Avoid forcing a clip into a section simply because it is available. If the recording does not match the message, consider capturing another shot.
Step 5: Adjust Scene Timing
After replacing the footage, review the relationship between the visuals and narration.
A common editing problem occurs when a replacement clip is significantly longer or shorter than the original scene. This can cause awkward pauses, rushed narration, or unnecessary repetition.
Trim recordings to focus on the most useful moments. If a scene needs more visual coverage, use an additional angle or a relevant close-up rather than extending an uninteresting shot.
Maintaining Visual Consistency Across Different Clips
One challenge of combining personal footage with AI-generated scenes is maintaining a consistent visual style.
Your recordings may have different lighting conditions, camera angles, colors, or levels of detail. Meanwhile, automatically generated scenes may have a noticeably different appearance.
A few editing adjustments can help create a more unified result.
Maintain Consistent Color and Brightness
Review the footage together rather than editing each clip independently.
If one recording appears significantly darker than the surrounding scenes, adjust its exposure and brightness where appropriate. Similarly, correct obvious differences in color temperature.
The goal is not to make every scene identical. It is to avoid distracting visual changes that make the video feel disconnected.
Use Similar Framing
A sequence can look inconsistent when one clip contains an extremely close subject while the next uses a distant wide-angle composition without a clear reason.
Consider how each shot relates to the previous one.
For example, a wide shot introducing a workspace can transition into a closer recording showing someone performing a specific task. This creates a natural visual progression.
Avoid Excessive Transitions
Transitions should help viewers follow the content, not become the main attraction.
Simple cuts and subtle fades are often sufficient for educational, informational, and business videos.
Using too many animated transitions can make a project feel cluttered, particularly when the original footage already contains noticeable movement.
Combining Original Clips With AI-Generated Visuals
Replacing stock footage does not mean removing every automatically generated scene.
Some topics are difficult to record directly. A video about abstract ideas, historical events, scientific concepts, or future technologies may benefit from generated imagery.
A balanced approach is to use original footage wherever real-world details matter and AI-generated visuals where they provide information that cannot easily be captured with a camera.
For example, a technology company might use recordings of its actual products and employees while incorporating generated animations to explain how an underlying system works.
Similarly, an educational video might combine a teacher's original recordings with AI-generated illustrations that clarify complex ideas.
The important consideration is transparency. Generated visuals should not be presented as genuine recordings of real events, people, or products when that distinction could mislead viewers.
Common Mistakes to Avoid
Although replacing stock footage is relatively straightforward, several mistakes can affect the final result.
Recording Without a Clear Purpose
Capturing too many unrelated clips can make the editing process unnecessarily complicated.
Before recording, identify the exact scenes needed and create a checklist. This helps prevent missing important shots while reducing unnecessary footage.
Ignoring Video Orientation
Different platforms use different aspect ratios. A horizontal recording may not fit naturally into a vertical social media video.
Decide where the content will be published before recording. If the video needs to work across multiple platforms, capture footage with enough space around the subject to allow different crops.
Using Low-Quality Replacement Clips
Not every personal recording will improve a video. Poor focus, excessive movement, weak lighting, and distracting backgrounds can make an original clip less effective than a suitable stock alternative.
Review recordings before adding them to the project. If a shot does not meet basic quality requirements, consider recording it again.
Forgetting About Copyright and Permissions
Personal footage can still contain material that requires permission.
For example, recording identifiable people, displaying copyrighted artwork, or capturing branded content may introduce legal or privacy considerations.
Obtain appropriate consent when necessary, particularly when producing commercial content. Also check the licensing terms of music, sound effects, and other third-party materials used in the video.
Overusing AI Effects
AI tools often provide automated effects, transitions, filters, and visual enhancements. However, applying too many effects can reduce clarity.
Choose enhancements that support the message and maintain a natural presentation.
A Practical Example: Turning a Product Script Into an Original Video
Consider a small business creating a video to introduce a new handmade skincare product.
The original AI-generated version might contain generic footage of people applying skincare products, bottles arranged on shelves, and close-ups of ingredients.
Although these scenes communicate the general subject, they do not show the actual product or explain what makes the business different.
The creator can improve the video by recording several original scenes.
First, capture a clean product shot showing the packaging and label. Next, record the preparation process, including relevant ingredients and production equipment. Add a close-up of the finished product and a short recording of the packaging process.
These clips can replace the generic visuals in the original project.
The introduction can use the actual product recording, the manufacturing section can show the preparation process, and the conclusion can display the finished packaging.
The narration remains connected to the original script, but the visuals now provide specific information about the business.
This simple approach makes the video more informative without requiring a complete production team.
Reviewing the Final Video Before Publishing
After completing the replacements, watch the entire video from beginning to end.
Do not focus exclusively on individual clips. A recording that looks good independently may not work well when placed between two different scenes.
Use a final review checklist:
Confirm that every scene supports the narration.
Check that no unwanted stock footage remains.
Ensure that original recordings are properly trimmed.
Review brightness, color, and audio consistency.
Check subtitles for spelling and timing errors.
Verify that transitions are smooth and appropriate.
Confirm the correct aspect ratio for the intended platform.
Check that all visual and audio assets have appropriate permissions.
It can also be helpful to watch the video without sound. This reveals whether the visual sequence communicates the main ideas clearly.
Then listen to the narration without watching the screen. This helps identify sections where the explanation feels rushed, unclear, or disconnected.
Conclusion
Replacing stock footage with personal recordings is a practical way to make AI-generated videos more authentic, relevant, and recognizable. Instead of relying entirely on generic visuals, creators can introduce real products, locations, people, and activities that directly support their message.
The process begins with careful planning. A clear script, a simple scene list, and well-organized recordings make it easier to identify which visuals should be replaced. From there, AI video tools can help establish the initial structure, while traditional editing techniques provide control over timing, framing, color, and transitions.
Not every scene needs to be recorded personally, and AI-generated visuals still have a useful role in explaining abstract or difficult-to-film subjects. The most effective approach is to choose visuals based on their relevance rather than their source.
With thoughtful preparation and a balanced editing workflow, creators can combine the convenience of AI video production with the distinctive qualities of original footage, producing content that feels more personal and better suited to its intended audience.
About the Creator
Gulshan
SEO Services, Guest Post & Content Writter.
Enjoyed the story? Support the Creator.
Subscribe for free to receive all their stories in your feed.
Comments
There are no comments for this story
Be the first to respond and start the conversation.