
How To Use BackupBuddy Plugin To Keep WordPress Content Safe?
BackupBuddy Plugin

Are you reaching for backup plugin to protect your website? We recommend you set up an automated backup solution for WordPress sites, regardless of whether you have a personal blogor a company website. We will demonstrate how BackupBuddy can help you keep your WordPress content secure.
WordPress Backup Plugin: Why you need it
Security threats can affect all websites. Every site is vulnerable to data loss, hackers, or server catastrophes.
It could happen to anyone regardless of whether they are using WordPress sites. Anybody with experience will tell you that the question is not if it would become however when.
Implementing an automated backup solution is the first step in protecting yourself from such catastrophes.
You can backup your website, just like you do with your computer. This makes it easy to recover your website whenever you need it.
You may make a backup of your WordPress website and then download it. If you upgrade your website on a continuous time, it would not be possible to keep your backups current.
So, here we have solution for you, BackupBuddy is here to help. BackupBuddy is a plugin in WordPress that automate makes backups of your WordPress website. You can save them to multiple locations, such as a cloud storage service or FTP server.
Installing BackupBuddy for WordPress
First, you’ll need to buy the BackupBuddy plugin. Pricing starts at \$80 and includes 1 year of plugin support and updates, 1GB cloud storage on Stash and Stash Live, and the ability to use the plugin on up to 2 websites.
You will need to download the plugin after you have purchased it.
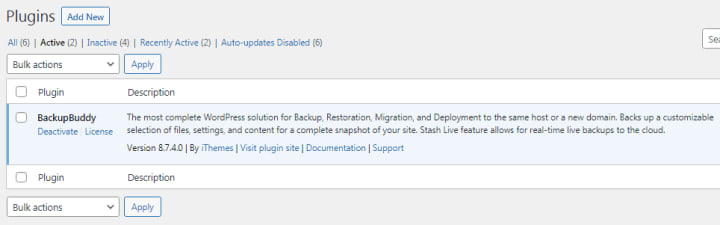
Next, install and activate BackupBuddy.
After activation, you would require to submit your license of BackupBuddy before you may receive auto updates to the most recent versions. A link will be displayed to the licensing page.
You may also visit to the page by selecting Settings >> iThemes License.
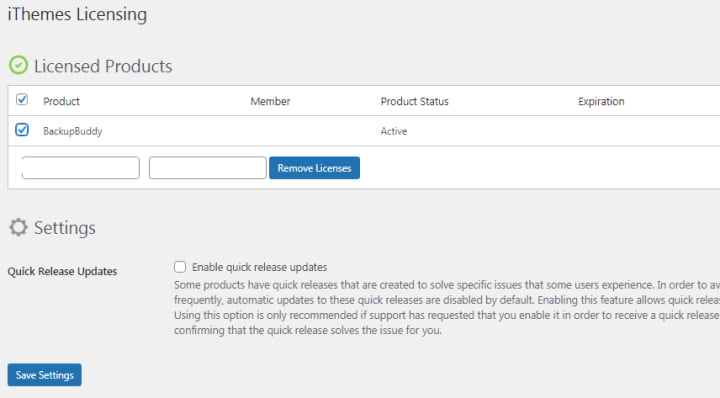
To continue, simply submit your iThemes user id and password, and select the button of license products. After completed verification, your subscription would be activated.
BackupBuddy and Stash live: Setting Up Real-Time Backups
You can access Stash Live with your BackupBuddy plugin. BackupBuddy’s backup storage system that is always available.
Your Stash cloud storage will automatically store any changes made to WordPress pages, pages, media or plugins with real-time backups.
It would secure that your website is always up-to-date. Stash Live makes it easy to quickly restore your website using just one click.
Proceed to visit BackupBuddy >>select the Stash Live page from dashboard , and submit your iThemes user id & password.
Also, you will need to insert an email id to which you will get backup notifications. These emails will include a link to zip downloads.
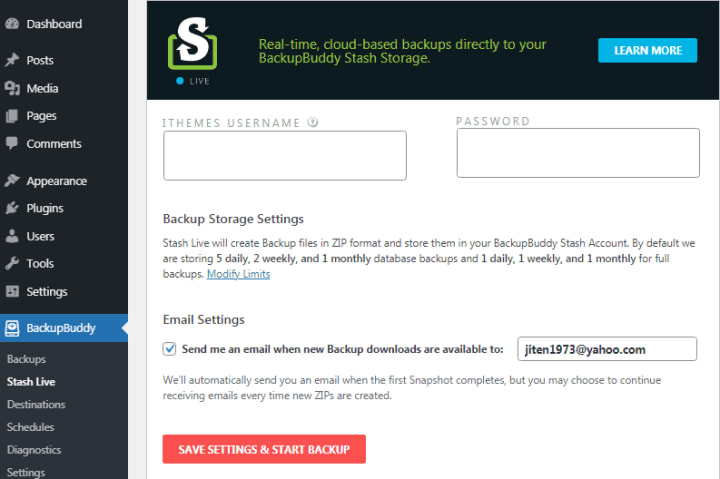
To continue, select the Save settings and Start Backup button.
BackupBuddy would at present start making first backup. Once it is complete, BackupBuddy will upload it to your Stash Account. The backup progression would be showed on your screen.
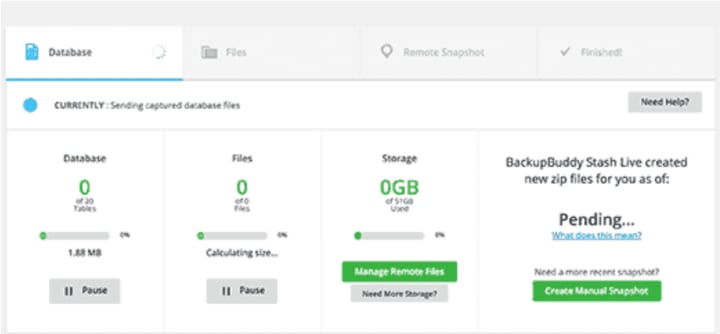
BackupBuddy will upload your complete backup since this is your first Stash backup.
It may grab some time or hours depending upon how much data you retain.
The backup will continue running even if you close the progress screen. While you can still work on your WordPress site, backup will continue to run in the background.
After the backup is complete, you will be notified via email. The backup files will be available as snapshots on the Stash Live page.
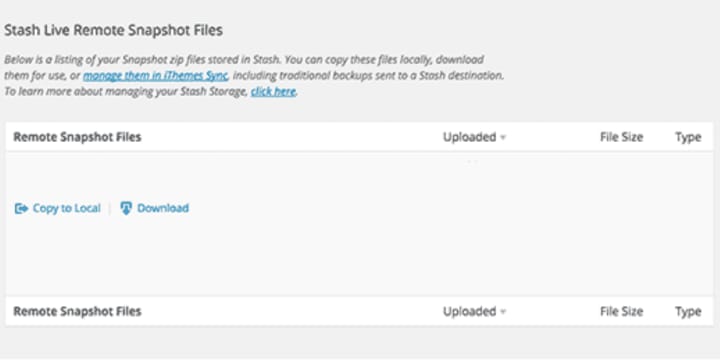
These snapshots can be saved to Stash Live. These snapshots can be downloaded to your computer, or moved to your server by clicking one button.
BackupBuddy – Setting Up Scheduled Backups
Stash Live lets you have real-time backups of your WordPress website and keeps it up to date.
BackupBuddy is a great alternative to using Stash live.
To create or set up backups, visit BackupBuddy >> Backup page
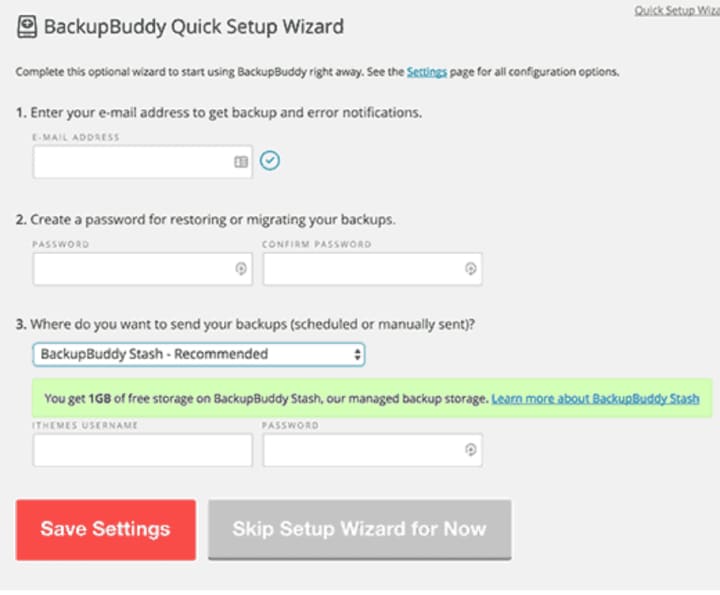
First, you will need to enter an email address. BackupBuddy will use this email address to send you backup emails and notifications.
Then, you would require to make a password. If you want to move your WordPress site from one server or host using BackupBuddy, this password will be used.
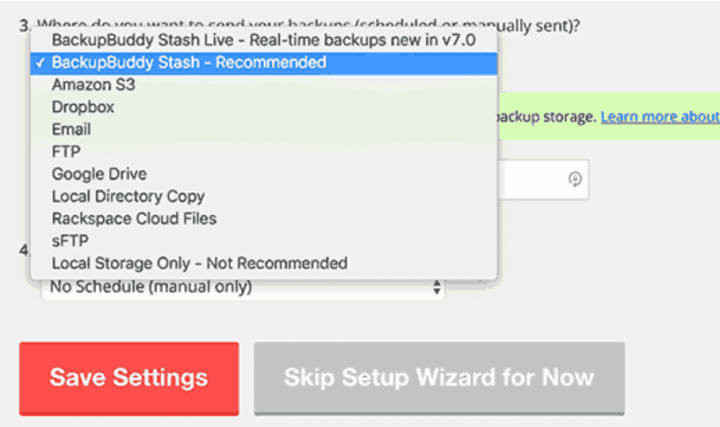
After you have make your password, you would require to select where you want to send your backups.
There are many options. There are many options for storing WordPress backups, including dropbox, Google Drive and BackupBuddy’s Sash storage.
You will also need to choose how often backups should be created. You have the option to create manual backups whenever you need them, or choose a weekly or monthly full backup option that includes daily database backups.
To continue, click on the Save Settings button
BackupBuddy will now display the backup profiles page. To create your first backup, you can click on Database and Complete Backup profiles.
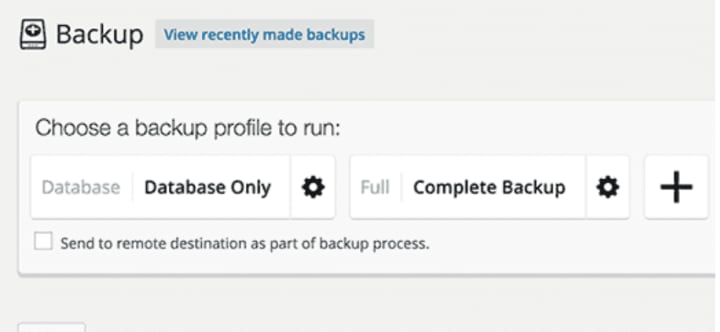
We recommend that you click on the full backup profile, as you have never created backups before.
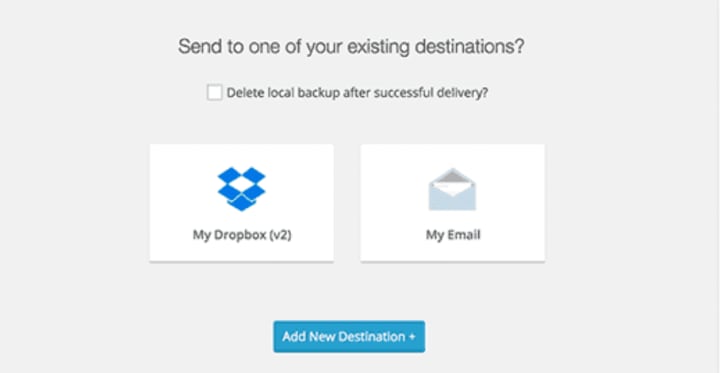
Check the box next to “Send to remote destinations as part of a backup process” option. You would in position to choose the destination you have added previously from this popup.
BackupBuddy will begin creating backup files. The backup progress will be visible to you. You would get a completion of task message once the backup is complete.
To verify that your backup has been successfully transferred, you can now access your remote destination.
BackupBuddy – Restoring WordPress Backups
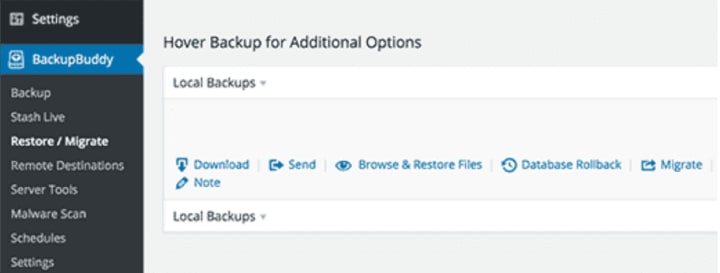
BackupBuddy makes it simple to create backups and allows you to restore your site from backups.
Go to BackupBuddy >> Migration page, and choose the backup section. You will find the link to browse, restore or rollback files.
You will need to upload the importbuddy.php file on your server to complete a restore.
We hope you found this article helpful in keeping your WordPress content secure with BackupBuddy.
If you want to read more please click here
About the Creator
Jitendra Kumar
Visit at: mybloggingidea
Read also: Navigating the Digital Landscape: The Vital Role of a Digital Media Planner
Read also: What Is Inside Sales Outsourcing?: Everything You Need to Know
Keep reading
More stories from Jitendra Kumar and writers in Journal and other communities.


Comments
There are no comments for this story
Be the first to respond and start the conversation.